Hudson-ci/Installing Hudson Windows Service---官方文档
| Hudson Continuous Integration Server |
| Website |
| Download |
| Community |
| Mailing List • Forums • IRC |
| Bugzilla |
| Open |
| Help Wanted |
| Bug Day |
| Contribute |
| Browse Source |
 |
Installing Hudson as a Windows Service |
|---|
Contents[hide] |
Install Hudson as a Windows service
First, you need to start Hudson before installing it. This can be done by running java -jar hudson.war. Now connect to hudson by going to the following URL http://locahost:8080/
Once Hudson is started, click the manage Hudson link and look for the "Install as Windows Service" link on the management page.
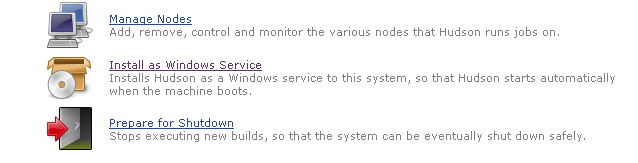
Clicking this link shows you the installation screen:

Choose the directory where Hudson shall be installed (the directory must already exist). This will become HUDSON_HOME and will be used to store data files and programs.
Upon successful completion of the installation, you should see a page asking you to restart Hudson. Note that you will need administrator privileges to complete this operation.
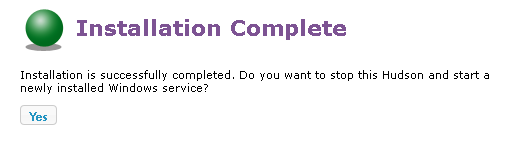
Hudson will then be relaunched as a Windows service.

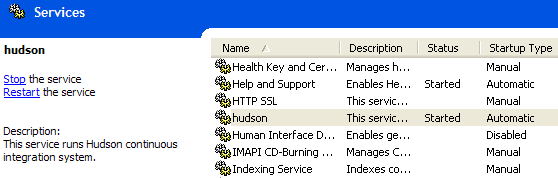
At this point you can use the service manager to confirm that Hudson is running as a service.
Install Slave as a Windows service (requires .Net 2 framework)
Hudson also allows you to install a slave agent as a Windows service. (See Distributed Builds for more about how to do distributed builds in general.)
First, you configure your slave to run as a JNLP slave agent. This should create a JNLP launch icon in the corresponding page, as shown below: 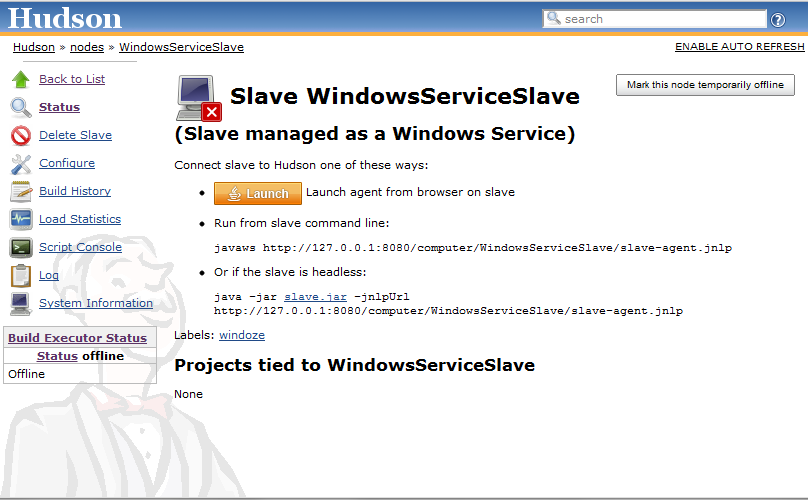
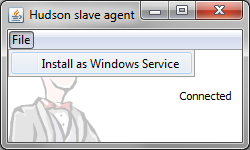
From the slave machine, launch a slave agent. You should see a window like this:

Choose "File" > "Install as Windows Service" from the menu:
Confirm your intention to install as a service. The installation will place the program files to the directory designated as the slave root directory (from the "configure executors" screen.)
Once the installation succeeds, you'll be asked if you'd like to stop the current slave agent and immediately start a slave agent. When you click "OK", the slave agent window will terminate. The new slave agent runs as a service without showing a window, so head over to the service manager from the control panel and confirm that the slave agent is indeed running as a service.
Changing the configuration of services
The JVM launch parameters of these Windows services are controlled by an XML file hudson.xml and hudson-slave.xml respectively. These files can be found in$HUDSON_HOME and in the slave root directory respectively, after you've install them as Windows services.
The file format should be self-explanatory. Tweak the arguments for example to give JVM a bigger memory.
Stdout and stderr from the service processes go to log files in the same directory.
Uninstallation
To uninstall the service, run hudson-slave.exe uninstall from the command line. The Hudson-slave executable can be found in the slave root directory. Note that you should run the uninstall from a admin command prompt on Windows 7 and the service will not be removed until the service is manually stopped or the Windows machine is re-booted. you can also manually uninstall the service using the command: sc delete Hudson Slave, again issue this from an admin console.
Hudson-ci/Installing Hudson Windows Service---官方文档的更多相关文章
- hbase官方文档(转)
FROM:http://www.just4e.com/hbase.html Apache HBase™ 参考指南 HBase 官方文档中文版 Copyright © 2012 Apache Soft ...
- 【K8S】K8S-网络模型、POD/RC/SVC YAML 语法官方文档
K8S-网络模型.POD/RC/SVC YAML 语法官方文档 Kubernetes - Production-Grade Container Orchestration kubernetes/kub ...
- gRPC官方文档(概览)
文章来自gRPC 官方文档中文版 概览 开始 欢迎进入 gRPC 的开发文档,gRPC 一开始由 google 开发,是一款语言中立.平台中立.开源的远程过程调用(RPC)系统. 本文档通过快速概述和 ...
- HBase 官方文档
HBase 官方文档 Copyright © 2010 Apache Software Foundation, 盛大游戏-数据仓库团队-颜开(译) Revision History Revision ...
- HBase官方文档
HBase官方文档 目录 序 1. 入门 1.1. 介绍 1.2. 快速开始 2. Apache HBase (TM)配置 2.1. 基础条件 2.2. HBase 运行模式: 独立和分布式 2.3. ...
- ubuntu16.04下snort的安装(官方文档安装)(图文详解)
不多说,直接上干货! 最近为了科研,需要安装和使用Snort. snort的官网 https://www.snort.org/ Snort作为一款优秀的开源主机入侵检测系统,在windows和Linu ...
- ubuntu14.04下snort的安装(官方文档安装)(图文详解)
不多说,直接上干货! 最近为了科研,需要安装和使用Snort. snort的官网 https://www.snort.org/ Snort作为一款优秀的开源主机入侵检测系统,在windows和Linu ...
- Elasticsearch 7.4.0官方文档操作
官方文档地址 https://www.elastic.co/guide/en/elasticsearch/reference/current/index.html 1.0.0 设置Elasticsea ...
- MySQL8.0.28安装教程全程参考MySQL官方文档
前言 为了MySQL8.0.28安装教程我竟然在MySQL官方文档逛了一天,至此献给想入门MySQL8.0的初学者.以目前最新版本的MySQL8.0.28为示例进行安装与初步使用的详细讲解,面向初学者 ...
- 一起学微软Power BI系列-官方文档-入门指南(7)发布与共享-终结篇+完整PDF文档
接触Power BI的时间也只有几个月,虽然花的时间不多,但通过各种渠道了解收集,谈不上精通,但对一些重要概念和细节还是有所了解.在整理官方文档的过程中,也熟悉和了解了很多概念.所以从前到后把微软官方 ...
随机推荐
- 常用脚本--生成Agent Job的创建脚本
USE [master] GO /****** Object: StoredProcedure [dbo].[DumpJobsql] Script Date: 02/07/2014 11:38:46 ...
- SQL表连接查询inner join left join right join full join ...
一.最常见的连接查询 select s.name,m.mark from student s,mark m where s.id=m.studentid. 二.内连接-inner join sel ...
- asp.net 错误页面自定义
在我们上网浏览信息的时候,总会有出现404页面的时候,在我们开发的时候也可以自定义这些页面.刚回这次项目中也使用到了,就在网上找到一些方法,今天就把这些方法重新写一遍加深记忆. 在项目的web.con ...
- WPF 使用QRCoder生成二维码
vs中使用Nuget获取QRCoder 窗体中添加按钮和Iage <Window x:Class="QRCoderTest.MainWindow" xmlns="h ...
- “全栈2019”Java多线程第六章:中断线程interrupt()方法详解
难度 初级 学习时间 10分钟 适合人群 零基础 开发语言 Java 开发环境 JDK v11 IntelliJ IDEA v2018.3 文章原文链接 "全栈2019"Java多 ...
- 洛谷P5282 【模板】快速阶乘算法(多项式多点求值+MTT)
题面 传送门 前置芝士 \(MTT\),多项式多点求值 题解 这题法老当初好像讲过--而且他还说这种题目如果模数已经给定可以直接分段打表艹过去 以下是题解 我们设 \[F(x)=\prod_{i=0} ...
- 创建maven自定义archetype项目
1.安装Nexus这里是用homebrew安装, brew nexus 安装成功后,默认的访问端口为8081, 我这里的访问地址是http://192.168.99.100:8081 默认用户:adm ...
- robot framework学习笔记之三—Scalar变量
一.变量赋值 1)Set赋值 通常使用Set Variable关键字对变量进行赋值,其他Set相关的带Variable的关键字也可以进行赋值 赋值的时候,变量后面写不写『=』都可以,如下: 如果${v ...
- springMVC和Struts异同
Spring MVC属于SpringFrameWork的后续产品,已经融合在Spring Web Flow里面.Spring 框架提供了构建 Web 应用程序的全功能 MVC 模块.使用 Spring ...
- jmeter ——JDBC Request中从数据库中读两个字段给接口取值
前置条件数据库: 给接口传:tid和shopid这俩字段 直接从JDBC Request开始: Variable name:这里写入数据库连接池的名字(和JDBC Connection Configu ...