abp(net core)+easyui+efcore实现仓储管理系统——入库管理之五(四十一)
abp(net core)+easyui+efcore实现仓储管理系统目录
abp(net core)+easyui+efcore实现仓储管理系统——EasyUI前端页面框架 (十八)
abp(net core)+easyui+efcore实现仓储管理系统——ABP WebAPI与EasyUI结合增删改查之八(三十四)
在上一篇abp(net core)+easyui+efcore实现仓储管理系统——入库管理之四(四十)文章中我们已经定义了应用的接口,并在应用层实现了这些接口。接下来我们要在展示层来实现前端功能。
八 创建InStockController继承自TPLMSControllerBase
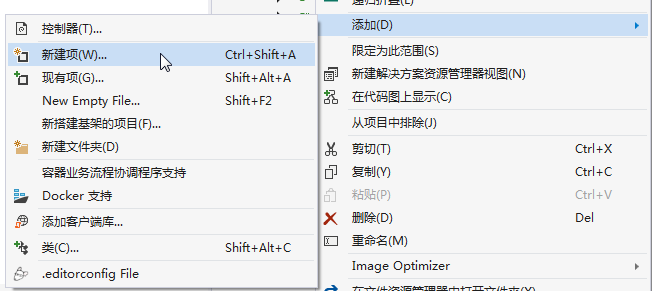
1. 在Visual Studio 2017的“解决方案资源管理器”中,右键单击在领域层“ABP.TPLMS.Web.Mvc”项目中的Controller目录。 选择“添加” > “新建项…”。如下图。
2. 在弹出对话框“添加新项-ABP.TPLMS.Web.Mvc”中选择“控制器类”,然后在名称输入框中输入“InStockController”,然后点击“添加”按钮。
3.在InStockController.cs文件中输入如下代码,通过构造函数注入对应用服务的依赖。
using System;

using System.Collections.Generic;

using System.Linq;

using System.Threading.Tasks;

using Abp.Runtime.Validation;

using Abp.Web.Models;

using ABP.TPLMS.Controllers;

using ABP.TPLMS.Entitys;

using ABP.TPLMS.Helpers;

using ABP.TPLMS.InStocks;

using ABP.TPLMS.InStocks.Dto;

using ABP.TPLMS.Models.InStock;

using Microsoft.AspNetCore.Mvc;

namespace ABP.TPLMS.Web.Controllers

{

    public class InStockController : TPLMSControllerBase

    {

        private readonly IInStockOrderAppService _inSOAppService;

        private readonly IInStockOrderDetailAppService _inSODAppService;

        private const int MAX_COUNT = ;

        public InStockController(IInStockOrderAppService InSOAppService,IInStockOrderDetailAppService InSODAppService)

        {

            _inSOAppService = InSOAppService;

            _inSODAppService = InSODAppService;

        }

        public IActionResult Index()

        {

            return View();

        }

        [DontWrapResult]

        [HttpPost]

        public string List()

        {

            var page = Request.Form["page"].ToString();

            var size = Request.Form["rows"].ToString();

            int pageIndex = page == null ?  : int.Parse(page);

            int pageSize = size == null ?  : int.Parse(size);

            PagedInStockResultRequestDto paged = new PagedInStockResultRequestDto();

            paged.MaxResultCount = MAX_COUNT;

            paged.SkipCount = ((pageIndex - ) <  ?  : pageIndex - ) * pageSize;

            paged.BeginTime = DateTime.Now.AddMonths(-);

            paged.EndTime = DateTime.Now.AddDays();

            var query = _inSOAppService.GetAll(paged).GetAwaiter().GetResult();

            var isoList = query.Items;

            int total = query.TotalCount;

            var json = JsonEasyUI(isoList, total);

            return json;

        }

        [DontWrapResult]

        public string GetDetail(string no)

        {

            PagedInStockDetailResultRequestDto paged = new PagedInStockDetailResultRequestDto();

            paged.MaxResultCount = MAX_COUNT;

            paged.InStockNo = no;

            var podList = _inSODAppService.GetAll(paged).GetAwaiter().GetResult().Items; ;

            var json = JsonEasyUI(podList);

            return json;

        }

        [HttpPost]

        [DisableValidation]

        public ActionResult Add(InStockOrderDto iso)

        {

            string result = "NO";

            try

            {

                PagedInStockResultRequestDto condition = new PagedInStockResultRequestDto();

                condition.No = iso.No;

                var isoExists = _inSOAppService.GetAll(condition).GetAwaiter().GetResult();

                if (isoExists.TotalCount > )

                {

                    return Content(result);

                }

                CreateUpdateInStockOrderDto cuIso = ObjectMapper.Map<CreateUpdateInStockOrderDto>(iso);

                // TODO: Add logic here

              var obj=  _inSOAppService.Create(cuIso);

                result = "OK";

            }

            catch(Exception ex)

            {

                result = "NO";

            }

            return Content(result);

        }

        [HttpPost]

        [DisableValidation]

        public string Update(InStockOrderDto iso)

        {

            string result = "NO";

            List<InStockOrderDetailDto> list = new List<InStockOrderDetailDto>();

            try

            {

                string deleted = Request.Form["deleted"];

                string inserted = Request.Form["inserted"];

                string updated = Request.Form["updated"];

                string head = Request.Form["postdata"];

                if (!string.IsNullOrEmpty(head))

                {

                    //把json字符串转换成对象

                    iso = JsonHelper.Instance.Deserialize<InStockOrderDto>(head);

                }

                if (!string.IsNullOrEmpty(deleted))

                {

                    //把json字符串转换成对象

                    List<InStockOrderDetailDto> listDeleted = JsonHelper.Instance.Deserialize<List<InStockOrderDetailDto>>(deleted);

                    //TODO 下面就可以根据转换后的对象进行相应的操作了

                    if (listDeleted != null && listDeleted.Count > )

                    {

                        list.AddRange(listDeleted.ToArray());

                    }

                }

                if (!string.IsNullOrEmpty(inserted))

                {

                    //把json字符串转换成对象

                    List<InStockOrderDetailDto> listInserted = JsonHelper.Instance.Deserialize<List<InStockOrderDetailDto>>(inserted);

                    if (listInserted != null && listInserted.Count > )

                    {

                        list.AddRange(listInserted.ToArray());

                    }

                }

                if (!string.IsNullOrEmpty(updated))

                {

                    //把json字符串转换成对象

                    List<InStockOrderDetailDto> listUpdated = JsonHelper.Instance.Deserialize<List<InStockOrderDetailDto>>(updated);

                    if (listUpdated != null && listUpdated.Count > )

                    {

                        list.AddRange(listUpdated.ToArray());

                    }

                }

                if (iso == null)

                {

                    return "没有表头!";

                }

   // TODO: Add update logic here

                iso.InStockOrderDetail = list;

                result = _inSOAppService.Save(iso);

            }

            catch

            {

            }

            if (result == "OK")

            {

                return "更新成功!";

            }

            else

                return "更新失败!";

        }

        [HttpPost]

        [DisableValidation]

        public ActionResult ImportCargo(CargoModel cargos)

        {

            string result = "NO";

            try

            {

                // TODO: 导入货物信息

                result = _inSOAppService.ImportCargo(cargos.Ids, cargos.No);

            }

            catch

            {

            }

            return Content(result);

        }

        [HttpPost]

        [DontWrapResult]

        public ActionResult Delete(string ids)

        {

            string result = "NO";

            try

            {

                // TODO: Add Delete logic here

                bool flag = _inSOAppService.DeleteById(ids);

                if (flag)

                {

                    result = "OK";

                }

            }

            catch

            {

            }

            return Content(result);

        }

    }

}
九、使用EasyUI创建入库单管理页面
1. 在Visual Studio 2017的“解决方案资源管理器”中,右键单击在领域层“ABP.TPLMS.Web.Mvc”项目中的Views目录。 选择“添加” > “新建文件夹”。并重命名为“InStock”。
2. 在Visual Studio 2017的“解决方案资源管理器”中,鼠标右键单击“InStock”文件夹,然后选择“添加” > “新建项…”。 在“添加新项-ABP.TPLMS.Web.Mvc”对话框中,选择“Razor视图”,并将名称命名为Index.cshmtl。如下图。

3. 在我们刚才创建的Index.cshmtl文件中,编写如下代码:
@using ABP.TPLMS.Web.Startup

@{

    ViewData["Title"] = PageNames.InStock;

}

@section scripts{

  <script src="~/view-resources/Views/InStock/Index.js" asp-append-version="true"></script>

    <script type="text/javascript">

          $(function () {

            initable();

             reloaded();

              $('#box').tabs({

                width: ,      //选项卡容器宽度

                height: ,      //选项卡容器高度

                onSelect: function (title, index) {

                    var rcv = $("#RcvUpdate").val();

                    if (title == "入库单明细") {

                        $("#rcv").val(rcv);

                    }

                }

            });

        });

    </script>

}

    <div data-options="region:'center'" style="overflow: hidden;">

        <div id="containter" style="width: 1000px; height: auto; margin: 0px auto;">

            <!--toolbar-->

            <div style="margin-bottom:1px;font-weight:bold;">

                <a href="#" id="add" class="easyui-linkbutton" data-options="iconCls:'icon-add'" style="width:100px; height:30px; ">生成入库单</a>

                <a href="#" id="del" class="easyui-linkbutton" data-options="iconCls:'icon-remove'" style="width:100px; height:30px; ">删除</a>

                <a href="#" id="edit" class="easyui-linkbutton" data-options="iconCls:'icon-edit'" style="width:100px; height:30px; ">修改</a>

                <a href="#" id="submits" class="easyui-linkbutton" data-options="iconCls:'icon-ok'" style="width:100px; height:30px; ">提交</a>

                <a href="#" id="reload" class="easyui-linkbutton" data-options="iconCls:'icon-reload'" style="width:100px; height:30px; ">刷新</a>

            </div>

            <!--panel-->

            <div data-options="region:'center',split:false" style="height:500px;">

                <!--表格-->

                <table id="dgINSO"></table>

            </div>

        </div>

    </div>
4. 在Visual Studio 2017的“解决方案资源管理器”中,找到领域层“ABP.TPLMS.Web.Mvc”项目中的wwwroot目录下的view-resources目录。使用鼠标右键单击此目录,在弹出菜单中选择“添加” > “新建文件夹”。并重命名为“InStock”。
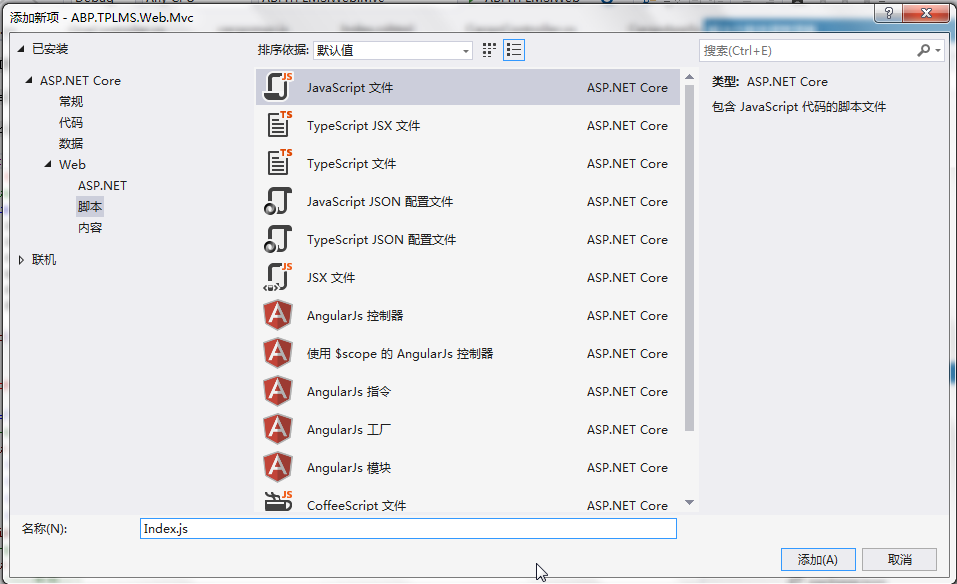
5. 在Visual Studio 2017的“解决方案资源管理器”中,鼠标右键单击“InStock”文件夹,然后选择“添加” > “新建项…”。 在“添加新项-ABP.TPLMS.Web.Mvc”对话框中,选择“javascript文件”,并将名称命名为Index.js。如下图。
6. 在Index.js文件中,我们写入如下代码。
//-----------------------系统管理-->入库单管理-----------------------------------------//

//刷新数据

function initable() {

    $("#dgINSO").datagrid({

        url: "/InStock/List",

        //url:"api/services/app/instock/GetAllInStockOrders",

        title: "入库单管理",

        pagination: true,

        pageSize: ,

        pageList: [, , ],

        fit: true,

        fitColumns: false,

        loadMsg: "正在加载入库单信息...",

        nowarp: false,

        border: false,

        idField: "Id",

        sortName: "Id",

        sortOrder: "asc",

        frozenColumns: [[//冻结列

            { field: "ck", checkbox: true, align: "left", width:  }

        ]],

        columns: [[

            { title: "编号", field: "Id", width: , sortable: true },

            { title: "入库单号", field: "No", width: , sortable: true },

            {title: "状态", field: "Status", width:             },

            { title: '到货日期', field: 'ReceiveTime',  width: , align: 'center' },

            { title: "货主", field: "OwnerCode", width: , sortable: true },

            { title: "预计到货时间", field: "PreDeliveryTime", width: , sortable: false },

            { title: '客户', field: 'CustomerName', width: , align: 'center' },

            { title: '收货人',field: 'Oper', width: , align: 'center' },

            { title: '审核人',field: 'Checker', width: , align: 'center' },

            { title: '件数', field: 'PackageNum', width: , align: 'center' },

            { title: '创建时间', field: 'CreationTime', width: , align: 'center' }

        ]]

    });

}

function reloaded() {   //reload

    $("#reload").click(function () {

        //

        $('#dgINSO').datagrid('reload');

    });}
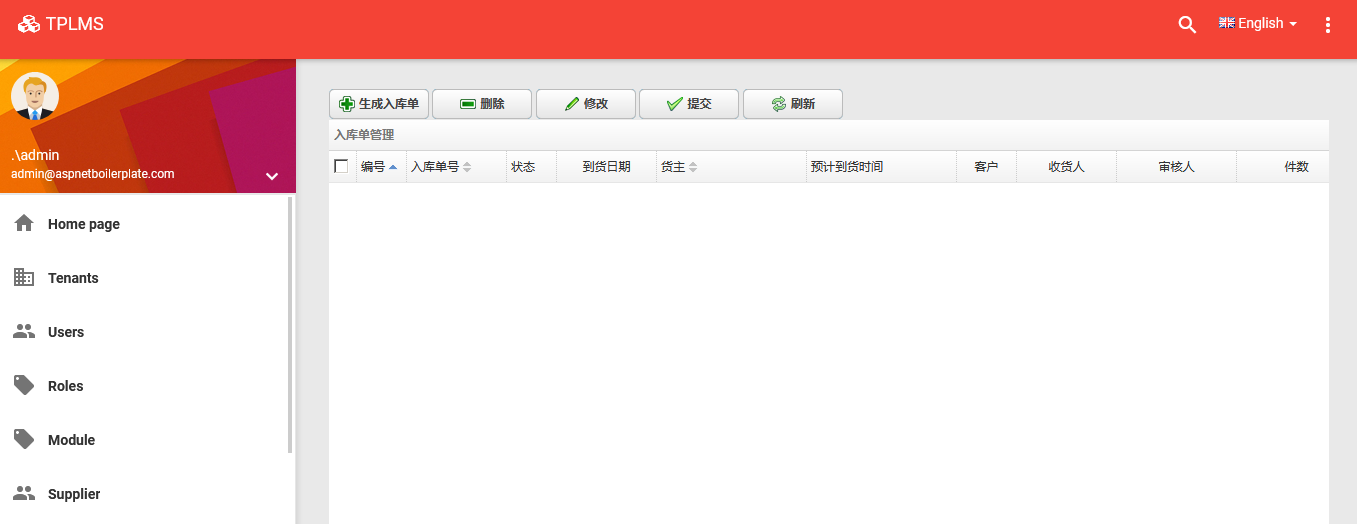
7. 在Visual Studio 2017中按F5运行应用程序。登录之后,点击“[入库管理]”菜单,我们可以看到货物管理列表页面。如下图。
abp(net core)+easyui+efcore实现仓储管理系统——入库管理之五(四十一)的更多相关文章
- abp(net core)+easyui+efcore实现仓储管理系统——入库管理之六(四十二)
abp(net core)+easyui+efcore实现仓储管理系统目录 abp(net core)+easyui+efcore实现仓储管理系统——ABP总体介绍(一) abp(net core)+ ...
- abp(net core)+easyui+efcore实现仓储管理系统——入库管理之七(四十三)
abp(net core)+easyui+efcore实现仓储管理系统目录 abp(net core)+easyui+efcore实现仓储管理系统——ABP总体介绍(一) abp(net core)+ ...
- abp(net core)+easyui+efcore实现仓储管理系统——入库管理之八(四十四)
abp(net core)+easyui+efcore实现仓储管理系统目录 abp(net core)+easyui+efcore实现仓储管理系统——ABP总体介绍(一) abp(net core)+ ...
- abp(net core)+easyui+efcore实现仓储管理系统——入库管理之四(四十)
abp(net core)+easyui+efcore实现仓储管理系统目录 abp(net core)+easyui+efcore实现仓储管理系统——ABP总体介绍(一) abp(net core)+ ...
- abp(net core)+easyui+efcore实现仓储管理系统——入库管理之九(四十五)
abp(net core)+easyui+efcore实现仓储管理系统目录 abp(net core)+easyui+efcore实现仓储管理系统——ABP总体介绍(一) abp(net core)+ ...
- abp(net core)+easyui+efcore实现仓储管理系统——入库管理之十(四十六)
abp(net core)+easyui+efcore实现仓储管理系统目录 abp(net core)+easyui+efcore实现仓储管理系统——ABP总体介绍(一) abp(net core)+ ...
- abp(net core)+easyui+efcore实现仓储管理系统——入库管理之十一(四十七)
abp(net core)+easyui+efcore实现仓储管理系统目录 abp(net core)+easyui+efcore实现仓储管理系统——ABP总体介绍(一) abp(net core)+ ...
- abp(net core)+easyui+efcore实现仓储管理系统——入库管理之十二(四十八)
abp(net core)+easyui+efcore实现仓储管理系统目录 abp(net core)+easyui+efcore实现仓储管理系统——ABP总体介绍(一) abp(net core)+ ...
- abp(net core)+easyui+efcore实现仓储管理系统——入库管理之一(三十七)
abp(net core)+easyui+efcore实现仓储管理系统目录 abp(net core)+easyui+efcore实现仓储管理系统——ABP总体介绍(一) abp(net core)+ ...
随机推荐
- Waymo
技术优势 Waymo在自己的激光雷达系统上投入了大量资金,它认为这项技术对自动驾驶汽车的长期成功至关重要.实际上,该公司声称它已经将专有激光雷达传感器的成本降低了90%,这种传感器以前的制造成本为7. ...
- Spring MVC 增加静态资源配置mvc:resources跳转不了链接
在使用mvc:resources 要配合 <mvc:annotation-driven/> 一起
- oppo互联网招聘-各类软件测试
一.服务端测试专家 关键词:安全测试.白盒测试.性能测试.自动化.持续集成.服务端 岗位职责: 主导多个高日活产品的测试方案: 试点和推广自动化和持续集成: 改善测试相关流程和规范. 职位要求: 计算 ...
- 使用 KM 处理 HHKB 方向键
对于上了 HHKB 这条贼船的人来说,刚开始使用起来最大的别扭可能就是没有方向键的问题了. 最早的我使用 Karabiner 来解决,里边有一些内置的组合可以替代方向键,我用 control + hj ...
- Android入门(创建、编译、运行、打包、安装)
一.创建Android项目 1.选择Emtpy Activity=>Next 2.配置项目 输入Name(名称) Package.name(包名) Save location(保存位置) Lan ...
- Git私服搭建
Git私服搭建 一.Git服务器搭建方式 GIT是一个分布式版本管理系统,既然是分布那么必定会涉及远程通信,那么GIT是采用什么协议进行远程通信? Git支持的四种通信协议: Local(本地协议) ...
- JS 获取一段时间内的工作时长小时数
本来想是想找轮子的,但是并没有找到能用的,多数都是问题很大,所以就自己写了一个 需求说明 支持自选时间段,即开始时间与结束时间根据用户的上班及下班时间判定返回小时数 技术栈 moment.js 思考过 ...
- 用vue开发一个公众号商城SPA——1.前期准备和写页面
使用vue开发公众号商城 第1篇记录项目准备.搭建,写页面遇到第问题以及总结,持续更新 公司最近接了个商城项目,包括PC端商城.微信公众号网页商城.后台管理系统.这几天在做微信公众号商城,又新接触了很 ...
- LeetCode37 使用回溯算法实现解数独,详解剪枝优化
本文始发于个人公众号:TechFlow,原创不易,求个关注 数独是一个老少咸宜的益智游戏,一直有很多拥趸.但是有没有想过,数独游戏是怎么创造出来的呢?当然我们可以每一关都人工设置,但是显然这工作量非常 ...
- Yuchuan_Linux_C 编程之十 进程及进程控制
一.整体大纲 二.基础知识 1. 进程相关概念 1)程序和进程 程序,是指编译好的二进制文件,在磁盘上,不占用系统资源(cpu.内存.打开的文件.设备.锁....) 进程,是一个抽象的概念,与 ...