
【原】iOS学习之苹果原生代码实现Autolayout和VFL语言
1、添加约束的规则
- 在创建约束之后,需要将其添加到作用的view上
- 在添加时要注意目标view需要遵循以下规则:
- 步骤
1)利用NSLayoutConstraint类创建具体的约束对象
1> 一个NSLayoutConstraint对象就代表一个约束
2> 创建约束对象的常用方法
+(id)constraintWithItem:(id)view1 attribute:(NSLayoutAttribute)attr1 relatedBy:(NSLayoutRelation)relation toItem:(id)view2 attribute:(NSLayoutAttribute)attr2 multiplier:(CGFloat)multiplier constant:(CGFloat)c;
参数说明
pview1 :要约束的控件
pattr1 :约束的类型(做怎样的约束)
prelation :与参照控件之间的关系
pview2 :参照的控件
pattr2 :约束的类型(做怎样的约束)
pmultiplier :乘数
pc :常量
2)添加约束对象到相应的view上
- (void)addConstraint:(NSLayoutConstraint *)constraint;
- (void)addConstraints:(NSArray *)constraints;
- 注意点
1)要先禁止autoresizing功能,设置view的下面属性为NO
view.translatesAutoresizingMaskIntoConstraints = NO;
如果不设置为NO,系统会自动将AutoresizingMask转为Autolayout的约束,从而造成约束冲突,控制台打印内容如下:
Unable to simultaneously satisfy constraints.
Probably at least one of the constraints in the following list is one you don't want.
Try this:
(1) look at each constraint and try to figure out which you don't expect;
(2) find the code that added the unwanted constraint or constraints and fix it.
(Note: If you're seeing NSAutoresizingMaskLayoutConstraints that you don't understand, refer to the documentation for the UIView property translatesAutoresizingMaskIntoConstraints)
(
"<NSAutoresizingMaskLayoutConstraint:0x7ff339620540 h=--& v=--& V:[UIView:0x7ff339714510(0)]>",
"<NSLayoutConstraint:0x7ff339714990 V:[UIView:0x7ff339714510(40)]>"
)
Will attempt to recover by breaking constraint
<NSLayoutConstraint:0x7ff339714990 V:[UIView:0x7ff339714510(40)]>
Make a symbolic breakpoint at UIViewAlertForUnsatisfiableConstraints to catch this in the debugger.
The methods in the UIConstraintBasedLayoutDebugging category on UIView listed in <UIKit/UIView.h> may also be helpful.
2)添加约束之前,一定要保证相关控件都已经在各自的父控件上,也就是将子控件添加到父控件上
3)不用再给view设置frame
- 代码:
   UIView *blueView = [[UIView alloc] init];

    blueView.backgroundColor = [UIColor blueColor];

    // 不要将AutoresizingMask转为Autolayout的约束

    blueView.translatesAutoresizingMaskIntoConstraints = NO;

    [self.view addSubview:blueView];

    UIView *redView = [[UIView alloc] init];

    redView.backgroundColor = [UIColor redColor];

    // 不要将AutoresizingMask转为Autolayout的约束

    redView.translatesAutoresizingMaskIntoConstraints = NO;

    [self.view addSubview:redView];// 添加宽度约束:100

    /************************** 蓝色 **************************/

    // 添加高度约束:40

    NSLayoutConstraint *heightConstraint = [NSLayoutConstraint constraintWithItem:blueView attribute:NSLayoutAttributeHeight relatedBy:NSLayoutRelationEqual toItem:nil attribute:NSLayoutAttributeNotAnAttribute multiplier:0.0 constant:];

    [blueView addConstraint:heightConstraint];

    // 添加左边约束:blueView的左边距离父控件左边有20的间距

    NSLayoutConstraint *leftConstraint = [NSLayoutConstraint constraintWithItem:blueView attribute:NSLayoutAttributeLeft relatedBy:NSLayoutRelationEqual toItem:self.view attribute:NSLayoutAttributeLeft multiplier:1.0 constant:];

    [self.view addConstraint:leftConstraint];

    // 添加右边约束:blueView的右边距离父控件右边有20的间距

    NSLayoutConstraint *rightConstraint = [NSLayoutConstraint constraintWithItem:blueView attribute:NSLayoutAttributeRight relatedBy:NSLayoutRelationEqual toItem:self.view attribute:NSLayoutAttributeRight multiplier:1.0 constant:-];

    [self.view addConstraint:rightConstraint];

    // 添加顶部约束:blueView的顶部距离父控件顶部有20的间距

    NSLayoutConstraint *topConstraint = [NSLayoutConstraint constraintWithItem:blueView attribute:NSLayoutAttributeTop relatedBy:NSLayoutRelationEqual toItem:self.view attribute:NSLayoutAttributeTop multiplier:1.0 constant:];

    [self.view addConstraint:topConstraint];

    /************************** 红色 **************************/

    // 添加高度约束:蓝色等高

    NSLayoutConstraint *heightConstraint2 = [NSLayoutConstraint constraintWithItem:redView attribute:NSLayoutAttributeHeight relatedBy:NSLayoutRelationEqual toItem:blueView attribute:NSLayoutAttributeHeight multiplier:1.0 constant:];

    [self.view addConstraint:heightConstraint2];

    // 添加左边约束:redView的左边 == 父控件的中心x

    NSLayoutConstraint *leftConstraint2 = [NSLayoutConstraint constraintWithItem:redView attribute:NSLayoutAttributeLeft relatedBy:NSLayoutRelationEqual toItem:self.view attribute:NSLayoutAttributeCenterX multiplier:1.0 constant:];

    [self.view addConstraint:leftConstraint2];

    // 添加顶部约束:redView的顶部距离blueView的底部有20的间距

    NSLayoutConstraint *topConstraint2 = [NSLayoutConstraint constraintWithItem:redView attribute:NSLayoutAttributeTop relatedBy:NSLayoutRelationEqual toItem:blueView attribute:NSLayoutAttributeBottom multiplier:1.0 constant:];

    [self.view addConstraint:topConstraint2];

    // 添加右边约束:redView的右边 == blueView的右边

    NSLayoutConstraint *rightConstraint2 = [NSLayoutConstraint constraintWithItem:redView attribute:NSLayoutAttributeRight relatedBy:NSLayoutRelationEqual toItem:blueView attribute:NSLayoutAttributeRight multiplier:1.0 constant:];

    [self.view addConstraint:rightConstraint2];
效果图如下:
3、VFL语言
- 什么是VFL语言
VFL全称是Visual Format Language,翻译过来是“可视化格式语言”
VFL是苹果公司为了简化Autolayout的编码而推出的抽象语言
- VFL示例:
1)H:[cancelButton(72)]-12-[acceptButton(50)]
canelButton宽72,acceptButton宽50,它们之间间距12
2)H:[wideView(>=60@700)]
wideView宽度大于等于60point,该约束条件优先级为700(优先级最大值为1000,优先级越高的约束越先被满足)
3)V:[redBox][yellowBox(==redBox)]
竖直方向上,先有一个redBox,其下方紧接一个高度等于redBox高度的yellowBox
4)H:|-10-[Find]-[FindNext]-[FindField(>=20)]
水平方向上,Find距离父view左边缘默认间隔宽度,之后是FindNext距离Find间隔默认宽度;再之后是宽度不小于20的FindField,它和FindNext以及父view右边缘的间距都是默认宽度。(竖线“|” 表示superview的边缘)
- VFL的使用
1)使用VFL来创建约束数组方法
+ (NSArray *)constraintsWithVisualFormat:(NSString *)format options:(NSLayoutFormatOptions)opts metrics:(NSDictionary *)metrics views:(NSDictionary *)views;
2)创建一个字典(内部包含VFL语句中用到的控件)的快捷宏定义
NSDictionaryOfVariableBindings(...)
代码:NSDictionaryOfVariableBindings(v1, v2, v3) 和 [NSDictionary dictionaryWithObjectsAndKeys:v1, @"v1", v2, @"v2", v3, @"v3", nil] 是等价的
- 代码:
    UIView *blueView = [[UIView alloc] init];

    blueView.backgroundColor = [UIColor blueColor];

    // 不要将AutoresizingMask转为Autolayout的约束

    blueView.translatesAutoresizingMaskIntoConstraints = NO;

    [self.view addSubview:blueView];

    UIView *redView = [[UIView alloc] init];

    redView.backgroundColor = [UIColor redColor];

    // 不要将AutoresizingMask转为Autolayout的约束

    redView.translatesAutoresizingMaskIntoConstraints = NO;

    [self.view addSubview:redView];

    // 间距

    NSNumber *margin = @;

    // 添加水平方向的约束

    NSString *vfl = @"H:|-margin-[blueView]-margin-[redView(==blueView)]-margin-|";

    NSDictionary *views = NSDictionaryOfVariableBindings(blueView, redView);

    NSDictionary *mertrics = NSDictionaryOfVariableBindings(margin);

    NSArray *constraints = [NSLayoutConstraint constraintsWithVisualFormat:vfl options:NSLayoutFormatAlignAllTop | NSLayoutFormatAlignAllBottom metrics:mertrics views:views];

    [self.view addConstraints:constraints];

    // 添加竖直方向的间距

    NSNumber *height = @;

    NSString *vfl2 = @"V:[blueView(height)]-margin-|";

    NSDictionary *mertrics2 = NSDictionaryOfVariableBindings(margin, height);

    NSArray *constraints2 = [NSLayoutConstraint constraintsWithVisualFormat:vfl2 options:kNilOptions metrics:mertrics2 views:views];

    [self.view addConstraints:constraints2];
效果图如下:
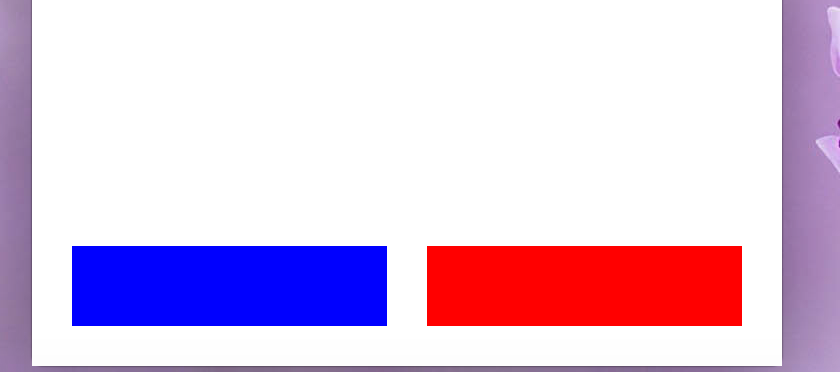
VFL存在一定的缺陷,它只能满足大部分的约束,不能满足存在倍数关系的约束!
【原】iOS学习之苹果原生代码实现Autolayout和VFL语言的更多相关文章
- 【原】iOS学习之苹果开发者账号的相关操作
1.苹果开发者账号分类 按价格分类 免费 ① 个人申请账号 仅可以用于真机调试 ② 院校账号 仅可以用于真机调试 通过苹果认证的高校可以使用 99$ ① 个人账号 ② 企业(公司)账号 申请所需的条件 ...
- IOS学习笔记—苹果推送机制APNs
转自:唐韧_Ryan http://blog.csdn.net/ryantang03/article/details/8482259 推送是解决轮询所造成的流量消耗和 电量消耗的一个比较好的解决方案, ...
- IOS开发之 ---- 苹果系统代码汉字转拼音
NSString *hanziText = @"我是中国人"; if ([hanziText length]) { NSMutableString *ms = [[ ...
- iOS: 学习笔记实例, 用代码控制视图创建与切换
1. 创建iOS, Single View Application.2. 修改YYViewController.m // // YYViewController.m // DynamicViewDem ...
- IOS学习之路(代码实现自动布局)
1.将一个试图放置在其父视图的中央位置,使用限制条件. 2.创建两个限制条件:一个是将目标视图的 center.x 位置排列在其父视图的 center.x 位置,并且另外一个是将目标视图的 cente ...
- iOS,自动布局autoresizing和auto layout,VFL语言
1.使用autoresizing 2.使用autolayout 3.VFL语言(Visual Format Language:可视化格式语言) 使用autoresizing 点击xib文件,去掉使用a ...
- 原 iOS深入学习(Block全面分析)http://my.oschina.net/leejan97/blog/268536
原 iOS深入学习(Block全面分析) 发表于1年前(2014-05-24 16:45) 阅读(26949) | 评论(14) 39人收藏此文章, 我要收藏 赞21 12月12日北京OSC源创会 ...
- 【原】iOS学习47之第三方-FMDB
将 CocoaPods 安装后,按照 CocoaPods 的使用说明就可以将 FMDB 第三方集成到工程中,具体请看博客iOS学习46之第三方CocoaPods的安装和使用(通用方法) 1. FMDB ...
- Cordova - 与iOS原生代码交互1(通过JS调用Swift方法)
在前面的文章中介绍的了如何使用Cordova进行跨平台应用的开发,使用Cordova的话基本上就不需要在写系统原生代码了,只要通过编写html页面和js方法即可. 但在有些特殊情况下,还是是需要htm ...
随机推荐
- Yii2 认证实现原理和示例
Yii的用户认证分为两个部分,一个是User组件,负责管理用户认证状态的,包括登录,登出,检测当前登录状态等,源文件位于vender/yiisoft/yii2/web/User.php.另一个是实现接 ...
- 第四篇 基于.net搭建热插拔式web框架(RazorEngine实现)
在开头也是先给大家道个歉,由于最近准备婚事导致这篇文章耽误了许久,同时也谢谢老婆大人对我的支持. 回顾上篇文章,我们重造了一个controller,这个controller中用到了视图引擎,我们的视图 ...
- bodyParser中间件的研究
原文链接: bodyParser中间件 bodyParser中间件用来解析http请求体,是express默认使用的中间件之一. 使用express应用生成器生成一个网站,它默认已经使用了 bodyP ...
- ssl访问的原理
本文无图文对照解释,但力求通俗易懂.请读者边读边手绘各个流程,一便于理解. 总体交互流程如下 1. 客户端发起HTTPS请求 这个没什么好说的,就是用户在浏览器里输入一个https ...
- pngcrush caught libpng error: Not a PNG file..
今日真机测试遇到这样的奇葩问题: While reading XXX/XXX.png pngcrush caught libpng error: Not a PNG file.. 替换几次图片都没解决 ...
- java 文件按行读写
import java.io.BufferedReader; import java.io.BufferedWriter; import java.io.File; import java.io.Fi ...
- kettle系列-6.kettle实现多字段字典快速翻译
在数据清洗转换中,常见的字典翻译,如性别在原表中是1(男).2(女)等,类似还有很多较大的字典需要翻译,若同一个表中有很多个字典需要翻译,采用[数据库查询]方式翻译的话效率就会相当低下. 这里采用ja ...
- python import cv2 出错:cv2.x86_64-linux-gnu.so: undefined symbol
之前写过一个python使用opencv处理图片的脚本,当时是可以使用的,现在突然发现执行时出错: ImportError: /usr/lib/python2.7/dist-packages/cv2. ...
- 【Java EE 学习 75 上】【数据采集系统第七天】【二进制运算实现权限管理】【权限分析和设计】
一.权限计算相关分析 1.如何存储权限 首先说一下权限保存的问题,一个系统中最多有多少权限呢?一个大的系统中可能有成百上千个权限需要管理.怎么保存这么多的权限?首先,我们使用一个数字中的一位保存一种权 ...
- BitHacks
备份文件时看到的.我以前居然下过这东西. 2016-12-4 12:05:52更新 纯文本格式真棒.假如使用word写的我能拷过来格式还不乱?? Markdown真好. Bit Hacks By Se ...