ZXing开发详解
博客转载自:https://blog.csdn.net/skillcollege/article/details/38852183
什么是Z*?
在Android平台做过二维码相关模块的肯定都熟知ZXing开源项目,Z*是一个开源Java类库用于解析多种格式的1D/2D条形码。目标是能够对QR编码、Data Matrix、UPC的1D条形码进行解码。 其提供了多种平台下的客户端包括:J2ME、J2SE和Android。其GitHub地址是:传送门
Z*项目里面代码很多,实现的功能也很多,我们的应用只需要剥离其中的扫描模块即可,再多一点也就是生成二维码的功能;接下来我们就一起来精简ZXing项目,最终形成一个小的Demo案例,当然江湖上已经有过N多种版本的ZXing精简项目,什么横屏改竖屏,绘制扫描界面,开启闪光灯等等,并且许多都是基于ZXing2.3.0来做精简的,后续有许多更新的版本,包括自动对焦,Camera管理,bug修复等等新功能;笔者使用的是ZXing3.1.0版本,这里需要说明的就是我的这版Demo绝对是江湖上面还没有出现的,也算是一点点小小的创新把,那就是去除ZXing项目中恼人的ViewFinderView的绘制,使用XML布局扫描界面,添加扫描动画,精确计算扫描区域
克隆Z*项目到本地
git clone https://github.com/zxing/zxing.git
整理ZXing代码
打开ZXing项目的文件夹,可以看到如下文件目录:
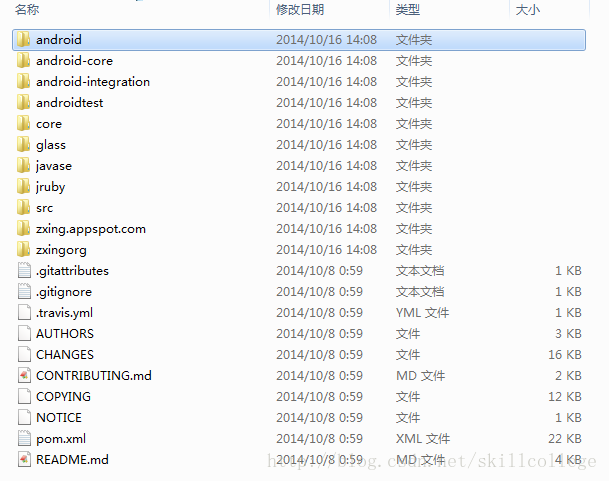
其中我们主要关注2个文件夹里的内容:
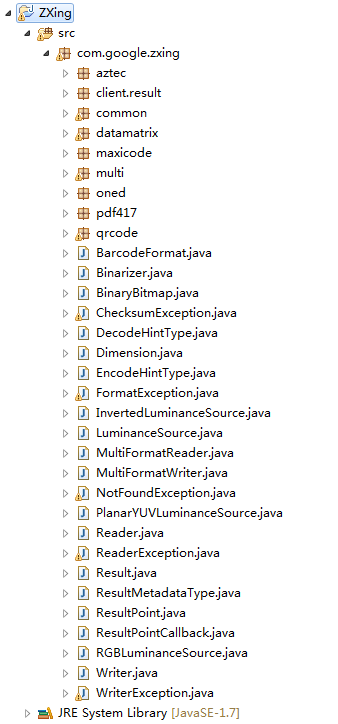
1. core : Z*项目的核心代码,可以新建一个Java工程,然后export成jar来调用。如下图所示:
免打包即可获得的zxing-3.1.0.jar 猛戳下载
2. android : Android示例工程代码,成功运行之后就是一个专业的扫码应用了。如下图所示:

免引入免整理的zxing原始工程 ZXingRawProject 猛戳下载
但是这样就让你满足了,那怎么可以说是极致二维码扫描呢,有木有感觉ZXing的扫描框的绘制很不爽啊?自定义的View绘制的很丑,多屏幕适配的时候还经常不兼容,原始项目还是横屏模式的,目前大家都习惯竖屏扫描呢。怎么办?别怕,我来告诉你,我要将ViewFinderView砍掉,使用xml界面布局,添加扫描动画,最终一样准确无误的扫描到二维码数据,只需要对准,是的,毫厘不差的对准就可以了。
精简Z*代码,打造极致扫描
1. 去掉Z*中一些和扫描无关的代码,最终留下的代码结构如下图所示,最关键的是你看不到ViewFinderView 了

2. 布局扫描界面,xml代码如下:
<?xml version="1.0" encoding="utf-8"?>

<RelativeLayout xmlns:android="http://schemas.android.com/apk/res/android"

    android:layout_width="match_parent"

    android:layout_height="match_parent"

    android:background="@android:color/transparent"

    android:orientation="vertical" >

    <SurfaceView

        android:id="@+id/capture_preview"

        android:layout_width="match_parent"

        android:layout_height="match_parent" />

    <RelativeLayout

        android:id="@+id/capture_container"

        android:layout_width="match_parent"

        android:layout_height="match_parent" >

        <ImageView

            android:id="@+id/capture_mask_top"

            android:layout_width="match_parent"

            android:layout_height="120dp"

            android:layout_alignParentTop="true"

            android:background="@drawable/shadow" />

        <RelativeLayout

            android:id="@+id/capture_crop_view"

            android:layout_width="200dp"

            android:layout_height="200dp"

            android:layout_below="@id/capture_mask_top"

            android:layout_centerHorizontal="true"

            android:background="@drawable/qr_code_bg" >

            <ImageView

                android:id="@+id/capture_scan_line"

                android:layout_width="match_parent"

                android:layout_height="wrap_content"

                android:layout_alignParentTop="true"

                android:layout_marginBottom="5dp"

                android:layout_marginTop="5dp"

                android:src="@drawable/scan_line" />

        </RelativeLayout>

        <ImageView

            android:id="@+id/capture_mask_bottom"

            android:layout_width="match_parent"

            android:layout_height="wrap_content"

            android:layout_alignParentBottom="true"

            android:layout_below="@id/capture_crop_view"

            android:background="@drawable/shadow" />

        <ImageView

            android:id="@+id/capture_mask_left"

            android:layout_width="wrap_content"

            android:layout_height="match_parent"

            android:layout_above="@id/capture_mask_bottom"

            android:layout_alignParentLeft="true"

            android:layout_below="@id/capture_mask_top"

            android:layout_toLeftOf="@id/capture_crop_view"

            android:background="@drawable/shadow" />

        <ImageView

            android:id="@+id/capture_mask_right"

            android:layout_width="wrap_content"

            android:layout_height="match_parent"

            android:layout_above="@id/capture_mask_bottom"

            android:layout_alignParentRight="true"

            android:layout_below="@id/capture_mask_top"

            android:layout_toRightOf="@id/capture_crop_view"

            android:background="@drawable/shadow" />

    </RelativeLayout>

</RelativeLayout>
3. 计算截取区域 贴心注解: 如果你没有看上一篇ZBar扫描中关于扫描区域计算的解释,那赶紧回去,咱不能急,看完再来接上,否则你会不理解的!传送门
private void initCrop() {

    int cameraWidth = cameraManager.getCameraResolution().y;

    int cameraHeight = cameraManager.getCameraResolution().x;

    /** 获取布局中扫描框的位置信息 */

    int[] location = new int[2];

    scanCropView.getLocationInWindow(location);

    int cropLeft = location[0];

    int cropTop = location[1] - getStatusBarHeight();

    int cropWidth = scanCropView.getWidth();

    int cropHeight = scanCropView.getHeight();

    /** 获取布局容器的宽高 */

    int containerWidth = scanContainer.getWidth();

    int containerHeight = scanContainer.getHeight();

    /** 计算最终截取的矩形的左上角顶点x坐标 */

    int x = cropLeft * cameraWidth / containerWidth;

    /** 计算最终截取的矩形的左上角顶点y坐标 */

    int y = cropTop * cameraHeight / containerHeight;

    /** 计算最终截取的矩形的宽度 */

    int width = cropWidth * cameraWidth / containerWidth;

    /** 计算最终截取的矩形的高度 */

    int height = cropHeight * cameraHeight / containerHeight;

    /** 生成最终的截取的矩形 */

    mCropRect = new Rect(x, y, width + x, height + y);

}
5. 完整项目代码: 猛戳下载
ZXing开发详解的更多相关文章
- Xamarin+Prism开发详解七:Plugin开发与打包测试
有了上章[Xamarin+Prism开发详解六:DependencyService与IPlatformInitializer的关系]的基础,现在来理解Plugin开发就简单了. 本文实例代码地址:ht ...
- EasyPR--开发详解(6)SVM开发详解
在前面的几篇文章中,我们介绍了EasyPR中车牌定位模块的相关内容.本文开始分析车牌定位模块后续步骤的车牌判断模块.车牌判断模块是EasyPR中的基于机器学习模型的一个模块,这个模型就是作者前文中从机 ...
- 基于H5的微信支付开发详解
这次总结一下用户在微信内打开网页时,可以调用微信支付完成下单功能的模块开发,也就是在微信内的H5页面通过jsApi接口实现支付功能.当然了,微信官网上的微信支付开发文档也讲解的很详细,并且有实现代码可 ...
- ****基于H5的微信支付开发详解[转]
这次总结一下用户在微信内打开网页时,可以调用微信支付完成下单功能的模块开发,也就是在微信内的H5页面通过jsApi接口实现支付功能.当然了,微信官网上的微信支付开发文档也讲解的很详细,并且有实现代码可 ...
- 【转发】NPAPI开发详解,Windows版
NPAPI开发详解,Windows版 9 jiaofeng601, +479 9人支持,来自Meteor.猪爪.hanyuxinting更多 .是非黑白 .Yuan Xulei.hyolin.Andy ...
- 热烈祝贺华清远见《ARM处理器开发详解》第2版正式出版
2014年6月,由华清远见研发中心组织多名业 内顶尖讲师编写的<ARM处理器开发详解>一书正式出版.本书以S5PV210处理器为平台,详细介绍了嵌入式系统开发的各个主要环节,并注重实践,辅 ...
- 嵌入式Linux应用程序开发详解------(创建守护进程)
嵌入式Linux应用程序开发详解 华清远见 本文只是阅读文摘. 创建一个守护进程的步骤: 1.创建一个子进程,然后退出父进程: 2.在子进程中使用创建新会话---setsid(): 3.改变当前工作目 ...
- iOS原生地图开发详解
在上一篇博客中:http://my.oschina.net/u/2340880/blog/414760.对iOS中的定位服务进行了详细的介绍与参数说明,在开发中,地位服务往往与地图框架结合使用,这篇博 ...
- wpf 客户端【JDAgent桌面助手】开发详解(四) popup控件的win8.0的bug
目录区域: 业余开发的wpf 客户端终于完工了..晒晒截图 wpf 客户端[JDAgent桌面助手]开发详解-开篇 wpf 客户端[JDAgent桌面助手]详解(一)主窗口 圆形菜单... wpf 客 ...
随机推荐
- Linux下添加,删除,修改,查看用户和用户组
linux下添加,删除,修改,查看用户和用户组 1,创建组 groupadd test 增加一个test组 2,修改组 groupmod -n test2 test 将test组的名子改成test ...
- Javascript-- jQuery Ajax应用
使用ajax()方法加载服务器数据 使用ajax()方法是最底层.功能最强大的请求服务器数据的方法,它不仅可以获取服务器返回的数据,还能向服务器发送请求并传递数值,它的调用格式如下: jQuery.a ...
- php 中改变字符编码的函数 是 iconv()
json_enocode() 此函数里边接收的数据必须是utf8格式.要不然会输出null
- Java中print()、printf()、println()的区别?
区别: 1.printf主要是继承了C语言的printf的一些特性,可以进行格式化输出 2.print就是一般的标准输出,输入信息后不会换行 3.println输入信息会换行 参照JAVA API的定 ...
- Long Jumps(二分查找lower_bound()函数的运用)
Valery is a PE teacher at a school in Berland. Soon the students are going to take a test in long ju ...
- Codeforces 802 ABC. Heidi and Library
题目大意 你需要保证第\(i\)天时有第\(a_i\)种书.你可以在任何一天买书,买第\(i\)种书的代价为\(c_i\). 你最多同时拥有\(k\)本书,如果此时再买书,则必须先扔掉已拥有的一本书. ...
- css3 flex布局/grid布局
1.CSS3 Flexbox 布局完全指南(图解 Flexbox 布局详细教程) 2.CSS Grid 布局完全指南(图解 Grid 详细教程)
- 解决 ASP.NET Chart 控件出错 为 ChartImg.axd 执行子请求时出错
今天在做一个关于MVC的MSChart时,本以为很简单的一个东西,后面把数据什么的都绑定好后,满以为OK了,一运行就报错“ ASP.NET Chart 控件出错 为 ChartImg.axd ...
- (转)基于PHP——简单的WSDL的创建(WSDL篇)
本文转载自:http://blog.csdn.net/rrr4578/article/details/24451943 1.建立WSDL文件 建立WSDL的工具很多,eclipse.zends ...
- Java: What is the difference between <init> and <clinit>?
Stack Overflow 上的一个问题:Java: What is the difference between <init> and <clinit>? JVM Sp ...