Java第四次实验
实验一:
Android Stuidio的安装测试: 参考《Java和Android开发学习指南(第二版)(EPUBIT,Java for Android 2nd)》第二十四章:
- 参考http://www.cnblogs.com/rocedu/p/6371315.html#SECANDROID,安装 Android Stuidio
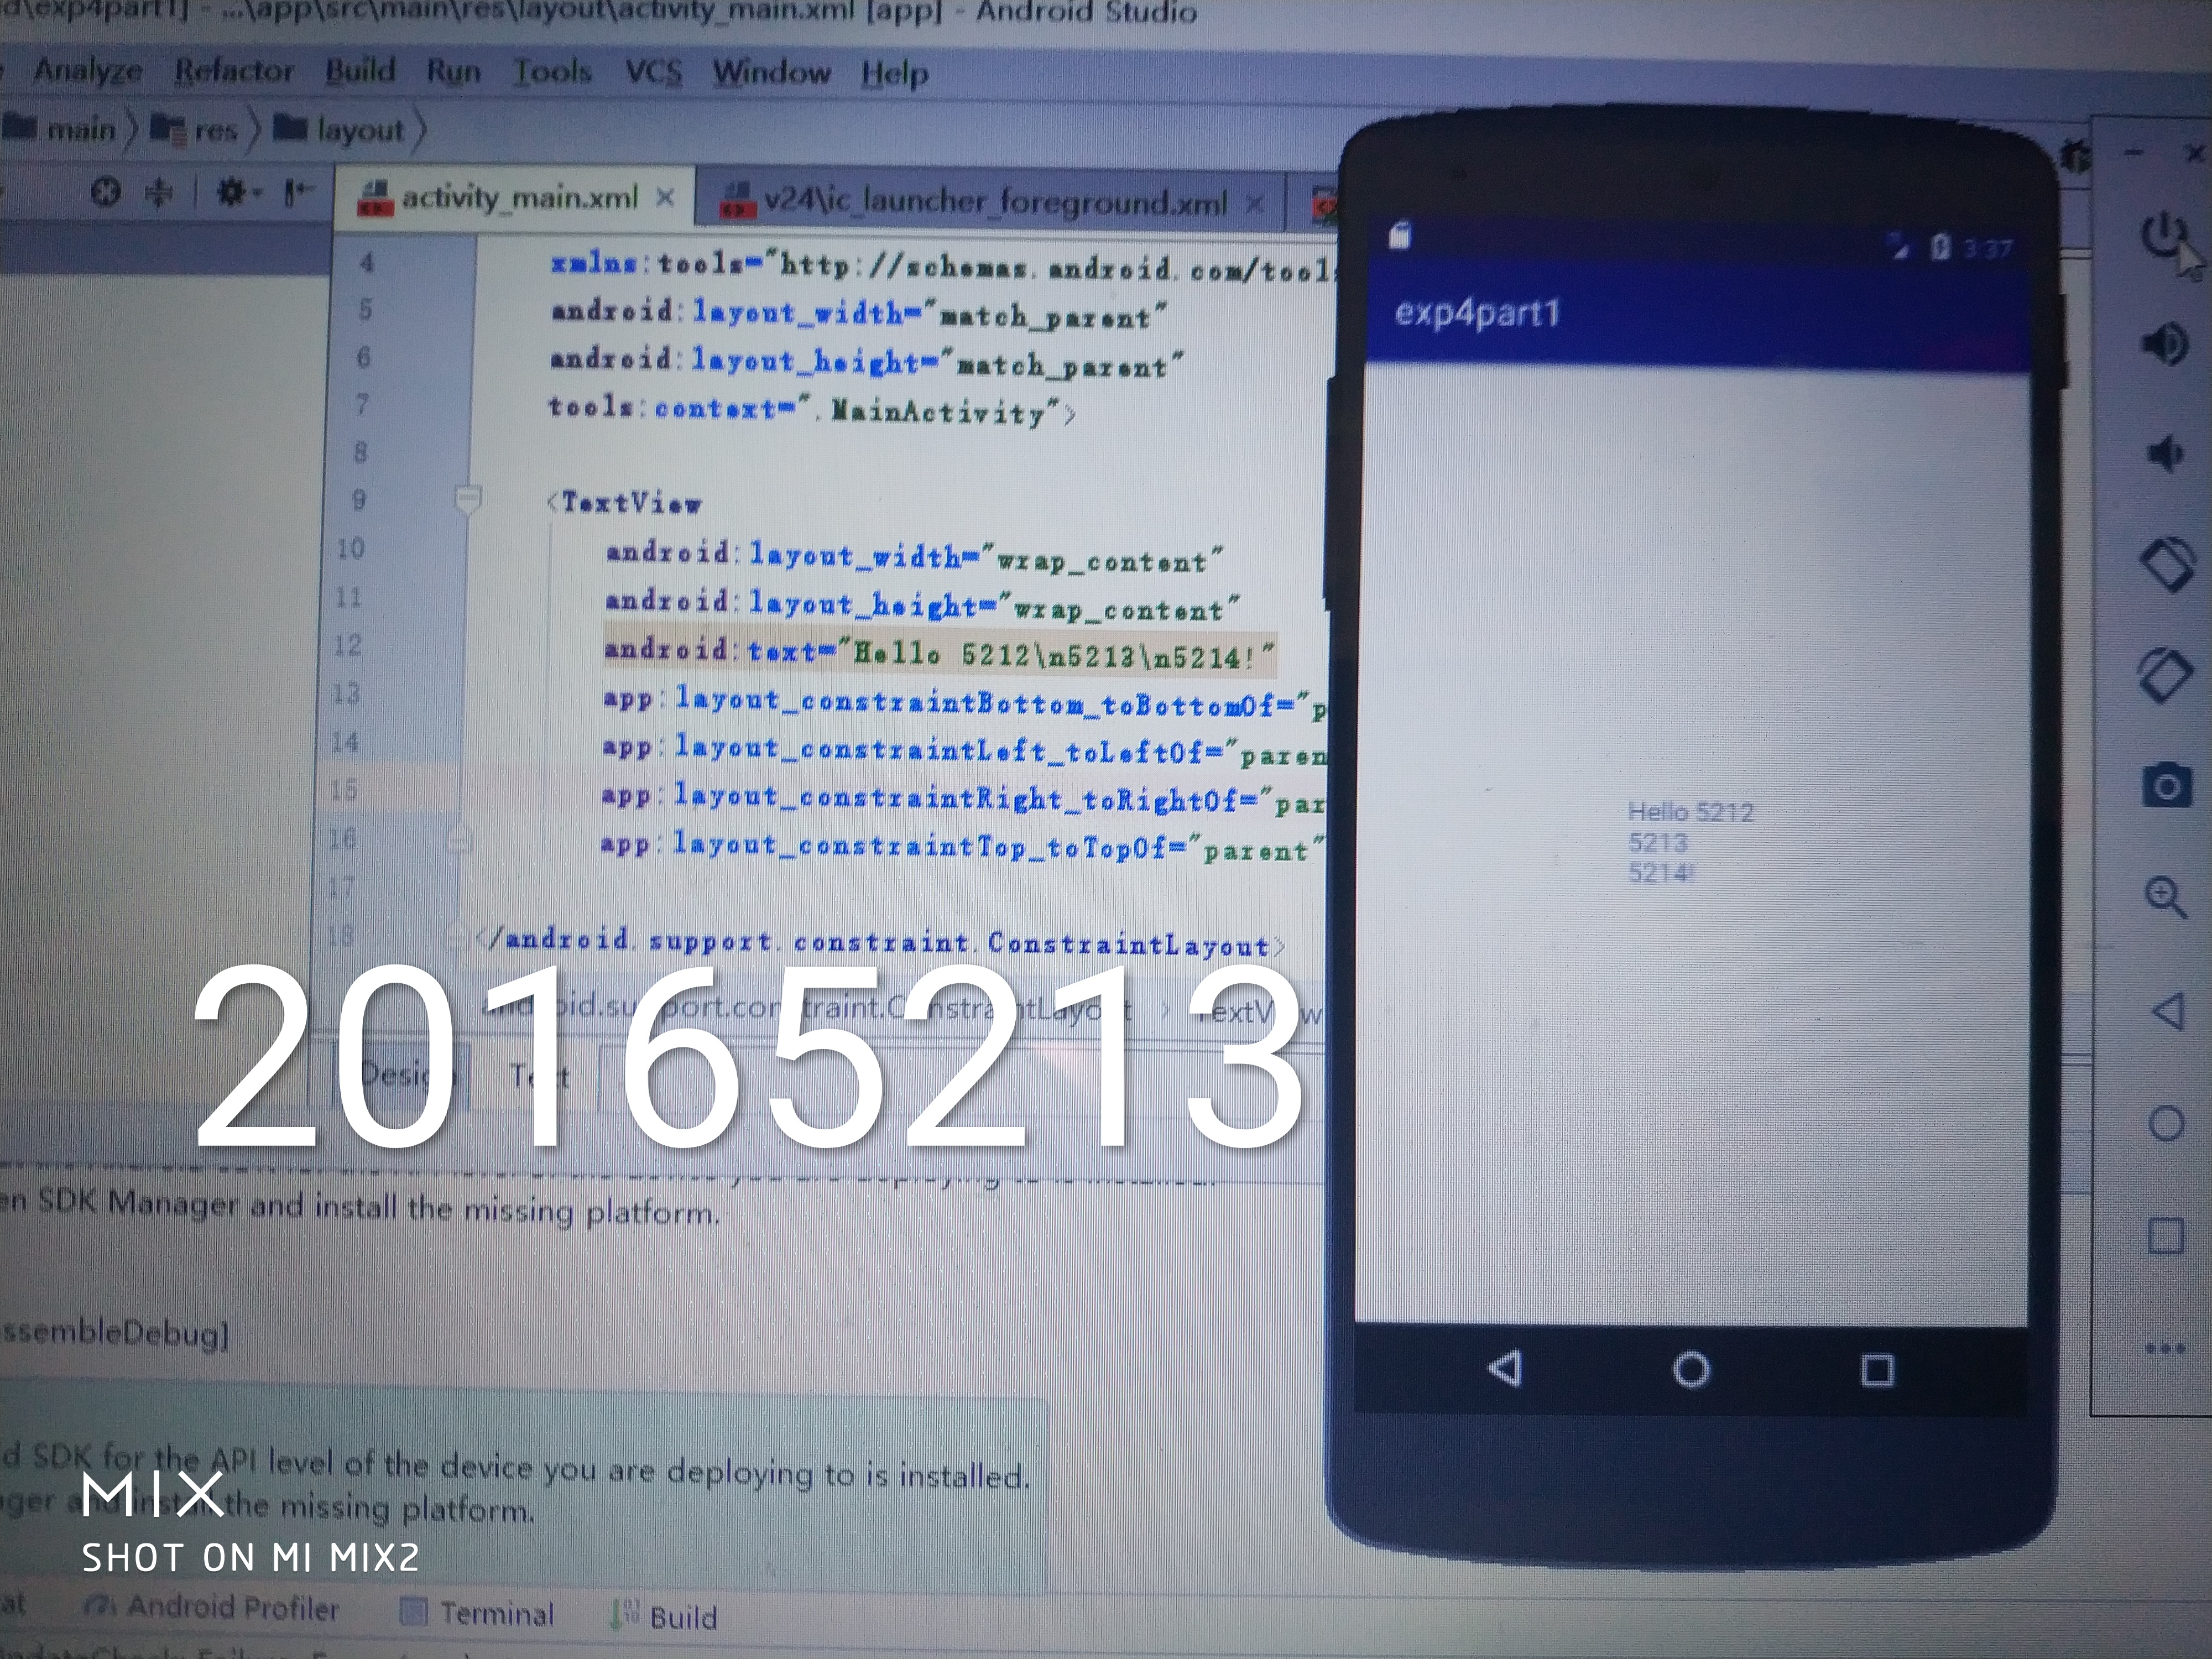
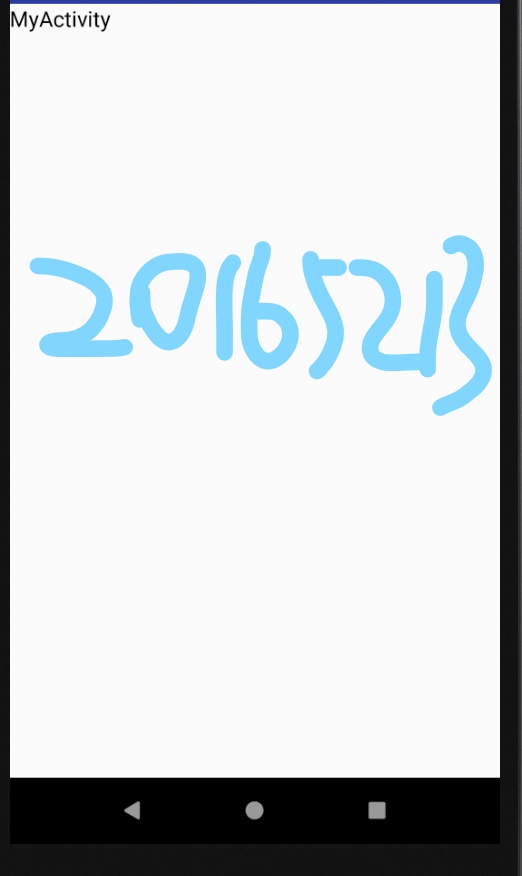
- 完成Hello World, 要求修改res目录中的内容,Hello World后要显示自己的学号,自己学号前后一名同学的学号,提交代码运行截图和码云Git链接,截图没有学号要扣分
- 学习Android Stuidio调试应用程序
package yh.is.besti.edu.cn.helloworld;

import android.support.v7.app.AppCompatActivity;

import android.os.Bundle;

public class MainActivity extends AppCompatActivity {

    @Override

    protected void onCreate(Bundle savedInstanceState) {

        super.onCreate(savedInstanceState);

        setContentView(R.layout.activity_main);

    }

}
<?xml version="1.0" encoding="utf-8"?>

<android.support.constraint.ConstraintLayout xmlns:android="http://schemas.android.com/apk/res/android"

    xmlns:app="http://schemas.android.com/apk/res-auto"

    xmlns:tools="http://schemas.android.com/tools"

    android:layout_width="match_parent"

    android:layout_height="match_parent"

    tools:context=".MainActivity">

    <TextView

        android:layout_width="wrap_content"

        android:layout_height="wrap_content"

        android:text="Hello World!20165212 20165213 20165214"

        app:layout_constraintBottom_toBottomOf="parent"

        app:layout_constraintLeft_toLeftOf="parent"

        app:layout_constraintRight_toRightOf="parent"

        app:layout_constraintTop_toTopOf="parent" />

</android.support.constraint.ConstraintLayout>
实验二
Activity测试: 参考《Java和Android开发学习指南(第二版)(EPUBIT,Java for Android 2nd)》第二十五章:
- 构建项目,运行教材相关代码
- 创建 ThirdActivity, 在ThirdActivity中显示自己的学号,修改代码让MainActivity启动ThirdActivity
- 提交代码运行截图和码云Git链接,截图要有学号水印,否则会扣分.
<?xml version="1.0" encoding="utf-8"?>

<manifest xmlns:android="http://schemas.android.com/apk/res/android"

    package="yh.is.besti.edu.cn.layouttest">

    <application

        android:allowBackup="true"

        android:icon="@mipmap/ic_launcher"

        android:label="@string/app_name"

        android:roundIcon="@mipmap/ic_launcher_round"

        android:supportsRtl="true"

        android:theme="@style/AppTheme">

        <activity android:name=".MainActivity">

            <intent-filter>

                <action android:name="android.intent.action.MAIN" />

                <category android:name="android.intent.category.LAUNCHER" />

            </intent-filter>

        </activity>

    </application>

</manifest>
实验三
UI测试: 参考《Java和Android开发学习指南(第二版)(EPUBIT,Java for Android 2nd)》第二十六章:
- 构建项目,运行教材相关代码
- 修改代码让Toast消息中显示自己的学号信息
- 提交代码运行截图和码云Git链接,截图要有学号水印,否则会扣分
import android.support.v7.app.AppCompatActivity;

import android.os.Bundle;

import android.view.Gravity;

import android.view.View;

import android.widget.Button;

import android.widget.ImageView;

import android.widget.LinearLayout;

import android.widget.RelativeLayout;

import android.widget.TextView;

import android.widget.Toast;

public class MainActivity extends AppCompatActivity {

    @Override

    protected void onCreate(Bundle savedInstanceState) {

        super.onCreate(savedInstanceState);

        setContentView(R.layout.activity_main);

        Button btnshow1 = (Button) findViewById(R.id.btn1);

        btnshow1.setOnClickListener(new View.OnClickListener() {

            @Override

            public void onClick(View v) {

                Toast toast = Toast.makeText(MainActivity.this, "20165213", Toast.LENGTH_LONG);

                toast.show();

            }

        });

    }

}

实验四:
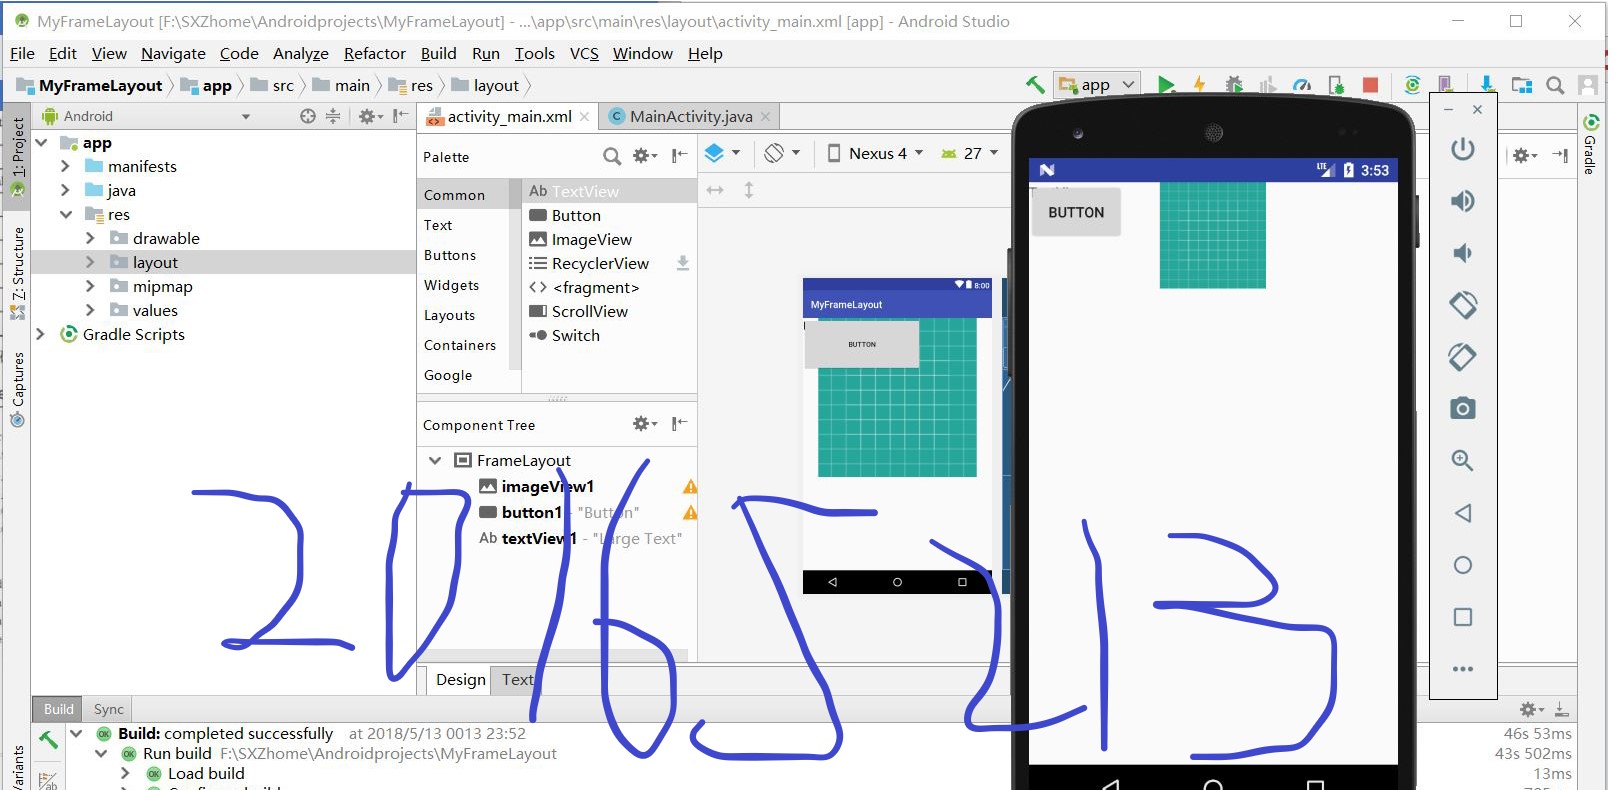
布局测试: 参考《Java和Android开发学习指南(第二版)(EPUBIT,Java for Android 2nd)》第二十七章:
- 构建项目,运行教材相关代码
- 修改布局让P290页的界面与教材不同
- 提交代码运行截图和码云Git链接,截图要有学号水印,否则会扣分
<?xml version="1.0" encoding="utf-8"?>

<FrameLayout xmlns:android="http://schemas.android.com/apk/res/android"

    xmlns:tools="http://schemas.android.com/tools"

    android:layout_width="match_parent"

    android:layout_height="match_parent"

    android:orientation="horizontal">

    <Button

        android:layout_width="wrap_content"

        android:layout_height="wrap_content"

        android:layout_marginLeft="100dp"

        android:layout_marginTop="100dp"

        android:text="20165211" />

    <FrameLayout

        android:layout_width="wrap_content"

        android:layout_height="wrap_content"

        android:text="20165211"></FrameLayout>

    <Button

        android:id="@+id/button"

        android:layout_width="wrap_content"

        android:layout_height="wrap_content"

        android:text="Button" />

</FrameLayout>
实验五
事件处理测试: 参考《Java和Android开发学习指南(第二版)(EPUBIT,Java for Android 2nd)》第二十八章:
- 构建项目,运行教材相关代码
- 提交代码运行截图和码云Git链接,截图要有学号水印,否则会扣分
package cn.edu.besti.is.jhs.multicolorclock;

import android.support.v7.app.AppCompatActivity;

import android.os.Bundle;

import android.app.Activity;

import android.graphics.Color;

import android.os.Bundle;

import android.view.Menu;

import android.view.View;

import android.widget.AnalogClock;

import android.app.Activity;

import android.graphics.Color;

import android.os.Bundle;

import android.view.Menu;

import android.view.View;

import android.widget.AnalogClock;

public class MainActivity extends Activity {

    int counter = 0;

    int[] colors = { Color.BLACK, Color.BLUE, Color.CYAN,

            Color.DKGRAY, Color.GRAY, Color.GREEN, Color.LTGRAY,

            Color.MAGENTA, Color.RED, Color.WHITE, Color.YELLOW };

    @Override

    protected void onCreate(Bundle savedInstanceState) {

        super.onCreate(savedInstanceState);

        setContentView(R.layout.activity_main);

    }

    @Override

    public boolean onCreateOptionsMenu(Menu menu) {

// Inflate the menu; this adds items to the action bar if it

// is present.

        getMenuInflater().inflate(R.menu.menu_main, menu);

        return true;

    }

    public void changeColor(View view) {

        if (counter == colors.length) {

            counter = 0;

        }

        view.setBackgroundColor(colors[counter++]);

    }

}
<RelativeLayout

    xmlns:android="http://schemas.android.com/apk/res/android"

    xmlns:tools="http://schemas.android.com/tools"

    android:layout_width="match_parent"

    android:layout_height="match_parent"

    android:paddingBottom="10dp"

    android:paddingLeft="10dp"

    android:paddingRight="10dp"

    android:paddingTop="10dp"

    tools:context=".MainActivity">

    <AnalogClock

        android:id="@+id/analogClock1"

        android:layout_width="wrap_content"

        android:layout_height="wrap_content"

        android:layout_alignParentTop="true"

        android:layout_centerHorizontal="true"

        android:layout_marginTop="90dp"

        android:onClick="changeColor"

        />

</RelativeLayout>
码云链接:https://gitee.com/BESTI-IS-JAVA-2018/20165213zqh/tree/master/Projects
Java第四次实验的更多相关文章
- 南京邮电大学java第四次实验报告
实 验 报 告 ( 2017 / 2018学年 第2学期) 课程名称 JAVA语言程序设计 实验名称 Java集成开发环境的安装与使用. Java变量.表达式与控制结构 实验时间 2018 年 6 月 ...
- java第四次实验报告
课程:Java程序与设计 班级:1352 姓 名:池彬宁 小组成员: 20135212池彬宁 20135208贺邦 学号:20135212 成绩: 指导教师:娄嘉鹏 ...
- 20135208 JAVA第四次实验
课程:Java程序与设计 班级:1352 姓名:贺邦 小组成员: 20135212池彬宁 20135208贺邦 学号:20135208 成绩: 指导教师:娄嘉鹏 ...
- 20165210 Java第四次实验报告
20165210 实验四 Android程序设计 实验步骤 第24章:初识Android 任务一:完成Hello World, 要求修改res目录中的内容,Hello World后要显示自己的学号 学 ...
- 20145330《Java程序设计》第四次实验报告
20145330<Java程序设计>第四次实验报告 实验四 Android环境搭建 实验内容 1.搭建Android环境 2.运行Android 3.修改代码,能输出学号 实验步骤 搭建A ...
- 20145320《Java程序设计》第四次实验报告
20145320<Java程序设计>第四次实验报告 北京电子科技学院(BESTI)实验报告 课程:Java程序设计 班级:1453 指导教师:娄嘉鹏 实验日期:2016.04.26 15: ...
- 2017-2018-2 20165301 实验四《Java面向对象程序设计》实验报告
2017-2018-2 20165301 实验四<Java面向对象程序设计>实验报告 一.Android Stuidio的安装测试 实验要求: 参考<Java和Android开发学习 ...
- 20155201 实验四《Java面向对象程序设计》实验报告
20155201 实验四<Java面向对象程序设计>实验报告 一.实验内容 1.基于Android Studio开发简单的Android应用并部署测试; 2.了解Android.组件.布局 ...
- 《JAVA程序设计》 20155208 实验四 Android程序设计
<JAVA程序设计> 20155208 实验四 Android程序设计 实验一: 实验要求: Android Stuidio的安装测试: 参考<Java和Android开发学习指南( ...
随机推荐
- 数据库SQL语言学习----左外连接,右外连接,外连接,自然连接的形象对比
现在有两张表,一张Student 另一张Score 1.查询每个学生及其选修课程的情况: 自然连接,Sno在Cscore中找不到就不显示,Cno在Cscore中找不到也不显示 SELECT Stu ...
- 第17课 类型萃取(1)_基本的type_traits
1. type_traits类型萃取 (1)type_traits通过定义一些结构体或类,并利用模板类特化和偏特化的能力,给类型赋予一些特性,这些特性根据类型的不同而异.在程序设计中可以使用这些tra ...
- WebHttpRequest在sharepoint文档库中的使用
写在前面 由于sharepoint服务器上的站点采用的域用户windows认证的方式登陆,而app项目虽然能够提供用户名和密码,但客户是不愿意在网络上这样传输的.所以给提供了使用ssl证书认证的方式. ...
- ADO.NET链接数据库封装方法
/// <summary> /// 获取一个表 /// </summary> /// <param name="sql ...
- vue仿淘宝订单状态的tab切换效果
<div class="navigation"> //这里是通过循环遍历出来的数据,你需要根据index的值来判断你现在点击的是第几个tab栏导航,同时在js中写一个 ...
- Tomcat 配置详解和优化
2018年01月09日 18:14:41 tianxiaojun2014 阅读数:306 转自:https://www.cnblogs.com/xbq8080/p/6417671.html htt ...
- 63.1拓展之纯 CSS 创作一个摇摇晃晃的 loader
效果地址:https://scrimba.com/c/cqKv4VCR HTML code: <div class="loader"> <span>Load ...
- 3Linux常用命令
文件目录管理命令 1.touch touch 文件名 #创建空白文件 -a 修改读取(访问)时间atime -m 修改修改时间mtime -d 同时修改atime 和 mtime touch ...
- laravel PHPExcel 使用小结
最近需求要用到PHPExcel,laravel框架中有相应的组件https://github.com/Maatwebsite/Laravel-Excel,我用的是2.1的(3.0文档不详细而且坑似乎也 ...
- 把Gitlab迁移到Docker容器里
把Gitlab迁移到Docker容器里 Apr 9, 2015. | By: 任怀林 公司的gitlab一直是运行在ovm的虚拟机里的,版本还是6.7.5.版本有点老了,最近在研究docker,于是想 ...