MongoDB 3.6.1集群部署
Mongodb安装
Linux版本:CentOS release 6.9
Mongodb版本:mongodb-linux-x86_64-3.6.1.tgz
示例是在一台主机上安装mongodb集群
|
端口 |
|||
|
路由进程mongo |
20001 |
20002 |
20003 |
|
配置服务器config |
20011 |
20012 |
20013 |
|
分片服务器shard1 |
20031 |
20032 |
20033 |
|
分片服务器shard2 |
20041 |
20042 |
20043 |
1、解压文件
执行解压命令:tar -zxvf mongodb-linux-x86_64-3.6.1.tgz

2、创建数据,日志目录,结构如下 在同台机器创建三主三从三配置三路由架构cp001,cp002,cp003目录结构均一样
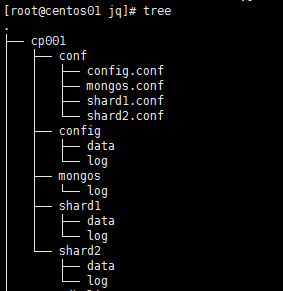
3、
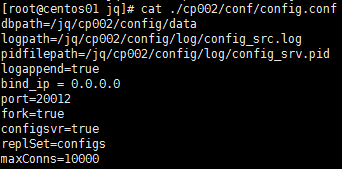
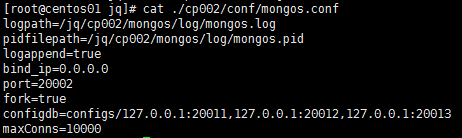
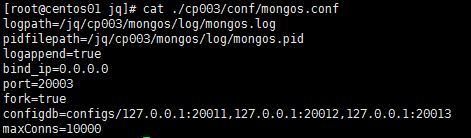
1、配置文件
dbpath数据存放位置
logpath日志文件位置
pidfilepath进程号存放位置
port端口号
fork是否后台运行
replSet副本集名称
configdb监听的配置服务器,只能有1个或者3个 configs为配置服务器的副本集名字
1)mongo配置服务器的配置


2)mongo路由服务器配置

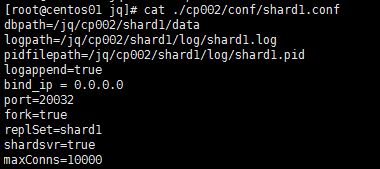
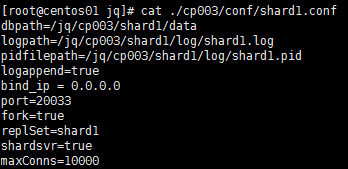
3)shard1配置

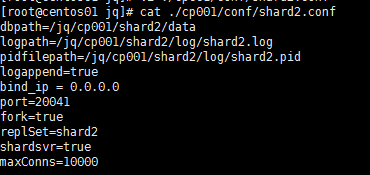
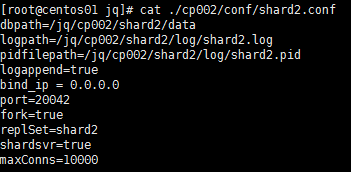
4)shard2配置

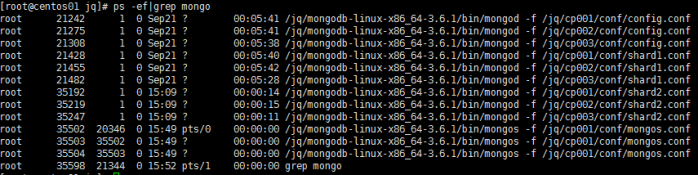
4、启动Mongodb
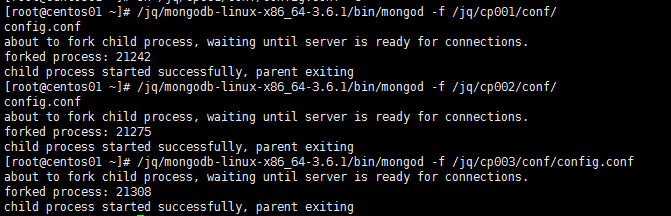
1)启动配置
/jq/mongodb-linux-x86_64-3.6.1/bin/mongod -f /jq/cp001/conf/config.conf
/jq/mongodb-linux-x86_64-3.6.1/bin/mongod -f /jq/cp002/conf/config.conf
/jq/mongodb-linux-x86_64-3.6.1/bin/mongod -f /jq/cp003/conf/config.conf
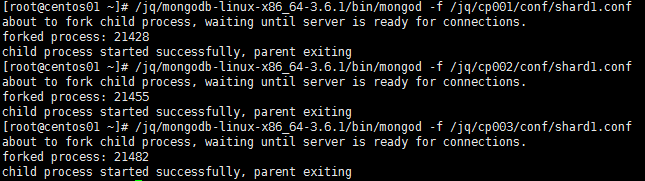
2)启动复制集
/jq/mongodb-linux-x86_64-3.6.1/bin/mongod -f /jq/cp001/conf/shard1.conf
/jq/mongodb-linux-x86_64-3.6.1/bin/mongod -f /jq/cp002/conf/shard1.conf
/jq/mongodb-linux-x86_64-3.6.1/bin/mongod -f /jq/cp003/conf/shard1.conf
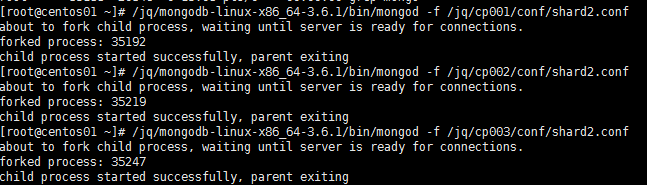
/jq/mongodb-linux-x86_64-3.6.1/bin/mongod -f /jq/cp001/conf/shard2.conf
/jq/mongodb-linux-x86_64-3.6.1/bin/mongod -f /jq/cp002/conf/shard2.conf
/jq/mongodb-linux-x86_64-3.6.1/bin/mongod -f /jq/cp003/conf/shard2.conf
3)启动路由
/jq/mongodb-linux-x86_64-3.6.1/bin/mongos -f /jq/cp001/conf/mongos.conf
*由于是同一台主机,只执行一个配置
5、登陆任意一个config server节点,配置副本集
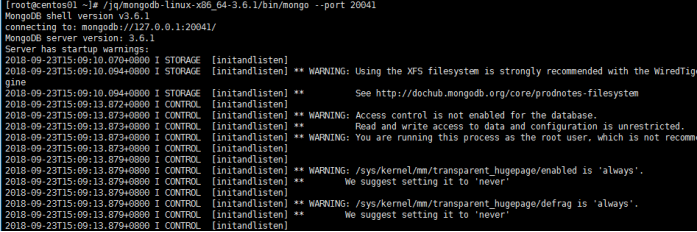
/jq/mongodb-linux-x86_64-3.6.1/bin/mongo --port 20011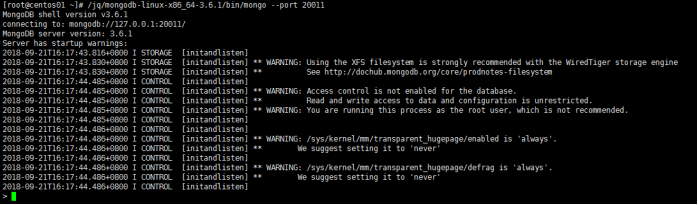
#设置变量 这里的id号,要和配置文件中的副本集名称相同
config = {
_id : "configs",
members : [
{_id : 0, host : "127.0.0.1:20011" },
{_id : 1, host : "127.0.0.1:20012" },
{_id : 2, host : "127.0.0.1:20013" }
]
}
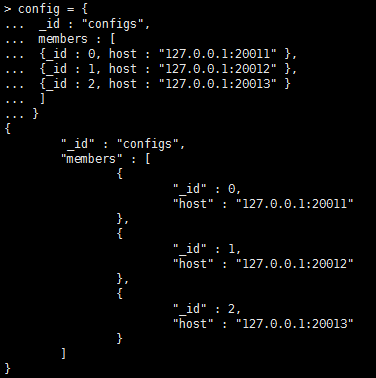
#初始化副本集
rs.initiate(config)

6、配置shard
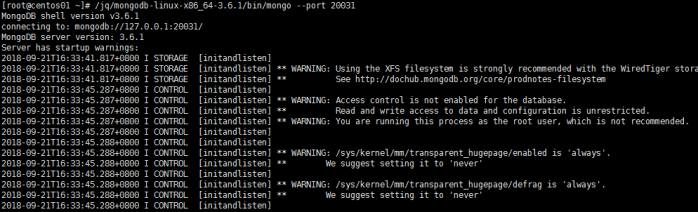
1)配置shard1,进入任意一个shard1节点
/jq/mongodb-linux-x86_64-3.6.1/bin/mongo --port 20031
#设置变量
config = {
_id : "shard1",
members : [
{_id : 0, host : "127.0.0.1:20031" },
{_id : 1, host : "127.0.0.1:20032" },
{_id : 2, host : "127.0.0.1:20033" }
]
}
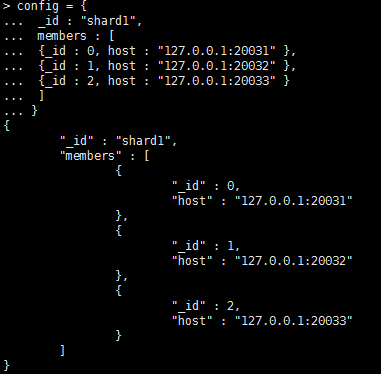
#设置shard1初始化
rs.initiate(config)

2)配置shard2,进入任意一个shard2节点
/jq/mongodb-linux-x86_64-3.6.1/bin/mongo --port 20041
#设置变量
config = {
_id : "shard2",
members : [
{_id : 0, host : "127.0.0.1:20041" },
{_id : 1, host : "127.0.0.1:20042" },
{_id : 2, host : "127.0.0.1:20043" }
]
}
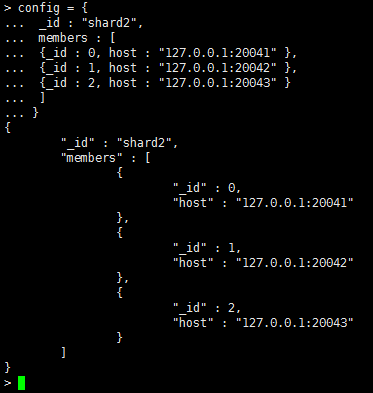
#设置shard2初始化
rs.initiate(config)

7、启用分片
登陆任意一个mongos
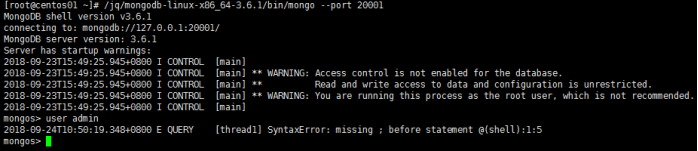
/jq/mongodb-linux-x86_64-3.6.1/bin/mongo --port 20001
切换到admin数据库
use admin
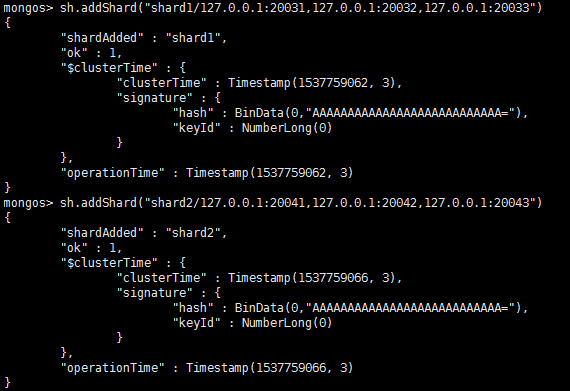
串联路由服务器与分配副本集
sh.addShard("shard1/127.0.0.1:20031,127.0.0.1:20032,127.0.0.1:20033")
sh.addShard("shard2/127.0.0.1:20041,127.0.0.1:20042,127.0.0.1:20043")
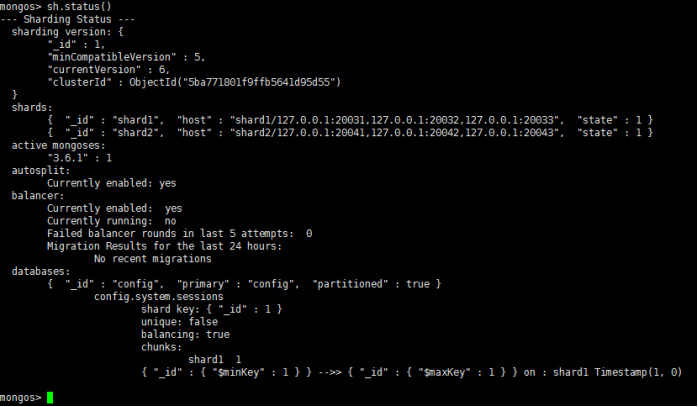
查看状态
sh.status()
8、测试分片
*不启用分片
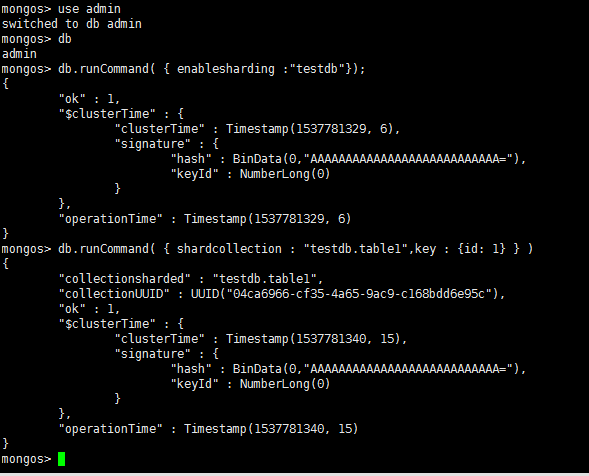
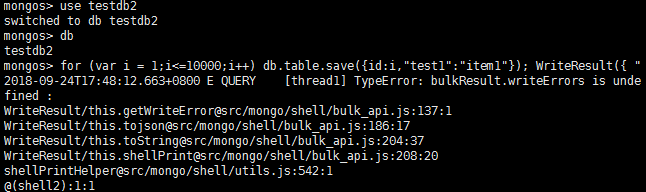
use admin
#指定testdb分片生效
db.runCommand( { enablesharding :"testdb"});
#指定数据库里需要分片的集合和片键
db.runCommand( { shardcollection : "testdb.table1",key : {id: 1} } )
for (var i = 1;i<=10000;i++) db.table1.save({id:i,"test1":"item1"}); WriteResult({ "nInserted" : 1 });

#查看状态
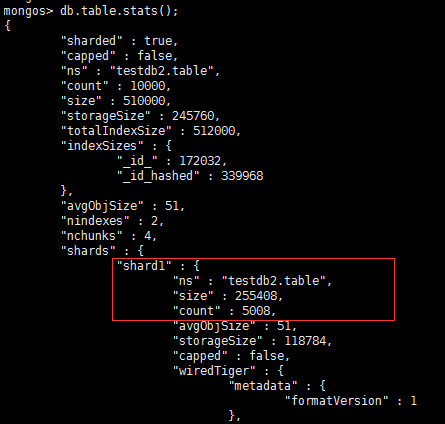
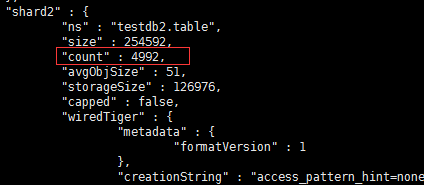
db.table1.stats();

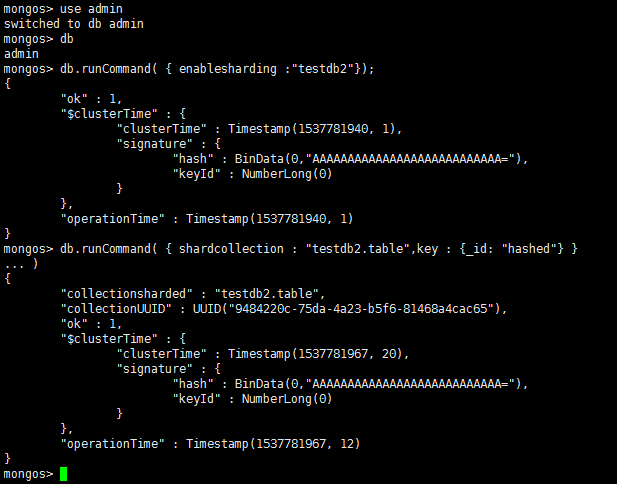
*启用分片
use admin
#指定testdb分片生效
db.runCommand( { enablesharding :"testdb2"});
#指定数据库里需要分片的集合和片键
db.runCommand( { shardcollection : "testdb2.table",key : {_id: "hashed"} })
for (var i = 1;i<=10000;i++) db.table.save({id:i,"test1":"item1"}); WriteResult({ "nInserted" : 1 });
#查看状态
db.table1.stats();
停止MongoDB
/jq/mongodb-linux-x86_64-3.6.1/bin/mongod -f /jq/cp001/conf/config.conf --shutdown
/jq/mongodb-linux-x86_64-3.6.1/bin/mongod -f /jq/cp002/conf/config.conf --shutdown
/jq/mongodb-linux-x86_64-3.6.1/bin/mongod -f /jq/cp003/conf/config.conf --shutdown
/jq/mongodb-linux-x86_64-3.6.1/bin/mongod -f /jq/cp001/conf/shard1.conf --shutdown
/jq/mongodb-linux-x86_64-3.6.1/bin/mongod -f /jq/cp002/conf/shard1.conf --shutdown
/jq/mongodb-linux-x86_64-3.6.1/bin/mongod -f /jq/cp003/conf/shard1.conf --shutdown
/jq/mongodb-linux-x86_64-3.6.1/bin/mongod -f /jq/cp001/conf/shard2.conf --shutdown
/jq/mongodb-linux-x86_64-3.6.1/bin/mongod -f /jq/cp002/conf/shard2.conf --shutdown
/jq/mongodb-linux-x86_64-3.6.1/bin/mongod -f /jq/cp003/conf/shard2.conf --shutdown
/jq/mongodb-linux-x86_64-3.6.1/bin/mongos -f /jq/cp001/conf/mongos.conf --shutdown
MongoDB 3.6.1集群部署的更多相关文章
- mongoDB研究笔记:分片集群部署
前面几篇文章的分析复制集解决了数据库的备份与自动故障转移,但是围绕数据库的业务中当前还有两个方面的问题变得越来越重要.一是海量数据如何存储?二是如何高效的读写海量数据?尽管复制集也可以实现读写分析,如 ...
- Mongodb集群部署ReplicaSet+Sharding -摘自网络
网上关于三种集群方式的搭建方式很多,都是分开来介绍的.Replica Set (复制集成)主要是做主从库的,但是没法实现负载均衡的效果,真正实现这个的,是Sharding(分片集群),通过数据分布在每 ...
- MongoDB DBA 实践6-----MongoDB的分片集群部署
一.分片 MongoDB使用分片技术来支持大数据集和高吞吐量操作. 1.分片目的 对于单台数据库服务器,庞大的数据量及高吞吐量的应用程序对它而言无疑是个巨大的挑战.频繁的CRUD操作能够耗尽服务器的C ...
- mtools 是由MongoDB 官方工程师实现的一套工具集,可以很快速的日志查询分析、统计功能,此外还支持本地集群部署管理.
mtools 是由MongoDB 官方工程师实现的一套工具集,可以很快速的日志查询分析.统计功能,此外还支持本地集群部署管理 https://www.cnblogs.com/littleatp/p/9 ...
- MongoDB DBA 实践8-----Linux系统Mongodb分片集群部署
在Linux系统中,主要是使用命令行进行mongodb的分片集群部署 一.先决条件 mongodb安装成功,明确路径, MongoDB的几个路径: /var/lib/mongodb /var/log/ ...
- MongoDB分片集群部署方案
前言 副本集部署是对数据的冗余和增加读请求的处理能力,却不能提高写请求的处理能力:关键问题是随着数据增加,单机硬件配置会成为性能的瓶颈.而分片集群可以很好的解决这一问题,通过水平扩展来提升性能.分片部 ...
- 图解MongoDB集群部署原理(3)
MongoDB的集群部署方案中有三类角色:实际数据存储结点.配置文件存储结点和路由接入结点. 连接的客户端直接与路由结点相连,从配置结点上查询数据,根据查询结果到实际的存储结点上查询和存储数据.Mon ...
- Presto集群部署
前言: 随着大数据的普及,大部分企业的大数据查询与统计渐渐出现瓶颈.虽说存储方面有分布式的HDFS,HBSE,MongoDB等可以应对,但是面对千万级别(1x10^7)界别的数据量查询时,以上组件也不 ...
- centos6下redis cluster集群部署过程
一般来说,redis主从和mysql主从目的差不多,但redis主从配置很简单,主要在从节点配置文件指定主节点ip和端口,比如:slaveof 192.168.10.10 6379,然后启动主从,主从 ...
随机推荐
- android 连接蓝牙打印机 BluetoothAdapter
android 连接蓝牙打印机 BluetoothAdapter 源码下载地址:https://github.com/yylxy/BluetoothText.git public class Prin ...
- 错误详情:已取消该操作。--------- 在 System.Threading.CancellationToken.ThrowOperationCanceledException()
错误详情:已取消该操作.--------- 在 System.Threading.CancellationToken.ThrowOperationCanceledException() 在 Syste ...
- mac安装MySQLdb:IndexError: string index out of range
使用mac安装MySQLdb的时候出现string index out of range 大概的错误是这样的: 然后尝试手动安装,我下载了包后,依然出现这个错误. 于是百度了下: https://ww ...
- python2.7报错Non-ASCII character '\xe5' in file的解决方法
在文件首行加#coding=utf-8,一定要在最顶行添加
- git 如何同步本地tag与远程tag
问题场景:同事A在本地创建tagA并push同步到了远程->同事B在本地拉取了远程tagA(git fetch)->同事A工作需要将远程标签tagA删除->同事B用git fetch ...
- PHP用curl抓取网站数据,仿造IP、伪造来源等,防屏蔽解决方案教程
1.伪造客户端IP地址,伪造访问referer:(一般情况下这就可以访问到数据了) curl_setopt($curl, CURLOPT_HTTPHEADER, ['X-FORWARDED-FOR:1 ...
- iOS - 点击按钮实现简单的复制功能
UIPasteboard使用 基本使用: - (void)copyClick { UIPasteboard *pab = [UIPasteboard generalPasteboard]; pab.s ...
- 基于EasyNVR摄像机网页无插件直播服务二次开发实现H5播放页面的简单集成方案
我们通常在构架一套视频SaaS应用的过程中,将平台设计为3层:视频硬件层(视频源).视频能力平台(vPaaS).视频应用平台(vSaaS),视频硬件包括各种IPC.NVR.编码器等视频生成设备,vPa ...
- [LeetCode] 291. Word Pattern II 词语模式 II
Given a pattern and a string str, find if str follows the same pattern. Here follow means a full mat ...
- RDB和AOF持久化
RDB和AOF持久化 https://www.cnblogs.com/Tu9oh0st/p/11229317.html Redis提供了不同的持久化选项: RDB持久化以指定的时间间隔保存那个时间点的 ...