yum源仓库搭建
系统:centos7
一、安装nginx
yum install -y nginx
yum install -y createrepo 安装建yum源仓库的工具,可以用来建立yum仓库
yum install -y yum-plugin-priorities 安装控制yum源更新优先级工具,这个工具可以用来控制进行yum源检索的先后顺序,建议可以用在client端。
二、配置nginx
/etc/nginx/nginx.conf
server{

listen ;

autoindex on;

autoindex_exact_size on;

autoindex_localtime on;

}
默认index路径/usr/share/nginx/html
那么在html下面建立以下目录:
mkdir -p /usr/share/nginx/html/CentOS-YUM/CentOS/version_6./64bit/

mkdir -p /usr/share/nginx/html/CentOS-YUM/CentOS/version_7./64bit/

mkdir -p /usr/share/nginx/html/CentOS-YUM/Aliyun/version_6./64bit/

mkdir -p /usr/share/nginx/html/CentOS-YUM/Aliyun/version_7./64bit/
且不要忘记给目录增加可读和可执行权限,否则在web页面显示不出来。
chmod -R +x /usr/share/nginx/html/
在web的index.html首页里面添加指向文件目录的超链接:
<p style="font-weight:bolder;color:green;font-size:30px;">ALL of the packages in the below:</p>
<br/>
<a href="http://159.138.1.77/CentOS-YUM/Aliyun">Aliyun</a><br/>
These packagers from of CentOS ISO.<br/>
<a href="http://159.138.1.77/CentOS-YUM/CentOS">CentOS</a><br/>
These packagers from of "Internet service provider".<br/>
<p style="font-weight:bolder;color:red;font-size:18px;">Please replace the file and fill in the following content:</p>
<p style="font-weight:bolder;color:blue;font-size:15px;">Way: /etc/yum.repos.d/CentOS-Base.repo</p>
重启nginx
systemctl restart nginx
三、修改当前系统yum来源repo文件
1.首先对此文件进行备份
cp -p /etc/yum.repos.d/CentOS-Base.repo /etc/yum.repos.d/CentOS-Base.repo.bak
2.接下来去阿里云的官方网站下载阿里云的CentOS-Base.repo文件,如下所示:
mkdir -p /etc/yum.repos.d/Aliyun
wget -O /etc/yum.repos.d/Aliyun/CentOS-6.repo http://mirrors.aliyun.com/repo/Centos-6.repo

wget -O /etc/yum.repos.d/Aliyun/CentOS-7.repo http://mirrors.aliyun.com/repo/Centos-7.repo
四、进行同步脚本的创建并执行同步
vim /etc/yum.repos.d/yum.reposync.sh
#!/bin/bash

reposync -p /usr/share/nginx/html/CentOS-YUM/CentOS/version_7./64bit/

/usr/bin/sed -i "s/7/6/g" `grep  -rl /etc/yum.repos.d/CentOS-Base.repo`

reposync -p /usr/share/nginx/html/CentOS-YUM/CentOS/version_6./64bit/

cat /etc/yum.repos.d/Aliyun/CentOS-.repo > /etc/yum.repos.d/CentOS-Base.repo

reposync -p /usr/share/nginx/html/CentOS-YUM/Aliyun/version_6./64bit/

/usr/bin/sed -i "s/6/7/g" `grep  -rl /etc/yum.repos.d/CentOS-Base.repo`

reposync -p /usr/share/nginx/html/CentOS-YUM/Aliyun/version_7./64bit/

cat /etc/yum.repos.d/CentOS-Base.repo.bak > /etc/yum.repos.d/CentOS-Base.repo
chmod +x /etc/yum.repos.d/yum.reposync.sh
然后执行脚本
sh /etc/yum.repos.d/yum.reposync.sh
createrepo -p /usr/share/nginx/html/CentOS-YUM/CentOS/version_6./64bit/base/Packages

createrepo -p /usr/share/nginx/html/CentOS-YUM/CentOS/version_7./64bit/base/Packages

createrepo -p /usr/share/nginx/html/CentOS-YUM/Aliyun/version_6./64bit/base/Packages

createrepo -p /usr/share/nginx/html/CentOS-YUM/Aliyun/version_7./64bit/base/Packages
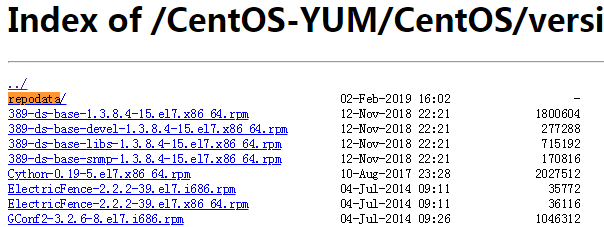
当yum源仓库建立好以后,会在对应的目录下面出现“repodata”的目录。如下图所示:
五、客户端Client的yum配置:
1、安装优先级软件:
yum install -y yum-plugin-priorities
2.首先对client端的/etc/yum.repos.d/目录下的repo文件进行更改。
mkdir –p /etc/yum.repos.d/back

mv /etc/yum.repos.d/* /etc/yum.repos.d/back/

vim /etc/yum.repos.d/CentOS-Base.repo
[mylocal]

name=source_from_localserver  #这里是整合到server端的centos6的光盘镜像yum源

baseurl=http://http://159.138.1.77/centos/6.6/x86_64/Packagers/

gpgcheck=

enable=

priority=    #这里的priority就是上面安装的优先级工具,设定从小到大

[Aliyun_6.6_base]

name=source_from_localserver

baseurl=http://159.138.1.77/CentOS-YUM/Aliyun/version_6.6/64bit/base/Packages

gpgcheck=

enable=

priority=

[Centos_6.6_base]

name=source_from_localserver

baseurl=http://159.138.1.77/CentOS-YUM/CentOS/version_6.6/64bit/base/Packages

gpgcheck=

enable=

priority=

[Aliyun_6.6_extras]

name=source_from_localserver

baseurl=http://159.138.1.77/CentOS-YUM/Aliyun/version_6.6/64bit/extras/Packages

gpgcheck=

enable=

priority=

[Centos_6.6_extras]

name=source_from_localserver

baseurl=http://159.138.1.77/CentOS-YUM/CentOS/version_6.6/64bit/extras/Packages

gpgcheck=

enable=

priority=

[Aliyun_6.6_updates]

name=source_from_localserver

baseurl=http://159.138.1.77/CentOS-YUM/Aliyun/version_6.6/64bit/updates/Packages

gpgcheck=

enable=

priority=

[Centos_6.6_updates]

name=source_from_localserver

baseurl=http://159.138.1.77/CentOS-YUM/CentOS/version_6.6/64bit/updates/Packages

gpgcheck=

enable=

priority=

---------------------
3.然后进行本利的缓存的清理和建立
yum clean all

yum makecache

yum repolist

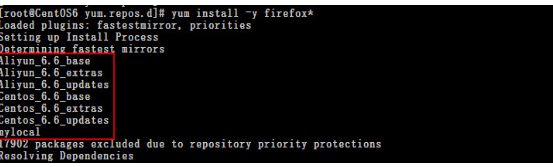
当缓存建立好以后,就可以在client端直接使用yum进行安装软件包了。而检索的顺序就是根据优先级来的。
六、配置server端的yum源自动更新机制
1.首先来写一个bash脚本在/home/crontab/下,这个脚本的作用说白了就是通过一条一条自动执行,最终达到,自动更新yum源的目的,代码如下:
vim /home/crontab/oderforrepo.sh
#!bin/bash

/usr/bin/reposync -np /usr/share/nginx/html/CentOS-YUM/CentOS/version_7./64bit/

/usr/bin/sed -i "s/7/6/g" `grep  -rl /etc/yum.repos.d/CentOS-Base.repo`

/usr/bin/reposync -np /usr/share/nginx/html/CentOS-YUM/CentOS/version_6./64bit/

cat /etc/yum.repos.d/CentOS-Base.aliyun.repo.bak > /etc/yum.repos.d/CentOS-Base.repo

/usr/bin/reposync -np /usr/share/nginx/html/CentOS-YUM/Aliyun/version_6./64bit/

/usr/bin/sed -i "s/6/7/g" `grep  -rl /etc/yum.repos.d/CentOS-Base.repo`

/usr/bin/reposync -np /usr/share/nginx/html/CentOS-YUM/Aliyun/version_7./64bit/

cat /etc/yum.repos.d/CentOS-Base.repo.bak > /etc/yum.repos.d/CentOS-Base.repo
“-np”的意思为仅仅更新新更新的软件到指定目录
其他的跟第四步的语句是一个意思。
2、然后再来添加定时计划:
vim /etc/crontab

  * *  rootrun-parts /home/crontab/oderforrepo.sh
这个定时任务表示:每周6的晚上凌晨2点开始执行oderforrepo.sh的脚本.
这样就可以自动更新yum源了。
最后记得查看本地系统的系统时间,如果觉得有必要可以将时间同步。
参考:https://blog.csdn.net/u012402276/article/details/53158682
yum源仓库搭建的更多相关文章
- yum源仓库的三种搭建方式
yum源的三种搭建方式 一. 本地yum仓库的搭建 1.1.获取软件包资源 将iso镜像挂载在本地目录中,此次挂载目录为/var/www/html/repo/,此目录本身不存在,需要创建.软件宝资源 ...
- 在linux上搭建本地yum源
准备yum仓库的光盘镜像IOS文件: 设置光驱加载本地磁盘的yum仓库的光盘镜像文件: 在linux的命令行输入setup命令打开设置窗口,选择"System Service": ...
- 【程序包管理】Linux程序包管理之yum源安装
yum源安装是我们工作中常用的一种方式,它是在Fedora和RedHat以及SUSE中基于rpm的软件包管理器,它可以使系统管理人员交互和自动化地更细与管理RPM软件包,能够从指定的服务器自动下载RP ...
- 配置 EPEL yum 源
当我们在linux上, 使用yum 安装包时,报错如下: Loaded plugins: product-id, refresh-packagekit, security, subscription- ...
- (转载)centos yum源的配置和使用
原文地址:http://www.cnblogs.com/mchina/archive/2013/01/04/2842275.html 一.yum 简介 yum,是Yellow dog Updater, ...
- 阿里云yum源安装
1.先清理掉yum.repos.d下面的所有repo文件 [root@localhost yum.repos.d]# rm -rf * 2.下载repo文件 wget http://mirror ...
- centos本地yum源安装
1.为DVD或U盘创建一个用于挂载的目录 [root@localhost ~]# mkdir /media/CentOS/ 2.查看DVD或U盘所在的路径 [root@localhost ~]# fd ...
- CentOS yum 源的配置与使用
一.yum 简介 yum,是Yellow dog Updater, Modified 的简称,是杜克大学为了提高RPM 软件包安装性而开发的一种软件包管理器.起初是由yellow dog 这一发行版的 ...
- Linux下更换默认yum源为网易yum源的操作记录
废话不多说,下面记录了centos下更换系统默认yum源为网易yum源的操作过程:1)备份原有的默认yum源[root@bastion-IDC ~]# cp /etc/yum.repos.d/Cent ...
随机推荐
- input事件手机端可能会影响手写
<input type="text" oninput="this.value=this.value.trim()"> 这样会导致手写出现问题,一个字 ...
- $on在构造器外部添加事件(通过$emit进行外部调用)$once执行一次的事件(通过$emit进行外部调用)$off关闭事件
$on 在构造器外部添加事件. $on接收两个参数,第一个参数是调用时的事件名称,第二个参数是一个匿名方法. 如果按钮在作用域外部,可以利用$emit来执行. html <div id=&quo ...
- Win10下Java开发环境配置
首先下载符合操作系统版本的jdk,比如64位的JDK8: 下载链接:https://www.oracle.com/technetwork/java/javase/downloads/jdk8-down ...
- 解决 dpkg: warning: files list file for package 'x' missing 问题
参考: dpkg: warning: files list file for package 'x' missing 解决 dpkg: warning: files list file for pac ...
- 【Django】【二】模板
1. Django-bootstrap3 guest>python -m pip install django-bootstrap3 [代码] settings.py ""& ...
- _faction
一.自定义阵营独立于联盟,部落,联盟和部落玩家可以加入同一阵营 二._function_menu表可以配置自定义阵营开启 二.配合_pvp表,可以实现区域的自定义阵营PVP 三.配合_req表fact ...
- 【BZOJ】1832: [AHOI2008]聚会
题目链接:http://www.lydsy.com/JudgeOnline/problem.php?id=1832 省选出出了CF的感觉..... 显然一发贪心,如果两个点显然就是他们的$LCA$(不 ...
- Git 基础 - 打标签
列出现有标签(或者使用git tag -l) $ git tag v0. v1. 如果只对 1.4.2 系列的版本感兴趣 $ git tag -l 'v1.4.2.*' v1. v1. v1. v1. ...
- Utunbu常见问题
关于Ubuntu中Could not get lock /var/lib/dpkg/lock解决方案 https://blog.csdn.net/u011596455/article/details/ ...
- zlib交叉编译
下载 zlib-1.2.9.tar.gz wget http://www.zlib.net/fossils/zlib-1.2.9.tar.gz 解压文件 tar -zxvf zlib-1.2.9.ta ...