Android布局解析,图文(转)
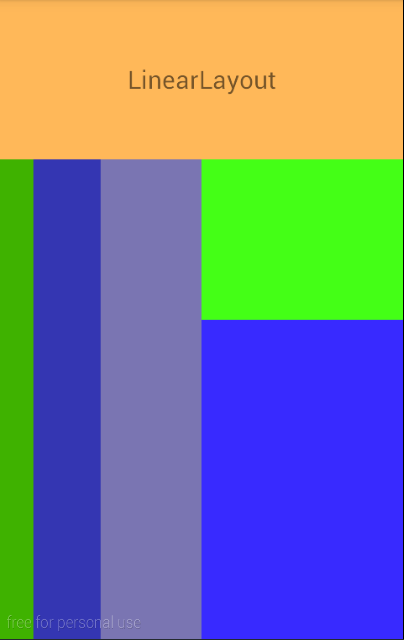
LinearLayout:相当于Java GUI中的FlowLayout(流式布局),就是说一个组件后边跟一个,挨着靠,一个组件把一行占满了,就靠到下一行。
linearlayoutdemo.xml

<LinearLayout xmlns:android="http://schemas.android.com/apk/res/android"

    xmlns:tools="http://schemas.android.com/tools"

    android:id="@+id/L1"

    android:layout_width="fill_parent"

    android:layout_height="fill_parent"

    android:orientation="vertical"

    tools:context=".MainActivity">

    <TextView

        android:id="@+id/tv"

        android:layout_width="fill_parent"

        android:layout_height="fill_parent"

        android:layout_weight="3"

        android:background="#ffffb859"

        android:gravity="center"

        android:text="@string/ll"

        android:textSize="20sp" />

    <LinearLayout

        android:id="@+id/L21"

        android:layout_width="fill_parent"

        android:layout_height="fill_parent"

        android:layout_weight="1"

        android:orientation="horizontal">

        <TextView

            android:id="@+id/tv2"

            android:layout_width="wrap_content"

            android:layout_height="fill_parent"

            android:layout_weight="1"

            android:background="#ff3fb200" />

        <TextView

            android:id="@+id/tv3"

            android:layout_width="wrap_content"

            android:layout_height="fill_parent"

            android:layout_weight="2"

            android:background="#ff3436b2" />

        <TextView

            android:id="@+id/tv5"

            android:layout_width="wrap_content"

            android:layout_height="fill_parent"

            android:layout_weight="3"

            android:background="#ff7a75b2" />

        <LinearLayout

            android:id="@+id/L27"

            android:layout_width="wrap_content"

            android:layout_height="fill_parent"

            android:layout_weight="6"

            android:orientation="vertical">

            <LinearLayout

                android:id="@+id/L37"

                android:layout_width="fill_parent"

                android:layout_height="fill_parent"

                android:layout_weight="2"

                android:background="#ff44ff16"

                android:orientation="horizontal">

            </LinearLayout>

            <LinearLayout

                android:id="@+id/L32"

                android:layout_width="fill_parent"

                android:layout_height="fill_parent"

                android:layout_weight="1"

                android:background="#ff382aff"

                android:gravity="center"

                android:orientation="horizontal">             </LinearLayout>

        </LinearLayout>

    </LinearLayout>

</LinearLayout>
效果:
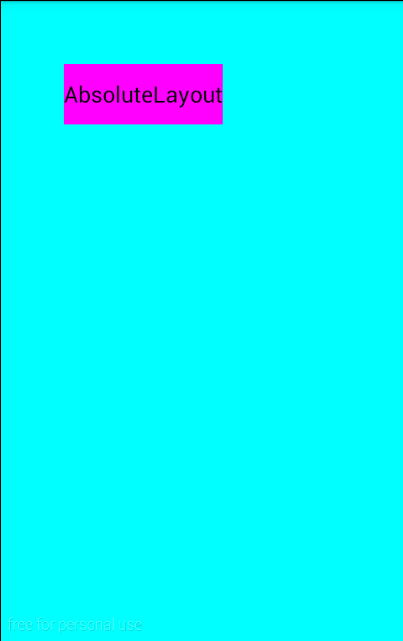
AbsolutelyLayout:绝对布局,相当于Java GUI中的空布局,就是啥也没有。组件的位置需要用坐标来显示。但是在android2.3之后已经弃用了,这种布局不能适应多种屏幕尺寸,局限性太大,但是对于独立开发者,单人单机来讲,用用也无妨。
absolutelayoutdemo.xml
<AbsoluteLayout xmlns:android="http://schemas.android.com/apk/res/android"

    android:layout_width="match_parent"

    android:layout_height="match_parent"

    android:background="#00ffff">

    <Button

        android:id="@+id/er"

        android:layout_width="wrap_content"

        android:layout_height="wrap_content"

        android:layout_x="50dp"

        android:layout_y="50dp"

        android:background="#ff00ff"

        android:text="@string/al" />

</AbsoluteLayout>
效果:
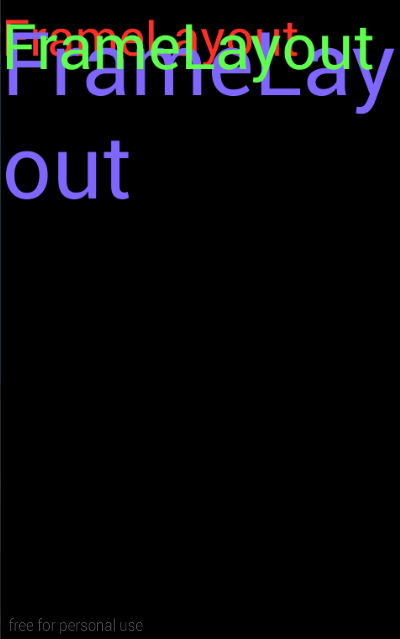
FrameLayout:这种布局是一层叠着一层,游戏类应用常会使用,涉及到NPC的构建视图等。
framelayoutdemo.xml
<FrameLayout xmlns:android="http://schemas.android.com/apk/res/android"

    android:layout_width="match_parent"

    android:layout_height="match_parent"

    android:background="#000000">

    <TextView

        android:layout_width="wrap_content"

        android:layout_height="wrap_content"

        android:text="@string/fl"

        android:textColor="#ffff2f25"

        android:textSize="40sp" />

    <TextView

        android:layout_width="wrap_content"

        android:layout_height="wrap_content"

        android:text="@string/fl"

        android:textColor="#ff7e66ff"

        android:textSize="70sp" />

    <TextView

        android:layout_width="wrap_content"

        android:layout_height="wrap_content"

        android:text="@string/fl"

        android:textColor="#ff5eff4f"

        android:textSize="50sp" />

</FrameLayout>
效果:
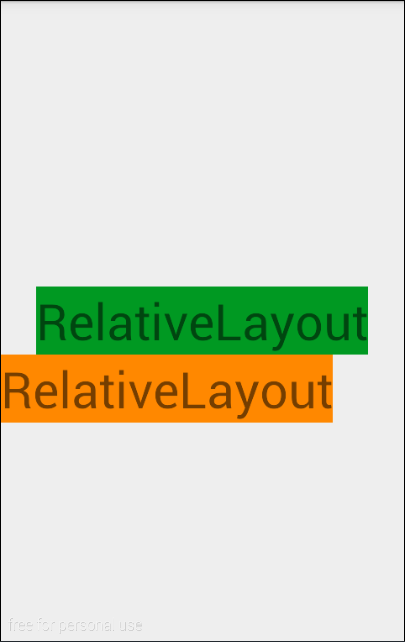
RelativeLayout:关系布局,顾名思义,就是靠关系,谁在谁的左边谁在谁的上边,谁前边和谁对其等等。属性这里就不赘述了,需要时查API即可。
relativelayoutdemo.xml
<RelativeLayout xmlns:android="http://schemas.android.com/apk/res/android"

    android:layout_width="match_parent"

    android:layout_height="match_parent">

    <TextView

        android:id="@+id/t1"

        android:layout_width="wrap_content"

        android:layout_height="wrap_content"

        android:layout_centerInParent="true"

        android:background="#009922"

        android:text="@string/rl"

        android:textSize="40sp" />

    <TextView

        android:id="@+id/t2"

        android:layout_width="wrap_content"

        android:layout_height="wrap_content"

        android:layout_below="@+id/t1"

        android:background="#ff8800"

        android:text="@string/rl"

        android:textSize="40sp" />

</RelativeLayout>
效果:
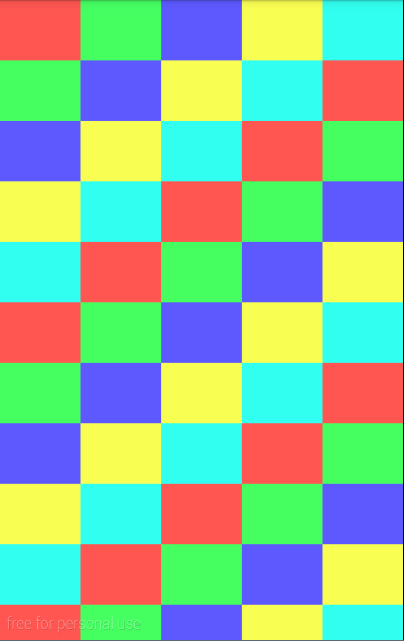
GridLayout:网格布局,自定义N x N,可拓展到屏幕外围,猜想:当某些游戏应用的地图大于手机屏幕时,可以使用此种布局,一张图片太大,可以用多张图片进行拼接,内嵌FrameLayout实现NPC在地图上。
gridlayoutdemo.xml
<?xml version="1.0" encoding="utf-8"?>

<GridLayout xmlns:android="http://schemas.android.com/apk/res/android"

    android:layout_width="wrap_content"

    android:layout_height="wrap_content"

    android:columnCount="6"

    android:orientation="horizontal"

    android:rowCount="10">


    <Button android:background="#ffff5651" />

    <Button android:background="#ff45ff61" />

    <Button android:background="#ff5d59ff" />

    <Button android:background="#fff9ff52" />

    <Button android:background="#ff31fff0" />

    <Button android:background="#ffff5651" />

    <Button android:background="#ff45ff61" />

    <Button android:background="#ff5d59ff" />

    <Button android:background="#fff9ff52" />

    <Button android:background="#ff31fff0" />

    <Button android:background="#ffff5651" />

    <Button android:background="#ff45ff61" />

    <Button android:background="#ff5d59ff" />

    <Button android:background="#fff9ff52" />

    <Button android:background="#ff31fff0" />

    <Button android:background="#ffff5651" />

    <Button android:background="#ff45ff61" />

    <Button android:background="#ff5d59ff" />

    <Button android:background="#fff9ff52" />

    <Button android:background="#ff31fff0" />

    <Button android:background="#ffff5651" />

    <Button android:background="#ff45ff61" />

    <Button android:background="#ff5d59ff" />

    <Button android:background="#fff9ff52" />

    <Button android:background="#ff31fff0" />

    <Button android:background="#ffff5651" />

    <Button android:background="#ff45ff61" />

    <Button android:background="#ff5d59ff" />

    <Button android:background="#fff9ff52" />

    <Button android:background="#ff31fff0" />

    <Button android:background="#ffff5651" />

    <Button android:background="#ff45ff61" />

    <Button android:background="#ff5d59ff" />

    <Button android:background="#fff9ff52" />

    <Button android:background="#ff31fff0" />

    <Button android:background="#ffff5651" />

    <Button android:background="#ff45ff61" />

    <Button android:background="#ff5d59ff" />

    <Button android:background="#fff9ff52" />

    <Button android:background="#ff31fff0" />

    <Button android:background="#ffff5651" />

    <Button android:background="#ff45ff61" />

    <Button android:background="#ff5d59ff" />

    <Button android:background="#fff9ff52" />

    <Button android:background="#ff31fff0" />

    <Button android:background="#ffff5651" />

    <Button android:background="#ff45ff61" />

    <Button android:background="#ff5d59ff" />

    <Button android:background="#fff9ff52" />

    <Button android:background="#ff31fff0" />

    <Button android:background="#ffff5651" />

    <Button android:background="#ff45ff61" />

    <Button android:background="#ff5d59ff" />

    <Button android:background="#fff9ff52" />

    <Button android:background="#ff31fff0" />

    <Button android:background="#ffff5651" />

    <Button android:background="#ff45ff61" />

    <Button android:background="#ff5d59ff" />

    <Button android:background="#fff9ff52" />

    <Button android:background="#ff31fff0" />

    <Button android:background="#ffff5651" />

    <Button android:background="#ff45ff61" />

    <Button android:background="#ff5d59ff" />

    <Button android:background="#fff9ff52" />

    <Button android:background="#ff31fff0" />

    <Button android:background="#ffff5651" />

    <Button android:background="#ff45ff61" />

    <Button android:background="#ff5d59ff" />

    <Button android:background="#fff9ff52" />

    <Button android:background="#ff31fff0" />

</GridLayout>
效果:
Android布局解析,图文(转)的更多相关文章
- Android成长日记-Android布局优化
Android常用布局 1. LinearLayout(线性布局) 2. RelativeLayout(相对布局) 3. TableLayout(表格布局) 4. AbsoluteLayou(绝对布局 ...
- 【转】Android布局优化之ViewStub
ViewStub是Android布局优化中一个很不错的标签/控件,直接继承自View.虽然Android开发人员基本上都听说过,但是真正用的可能不多. ViewStub可以理解成一个非常轻量级的Vie ...
- android 中解析XML的方法(转)
在XML解析和使用原始XML资源中都涉及过对XML的解析,之前使用的是 DOM4J和 XmlResourceParser 来解析的.本文中将使用XmlPullParser来解析,分别解析不同复杂度的t ...
- xml布局解析报错的可能原因
xml布局解析报如下的错11-15 16:55:21.425 17633-17633/com.hongfans.mobileconnect I/LogUtils_info: [CrashHandler ...
- 从LayoutInflater分析XML布局解析成View的树形结构的过程
上一篇博客分析了XML布局怎么载入到Activity上.不了解的能够參考 从setContentView方法分析Android载入布局流程 上一篇博客仅仅是分析了怎么讲XML布局加入到 Activit ...
- Android中解析XML格式数据的方法
XML介绍:Extensible Markup Language,即可扩展标记语言 一.概述 Android中解析XML格式数据大致有三种方法: SAX DOM PULL 二.详解 2.1 SAX S ...
- Android全面解析之Context机制
前言 很高兴遇见你~ 欢迎阅读我的文章. 在文章Android全面解析之由浅及深Handler消息机制中讨论到,Handler可以: 避免我们自己去手动写 死循环和输入阻塞 来不断获取用户的输入以及避 ...
- 【转】在Android布局中使用include和merge标签
内容转自:http://fengweipeng1208.blog.163.com/blog/static/21277318020138229754135/ 在我们开发android布局时,经常会有很多 ...
- Android 布局之LinearLayout
Android 布局之LinearLayout 1 LinearLayout简介 LinearLayout是线程布局.它包括2个方向(android:orientation):“水平”(horizon ...
随机推荐
- Xamarin for android:为button设置click事件的几种方法
原文:Xamarin for android:为button设置click事件的几种方法 在Xamarin中一个最基础的事情,就是为一个button指定click事件处理方法,可是即使是这么一件事也有 ...
- SQL Server :理解IAM 页
原文:SQL Server :理解IAM 页 在以前的文章里,我们讨论了数据页,GAM和SGAM,还有PFS页.今天我们一起来讨论下索引分配映射(Index Allocation Map:IAM)页. ...
- virtio-blk分析
和virtio-network相同,virtio-blk驱动程序使用Virtio机制Guest它提供了一个高性能的设备I/O方法.我们期待在这里virtio-blk实现. [点击查看全文] http: ...
- android手机SD卡中的android_secure目录
.android_secure 是官方app2sd的产物,删了之后装到sd卡中的软件就无法使用了.里面有非常多.asec的文件,都是装到SD卡上的软件,可是一般装到sd卡中的程序被卸载了.androi ...
- 利用ffmpeg将H264解码为RGB
因为公司买到了一个不提供解码器的设备,我不得已还要做解码的工作.在网上找了一圈,H264解码比較方便的也就是ffmpeg一系列的函数库了,原本设备中也是用这套函数库解码,但厂家不给提供,没办法,仅仅得 ...
- Asp.net
视频摘要
Asp.net一遍又一遍视频最近,例如中,大多数的实现.由于原因的版本号,.当然学过是学过.总结不可缺少. 先宏观后微观.刚学完,感觉知识特别乱,所以先画了张图: watermark/2/text/a ...
- 【NO.3】 c program to caculate and display sum of two matrix
source code: #include "stdafx.h" /* display sum of two matrix*/ int _tmain(int argc, _TCHA ...
- Java Web整合开发(附录1) - 安装配置环境
1. Install JDK http://blog.csdn.net/sonnet123/article/details/9169741 Download JDK http://www.oracle ...
- J2SE基础:7.系统经常使用类一
1.Object对象 Object对象是全部对象的根类. 每一个对象都默认继承自Object类. equals():对象与对象之间是否相等. 逻辑上面的相等.equals 物理上面的相等(地址相等) ...
- 引用第三方框架 不支持ARC
我们会常常遇到一个问题就是引用第三方框架之后发现不支持内存的自己主动处理(ARC) 我们须要这样来操作: watermark/2/text/aHR0cDovL2Jsb2cuY3Nkbi5uZXQvdT ...