
centos7安装redmine3.4
前言:安装要求
Ruby解释器
给定Redmine版本所需的Ruby版本是:
| Redmine版本 | 支持的Ruby版本 | 使用Rails版本 |
|---|---|---|
| 4.0 | ruby 2.2(2.2.2及更高版本),2.3,2.4,2.5 | Rails 5.2 |
| 3.4 | 红宝石1.9.3 1,2.0.0,2.1,2.2,2.3,2.4 | Rails 4.2 |
| 3.3 | 红宝石1.9.3 1,2.0.0,2.1,2.2,2.3 | Rails 4.2 |
支持的数据库后端
MySQL 5.5 - 5.7

  MySQL的5.6或更高版本和MariaDB的认识问题(#,#,#)。

  Redmine .x还支持MySQL .0和5.

PostgreSQL .2或更高版本

  确保您的数据库日期样式设置为ISO(Postgresql默认设置)。您可以使用以下方式设置:ALTER DATABASE "redmine_db" SET datestyle="ISO,MDY";

  Redmine .x还支持PostgreSQL 8.3 - 9.1。

Microsoft SQL Server 2012或更高版本

  Redmine .0自2018年12月起不支持SQL Server,因为依赖库activerecord-sqlserver-adapter尚不支持Rails 5.2。

SQLite (不适用于多用户生产!)
可选组件
svn用于存储库浏览的SCM二进制文件(例如)(必须在PATH中可用)。有关SCM兼容性和要求,请参阅RedmineRepositories。

ImageMagick(使Gantt导出为PNG图像和缩略图生成)。
第1步、下载redmine应用软件(下载地址:http://www.redmine.org/projects/redmine/wiki/Download)
[root@remind ~]# systemctl stop firewalld

[root@remind ~]# iptables -L -n

[root@remind ~]#wget https://www.redmine.org/releases/redmine-3.4.7.tar.gz

[root@remind ~]# tar xf redmine-3.4..tar.gz -C  /usr/local/

[root@localhost ~]# cd /usr/local/

[root@localhost local]# cd redmine-3.4./
第2步、安装数据库,并为redmine创建一个空数据库和用户
[root@localhost redmine-3.4.]# yum install mariadb-libs mariadb mariadb-devel mariadb-server -y

[root@localhost redmine-3.4.]# systemctl start mariadb

[root@localhost redmine-3.4.]# mysql

MariaDB [(none)]> CREATE DATABASE redmine CHARACTER SET utf8mb4;

Query OK,  row affected (0.01 sec)

MariaDB [(none)]> CREATE USER 'redmine'@'localhost' IDENTIFIED BY '';

Query OK,  rows affected (0.00 sec)

MariaDB [(none)]> GRANT ALL PRIVILEGES ON redmine.* TO 'redmine'@'localhost';

Query OK,  rows affected (0.00 sec)

MariaDB [(none)]> \q
第3步 、数据库连接配置
复制config/database.yml.example到config/database.yml和编辑这个文件,配置数据库"production"环境
[root@localhost ~]# cd /usr/local/redmine-3.4./

[root@localhost redmine-3.4.]# cd config

[root@localhost config]# cp configuration.yml.example  configuration.yml

[root@localhost config]# vim configuration.yml

[root@localhost config]# cp database.yml.example database.yml

[root@localhost config]# vim database.yml

...

production:

  adapter: mysql2

  database: redmine

  host: localhost

  username: redmine

  password: ""

...
第4步 -依赖安装
[root@localhost config]#yum install ImageMagick-devel  ImageMagick  -y

[root@remind config]# yum -y install ruby rubygems ruby-devel

[root@remind config]# gem source -l

[root@remind config]# gem sources -a http://mirrors.aliyun.com/rubygems/

http://mirrors.aliyun.com/rubygems/ added to sources

[root@remind config]# gem sources --remove  https://rubygems.org/

https://rubygems.org/ removed from sources

[root@remind config]# gem source -u

source cache successfully updated

[root@remind config]# gem source -l

*** CURRENT SOURCES ***

http://mirrors.aliyun.com/rubygems/

[root@remindconfig]# gem install bundler  #Redmine使用Bundler来管理gems依赖项,需要先安装Bundler

[root@remind config]# bundle install --without development test  production  #安装Redmine所需的所有gem
第5步 -生成会话存储秘密
[root@localhost config]# bundle exec rake generate_secret_token   #生成Rails使用的随机密钥,用于编码存储会话数据的cookie,从而防止其被篡改。
生成新的机密令牌会在重新启动后使所有现有会话无效。将此秘密存储在config/secrets.yml中:http:
//guides.rubyonrails.org/upgrading_ruby_on_rails.html#config-secrets-yml
第6步 - 创建数据库模式对象
[root@localhost config]# RAILS_ENV=production bundle exec rake db:migrate #创建数据库结构:
这一步有一个bug(Mysql2::Error: Specified key was too long; max key length is 767 bytes: CREATE UNIQUE INDEX `changesets_repos_rev.....),如下图:

解决:在 redmine/config/initializers/下添加mysqlpls.rb脚本,脚本内容如下
[root@localhost config]# cd initializers/

[root@localhost initializers]# cat mysqlpls.rb

require 'active_record/connection_adapters/abstract_mysql_adapter'

module ActiveRecord

  module ConnectionAdapters

    class AbstractMysqlAdapter

      NATIVE_DATABASE_TYPES[:string] = { :name => "varchar", :limit =>  }

    end

  end

end
[root@localhost config]# RAILS_ENV=production bundle exec rake db:migrate
第7步 - 数据库默认数据集
[root@localhost config]# RAILS_ENV=production bundle exec rake redmine:load_default_data #在数据库中插入默认配置数据

(in /usr/local/redmine-3.4.)

Select language: ar, az, bg, bs, ca, cs, da, de, el, en, en-GB, es, es-PA, et, eu, fa, fi, fr, gl, he, hr, hu, id, it, ja, ko, lt, lv, mk, mn, nl, no, pl, pt, pt-BR, ro, ru, sk, sl, sq, sr, sr-YU, sv, th, tr, uk, vi, zh, zh-TW [en] zh

====================================

Default configuration data loaded.
第8步 - 文件系统权限(我用的是root所以不需要设置,之所以用root用户是因为后面需要和httpd服务相结合发布redmine)
运行应用程序的用户帐户必须具有以下子目录的写入权限:

  files (附件存储)

  log(应用程序日志文件production.log)

  tmp和tmp/pdf(创建这些,如果不存在,用于生成PDF文档等)

  public/plugin_assets (插件的资产)
第9步 - 测试运行
[root@localhost config]# bundle exec rails server webrick -e production -b 192.168.1.110  #如果不指定地址默认为localhost

=> Booting WEBrick

=> Rails 4.2. application starting in production on http://192.168.1.110:3000

=> Run `rails server -h` for more startup options

=> Ctrl-C to shutdown server

[-- ::] INFO  WEBrick 1.3.

[-- ::] INFO  ruby 2.0. (--) [x86_64-linux]

[-- ::] INFO  WEBrick::HTTPServer#start: pid= port=
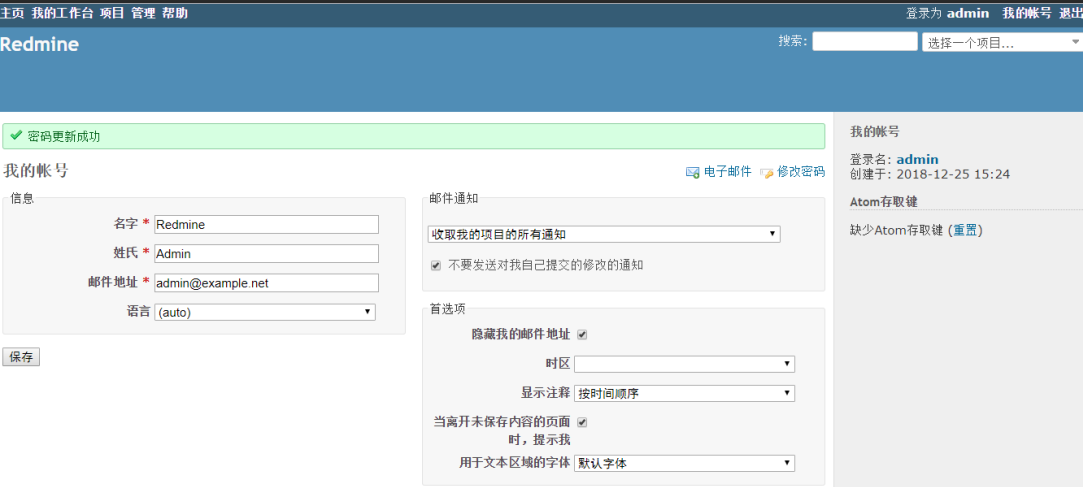
访问redmine,登录账号密码为admin:admin


第10步 -配置redmine
登录后可以转到"管理(Administration)"菜单,然后选择"设置(Settings)"以修改大多数应用程序设置
Redmine设置文件为config/configuration.yml
如果需要覆盖默认应用程序设置,只需复制config/configuration.yml.example到config/configuration.yml和编辑新的文件;
可以根据Rails环境(production/ development/ test)定义这些设置。
重要 :不要忘记在任何更改后重新启动应用程序。
我们以邮件服务为例:
[root@localhost config]# cp configuration.yml.example configuration.yml

[root@localhost config]# vim configuration.yml  #以腾讯企业邮为例

default:

  email_delivery:

    delivery_method: :smtp

    smtp_settings:

      address: smtp.exmail.qq.com

      port:

      domain: exmail.qq.com

      authentication: :login

      user_name: "admin@xxxx.com"

      password: ""
参考文档:
http://www.redmine.org/projects/redmine/wiki/RedmineInstall
http://www.redmine.org/projects/redmine/wiki/RedmineUpgrade
https://docs.bitnami.com/installer/apps/redmine/administration/upgrade/
http://www.redmine.org/boards/2/topics/54308
https://blog.csdn.net/huoyunshen88/article/details/21241711
centos7安装redmine3.4的更多相关文章
- HP服务器 hp 360g5 centos7安装问题
HP服务器 hp 360g5 centos7安装问题 一 :启动盘无法识别硬盘 1.进入安装光盘,用上下键选择安装centos--Install Centos7(注意不可按Enter键),如图: 2 ...
- CentOS7 安装Mono及Jexus
CentOS7安装Mono及Juxes 1 安装Mono 1.1 安装yum-utils 因为安装要用到yum-config-manager,默认是没有安装的,所以要先安装yum-utils包.命令如 ...
- CentOS7安装mysql提示“No package mysql-server available.”
针对centos7安装mysql,提示"No package mysql-server available."错误,解决方法如下: Centos 7 comes with Mari ...
- CentOS7安装Oracle 11gR2 安装
概述 Oracle 在Linux和window上的安装不太一样,公司又是Linux系统上的Oracle,实在没辙,研究下Linux下Oracle的使用,oracle默认不支持CentOS系统安装,所以 ...
- Centos7安装完毕后重启提示Initial setup of CentOS Linux 7 (core)的解决方法
问题: CentOS7安装完毕,重新开机启动后显示: Initial setup of CentOS Linux 7 (core) 1) [x] Creat user 2) [!] License i ...
- centos7安装eclipse
centos7安装eclipse Eclipse是一个集成开发环境(IDE),包含一个基工作区和定制环境的可扩展插件系统.大部分使用 Java 编写,Eclipse 可以用来开发应用程序.通过各种插件 ...
- CentOS7安装mongoDB数据库
CentOS7安装mongoDB数据库 时间:2015-03-03 16:45来源:blog.csdn.net 作者:进击的木偶 举报 点击:8795次 mongoDB是目前发展比较好的NOSQL数据 ...
- CentOS7安装Ambari
环境: CentOS7安装两个节点:master.slave1.并配置ssh无密码登录. 步骤: 获取 Ambari 的公共库文件(public repository): wget http://pu ...
- [CentOs7]安装mysql(2)
摘要 之前安装过一次mysql,最后配置,发现在本地无法连接,重启服务的时候一直卡在那里不动,感觉是安装的过程出问题,最后没办法还是卸载了,然后重新安装一下. [CentOs7]安装mysql Mys ...
随机推荐
- unity5.x中的关节和布料
关节 布料 关节 铰链关节(Hinge Joint):将两个物体以链条的形式绑在一起,当力量过大超过链条的固定力矩时,两个物体就会产生相互的拉力. 固定关节(Fixed Joint): ...
- 为什么ssh 执行完命令以后 挂了, hang , stop respond
- Django runserver UnicodeDecodeError
编码问题可以说是我遇到过的python 2.7最大的败笔 今天写django时,很简单的一个项目却报UnicodeDecodeError,而我的代码中一个中文字符都没有出现. 如下: 网上找到的所谓解 ...
- Linux 驱动——Led驱动1
led_drv.c驱动文件: #include <linux/module.h>#include <linux/kernel.h>#include <linux/init ...
- ssh: connect to host gitlab.alpha.com port 22: Network is unreachable
在这里只说明我遇到的问题和解决方法,可能并不能解决你遇到的问题: git clone git@gitlab.alpha.com:ipcam/ambarella.gitCloning into 'amb ...
- 【EMV L2】DDA标准动态数据认证处理流程
[标准动态数据认证DDA] 标准动态数据处理过程,除了动态签名由卡片生成以外,其他都是由终端执行的.处理过程: 1.认证中心公钥的获取终端使用认证中心公钥索引(PKI)以及卡片中的注册的应用提供商标识 ...
- alpha冲刺(5/10)
前言 队名:旅法师 作业链接 队长博客 燃尽图 会议 会议照片 会议内容 陈晓彬(组长) 今日进展: 召开会议 博客撰写 问题困扰: 我想尝试让他们自己安排明天的任务,不知道是否可行. 心得体会: 一 ...
- laravel 语言插件
aravel 5 语言包,包含 52 种语言, 基于 caouecs/Laravel-lang. trans() 函数根据你的 [本地化文件] 翻译指定的语句 安装 composer require ...
- 编译安装和apt安装Nginx1.14.0
安装依赖 yum -y install gcc gcc-c++yum -y install zlib zlib-devel openssl openssl-devel pcre-devel 在Ubun ...
- PythonStudy——字符串重要方法 String important method
# 1.索引(目标字符串的索引位置) s1 = '123abc呵呵' print(s1.index('b')) # 2.去留白(默认去两端留白,也可以去指定字符) s2 = '***好 * 的 *** ...