一次性讲清楚spring中bean的生命周期之三:bean是如何实例化的
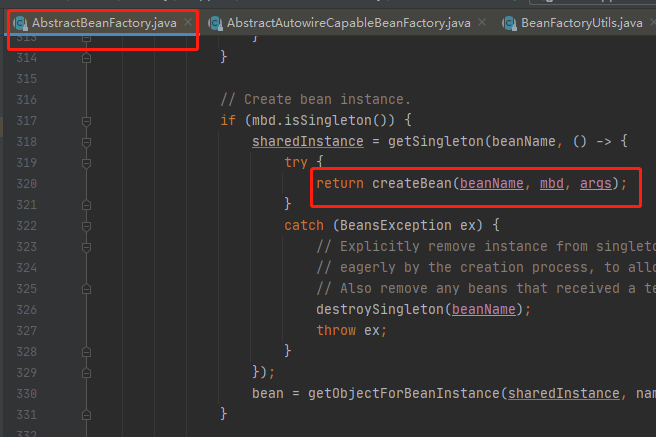
在前面的两篇博文《一次性讲清楚spring中bean的生命周期之一:getSingleton方法》和《一次性讲清楚spring中bean的生命周期之二:FactoryBean的前世今生》中分析了spring中bean生命周期的过程中的getSingleton方法和getObjectForBeanInstance方法,今天来分析另外一个重要的方法createBean方法。分析的入口是AbstractBeanFacotry.doGetBean方法,如下图,
这就是本次分析的入口。下面看该方法的详细定义,AbstractAutowireCapableBeanFactory.createBean
@Override

    protected Object createBean(String beanName, RootBeanDefinition mbd, @Nullable Object[] args)

            throws BeanCreationException {

        if (logger.isTraceEnabled()) {

            logger.trace("Creating instance of bean '" + beanName + "'");

        }

        RootBeanDefinition mbdToUse = mbd;

        // Make sure bean class is actually resolved at this point, and

        // clone the bean definition in case of a dynamically resolved Class

        // which cannot be stored in the shared merged bean definition.

        Class<?> resolvedClass = resolveBeanClass(mbd, beanName);

        if (resolvedClass != null && !mbd.hasBeanClass() && mbd.getBeanClassName() != null) {

            mbdToUse = new RootBeanDefinition(mbd);

            mbdToUse.setBeanClass(resolvedClass);

        }

        // Prepare method overrides.

        try {

            mbdToUse.prepareMethodOverrides();

        }

        catch (BeanDefinitionValidationException ex) {

            throw new BeanDefinitionStoreException(mbdToUse.getResourceDescription(),

                    beanName, "Validation of method overrides failed", ex);

        }

        try {

            // Give BeanPostProcessors a chance to return a proxy instead of the target bean instance.
            //给beanPostProcessor一个返回目标类代理类的机会

            Object bean = resolveBeforeInstantiation(beanName, mbdToUse);

            if (bean != null) {

                return bean;

            }

        }

        catch (Throwable ex) {

            throw new BeanCreationException(mbdToUse.getResourceDescription(), beanName,

                    "BeanPostProcessor before instantiation of bean failed", ex);

        }

        try {
            //执行doCreatBean方法

            Object beanInstance = doCreateBean(beanName, mbdToUse, args);

            if (logger.isTraceEnabled()) {

                logger.trace("Finished creating instance of bean '" + beanName + "'");

            }

            return beanInstance;

        }

        catch (BeanCreationException | ImplicitlyAppearedSingletonException ex) {

            // A previously detected exception with proper bean creation context already,

            // or illegal singleton state to be communicated up to DefaultSingletonBeanRegistry.

            throw ex;

        }

        catch (Throwable ex) {

            throw new BeanCreationException(

                    mbdToUse.getResourceDescription(), beanName, "Unexpected exception during bean creation", ex);

        }

    }
重点部分已用红色标出,下面具体来分析
bean生命周期前
在上面的方法定义中有这样一段代码,
// Give BeanPostProcessors a chance to return a proxy instead of the target bean instance.

            Object bean = resolveBeforeInstantiation(beanName, mbdToUse);
就是说在进入bean的创建之前,开发者可以自己返回一个目标类的代理类,如果返回了那么便直接返回,不会继续向下执行。看该方法怎么实现的,AbstractAutowireCapableBeanFactory.resolveBeforeInstantiation
@Nullable

    protected Object resolveBeforeInstantiation(String beanName, RootBeanDefinition mbd) {

        Object bean = null;

        if (!Boolean.FALSE.equals(mbd.beforeInstantiationResolved)) {

            // Make sure bean class is actually resolved at this point.

            if (!mbd.isSynthetic() && hasInstantiationAwareBeanPostProcessors()) {

                Class<?> targetType = determineTargetType(beanName, mbd);

                if (targetType != null) {
                    //应用BeanPostProcessor实例化前

                    bean = applyBeanPostProcessorsBeforeInstantiation(targetType, beanName);

                    if (bean != null) {
                       //应用BeanpPostProcessor初始化后

                        bean = applyBeanPostProcessorsAfterInitialization(bean, beanName);

                    }

                }

            }

            mbd.beforeInstantiationResolved = (bean != null);

        }

        return bean;

    }
该方法重要的就是applyBeanPostProcessorsBeforeInstantiation和applyBeanPostProcessorsAfterInitalization方法。
applyBeanPostProcessorsBeforeInstantiation
@Nullable

    protected Object applyBeanPostProcessorsBeforeInstantiation(Class<?> beanClass, String beanName) {

        for (BeanPostProcessor bp : getBeanPostProcessors()) {
            //在spring中有InstantiationAwareBeanPostProcessor的实例,则执行其postProcessBeforeInstantiation方法

            if (bp instanceof InstantiationAwareBeanPostProcessor) {

                InstantiationAwareBeanPostProcessor ibp = (InstantiationAwareBeanPostProcessor) bp;

                Object result = ibp.postProcessBeforeInstantiation(beanClass, beanName);

                if (result != null) {

                    return result;

                }

            }

        }

        return null;

    }
该方法的主要作用是如果在spring中有InstantiationAwareBeanPostProcessor类型的beanPostProcessor的化,会执行其postProcessBeforeInstantiation方法,也就是我们可以实现InstantiationAwareBeanPostProcessor接口,并实现其postProcessBeforeInstantiation方法。默认情况下该接口的方法返回null,
@Nullable

    default Object postProcessBeforeInstantiation(Class<?> beanClass, String beanName) throws BeansException {

        return null;

    }
applyBeanPostProcessorsAfterInitalization
回过头来看另外一个方法,
@Override

    public Object applyBeanPostProcessorsAfterInitialization(Object existingBean, String beanName)

            throws BeansException {

        Object result = existingBean;
        //遍历spring容器中所有的beanPostProcessor,执行其postProcessAfterInitialization方法

        for (BeanPostProcessor processor : getBeanPostProcessors()) {

            Object current = processor.postProcessAfterInitialization(result, beanName);

            if (current == null) {

                return result;

            }

            result = current;

        }

        return result;

    }
BeanPostProcessor接口中该方法默认返回如下
@Nullable

    default Object postProcessAfterInitialization(Object bean, String beanName) throws BeansException {

        return bean;

    }
在spring容器中会有多少BeanPostProcessor这个后面会分析。
分析完了进入bean生命周期前的方法,也就是留个开发者一个后门,通过实现InstantiationAwareBeanPostProcessor接口中的postProcessBeforeInstantiation方法可以自定义返回一个目标类型的代理对象。现在回到createBean方法中,真正进入bean的生命周期,看doCreateBean方法,
doCreateBean
该方法的篇幅过长,仅保留关键代码,其他代码删除,请知悉,
protected Object doCreateBean(final String beanName, final RootBeanDefinition mbd, final @Nullable Object[] args)

            throws BeanCreationException {

        // Instantiate the bean.

        BeanWrapper instanceWrapper = null;

        if (mbd.isSingleton()) {

            instanceWrapper = this.factoryBeanInstanceCache.remove(beanName);

        }

        if (instanceWrapper == null) {
            //实例化bean

            instanceWrapper = createBeanInstance(beanName, mbd, args);

        }

        final Object bean = instanceWrapper.getWrappedInstance();

        Class<?> beanType = instanceWrapper.getWrappedClass();

        if (beanType != NullBean.class) {

            mbd.resolvedTargetType = beanType;

        }

        ....

        // Eagerly cache singletons to be able to resolve circular references

        // even when triggered by lifecycle interfaces like BeanFactoryAware.

        boolean earlySingletonExposure = (mbd.isSingleton() && this.allowCircularReferences &&

                isSingletonCurrentlyInCreation(beanName));

        if (earlySingletonExposure) {

            if (logger.isTraceEnabled()) {

                logger.trace("Eagerly caching bean '" + beanName +

                        "' to allow for resolving potential circular references");

            }
            //放到singletonFactory中解决循环依赖的问题

            addSingletonFactory(beanName, () -> getEarlyBeanReference(beanName, mbd, bean));

        }

        // Initialize the bean instance.

        Object exposedObject = bean;

        try {
            //属性注入

            populateBean(beanName, mbd, instanceWrapper);
            //初始化bean

            exposedObject = initializeBean(beanName, exposedObject, mbd);

        }

        catch (Throwable ex) {

            if (ex instanceof BeanCreationException && beanName.equals(((BeanCreationException) ex).getBeanName())) {

                throw (BeanCreationException) ex;

            }

            else {

                throw new BeanCreationException(

                        mbd.getResourceDescription(), beanName, "Initialization of bean failed", ex);

            }

        }

        ....

        return exposedObject;

    }
看createBeanInstance方法
createBeanInstance
该方法的定义如下,
protected BeanWrapper createBeanInstance(String beanName, RootBeanDefinition mbd, @Nullable Object[] args) {

        // Make sure bean class is actually resolved at this point.

        Class<?> beanClass = resolveBeanClass(mbd, beanName);

        if (beanClass != null && !Modifier.isPublic(beanClass.getModifiers()) && !mbd.isNonPublicAccessAllowed()) {

            throw new BeanCreationException(mbd.getResourceDescription(), beanName,

                    "Bean class isn't public, and non-public access not allowed: " + beanClass.getName());

        }

        Supplier<?> instanceSupplier = mbd.getInstanceSupplier();

        if (instanceSupplier != null) {

            return obtainFromSupplier(instanceSupplier, beanName);

        }

        //使用实例工厂或静态工厂的方式生成bean实例

        if (mbd.getFactoryMethodName() != null) {

            return instantiateUsingFactoryMethod(beanName, mbd, args);

        }

        // Shortcut when re-creating the same bean...

        boolean resolved = false;

        boolean autowireNecessary = false;

        if (args == null) {

            synchronized (mbd.constructorArgumentLock) {

                if (mbd.resolvedConstructorOrFactoryMethod != null) {

                    resolved = true;

                    autowireNecessary = mbd.constructorArgumentsResolved;

                }

            }

        }

        if (resolved) {

            if (autowireNecessary) {

                return autowireConstructor(beanName, mbd, null, null);

            }

            else {

                return instantiateBean(beanName, mbd);

            }

        }

        // Candidate constructors for autowiring?
        //检测是否有重写的构造方法

        Constructor<?>[] ctors = determineConstructorsFromBeanPostProcessors(beanClass, beanName);

        if (ctors != null || mbd.getResolvedAutowireMode() == AUTOWIRE_CONSTRUCTOR ||

                mbd.hasConstructorArgumentValues() || !ObjectUtils.isEmpty(args)) {

            return autowireConstructor(beanName, mbd, ctors, args);

        }

        // Preferred constructors for default construction?
        //首选默认的构造方法

        ctors = mbd.getPreferredConstructors();

        if (ctors != null) {

            return autowireConstructor(beanName, mbd, ctors, null);

        }

        // No special handling: simply use no-arg constructor.
        //使用无参构造方法

        return instantiateBean(beanName, mbd);

    }
从上面的方法中可以看出实例化bean,其实就是使用类的构造方法来进行实例化,这里看下instantiateBean方法的过程,
instantiateBean
看该方法的定义,
protected BeanWrapper instantiateBean(final String beanName, final RootBeanDefinition mbd) {

        try {

            Object beanInstance;

            final BeanFactory parent = this;

            if (System.getSecurityManager() != null) {

                beanInstance = AccessController.doPrivileged((PrivilegedAction<Object>) () ->

                        getInstantiationStrategy().instantiate(mbd, beanName, parent),

                        getAccessControlContext());

            }

            else {
               //生成bean的实例

                beanInstance = getInstantiationStrategy().instantiate(mbd, beanName, parent);

            }
            //构造一个beanWrapper对象

            BeanWrapper bw = new BeanWrapperImpl(beanInstance);

            initBeanWrapper(bw);

            return bw;

        }

        catch (Throwable ex) {

            throw new BeanCreationException(

                    mbd.getResourceDescription(), beanName, "Instantiation of bean failed", ex);

        }

    }
从上面的代码可以看到该方法中重要的就是下面这句
beanInstance = getInstantiationStrategy().instantiate(mbd, beanName, parent);
看下getInstantiationStrategy()方法返回什么,
/**

     * Return the instantiation strategy to use for creating bean instances.

     */

    protected InstantiationStrategy getInstantiationStrategy() {

        return this.instantiationStrategy;

    }
返回的是一个属性,
/** Strategy for creating bean instances. */

    private InstantiationStrategy instantiationStrategy = new CglibSubclassingInstantiationStrategy();
是一个CglibSubclassingInstantiationStragegy对象,看其instantiate方法,由于CglibSubclassingInstantiationStrategy继承了SimpleInstantiationStrategy类,该方法在父类SimpleInstantiationStrategy中
@Override

    public Object instantiate(RootBeanDefinition bd, @Nullable String beanName, BeanFactory owner) {

        // Don't override the class with CGLIB if no overrides.
        //如果没有使用lookup或replaced,不使用CGLIB重写该类

        if (!bd.hasMethodOverrides()) {

            Constructor<?> constructorToUse;

            synchronized (bd.constructorArgumentLock) {

                constructorToUse = (Constructor<?>) bd.resolvedConstructorOrFactoryMethod;

                if (constructorToUse == null) {

                    final Class<?> clazz = bd.getBeanClass();

                    if (clazz.isInterface()) {

                        throw new BeanInstantiationException(clazz, "Specified class is an interface");

                    }

                    try {

                        if (System.getSecurityManager() != null) {

                            constructorToUse = AccessController.doPrivileged(

                                    (PrivilegedExceptionAction<Constructor<?>>) clazz::getDeclaredConstructor);

                        }

                        else {

                            constructorToUse = clazz.getDeclaredConstructor();

                        }

                        bd.resolvedConstructorOrFactoryMethod = constructorToUse;

                    }

                    catch (Throwable ex) {

                        throw new BeanInstantiationException(clazz, "No default constructor found", ex);

                    }

                }

            }

            return BeanUtils.instantiateClass(constructorToUse);

        }

        else {

            // Must generate CGLIB subclass.
            //使用cglib生成子类

            return instantiateWithMethodInjection(bd, beanName, owner);

        }

    }
从上面可以看出有两种方式生成实例,使用反射的机制
return BeanUtils.instantiateClass(constructorToUse);
如果有lookup或replaced,使用cglib方式
return instantiateWithMethodInjection(bd, beanName, owner);
BeanUtils.instantiateClass(反射)
public static <T> T instantiateClass(Constructor<T> ctor, Object... args) throws BeanInstantiationException {

        Assert.notNull(ctor, "Constructor must not be null");

        try {

            ReflectionUtils.makeAccessible(ctor);

            return (KotlinDetector.isKotlinReflectPresent() && KotlinDetector.isKotlinType(ctor.getDeclaringClass()) ?

                    KotlinDelegate.instantiateClass(ctor, args) : ctor.newInstance(args));

        }

        catch (InstantiationException ex) {

            throw new BeanInstantiationException(ctor, "Is it an abstract class?", ex);

        }

        catch (IllegalAccessException ex) {

            throw new BeanInstantiationException(ctor, "Is the constructor accessible?", ex);

        }

        catch (IllegalArgumentException ex) {

            throw new BeanInstantiationException(ctor, "Illegal arguments for constructor", ex);

        }

        catch (InvocationTargetException ex) {

            throw new BeanInstantiationException(ctor, "Constructor threw exception", ex.getTargetException());

        }

    }
标红的代码就是生成的逻辑,可以看到是利用的java的反射机制,也就是使用Constructor类的newInstance方法。
instantiateWithMethodInjection(cglib)
该方法在CglibSubclassingInstantiationStrategy中
@Override

    protected Object instantiateWithMethodInjection(RootBeanDefinition bd, @Nullable String beanName, BeanFactory owner) {

        return instantiateWithMethodInjection(bd, beanName, owner, null);

    }
@Override

    protected Object instantiateWithMethodInjection(RootBeanDefinition bd, @Nullable String beanName, BeanFactory owner,

            @Nullable Constructor<?> ctor, Object... args) {

        // Must generate CGLIB subclass...

        return new CglibSubclassCreator(bd, owner).instantiate(ctor, args);

    }
使用的是CglibSubclassCreator生成的实例,具体方式就是cglib生成代理类的方式,
public Object instantiate(@Nullable Constructor<?> ctor, Object... args) {

            Class<?> subclass = createEnhancedSubclass(this.beanDefinition);

            Object instance;

            if (ctor == null) {

                instance = BeanUtils.instantiateClass(subclass);

            }

            else {

                try {

                    Constructor<?> enhancedSubclassConstructor = subclass.getConstructor(ctor.getParameterTypes());

                    instance = enhancedSubclassConstructor.newInstance(args);

                }

                catch (Exception ex) {

                    throw new BeanInstantiationException(this.beanDefinition.getBeanClass(),

                            "Failed to invoke constructor for CGLIB enhanced subclass [" + subclass.getName() + "]", ex);

                }

            }

            // SPR-10785: set callbacks directly on the instance instead of in the

            // enhanced class (via the Enhancer) in order to avoid memory leaks.

            Factory factory = (Factory) instance;

            factory.setCallbacks(new Callback[] {NoOp.INSTANCE,

                    new LookupOverrideMethodInterceptor(this.beanDefinition, this.owner),

                    new ReplaceOverrideMethodInterceptor(this.beanDefinition, this.owner)});

            return instance;

        }
分析完毕spring中单例bean的实例化过程。
总结
至此分析完了spring中单例bean的实例化过程,主要有两点,
1、类中有lookup或replaced方式,使用cglib的方式生成bean的实例;
2、类中无lookup或replaced方式,使用java反射机制Constructor生成实例;
推荐阅读
《一次性讲清楚spring中bean的生命周期之二:FactoryBean的前世今生 》
《一次性讲清楚spring中bean的生命周期之一:getSingleton方法》

一次性讲清楚spring中bean的生命周期之三:bean是如何实例化的的更多相关文章
- 一次性讲清楚spring中bean的生命周期之二:FactoryBean的前世今生
前言 在<spring中FactoryBean是什么bean>一文中,带着小伙伴学习了spring中的FactoryBean,了解了到了FactoryBean其实是一种生产Bean的bea ...
- 一次性讲清楚spring中bean的生命周期之一:getSingleton方法
要想讲清楚spring中bean的生命周期,真的是不容易,以AnnotationConfigApplicationContext上下文为基础来讲解bean的生命周期,AnnotationConfigA ...
- Spring的Bean的生命周期以及Bean的后置处理器
Bean的生命周期: Spring IOC 容器可以管理 Bean 的生命周期, Spring 允许在 Bean 生命周期的特定点执行定制的任务. Spring IOC 容器对 Bean 的生命周期进 ...
- spring中的bean的生命周期
bean的生命周期:bean的创建 —— 初始化 ——销毁的过程 容器管理bean的生命周期,我们可以自定义初始化和销毁方法,容器在bean进行到当前生命周期就会调用我们的方法 在xml配置文件中是在 ...
- BeanFactory中Bean的生命周期
Bean的生命周期图解 集体过程如下: 当调用者通过getBean(beanName)向容器请求某一个Bean时,如果容器注册了org.springframework.beans.factory.co ...
- 1. spring5源码 -- Spring整体脉络 IOC加载过程 Bean的生命周期
可以学习到什么? 0. spring整体脉络 1. 描述BeanFactory 2. BeanFactory和ApplicationContext的区别 3. 简述SpringIoC的加载过程 4. ...
- Spring第三天,详解Bean的生命周期,学会后让面试官无话可说!
点击下方链接回顾往期 不要再说不会Spring了!Spring第一天,学会进大厂! Spring第二天,你必须知道容器注册组件的几种方式!学废它吊打面试官! 今天讲解Spring中Bean的生命周期. ...
- Spring Boot中的那些生命周期和其中的可扩展点(转)
前言可扩展点的种类Spring Boot启动过程 1.SpringApplication的启动过程 2.ApplicationContext的启动过程 3.一般的非懒加载单例Bean在Spring B ...
- spring中如何向一个单例bean中注入非单例bean
看到这个题目相信很多小伙伴都是懵懵的,平时我们的做法大都是下面的操作 @Component public class People{ @Autowired private Man man; } 这里如 ...
随机推荐
- 第4讲 | DHCP与PXE:IP是怎么来的,又是怎么没的?
第4讲 | DHCP与PXE:IP是怎么来的,又是怎么没的? linux 配置网络IP地址: 使用 net-tools: sudo ifconfig eth1 10.0.0.1/24 sudo ifc ...
- nlp任务中的传统分词器和Bert系列伴生的新分词器tokenizers介绍
layout: blog title: Bert系列伴生的新分词器 date: 2020-04-29 09:31:52 tags: 5 categories: nlp mathjax: true ty ...
- [转]CAP和BASE理论
1. CAP理论 2000年7月,加州大学伯克利分校的Eric Brewer教授在ACM PODC会议上提出CAP猜想.2年后,麻省理工学院的Seth Gilbert和Nancy Lynch从理论上证 ...
- jenkins配置基于角色的项目权限管理设置步骤
jenkins配置基于角色的项目权限管理设置步骤 本文链接:https://blog.csdn.net/russ44/article/details/52276222 由于jenkins默认的权限管理 ...
- 安装 error: Microsoft Visual C++ 14.0 is required 解决方案
最近写的项目需要用到Python的第三方库,比如:mmh3, pyshark等等,而直接pip install ... 会报错:error: Microsoft Visual C++ 14.0 is ...
- 将TVM集成到PyTorch上
将TVM集成到PyTorch上 随着TVM不断展示出对深度学习执行效率的改进,很明显PyTorch将从直接利用编译器堆栈中受益.PyTorch的主要宗旨是提供无缝且强大的集成,而这不会妨碍用户.为此, ...
- YOLOv4全文阅读(全文中文翻译)
YOLOv4全文阅读(全文中文翻译) YOLOv4: Optimal Speed and Accuracy of Object Detection 论文链接: https://arxiv.org/pd ...
- CUDA C++编程接口:编译
CUDA C++编程接口:编译 一.概述 CUDA C++为熟悉C++编程语言的用户提供了一个简单的路径,以方便地编写程序以执行该设备. 它由一组最小的扩展到C++语言和运行库. 在编程模型中引入了核 ...
- 三、Nginx设置用户认证
要求:通过nginx服务端配置实现以下目标 访问web页面需要进行用户认证. 用户名为:tom,密码:123456 操作步骤, 更改配置文件 [root@client ~]# vim /usr/loc ...
- 【NX二次开发】布尔操作
//布尔操作 //UF_MODL_operations 对两个体执行布尔操作 //UF_MODL_unite_bodies 相加布尔操作,不可保留目标体.工具体 //UF_MODL_unite_bod ...