iOS - UICollectionViewController
前言
	NS_CLASS_AVAILABLE_IOS(6_0) @interface UICollectionView : UIScrollView

	@available(iOS 6.0, *)		 public class UICollectionView : UIScrollView
1、collectionView 的创建
Objective-C
ViewController.m
- 遵守协议 UICollectionViewDataSource, UICollectionViewDelegate
	// 数据源初始化

		// 声明数据源

		@property(nonatomic, retain)NSMutableArray *myDataArray;

		myDataArray = [[NSMutableArray alloc] init];

		NSMutableArray *titleNameArray = [[NSMutableArray alloc] init];

		NSMutableArray *imageNameArray = [[NSMutableArray alloc] init];

		for (int i = 1; i <= 15; i++) {

		    [titleNameArray addObject:[NSString stringWithFormat:@"第 %i 个", i]];

		    [imageNameArray addObject:[NSString stringWithFormat:@"2_%i", i]];

		}

		[myDataArray addObject:titleNameArray];

		[myDataArray addObject:imageNameArray];

	// 网格视图初始化

		// 创建网格视图布局对象,可以设置滑动方向,cell 的间距等

		UICollectionViewFlowLayout *flowLayout = [[UICollectionViewFlowLayout alloc] init];

		// 创建网格视图对象,必须有布局对象

		UICollectionView *collectionView = [[UICollectionView alloc]

		                          initWithFrame:CGRectMake(0, 20, self.view.bounds.size.width,

		                                                          self.view.bounds.size.height - 20)

		                   collectionViewLayout:flowLayout];

		// 设置代理

		collectionView.dataSource = self;

		collectionView.delegate = self;

		// 将网格视图添加到屏幕视图

		[self.view addSubview:collectionView];

		// 注册自定义表格视图

		[collectionView registerClass:[myCollectionViewCell1 class] forCellWithReuseIdentifier:@"myCell"];

	// UICollectionView 协议方法

		// 设置网格数

		- (NSInteger)collectionView:(UICollectionView *)collectionView numberOfItemsInSection:(NSInteger)section {

			return [[myDataArray objectAtIndex:0] count];

		}

		// 设置网格大小

		- (CGSize)collectionView:(UICollectionView *)collectionView layout:(UICollectionViewLayout *)collectionViewLayout sizeForItemAtIndexPath:(NSIndexPath *)

			indexPath {

		   	return CGSizeMake((self.view.bounds.size.width - 40) / 3, 170);

		}

		// 设置每个网格的内容

		- (UICollectionViewCell *)collectionView:(UICollectionView *)collectionView cellForItemAtIndexPath:(NSIndexPath *)indexPath {

		    // 使用自定义 Cell 创建,cell 必须用注册的方式定义

		    myCollectionViewCell1 *cell = [collectionView dequeueReusableCellWithReuseIdentifier:@"myCell" forIndexPath:indexPath];

		    // 设置 Cell 中视图包含的内容

		    cell.nameLabel.text = [myDataArray[0] objectAtIndex:indexPath.item];

		    cell.iconImageView.image = [UIImage imageNamed:[myDataArray[1] objectAtIndex:indexPath.item]];

		    return cell;

		}
myCollectionViewCell.h
	@interface myCollectionViewCell1 : UICollectionViewCell

	@property(nonatomic, retain)UILabel *nameLabel;

	@property(nonatomic, retain)UIImageView *iconImageView;

	@end
myCollectionViewCell.m
	- (instancetype)initWithFrame:(CGRect)frame {

		self = [super initWithFrame:frame];

		if (self) {

			// 创建标签视图

        	_nameLabel = [[UILabel alloc] initWithFrame:CGRectMake(0, 0, self.bounds.size.width, 20)];

        	_nameLabel.backgroundColor = [UIColor orangeColor];

        	_nameLabel.textAlignment = NSTextAlignmentCenter;

        	[self.contentView addSubview:_nameLabel];

        	// 创建图片视图

        	_iconImageView = [[UIImageView alloc]

        	                           initWithFrame:CGRectMake(0, 20, self.bounds.size.width,

        	                                                           self.bounds.size.height - 20)];

        	[self.contentView addSubview:_iconImageView];

		}

		return self;

	}
Swift
ViewController.swift
- 遵守协议 UICollectionViewDataSource, UICollectionViewDelegate
	// 数据源初始化

		// 声明数据源

		var dataArray:[[String]] = Array()

		var titleNameArray:[String] = Array()

		var imageNameArray:[String] = Array()

		for i in 1...15 {

		    titleNameArray.append("第 \(i) 个")

		    imageNameArray.append("2_\(i)")

		}

		dataArray.append(titleNameArray)

		dataArray.append(imageNameArray)

	// 网格视图初始化

		// 创建网格视图布局对象,可以设置滑动方向,cell 的间距等

		let flowLayout = UICollectionViewFlowLayout()

		// 创建网格视图对象,必须有布局对象

		let collectionView = UICollectionView(frame: CGRectMake(0, 20, self.view.bounds.size.width,

		                                                               self.view.bounds.size.height - 20),

		                       collectionViewLayout: flowLayout)

		// 设置代理

		collectionView.dataSource = self

		collectionView.delegate = self

		// 将网格视图添加到屏幕视图

		self.view.addSubview(collectionView)

		// 注册自定义表格视图

		collectionView.registerClass(myCollectionViewCell1.self, forCellWithReuseIdentifier: "myCell")

	// UICollectionView 协议方法

		// 设置网格数

		func collectionView(collectionView: UICollectionView, numberOfItemsInSection section: Int) -> Int {

		  	return dataArray[0].count

		}

		// 设置网格大小

		func collectionView(collectionView: UICollectionView!, layout collectionViewLayout: UICollectionViewLayout!, sizeForItemAtIndexPath indexPath: 							NSIndexPath!) -> CGSize{

		  	return CGSizeMake((self.view.bounds.size.width - 40) / 3, 170)

		}

		// 设置每个网格的内容,cell 必须用注册方式定义

		func collectionView(collectionView: UICollectionView, cellForItemAtIndexPath indexPath: NSIndexPath) -> UICollectionViewCell {

		 	// 使用自定义 Cell 创建

		   	let cell = collectionView.dequeueReusableCellWithReuseIdentifier("myCell", forIndexPath: indexPath) as! myCollectionViewCell1

		   	// 设置 Cell 视图的内容

		   	cell.nameLabel.text = dataArray[0][indexPath.item]

		   	cell.iconImageView.image = UIImage(named: dataArray[1][indexPath.item])

		   	return cell

		}
myCollectionViewCell.swift
	class myCollectionViewCell1: UICollectionViewCell {

    	var nameLabel:UILabel!

    	var iconImageView:UIImageView!

    	override init(frame: CGRect) {

        	super.init(frame: frame)

        	// 创建标签视图

        	nameLabel = UILabel(frame: CGRectMake(0, 0, self.frame.size.width, 20))

        	nameLabel.backgroundColor = UIColor.orangeColor()

        	nameLabel.textAlignment = NSTextAlignment.Center

        	self.contentView.addSubview(nameLabel)

        	// 创建图片视图

        	iconImageView = UIImageView(frame: CGRectMake(0, 20, self.frame.size.width,

        	                                                     self.frame.size.height - 20))

        	self.contentView.addSubview(iconImageView)

    	}

	}
2、collectionView 的设置
Objective-C
	// 设置表格滑动方向

  	/*

		UICollectionViewScrollDirectionVertical       垂直方向,默认

		UICollectionViewScrollDirectionHorizontal     水平方向

	*/

 	flowLayout.scrollDirection = UICollectionViewScrollDirectionVertical;

	// 设置网格最小水平和垂直方向间距

	/*

		默认 10,也可以通过代理设置

	*/

  	flowLayout.minimumInteritemSpacing = 5;

	flowLayout.minimumLineSpacing = 30;

	// 设置网格背景颜色

	/*

		默认为黑色

	*/

	collectionView.backgroundColor = [UIColor clearColor];
Swift
	// 设置表格滑动方向

	/*

		case Vertical     垂直方向,默认

		case Horizontal   水平方向

	*/

	flowLayout.scrollDirection = UICollectionViewScrollDirection.Vertical

	// 设置网格最小水平和垂直方向间距

	/*

		默认 10,也可以通过代理设置

	*/

	flowLayout.minimumInteritemSpacing = 5

	flowLayout.minimumLineSpacing = 30

	// 设置网格背景颜色

	/*

		默认为黑色

	*/

	collectionView.backgroundColor = UIColor.clearColor()
3、自定义 Cell 的创建与引用
Objective-C
myCollectionViewCell.h
	@interface myCollectionViewCell1 : UICollectionViewCell

	@property(nonatomic, retain)UILabel *nameLabel;

	@property(nonatomic, retain)UIImageView *iconImageView;

	@end
myCollectionViewCell.m
	- (instancetype)initWithFrame:(CGRect)frame {

    	self = [super initWithFrame:frame];

    	if (self) {

        	// 创建标签视图

        	_nameLabel = [[UILabel alloc] initWithFrame:CGRectMake(0, 0, self.bounds.size.width, 20)];

        	_nameLabel.backgroundColor = [UIColor orangeColor];

        	_nameLabel.textAlignment = NSTextAlignmentCenter;

        	[self.contentView addSubview:_nameLabel];

        	// 创建图片视图

        	_iconImageView = [[UIImageView alloc] initWithFrame:CGRectMake(0, 20,

        	                                   self.bounds.size.width, self.bounds.size.height - 20)];

        	[self.contentView addSubview:_iconImageView];

    	}

    	return self;

	}
ViewController.m
	// 注册自定义表格视图

	[collectionView registerClass:[myCollectionViewCell1 class] forCellWithReuseIdentifier:@"myCell"];

	// 设置网格大小

	- (CGSize)collectionView:(UICollectionView *)collectionView layout:(UICollectionViewLayout *)collectionViewLayout sizeForItemAtIndexPath:(NSIndexPath *)

	indexPath {

		return CGSizeMake((self.view.bounds.size.width - 40) / 3, 170);

	}

	// 设置每个网格的内容,cell 必须采用注册的方式自定义

	- (UICollectionViewCell *)collectionView:(UICollectionView *)collectionView cellForItemAtIndexPath:(NSIndexPath *)indexPath {

		// 使用自定义 Cell 创建

		myCollectionViewCell1 *cell = [collectionView dequeueReusableCellWithReuseIdentifier:@"myCell" forIndexPath:indexPath];

		// 设置自定义 Cell 中视图包含的内容

		cell.nameLabel.text = [myDataArray[0] objectAtIndex:indexPath.item];

		cell.iconImageView.image = [UIImage imageNamed:[myDataArray[1] objectAtIndex:indexPath.item]];

		return cell;

	}
Swift
myCollectionViewCell.swift
	class myCollectionViewCell1: UICollectionViewCell {

    	var nameLabel:UILabel!

    	var iconImageView:UIImageView!

    	override init(frame: CGRect) {

        	super.init(frame: frame)

        	// 创建标签视图

        	nameLabel = UILabel(frame: CGRectMake(0, 0, self.frame.size.width, 20))

        	nameLabel.backgroundColor = UIColor.orangeColor()

        	nameLabel.textAlignment = NSTextAlignment.Center

        	self.contentView.addSubview(nameLabel)

        	// 创建图片视图

        	iconImageView = UIImageView(frame: CGRectMake(0, 20, self.frame.size.width,

        	                                                     self.frame.size.height - 20))

        	self.contentView.addSubview(iconImageView)

    	}

	}
ViewController.swift
	// 注册自定义表格视图

	collectionView.registerClass(myCollectionViewCell1.self, forCellWithReuseIdentifier: "myCell")

	// 设置网格大小

	func collectionView(collectionView: UICollectionView!, layout collectionViewLayout: UICollectionViewLayout!, sizeForItemAtIndexPath indexPath: NSIndexPath!) -> 			CGSize{

		return CGSizeMake((self.view.bounds.size.width - 40) / 3, 170)

	}

	// 设置每个网格的内容,cell 必须用注册方式定义

	func collectionView(collectionView: UICollectionView, cellForItemAtIndexPath indexPath: NSIndexPath) -> UICollectionViewCell {

  	// 使用自定义 Cell 创建

  	let cell = collectionView.dequeueReusableCellWithReuseIdentifier("myCell", forIndexPath: indexPath) as! myCollectionViewCell1

    	// 设置 Cell 视图的内容

		cell.nameLabel.text = dataArray[0][indexPath.item]

		cell.iconImageView.image = UIImage(named: dataArray[1][indexPath.item])

		return cell

	}
4、xib 自定义 Cell 的创建与引用
Objective-C
- myCollectionViewCell.xib

myCollectionViewCell.h
	@interface myCollectionViewCell : UICollectionViewCell

	@property (weak, nonatomic) IBOutlet UILabel *nameLabel;

	@property (weak, nonatomic) IBOutlet UIImageView *iconImageView;

	@end
ViewController.m
	// 注册自定义表格视图

	[collectionView registerNib:[UINib nibWithNibName:@"myCollectionViewCell3" bundle:nil] forCellWithReuseIdentifier:@"xibCell"];

	// 设置网格大小

	- (CGSize)collectionView:(UICollectionView *)collectionView layout:(UICollectionViewLayout *)collectionViewLayout sizeForItemAtIndexPath:(NSIndexPath *)

	indexPath {

    	return CGSizeMake(100, 170);

	}

	// 设置每个网格的内容,cell 必须采用注册的方式自定义

	- (UICollectionViewCell *)collectionView:(UICollectionView *)collectionView cellForItemAtIndexPath:(NSIndexPath *)indexPath {

    	// 使用自定义 Cell 创建

    	myCollectionViewCell3 *cell = [collectionView dequeueReusableCellWithReuseIdentifier:@"xibCell" forIndexPath:indexPath];

    	// 设置自定义 Cell 中视图包含的内容

    	cell.nameLabel.text = [dataArray[0] objectAtIndex:indexPath.item];

    	cell.iconImageView.image = [UIImage imageNamed:[dataArray[1] objectAtIndex:indexPath.item]];

    	return cell;

	}
Swift
- myCollectionViewCell.xib

myCollectionViewCell.swift
	class myCollectionViewCell: UICollectionViewCell {

    	@IBOutlet weak var nameLabel: UILabel!

    	@IBOutlet weak var iconImageView: UIImageView!

	}
ViewController.swift
	// 注册自定义表格视图

	collectionView.registerNib(UINib(nibName: "myCollectionViewCell3", bundle: nil), forCellWithReuseIdentifier: "xibCell")

	// 设置网格大小

	func collectionView(collectionView: UICollectionView!, layout collectionViewLayout: UICollectionViewLayout!, sizeForItemAtIndexPath indexPath: NSIndexPath!) -> 			CGSize{

    	return CGSizeMake(100, 170)

	}

	// 设置每个网格的内容,cell 必须用注册的方式定义

	func collectionView(collectionView: UICollectionView, cellForItemAtIndexPath indexPath: NSIndexPath) -> UICollectionViewCell {

    	// 使用自定义 Cell 创建

    	let cell = collectionView.dequeueReusableCellWithReuseIdentifier("xibCell", forIndexPath: indexPath) as! myCollectionViewCell3

    	// 设置 Cell 视图内容

    	cell.nameLabel.text = dataArray[0][indexPath.item]

    	cell.iconImageView.image = UIImage(named: dataArray[1][indexPath.item])

    	return cell

	}
5、自定义 分段头尾的创建与引用
Objective-C
myHeaderFooterView.h
	@interface myHeaderFooterView : UICollectionReusableView

	@property(nonatomic, retain)UILabel *nameLabel;

	@end
myHeaderFooterView.m
	- (instancetype)initWithFrame:(CGRect)frame {

    	self = [super initWithFrame:frame];

    	if (self) {

        	_nameLabel = [[UILabel alloc] initWithFrame:self.bounds];

        	_nameLabel.textAlignment = NSTextAlignmentCenter;

        	_nameLabel.backgroundColor = [UIColor lightGrayColor];

        	[self addSubview:_nameLabel];

    	}

    	return self;

	}
ViewController.m
	// 注册分段头视图

	[collectionView registerClass:[myHeaderFooterView1 class] forSupplementaryViewOfKind:UICollectionElementKindSectionHeader withReuseIdentifier:@"header"];

	// 注册分段尾视图

	[collectionView registerClass:[myHeaderFooterView1 class] forSupplementaryViewOfKind:UICollectionElementKindSectionFooter withReuseIdentifier:@"footer"];

	// 设置分段头大小

	- (CGSize)collectionView:(UICollectionView *)collectionView layout:(UICollectionViewLayout *)collectionViewLayout referenceSizeForHeaderInSection:(NSInteger)

	section {

    	/*

        	width 为水平滑动时,间距有效。height 为垂直滑动时,间距有效。

     	*/

    	return CGSizeMake(20, 30);

	}

	// 设置分段尾大小

	- (CGSize)collectionView:(UICollectionView *)collectionView layout:(UICollectionViewLayout *)collectionViewLayout referenceSizeForFooterInSection:(NSInteger)

	section {

    	/*

        	width 为水平滑动时,间距有效。height 为垂直滑动时,间距有效。

     	*/

    	return CGSizeMake(20, 30);

	}

	// 设置分段头尾的内容

	- (UICollectionReusableView *)collectionView:(UICollectionView *)collectionView viewForSupplementaryElementOfKind:(NSString *)kind atIndexPath:(NSIndexPath *)

	indexPath {

    	// collectionView 分段头尾的设置注册复用

    	myHeaderFooterView1 *view = nil;

    	// 分段头

    	if (kind == UICollectionElementKindSectionHeader) {

        	// 创建分段头视图

        	view = [collectionView dequeueReusableSupplementaryViewOfKind:UICollectionElementKindSectionHeader withReuseIdentifier:@"header" forIndexPath:indexPath];

        	// 设置分段头的内容

        	view.nameLabel.text = [NSString stringWithFormat:@"第 %ld 段 Header", indexPath.section];

    	}

    	// 分段尾

    	else {

        	// 创建分段尾视图

        	view = [collectionView dequeueReusableSupplementaryViewOfKind:UICollectionElementKindSectionFooter withReuseIdentifier:@"footer" forIndexPath:indexPath];

        	// 设置分段尾视图的内容

        	view.nameLabel.text = [NSString stringWithFormat:@"第 %ld 段结束 Footer", indexPath.section];

    	}

    	return view;

	}
Swift
myHeaderFooterView.swift
	class myHeaderFooterView: UICollectionReusableView {

    	var nameLabel:UILabel!

    	override init(frame: CGRect) {

        	super.init(frame: frame)

        	nameLabel = UILabel(frame: self.bounds)

        	nameLabel.textAlignment = NSTextAlignment.Center

        	nameLabel.backgroundColor = UIColor.lightGrayColor()

        	self.addSubview(nameLabel)

    	}

	}
ViewController.swift
	// 注册分段头视图

	collectionView.registerClass(myHeaderFooterView1.self, forSupplementaryViewOfKind: UICollectionElementKindSectionHeader, withReuseIdentifier: "header")

	// 注册分段尾视图

	collectionView.registerClass(myHeaderFooterView1.self, forSupplementaryViewOfKind: UICollectionElementKindSectionFooter, withReuseIdentifier: "footer")

	// 设置分段头大小

	func collectionView(collectionView: UICollectionView!, layout collectionViewLayout: UICollectionViewLayout!, referenceSizeForHeaderInSection:section) -> CGSize  			{

    	/*

        	width 为水平滑动时,间距有效。height 为垂直滑动时,间距有效。

     	*/

    	return CGSizeMake(20, 30)

	}

	// 设置分段尾大小

	func collectionView(collectionView: UICollectionView!, layout collectionViewLayout: UICollectionViewLayout!, referenceSizeForFooterInSection:section) -> CGSize  		{

    	/*

        	width 为水平滑动时,间距有效。height 为垂直滑动时,间距有效。

     	*/

    return CGSizeMake(20, 30)

	}

	// 设置分段头尾的内容

	func collectionView(collectionView: UICollectionView, viewForSupplementaryElementOfKind kind: String, atIndexPath indexPath: NSIndexPath) -> 							UICollectionReusableView {

    	var view:myHeaderFooterView1!

    	// 分段头

    	if kind == UICollectionElementKindSectionHeader {

        	// 创建分段头视图

        	view = collectionView.dequeueReusableSupplementaryViewOfKind(UICollectionElementKindSectionHeader, withReuseIdentifier: "header", forIndexPath:indexPath) as! myHeaderFooterView1

        	// 设置分段头的内容

       		view.nameLabel.text = "第 \(indexPath.section) 段 Header"

    	}

    	// 分段尾

    	else {

        	// 创建分段尾视图

        	view = collectionView.dequeueReusableSupplementaryViewOfKind(UICollectionElementKindSectionFooter, withReuseIdentifier: "footer", forIndexPath:indexPath) as! myHeaderFooterView1

        	// 设置分段尾视图的内容

        	view.nameLabel.text = "第 \(indexPath.section) 段 Footer"

    	}

    	return view

	}
6、xib 自定义 分段头尾的创建与引用
Objective-C
myHeaderFooterView.xib

myHeaderFooterView.h
	@interface myHeaderFooterView : UICollectionReusableView

	@property (weak, nonatomic) IBOutlet UILabel *nameLabel;

	@end
ViewController.m
	// 注册分段头视图

	[collectionView registerNib:[UINib nibWithNibName:@"myHeaderFooterView2" bundle:nil] forSupplementaryViewOfKind:UICollectionElementKindSectionHeader withReuseIdentifier:@"xibHeader"];

	// 注册分段尾视图

	[collectionView registerNib:[UINib nibWithNibName:@"myHeaderFooterView2" bundle:nil] forSupplementaryViewOfKind:UICollectionElementKindSectionFooter withReuseIdentifier:@"xibFooter"];

	// 设置分段头大小

	- (CGSize)collectionView:(UICollectionView *)collectionView layout:(UICollectionViewLayout *)collectionViewLayout referenceSizeForHeaderInSection:(NSInteger)section {

    	/*

      		width 为水平滑动时,间距有效。height 为垂直滑动时,间距有效。

     	*/

    	return CGSizeMake(20, 30);

	}

	// 设置分段尾大小

	- (CGSize)collectionView:(UICollectionView *)collectionView layout:(UICollectionViewLayout *)collectionViewLayout referenceSizeForFooterInSection:(NSInteger)section {

    	/*

        	width 为水平滑动时,间距有效。height 为垂直滑动时,间距有效。

     	*/

    	return CGSizeMake(20, 30);

	}

	// 设置分段头尾的内容

	- (UICollectionReusableView *)collectionView:(UICollectionView *)collectionView viewForSupplementaryElementOfKind:(NSString *)kind atIndexPath:(NSIndexPath *)indexPath {

    	// collectionView 分段头尾的设置注册复用

    	myHeaderFooterView2 *view = nil;

    	// 分段头

    	if (kind == UICollectionElementKindSectionHeader) {

       	// 创建分段头视图

        view = [collectionView dequeueReusableSupplementaryViewOfKind:UICollectionElementKindSectionHeader withReuseIdentifier:@"xibHeader" forIndexPath:indexPath];

        	// 设置分段头的内容

        	view.nameLabel.text = [NSString stringWithFormat:@"第 %ld 段 xibHeader", indexPath.section];

    	}

    	// 分段尾

    	else {

        	// 创建分段尾视图

        	view = [collectionView dequeueReusableSupplementaryViewOfKind:UICollectionElementKindSectionFooter withReuseIdentifier:@"xibFooter" forIndexPath:indexPath];

        	// 设置分段尾视图的内容

        	view.nameLabel.text = [NSString stringWithFormat:@"第 %ld 段结束 xibFooter", indexPath.section];

    	}

    	return view;

	}
Swift
myHeaderFooterView.xib
myHeaderFooterView.swift
	class myHeaderFooterView: UICollectionReusableView {

		@IBOutlet weak var nameLabel: UILabel!

	}
ViewController.swift
	// 注册分段头视图

	collectionView.registerNib(UINib(nibName: "myHeaderFooterView2", bundle: nil), forSupplementaryViewOfKind: UICollectionElementKindSectionHeader, withReuseIdentifier: "xibHeader")

	// 注册分段尾视图

	collectionView.registerNib(UINib(nibName: "myHeaderFooterView2", bundle: nil), forSupplementaryViewOfKind: UICollectionElementKindSectionFooter, 												withReuseIdentifier: "xibFooter")

	// 设置分段头大小

	func collectionView(collectionView: UICollectionView!, layout collectionViewLayout: UICollectionViewLayout!, referenceSizeForHeaderInSection:section) -> CGSize {

    	/*

        	width 为水平滑动时,间距有效。height 为垂直滑动时,间距有效。

     	*/

    	return CGSizeMake(20, 30)

	}

	// 设置分段尾大小

	func collectionView(collectionView: UICollectionView!, layout collectionViewLayout: UICollectionViewLayout!, referenceSizeForFooterInSection:section) -> CGSize {

    	/*

        	width 为水平滑动时,间距有效。height 为垂直滑动时,间距有效。

     	*/

    	return CGSizeMake(20, 30)

	}

	// 设置分段头尾的内容

	func collectionView(collectionView: UICollectionView, viewForSupplementaryElementOfKind kind: String, atIndexPath indexPath: NSIndexPath) -> UICollectionReusableView {

    	var view:myHeaderFooterView2!

    	// 分段头

    	if kind == UICollectionElementKindSectionHeader {

        	// 创建分段头视图

        	view = collectionView.dequeueReusableSupplementaryViewOfKind(UICollectionElementKindSectionHeader, withReuseIdentifier: "xibHeader", forIndexPath:indexPath) as! myHeaderFooterView2

        	// 设置分段头的内容

        	view.nameLabel.text = "第 \(indexPath.section) 段 Header"

    	}

    	// 分段尾

    	else {

        	// 创建分段尾视图

        	view = collectionView.dequeueReusableSupplementaryViewOfKind(UICollectionElementKindSectionFooter, withReuseIdentifier: "xibFooter", forIndexPath:indexPath) as! myHeaderFooterView2

        	// 设置分段尾视图的内容

        	view.nameLabel.text = "第 \(indexPath.section) 段 Footer"

    	}

    	return view

	}
7、自定义布局风格
Objective-C
CustomLayout.h
@interface CustomLayout : UICollectionViewLayout
CustomLayout.m
	/*

    	简单定义了一个 section 的布局

 	*/

	@implementation CustomLayout

	// 设置网格视图的大小

	- (CGSize)collectionViewContentSize {

    	// 每行显示 3 个图标,1大2小

    	return CGSizeMake(self.collectionView.bounds.size.width, [self.collectionView numberOfItemsInSection:0 / 3] * 200 + 200);

	}

	// 设置单元格的位置属性

	- (NSArray *)layoutAttributesForElementsInRect:(CGRect)rect {

    	NSMutableArray *attributesArray = [[NSMutableArray alloc] init];

    	NSUInteger cellCount = [self.collectionView numberOfItemsInSection:0];

    	for (int i = 0; i < cellCount; i++) {

        	UICollectionViewLayoutAttributes *attributes = [self layoutAttributesForItemAtIndexPath:[NSIndexPath indexPathForItem:i inSection:0]];

        	[attributesArray addObject:attributes];

    	}

    	return attributesArray;

	}

	// 设置单元格的位置与大小

	- (UICollectionViewLayoutAttributes *)layoutAttributesForItemAtIndexPath:(NSIndexPath *)indexPath {

    	// 获取当前单元格布局属性

    	UICollectionViewLayoutAttributes *attribute = [UICollectionViewLayoutAttributes layoutAttributesForCellWithIndexPath:indexPath];

    	// 单元格边长

    	CGFloat largeCellSide = 200;

    	CGFloat smallCellSide = 100;

    	// 单元格间距

    	//    NSUInteger itemSpacing = 2;

    	NSUInteger lineSpacing = 5;

    	// 边距

    	UIEdgeInsets insets = UIEdgeInsetsMake(2, 20, 2, 20);

    	// 当前行数

    	/*

    		每行显示 3 个图片,1 大 2 小

    	*/

    	NSInteger line = indexPath.item / 3;

    	// 当前行的 Y 坐标

    	CGFloat lineOriginY = insets.top + largeCellSide * line + lineSpacing * line;

    	// 右侧单元格 X 坐标

    	/*

    		这里按左右对齐,所以中间空隙大

    	*/

    	CGFloat rightLargeX = self.collectionView.bounds.size.width - largeCellSide - insets.right;

    	CGFloat rightSmallX = self.collectionView.bounds.size.width - smallCellSide - insets.right;

    	// 每行 2 个图片,2 行循环一次,一共 6 种位置

    	if (indexPath.item % 6 == 0) {

        	attribute.frame = CGRectMake(insets.left, lineOriginY, largeCellSide, largeCellSide);

    	}

    	else if (indexPath.item % 6 == 1) {

        	attribute.frame = CGRectMake(rightSmallX, lineOriginY, smallCellSide, smallCellSide);

    	}

    	else if (indexPath.item % 6 == 2) {

        	attribute.frame = CGRectMake(rightSmallX, lineOriginY + smallCellSide + insets.top, smallCellSide, smallCellSide);

    	}

    	else if (indexPath.item % 6 == 3) {

        	attribute.frame = CGRectMake(insets.left, lineOriginY, smallCellSide, smallCellSide);

    	}

    	else if (indexPath.item % 6 == 4) {

        	attribute.frame = CGRectMake(insets.left, lineOriginY + smallCellSide + insets.top, smallCellSide, smallCellSide);

    	}

    	else if (indexPath.item % 6 == 5) {

        	attribute.frame = CGRectMake(rightLargeX, lineOriginY, largeCellSide, largeCellSide);

    	}

    	return attribute;

	}
ViewController.m
	// 数据源初始化

		// 声明数据源

		@property(nonatomic, retain)NSMutableArray *dataArray;

    	dataArray = [NSMutableArray arrayWithObjects:   @{@"name":@"Swift" , @"pic":@"swift.png" },

                 	@{@"name":@"OC"    , @"pic":@"oc.jpg"    },

                 	@{@"name":@"Java"  , @"pic":@"java.png"  },

                 	@{@"name":@"PHP"   , @"pic":@"php.jpeg"  },

                 	@{@"name":@"JS"    , @"pic":@"js.jpeg"   },

                 	@{@"name":@"HTML"  , @"pic":@"html.jpeg" },

                 	@{@"name":@"Ruby"  , @"pic":@"ruby.png"  }, nil];

	// 网格视图初始化

		// 声明网格视图

		@property(nonatomic, retain)UICollectionView *myCollectionView;

    	CustomLayout *layout = [[CustomLayout alloc] init];

    	myCollectionView = [[UICollectionView alloc] initWithFrame:CGRectMake(0, 20, self.view.bounds.size.width, self.view.bounds.size.height - 20) collectionViewLayout:layout];

    	// 默认背景是黑色和 label 一致

    	myCollectionView.backgroundColor = [UIColor whiteColor];

    	myCollectionView.delegate = self;

    	myCollectionView.dataSource = self;

    	// 注册 CollectionViewCell

    	[myCollectionView registerClass:[UICollectionViewCell class] forCellWithReuseIdentifier:@"myCell"];

    	[self.view addSubview:myCollectionView];

	// UICollectionView 协议方法

    	// 设置行数

    	- (NSInteger)collectionView:(UICollectionView *)collectionView numberOfItemsInSection:(NSInteger)section {

        	return dataArray.count;

    	}

    	// 设置网格显示的内容

    	- (UICollectionViewCell *)collectionView:(UICollectionView *)collectionView cellForItemAtIndexPath:(NSIndexPath *)indexPath {

        	// 创建 cell

        	UICollectionViewCell *cell = [collectionView dequeueReusableCellWithReuseIdentifier:@"myCell" forIndexPath:indexPath];

        	// 创建自定义 cell 视图

        	UIImageView *imageView = [[UIImageView alloc] initWithFrame:cell.bounds];

        	imageView.image = [UIImage imageNamed:dataArray[indexPath.item][@"pic"]];

        	[cell addSubview:imageView];

        	UILabel *label = [[UILabel alloc] initWithFrame:CGRectMake(0, 5, cell.bounds.size.width, 20)];

        	label.text = dataArray[indexPath.item][@"name"];

        	label.textAlignment = NSTextAlignmentCenter;

        	[cell addSubview:label];

        	return cell;

    	}
Swift
CustomLayout.swift
	/*

		简单定义了一个 section 的布局

 	*/

	class CustomLayout: UICollectionViewLayout

	// 设置网格视图的大小

	override func collectionViewContentSize() -> CGSize {

    	// 每行显示 3 个图标,1大2小

    	return CGSizeMake(collectionView!.bounds.size.width, CGFloat((collectionView!.numberOfItemsInSection(0) / 3) * 200 + 200))

	}

	// 设置单元格的位置属性

	override func layoutAttributesForElementsInRect(rect: CGRect) -> [UICollectionViewLayoutAttributes]? {

    	var attributesArray = Array<UICollectionViewLayoutAttributes>()

    	let cellCount = self.collectionView!.numberOfItemsInSection(0)

    	for i in 0..<cellCount {

        	let attributes = self.layoutAttributesForItemAtIndexPath(NSIndexPath(forItem: i, inSection: 0))

        	attributesArray.append(attributes!)

    	}

    	return attributesArray

	}

	// 设置单元格的位置与大小

	override func layoutAttributesForItemAtIndexPath(indexPath: NSIndexPath) -> UICollectionViewLayoutAttributes? {

    	// 获取当前单元格布局属性

    	let attribute = UICollectionViewLayoutAttributes(forCellWithIndexPath:indexPath)

    	// 单元格边长

    	let largeCellSide = CGFloat(200)

    	let smallCellSide = CGFloat(100)

    	// 单元格间距

    	let itemSpacing = 2

    	let lineSpacing = 5

    	// 边距

    	let insets = UIEdgeInsetsMake(2, 20, 2, 20)

    	// 当前行数

    	/*

    		每行显示 3 个图片,1 大 2 小

    	*/

    	let line = indexPath.item / 3

    	// 当前行的 Y 坐标

    	let lineOriginY = insets.top + largeCellSide * CGFloat(line) + CGFloat(lineSpacing * line)

    	// 右侧单元格 X 坐标

    	/*

    		这里按左右对齐,所以中间空隙大

    	*/

    	let rightLargeX = collectionView!.bounds.size.width - largeCellSide - insets.right

    	let rightSmallX = collectionView!.bounds.size.width - smallCellSide - insets.right

    	// 每行 2 个图片,2 行循环一次,一共 6 种位置

    	if (indexPath.item % 6 == 0) {

        	attribute.frame = CGRectMake(insets.left, lineOriginY, largeCellSide, largeCellSide)

    	}

    	else if (indexPath.item % 6 == 1) {

        	attribute.frame = CGRectMake(rightSmallX, lineOriginY, smallCellSide, smallCellSide)

    	}

    	else if (indexPath.item % 6 == 2) {

        	attribute.frame = CGRectMake(rightSmallX, lineOriginY + smallCellSide + insets.top, smallCellSide, smallCellSide)

    	}

    	else if (indexPath.item % 6 == 3) {

        	attribute.frame = CGRectMake(insets.left, lineOriginY, smallCellSide, smallCellSide)

    	}

    	else if (indexPath.item % 6 == 4) {

        	attribute.frame = CGRectMake(insets.left, lineOriginY + smallCellSide + insets.top, smallCellSide, smallCellSide)

    	}

    	else if (indexPath.item % 6 == 5) {

        	attribute.frame = CGRectMake(rightLargeX, lineOriginY, largeCellSide, largeCellSide)

    	}

    	return attribute

	}
ViewController.swift
	// 数据源初始化

		// 声明数据源

		var dataArray:[[String:String]] = Array()

    	dataArray = [

        	["name":"Swift" , "pic":"swift.png" ],

        	["name":"OC"    , "pic":"oc.jpg"    ],

        	["name":"Java"  , "pic":"java.png"  ],

        	["name":"PHP"   , "pic":"php.jpeg"  ],

        	["name":"JS"    , "pic":"js.jpeg"   ],

        	["name":"HTML"  , "pic":"html.jpeg" ],

        	["name":"Ruby"  , "pic":"ruby.png"  ]

    	]

	// 网格视图初始化

		var myCollectionView:UICollectionView!

	// 声明网格视图

    	let layout = CustomLayout()

    	myCollectionView = UICollectionView(frame: CGRectMake(0, 20, self.view.bounds.size.width, self.view.bounds.size.height - 20),

    	                     collectionViewLayout:layout)

    	// 默认背景是黑色和 label 一致

    	myCollectionView.backgroundColor = UIColor.whiteColor()

    	myCollectionView.delegate = self

    	myCollectionView.dataSource = self

    	// 注册 CollectionViewCell

    	myCollectionView.registerClass(UICollectionViewCell.self, forCellWithReuseIdentifier: "myCell")

    	self.view.addSubview(myCollectionView)

	// UICollectionView 协议方法

    	// 设置行数

    	func collectionView(collectionView: UICollectionView, numberOfItemsInSection section: Int) -> Int {

        	return dataArray.count

    	}

    	// 设置网格显示的内容

    	func collectionView(collectionView: UICollectionView, cellForItemAtIndexPath indexPath: NSIndexPath) -> UICollectionViewCell {

        	// 创建 cell

        	let cell = collectionView.dequeueReusableCellWithReuseIdentifier("myCell", forIndexPath: indexPath)

        	// 创建自定义 cell 视图

        	let imageView = UIImageView(frame: cell.bounds)

        	imageView.image = UIImage(named: dataArray[indexPath.item]["pic"]!)

        	cell.addSubview(imageView)

        	let label = UILabel(frame:CGRectMake(0, 5, cell.bounds.size.width, 20))

        	label.text = dataArray[indexPath.item]["name"]

        	label.textAlignment = NSTextAlignment.Center

        	cell.addSubview(label)

        	return cell

    	}
8、UICollectionView 协议方法
需遵守协议 UICollectionViewDataSource, UICollectionViewDelegate,并设置代理
Objective-C
分段、网格 设置
	// 设置分段数

	- (NSInteger)numberOfSectionsInCollectionView:(UICollectionView *)collectionView {

    	return 3;

	}

	// 设置网格数

	- (NSInteger)collectionView:(UICollectionView *)collectionView numberOfItemsInSection:(NSInteger)section {

    	return 15;

	}

	// 设置网格大小

	- (CGSize)collectionView:(UICollectionView *)collectionView layout:(UICollectionViewLayout *)collectionViewLayout sizeForItemAtIndexPath:(NSIndexPath *)indexPath {

    	return CGSizeMake(100, 170);

	}

	// 设置每个网格的内容

	- (UICollectionViewCell *)collectionView:(UICollectionView *)collectionView cellForItemAtIndexPath:(NSIndexPath *)indexPath {

    	/*

        	cell 必须采用注册的方式自定义

     	*/

    	return cell;

	}
网格间距设置
	// 设置最小网格间距

	- (CGFloat)collectionView:(UICollectionView *)collectionView layout:(UICollectionViewLayout *)collectionViewLayout minimumInteritemSpacingForSectionAtIndex:(NSInteger)section {

    	/*

        	垂直滑动时,系统会根据屏幕宽度和网格(cell)的宽度在大于等于最小网格(cell)间距的范围内自动调整。

        	水平滑动时,系统会根据屏幕高度和网格(cell)的高度在大于等于最小网格(cell)间距的范围内自动调整。

     	*/

    	return 10;

	}

	// 设置最小行间距

	- (CGFloat)collectionView:(UICollectionView *)collectionView layout:(UICollectionViewLayout *)collectionViewLayout minimumLineSpacingForSectionAtIndex:(NSInteger)section {

    	return 10;

	}

	// 设置分段周边距

	- (UIEdgeInsets)collectionView:(UICollectionView *)collectionView layout:(UICollectionViewLayout *)collectionViewLayout insetForSectionAtIndex:(NSInteger)section {

    	// 上,左,下,右

    	return UIEdgeInsetsMake(20, 10, 20, 10);

	}
分段头尾 设置
	// 设置分段头大小

	- (CGSize)collectionView:(UICollectionView *)collectionView layout:(UICollectionViewLayout *)collectionViewLayout referenceSizeForHeaderInSection:(NSInteger)section {

    	/*

        	width 为水平滑动时的间距有效,height 为垂直滑动时的间距有效

     	*/

    	return CGSizeMake(20, 30);

	}

	// 设置分段尾大小

	- (CGSize)collectionView:(UICollectionView *)collectionView layout:(UICollectionViewLayout *)collectionViewLayout referenceSizeForFooterInSection:(NSInteger)section {

    	/*

        	width 为水平滑动时的间距有效,height 为垂直滑动时的间距有效

     	*/

    	return CGSizeMake(20, 30);

	}

	// 设置分段头尾视图

	- (UICollectionReusableView *)collectionView:(UICollectionView *)collectionView viewForSupplementaryElementOfKind:(NSString *)kind atIndexPath:(NSIndexPath *)indexPath {

    	return myView;

	}
网格点击 设置
	// 网格点击

	- (void)collectionView:(UICollectionView *)collectionView didSelectItemAtIndexPath:(NSIndexPath *)indexPath {

	}

	// 网格取消点击,点击另一个表格的时候触发

	- (void)collectionView:(UICollectionView *)collectionView didDeselectItemAtIndexPath:(NSIndexPath *)indexPath {

	}
Swift
分段、网格 设置
	// 设置分段数

	func numberOfSectionsInCollectionView(collectionView: UICollectionView) -> Int {

    	return 3

	}

	// 设置网格数

	func collectionView(collectionView: UICollectionView, numberOfItemsInSection section: Int) -> Int {

    	return 15

	}

	// 设置网格大小

	func collectionView(collectionView: UICollectionView!, layout collectionViewLayout: UICollectionViewLayout!, sizeForItemAtIndexPath indexPath: NSIndexPath!) -> CGSize {

    	return CGSizeMake(100, 170)

	}

	// 设置每个网格的内容

	func collectionView(collectionView: UICollectionView, cellForItemAtIndexPath indexPath: NSIndexPath) -> UICollectionViewCell {

    	/*

        	cell 必须采用注册的方式自定义

    	*/

    	return cell

	}
网格间距 设置
	// 设置最小网格间距

	func collectionView(collectionView: UICollectionView!, layout collectionViewLayout: UICollectionViewLayout!, minimumInteritemSpacingForSectionAtIndex:section) -> CGFloat {

    	/*

        	垂直滑动时,系统会根据屏幕宽度和网格(cell)的宽度在大于等于最小网格(cell)间距的范围内自动调整。

        	水平滑动时,系统会根据屏幕高度和网格(cell)的高度在大于等于最小网格(cell)间距的范围内自动调整。

     	*/

    	return 10

	}

	// 设置最小行间距

	func collectionView(collectionView: UICollectionView!, layout collectionViewLayout: UICollectionViewLayout!, minimumLineSpacingForSectionAtIndex:section) -> CGFloat {

    	return 50

	}

	// 设置分段周边距

	func collectionView(collectionView: UICollectionView!, layout collectionViewLayout: UICollectionViewLayout!, insetForSectionAtIndex:section) -> UIEdgeInsets {

    	// 上,左,下,右

    	return UIEdgeInsetsMake(20, 20, 20, 20)

	}
分段头尾 设置
	// 设置分段头大小

	func collectionView(collectionView: UICollectionView!, layut collectionViewLayout: UICollectionViewLayout, referenceSizeForHeaderInSection:section) -> CGSize {

    	/*

        	width 为水平滑动时的间距有效,height 为垂直滑动时的间距有效

     	*/

    	return CGSizeMake(20, 30)

	}

	// 设置分段尾大小

	func collectionView(collectionView: UICollectionView!, layut collectionViewLayout: UICollectionViewLayout, referenceSizeForFooterInSection:section) -> CGSize {

    	/*

        	width 为水平滑动时的间距有效,height 为垂直滑动时的间距有效

     	*/

    	return CGSizeMake(20, 30)

	}

	// 设置分段头尾视图

	func collectionView(collectionView: UICollectionView, viewForSupplementaryElementOfKind kind: String, atIndexPath indexPath: NSIndexPath) -> UICollectionReusableView {

    	return myView

	}
网格点击 设置
	// 网格点击

	func collectionView(collectionView: UICollectionView, didSelectItemAtIndexPath indexPath: NSIndexPath) {

	}

	// 网格取消点击,点击另一个表格的时候触发

	func collectionView(collectionView: UICollectionView, didDeselectItemAtIndexPath indexPath: NSIndexPath) {

	}
9、Storyboard 中设置
在 Storyboard 场景中设置
Collection View Controller
Selection ... Clear on Appearance Collection View
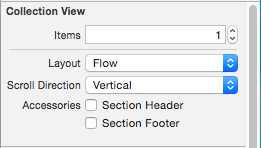
Items 设置不同类型的单元格数量 Layout 设置布局类型 Scroll Direction 设置网格滑动方向 Accessories Section Header | 显示网格头
Section Footer | 显示网格尾
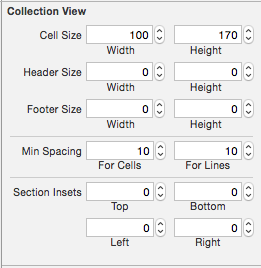
Cell Size 网格单元的大小 Header Size 网格头的大小 Footer Size 网格尾的大小 Min Spacing 最小行列间距 Section Insets 网格边距 Collection Reusable View

ntifier collectionViewCell 的 ID
在 Storyboard 场景绑定的 Controller 中设置
- 在 Storyboard 自带的 collectionViewCell 中没有 contentView,在使用 Cell 时显示的内容必须使用代码自定义,其它设置可以在系统自带的 Cell 上设置。
iOS - UICollectionViewController的更多相关文章
- 怎样在UICollectionView中添加Header和footer
---恢复内容开始--- 怎样在UICollectionView中添加Header和footer 转载于http://my.oschina.net/zboy/blog/221525 摘要 来自-htt ...
- iOS开发之窥探UICollectionViewController(五) --一款炫酷的图片浏览组件
本篇博客应该算的上CollectionView的高级应用了,从iOS开发之窥探UICollectionViewController(一)到今天的(五),可谓是由浅入深的窥探了一下UICollectio ...
- iOS开发之窥探UICollectionViewController(四) --一款功能强大的自定义瀑布流
在上一篇博客中<iOS开发之窥探UICollectionViewController(三) --使用UICollectionView自定义瀑布流>,自定义瀑布流的列数,Cell的外边距,C ...
- iOS开发之窥探UICollectionViewController(三) --使用UICollectionView自定义瀑布流
上篇博客的实例是自带的UICollectionViewDelegateFlowLayout布局基础上来做的Demo, 详情请看<iOS开发之窥探UICollectionViewControlle ...
- iOS开发之窥探UICollectionViewController(一) -- Ready Your CollectionViewController
之前用CollectionViewController只是皮毛,一些iOS从入门到精通的书上也是泛泛而谈.这几天好好的搞了搞苹果的开发文档上CollectionViewController的内容,亲身 ...
- IOS中UICollectionView和UICollectionViewController的用法
1.新建一个xib描述UICollectionViewCell(比如DealCell.xib),设置好resuse identifier(比如deal) 2.控制器继承UICollectionView ...
- iOS开发之UICollectionViewController
1.概述 UICollectionView控件主要是用来做九宫格的,类似于android中的GridView控件.其用法与UITableView一样,首先要使控制器遵守数据源协议,再将控制器设置为UI ...
- iOS彩票项目--第四天,新特性界面搭建,UICollectionViewController的初次使用
一.新特性界面搭建的思路: 在AppDelegate加载主窗体的时候进行判断程序版本号,直接进入程序或者进入新特性展示界面 取出当前的版本号,与旧的版本号相比较(旧的版本号在进入程序的时候存起来 =& ...
- iOS:集合视图UICollectionView、集合视图控制器UICollectionViewController、集合视图单元格UICollectionViewCell(创建表格的另一种控件)
两种创建表格方式的比较:表格视图.集合视图(二者十分类似) <1>相同点: 表格视图:UITableView(位于storyboard中,通过UIViewController控制器实现 ...
随机推荐
- ThinkPHP跳转与重定向的区别在哪里
跳转: 浏览器认为 : 当前 URL 请求成功 , 重新请求新的 URL . 浏览器会记录当前的 URL 和新的 URL 在请求历史记录中. 回退, 是可以回退到 , 当前的 URL 上的 . ( 无 ...
- IOS中用UIStoryBoard类初始化/跳转控制器
1.空工程中通过创建storyboard文件加载页面 //获取Main.storyboardUIStoryboard *mainStory = [UIStoryboard storyboardWi ...
- JavaEE基础(二十五)/多线程、GUI
1.多线程(单例设计模式) 单例设计模式:保证类在内存中只有一个对象. 如何保证类在内存中只有一个对象呢? (1)控制类的创建,不让其他类来创建本类的对象.private (2)在本类中定义一个本类的 ...
- java面试每日一题11
题目:求1+2!+3!+...+20!的和 public class Recursion { public static void main(String args[]) throws NumberF ...
- [Ogre][地形][原创]基于OgreTerrain的地形实现
需要用到的外部图片资源: 在ogre调用时需要多用到的几个外部dll: OgreTerrain_d.dll 需要添加头文件 #include "Ogre\Ogre.h"#inclu ...
- python8
编译和解释性语言的区别 编译 典型的C C++ 编译完成之后是可执行文件. 机器码-底层(外文书,但是不懂中文,翻译成中文就可以看) 解释性语言----看一句英文书,让翻译解释一句 解释器写的代码便于 ...
- ACM题目————又见拦截导弹
描述 大家对拦截导弹那个题目应该比较熟悉了,我再叙述一下题意:某国为了防御敌国的导弹袭击,新研制出来一种导弹拦截系统.但是这种导弹拦截系统有一个缺陷:它的第一发炮弹能够到达任意的高度,但是以后每一发炮 ...
- stl map底层之红黑树插入步骤详解与代码实现
转载注明出处:http://blog.csdn.net/mxway/article/details/29216199 本篇文章并没有详细的讲解红黑树各方面的知识,只是以图形的方式对红黑树插入节点需要进 ...
- DBUtils开源JDBC类库,对JDBC简单封装(作用是:简化编码工作量,同时不会影响程序的性能)
DBUtils:提高了程序的性能,编程更加简便 架包 mysql-connector-java-jar commons-dbcp-1.4jar commons-pool-1.5.5jar common ...
- 灰色预测模型 c# 算法实现
public class GrayModel { private double a0, a1, a2; private int size; priva ...