Android系统定制之SystemUI修改:下拉通知栏尺寸【转】
本文转载自:https://blog.csdn.net/huil0925/article/details/67632358
最近项目需要修改下拉通知栏面板的宽度,完成后,写个Blog做个总结,也提供给需要的开发人员参考。
本文介绍了DDMS中 Dump View Hierarchy for UI Automator 工具的使用方法,通过该工具找到一些应用的布局,快速定位我们需要修改的源码位置。
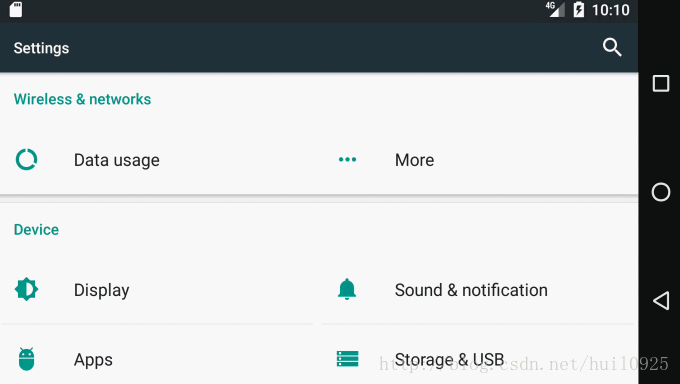
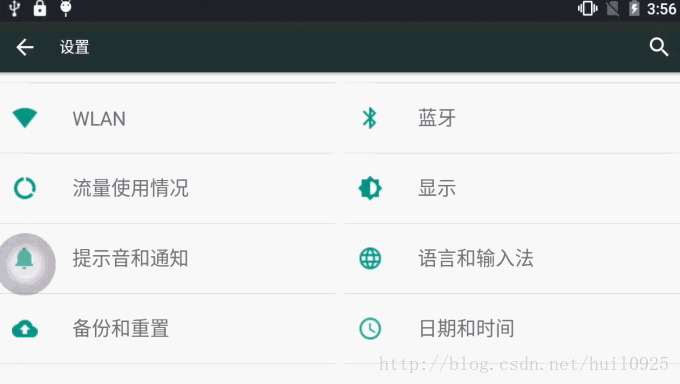
1 先看下效果图
修改前,横屏状态的下拉通知栏,距离屏幕左右两边还有段距离。(模拟器中的截图,Android原生的状态)
修改后,横屏状态的下拉通知栏,宽度铺满屏幕。(真实设备截图, 修改后刷机效果)
2 找到这部分的相关布局。
SystemUI下拉通知栏的布局为super_status_bar.xml

代码如下
<!-- This is the combined status bar / notification panel window. -->

<com.android.systemui.statusbar.phone.StatusBarWindowView

    xmlns:android="http://schemas.android.com/apk/res/android"

    android:layout_width="match_parent"

    android:layout_height="match_parent"

    android:fitsSystemWindows="true">

    <com.android.systemui.statusbar.BackDropView

            android:id="@+id/backdrop"

            android:layout_width="match_parent"

            android:layout_height="match_parent"

            android:visibility="gone"

            >

        <ImageView android:id="@+id/backdrop_back"

                   android:layout_width="match_parent"

                   android:scaleType="centerCrop"

                   android:layout_height="match_parent" />

        <ImageView android:id="@+id/backdrop_front"

                   android:layout_width="match_parent"

                   android:layout_height="match_parent"

                   android:scaleType="centerCrop"

                   android:visibility="invisible" />

    </com.android.systemui.statusbar.BackDropView>

    <com.android.systemui.statusbar.ScrimView android:id="@+id/scrim_behind"

        android:layout_width="match_parent"

        android:layout_height="match_parent"

        android:importantForAccessibility="no" />

    <include layout="@layout/status_bar"

        android:layout_width="match_parent"

        android:layout_height="@dimen/status_bar_height" />

    <FrameLayout android:id="@+id/brightness_mirror"

                 android:layout_width="@dimen/notification_panel_width"

                 android:layout_height="wrap_content"

                 android:layout_gravity="@integer/notification_panel_layout_gravity"

                 android:paddingLeft="@dimen/notification_side_padding"

                 android:paddingRight="@dimen/notification_side_padding"

                 android:visibility="gone">

        <FrameLayout

                android:layout_width="match_parent"

                android:layout_height="match_parent"

                android:elevation="2dp"

                android:background="@drawable/brightness_mirror_background">

            <include layout="@layout/quick_settings_brightness_dialog"

                     android:layout_width="match_parent"

                     android:layout_height="wrap_content" />

        </FrameLayout>

    </FrameLayout>

    <com.android.systemui.statusbar.phone.PanelHolder

        android:id="@+id/panel_holder"

        android:layout_width="match_parent"

        android:layout_height="match_parent"

        android:background="@color/transparent" >

        <include layout="@layout/status_bar_expanded"

            android:layout_width="match_parent"

            android:layout_height="match_parent"

            android:visibility="gone" />

    </com.android.systemui.statusbar.phone.PanelHolder>

    <com.android.systemui.statusbar.ScrimView android:id="@+id/scrim_in_front"

        android:layout_width="match_parent"

        android:layout_height="match_parent"

        android:importantForAccessibility="no" />

</com.android.systemui.statusbar.phone.StatusBarWindowView>- 1
- 2
- 3
- 4
- 5
- 6
- 7
- 8
- 9
- 10
- 11
- 12
- 13
- 14
- 15
- 16
- 17
- 18
- 19
- 20
- 21
- 22
- 23
- 24
- 25
- 26
- 27
- 28
- 29
- 30
- 31
- 32
- 33
- 34
- 35
- 36
- 37
- 38
- 39
- 40
- 41
- 42
- 43
- 44
- 45
- 46
- 47
- 48
- 49
- 50
- 51
- 52
- 53
- 54
- 55
- 56
- 57
- 58
- 59
- 60
- 61
- 62
- 63
- 64
- 65
- 66
- 67
- 68
几个关键的字眼:
| “@layout/status_bar” ————–> 状态栏
| “@+id/brightness_mirror” ——–> 下拉通知栏中调节亮度时,只剩下亮度调节弹出框,位置与下拉通知栏亮度调节位置一样的。
| “@+id/panel_holder”—————>下拉通知栏载体
| “@layout/status_bar_expanded”->下拉通知栏布局
super_status_bar.xml包含了状态栏,下拉通知栏等布局
3 找到下拉通知栏相关布局
通过 DDMS 的 Dump View Hierarchy for UI Automator 工具,我们可以抓取一些布局的ID。

-3.1 header
通知栏上半部分是 com.android.systemui:id/header,那我们在SystemUI的res中,搜索这个“header” 。
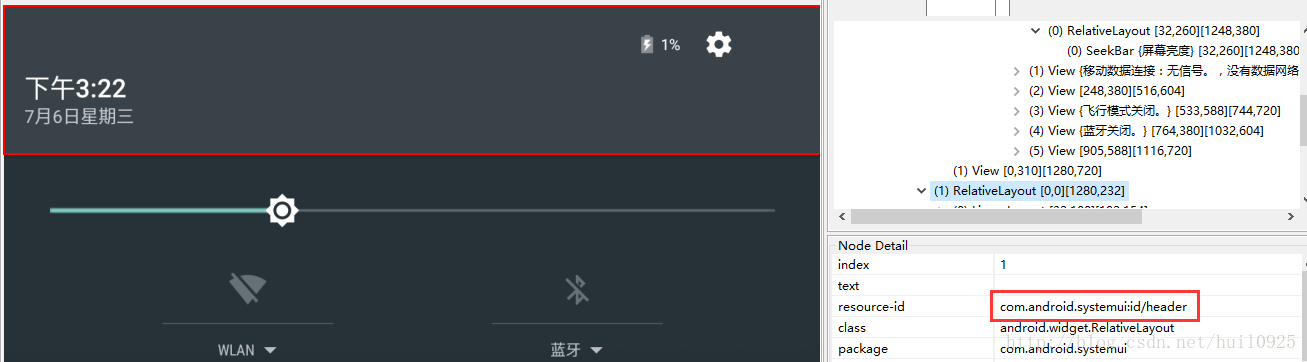
搜索到layout中带有header的,有status_bar_expanded_header.xml,只有这个布局有这个ID
<com.android.systemui.statusbar.phone.StatusBarHeaderView

    xmlns:android="http://schemas.android.com/apk/res/android"

    xmlns:systemui="http://schemas.android.com/apk/res-auto"

    android:id="@+id/header"

    android:layout_width="@dimen/notification_panel_width"

    android:layout_height="@dimen/status_bar_header_height"

    android:layout_gravity="@integer/notification_panel_layout_gravity"

    android:paddingStart="@dimen/notification_side_padding"

    android:paddingEnd="@dimen/notification_side_padding"

    android:baselineAligned="false"

    android:elevation="4dp"

    android:background="@drawable/notification_header_bg"

    android:clickable="true"

    android:focusable="true"
- 1
- 2
- 3
- 4
- 5
- 6
- 7
- 8
- 9
- 10
- 11
- 12
- 13
- 14
- 15
如果需要修改header的尺寸,可将
android:layout_width="@dimen/notification_panel_width"- 1
修改为
android:layout_width="match_parent"- 1
重新编译,这个header的宽度就和屏幕一样了。
-3.2 scroll_view
可上下滑动的快捷开关布局。
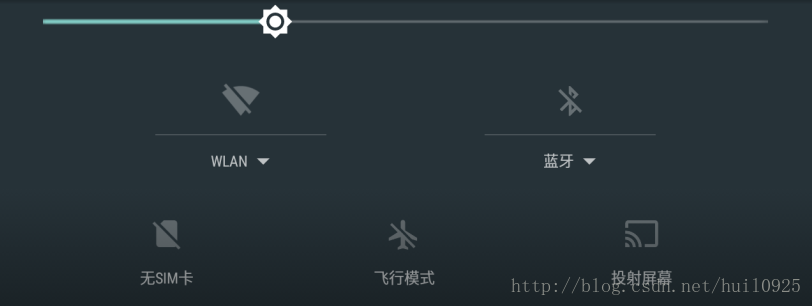
上图所示的布局代码如下
<com.android.systemui.statusbar.phone.ObservableScrollView

     android:id="@+id/scroll_view"

     android:layout_width="@dimen/notification_panel_width"

     android:layout_height="match_parent"

     android:layout_gravity="@integer/notification_panel_layout_gravity"

     android:scrollbars="none"

     android:overScrollMode="never"

android:fillViewport="true">- 1
- 2
- 3
- 4
- 5
- 6
- 7
- 8
将宽度属性改成:
android:layout_width="match_parent"- 1
-3.3 notification_stack_scroller
通知列表布局
上图所示的布局代码如下
<com.android.systemui.statusbar.stack.NotificationStackScrollLayout

android:id="@+id/notification_stack_scroller"

android:layout_width="@dimen/notification_panel_width"

android:layout_height="match_parent"

android:layout_gravity="@integer/notification_panel_layout_gravity"

android:layout_marginBottom="@dimen/close_handle_underlap"

android:importantForAccessibility="no" />- 1
- 2
- 3
- 4
- 5
- 6
- 7
宽度属性改成:
android:layout_width="match_parent"- 1
4 重新编译,打包ROM
make源码,重新刷机查看效果,可以看到文章开头的gif图所示的效果
Android系统定制之SystemUI修改:下拉通知栏尺寸【转】的更多相关文章
- Android系统定制和源码开发以及源码编译(附视频)
Android系统定制配套视频: 为了把Android系统源码定制和编译的课程讲完,从准备到录制完所有的视频,一共花去了近半年的时间,前前后后各种下载源码,编译源码,系统不兼容,版本适配,虚拟机配置困 ...
- [置顶] android系统如何在静音模式下关闭camera拍照声音(2)
之前写过一篇“android系统如何在静音模式下关闭camera拍照声音”的博客,今天来写他的续篇,继续探讨这个问题. 公司新需求,要求在camera应用中添加一个开关,可以进行拍照声音的关闭和开启. ...
- SupportV7包中 SwipeRefreshLayout 修改下拉控件的距离
//修改下拉距离 ViewTreeObserver vto = mCategoryResults.mSwipeRefreshLayout.getViewTreeObserver(); vto.addO ...
- bootstrap-select and selectpicker 修改下拉框的宽度或者下方留白
bootstrap-select and selectpicker 修改下拉框的宽度或者下方留白 $("#sel_userName").selectpicker({ "w ...
- QuickBase64 - Android 下拉通知栏快捷base64加解密工具
Android Quick Setting Tile Base64 Encode/Decode Tool Android 下拉通知栏快捷 base64 加解密,自动将剪切板的内容进行 base64 E ...
- Android 系统默认参数的修改
转自: http://www.th7.cn/Program/Android/201505/447097.shtml 写在前面的话 一般在新项目开始之初,我们需要针对客户需求进行各种系统默认属性的配置, ...
- Android系统定制——Download Android System 及加载system镜像文件
定制android系统(配置及相关系统的镜像文件),具体可参考:Driver_All_in_One_V1.0——MT6735_6753.pdf文档,特别需要理解的是Download部分. 与之对应的软 ...
- Android系统联系人全特效实现(下),字母表快速滚动
在上一篇文章中,我和大家一起实现了类似于Android系统联系人的分组导航和挤压动画功能,不过既然文章名叫做<Android系统联系人全特效实现>,那么没有快速滚动功能显然是称不上&quo ...
- PullToRefreshScrollView 修改下拉刷新图标
我的修改比较简单暴力.网上查了一番,貌似大家都没有改,无奈,查了一下源码.发现如下资源目录: 在看看我们的布局文件,此三个图片就是下拉刷新的三种图标 好吧,flip就是我目前的下拉刷新图片,对应的也就 ...
随机推荐
- jquery字符串转json
var data; var json='[{"CityId":18,"CityName":"西安","ProvinceId&quo ...
- Linux下安装jdk8的方法
一.yum安装 只需要一条命令就可以安装jdk: yum install java--openjdk* -y 执行过这条命令无需配置,直接可以使用. 二.下载tar包安装 下载jdk8 登录网址:ht ...
- oracle中导出表的结构和数据
在linux环境上: exp user_name/password@//ip_address:1521/service_name file=aa.sql tables=\(table_name\); ...
- PHP 使用 GeoLiteCity 库解析 IP 为地理位置
关于把 IP 地址转换为地理位置可以使用网络上很多的 API,好处就是不用在本地存储一个 IP 数据库,而且一般网络上的 IP 库会自动更新,不利的地方就是太依赖于网络,性能表现也可能会弱些.比如像下 ...
- NOJ1167 丑陋数 想法题
题意 丑陋数n的意思是n的全部素数因子仅仅有2,3,5. 求出前1500个丑陋数. (第一个丑陋数是1) 思路 用一个数组维护全部的丑陋数. 一開始数组中仅仅有一个数就是1. 如今能够确定的丑陋数还有 ...
- es6 初始化样式加载到head中
Demo1:function loadCss(css) { css.forEach((path)=>{ console.log($('<link/>', { rel: 'styles ...
- WebSocket和SocketIO总结
1.WebSocket是什么? WebScoket是一种让客户端和服务器之间能进行双向实时通信的技术.它是HTML最新标准HTML5的一个协议规范,本质上是个基于TCP的协议,它通过HTTP/HTTP ...
- java Collection-Map 之 TreeMap
TreeMap 内部定义了一个类 static final class Entry<K,V> implements Map.Entry<K,V>,(自平衡红黑二叉树)作为数据 ...
- Linux中crontab下scp文件传输的两种方式
Linux下文件传输一般有两个命令scp.ftp(工具需要下载安装) 本文主要讲讲scp的文件传输脚本 1.scp ssh-keygen -t rsa免输入密码,传输 这里假设主机A 用来获到主机B的 ...
- AngularJS form $addControl 注冊控件control
需求背景: 在form中使用编写的某component directive时.想通过form's name来对form中控件进行操作, 如使用$invalid等来ng-disabled btn. 解决 ...