
Sqoop Export HDFS
Sqoop Export应用场景——直接导出
直接导出
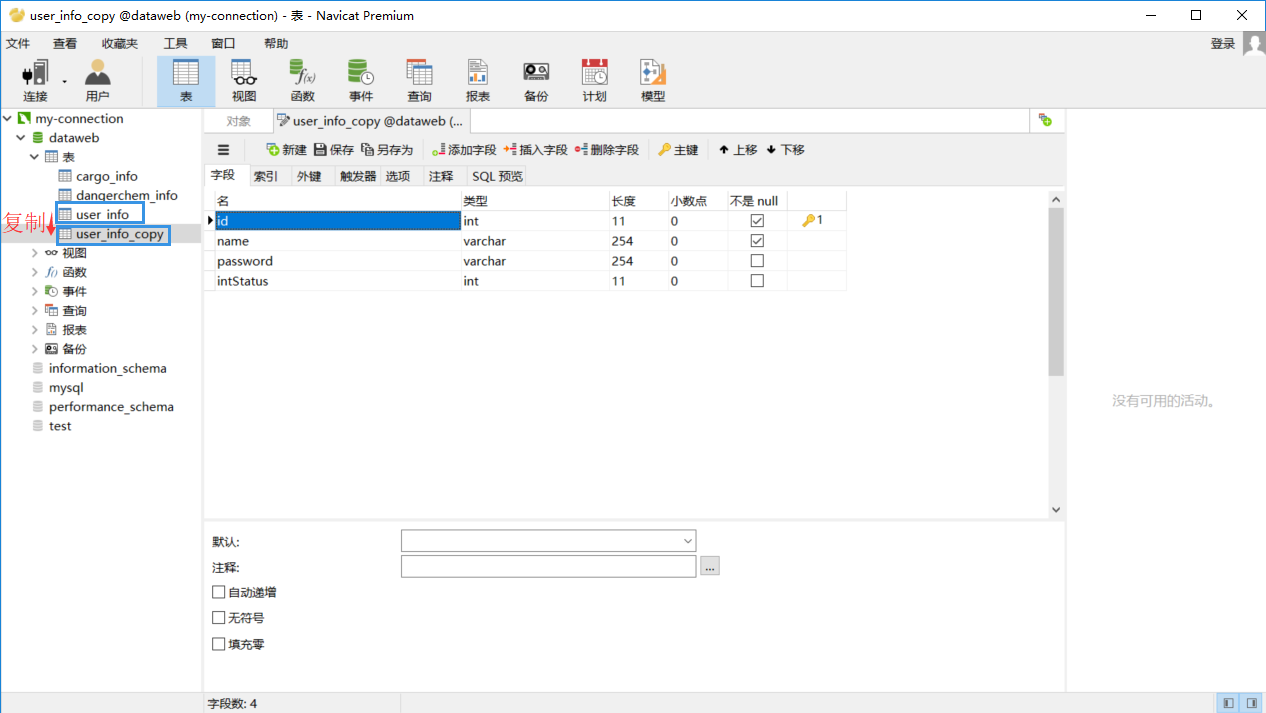
我们先复制一个表,然后将上一篇博文(Sqoop Import HDFS)导入的数据再导出到我们所复制的表里。
sqoop export \

--connect 'jdbc:mysql://202.193.60.117/dataweb?useUnicode=true&characterEncoding=utf-8' \

--username root \

--password-file /user/hadoop/.password \

--table user_info_copy \

--export-dir /user/hadoop/user_info \

--input-fields-terminated-by "," //此处分隔符根据建表时所用分隔符确定,可查看博客sqoop导出hive数据到mysql错误: Caused by: java.lang.RuntimeException: Can't parse input data
运行过程如下:
// :: INFO mapreduce.Job:  map % reduce %

// :: INFO mapreduce.Job:  map % reduce %

// :: INFO mapreduce.Job: Job job_1529567189245_0010 completed successfully

// :: INFO mapreduce.Job: Counters:

    File System Counters

        FILE: Number of bytes read=

        FILE: Number of bytes written=

        FILE: Number of read operations=

        FILE: Number of large read operations=

        FILE: Number of write operations=

        HDFS: Number of bytes read=

        HDFS: Number of bytes written=

        HDFS: Number of read operations=

        HDFS: Number of large read operations=

        HDFS: Number of write operations=

    Job Counters

        Launched map tasks=3

        Data-local map tasks=3   //map数为3,在下面可以指定map数来执行导出操作

        Total time spent by all maps in occupied slots (ms)=

        Total time spent by all reduces in occupied slots (ms)=

        Total time spent by all map tasks (ms)=

        Total vcore-seconds taken by all map tasks=

        Total megabyte-seconds taken by all map tasks=

    Map-Reduce Framework

        Map input records=

        Map output records=

        Input split bytes=

        Spilled Records=

        Failed Shuffles=

        Merged Map outputs=

        GC time elapsed (ms)=

        CPU time spent (ms)=

        Physical memory (bytes) snapshot=

        Virtual memory (bytes) snapshot=

        Total committed heap usage (bytes)=

    File Input Format Counters

        Bytes Read=

    File Output Format Counters

        Bytes Written=

// :: INFO mapreduce.ExportJobBase: Transferred  bytes in 38.2702 seconds (18.1865 bytes/sec)

// :: INFO mapreduce.ExportJobBase: Exported  records.
导入成功后我们再手动查看一下数据库。
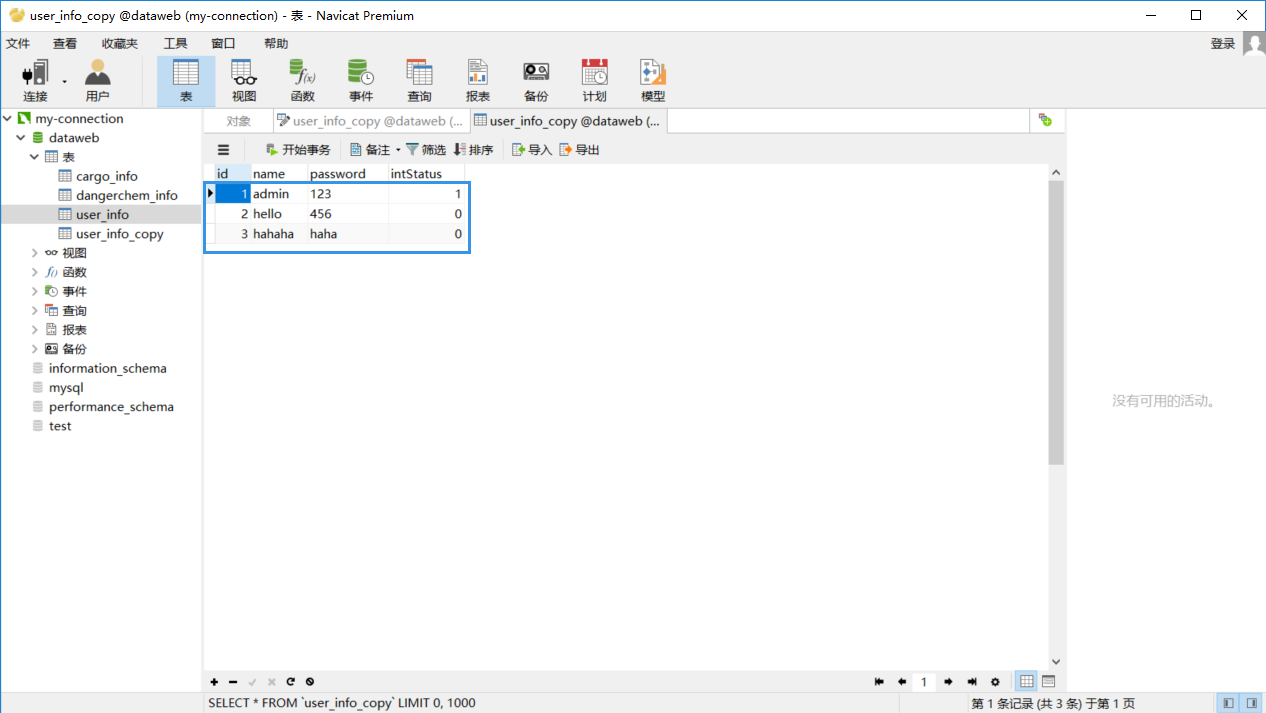
上图表示我们的导入是成功的。
指定Map个数
sqoop export \

--connect 'jdbc:mysql://202.193.60.117/dataweb?useUnicode=true&characterEncoding=utf-8' \

--username root \

--password-file /user/hadoop/.password \

--table user_info_copy \

--export-dir /user/hadoop/user_info \

--input-fields-terminated-by "," \

-m 1 //map数设定为1
先清除本地数据库数据之后再测试。

// :: INFO mapreduce.Job:  map % reduce %

// :: INFO mapreduce.Job:  map % reduce %

// :: INFO mapreduce.Job: Job job_1529567189245_0011 completed successfully

// :: INFO mapreduce.Job: Counters:

    File System Counters

        FILE: Number of bytes read=

        FILE: Number of bytes written=

        FILE: Number of read operations=

        FILE: Number of large read operations=

        FILE: Number of write operations=

        HDFS: Number of bytes read=

        HDFS: Number of bytes written=

        HDFS: Number of read operations=

        HDFS: Number of large read operations=

        HDFS: Number of write operations=

    Job Counters

        Launched map tasks=1

        Data-local map tasks=1   //map数变为了1个

        Total time spent by all maps in occupied slots (ms)=

        Total time spent by all reduces in occupied slots (ms)=

        Total time spent by all map tasks (ms)=

        Total vcore-seconds taken by all map tasks=

        Total megabyte-seconds taken by all map tasks=

    Map-Reduce Framework

        Map input records=

        Map output records=

        Input split bytes=

        Spilled Records=

        Failed Shuffles=

        Merged Map outputs=

        GC time elapsed (ms)=

        CPU time spent (ms)=

        Physical memory (bytes) snapshot=

        Virtual memory (bytes) snapshot=

        Total committed heap usage (bytes)=

    File Input Format Counters

        Bytes Read=

    File Output Format Counters

        Bytes Written=

// :: INFO mapreduce.ExportJobBase: Transferred  bytes in 25.1976 seconds (12.9774 bytes/sec)  //执行时间也较上面减少了

// :: INFO mapreduce.ExportJobBase: Exported  records.
Sqoop Export应用场景——插入和更新
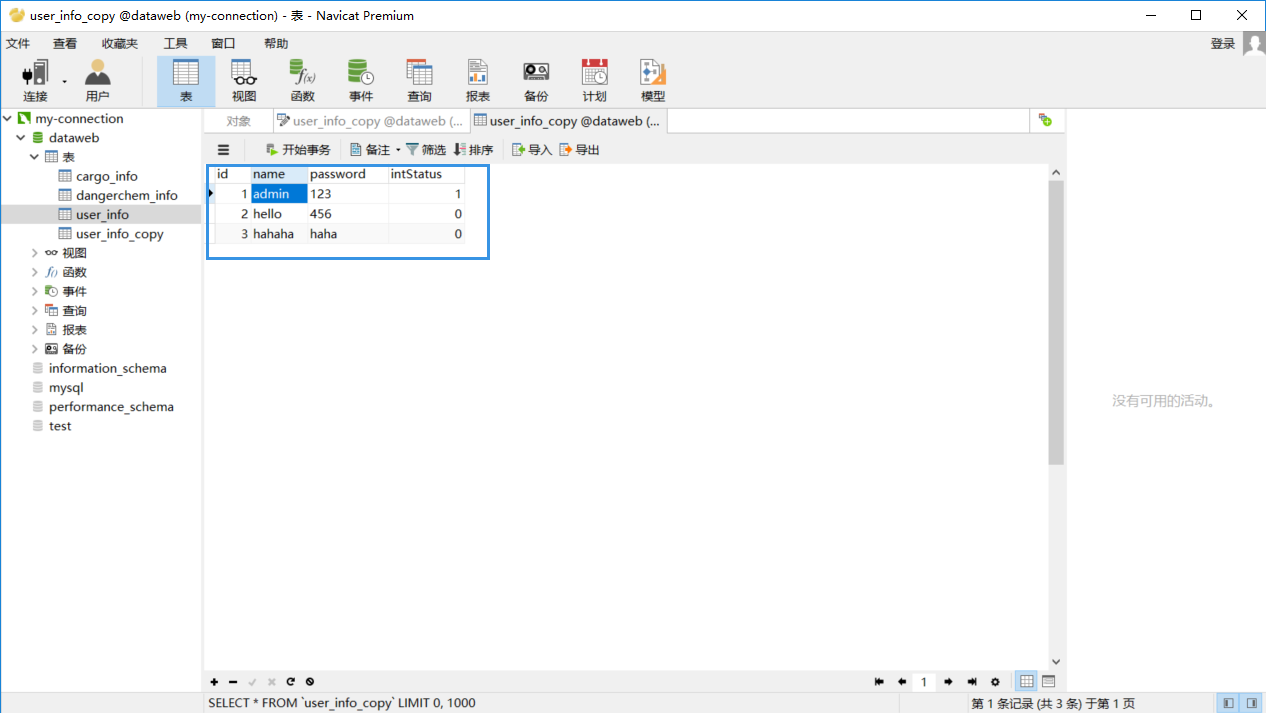
先将已经插入的信息作一点修改,然后重新导入,导入之后会将我们修改的信息又给复原回去。

执行命令
sqoop export \

--connect 'jdbc:mysql://202.193.60.117/dataweb?useUnicode=true&characterEncoding=utf-8' \

--username root \

--password-file /user/hadoop/.password \

--table user_info_copy \

--export-dir /user/hadoop/user_info \

--input-fields-terminated-by "," \

-m  \

--update-key id \

--update-mode allowinsert  //默认为updateonly(只更新),也可以设置为allowinsert(允许插入)
执行完毕后,信息又重新修改了回来。

Sqoop Export应用场景
事务处理
在将HDFS上的数据导入到数据库中之前先导入到一个临时表tmp中,如果导入成功的话,再转移到目标表中去。
sqoop export \

--connect 'jdbc:mysql://202.193.60.117/dataweb?useUnicode=true&characterEncoding=utf-8' \

--username root \

--password-file /user/hadoop/.password \

--table user_info_copy \

--staging-table user_info_tmp \  //临时表需要提前创建,可直接复制再重命名

--clear-staging-table \

--export-dir /user/hadoop/user_info \

--input-fields-terminated-by ","
// :: INFO mapreduce.Job:  map % reduce %

// :: INFO mapreduce.Job:  map % reduce %

// :: INFO mapreduce.Job: Job job_1529567189245_0014 completed successfully

// :: INFO mapreduce.Job: Counters:

    File System Counters

        FILE: Number of bytes read=

        FILE: Number of bytes written=

        FILE: Number of read operations=

        FILE: Number of large read operations=

        FILE: Number of write operations=

        HDFS: Number of bytes read=

        HDFS: Number of bytes written=

        HDFS: Number of read operations=

        HDFS: Number of large read operations=

        HDFS: Number of write operations=

    Job Counters

        Launched map tasks=

        Data-local map tasks=

        Total time spent by all maps in occupied slots (ms)=

        Total time spent by all reduces in occupied slots (ms)=

        Total time spent by all map tasks (ms)=

        Total vcore-seconds taken by all map tasks=

        Total megabyte-seconds taken by all map tasks=

    Map-Reduce Framework

        Map input records=

        Map output records=

        Input split bytes=

        Spilled Records=

        Failed Shuffles=

        Merged Map outputs=

        GC time elapsed (ms)=

        CPU time spent (ms)=

        Physical memory (bytes) snapshot=

        Virtual memory (bytes) snapshot=

        Total committed heap usage (bytes)=

    File Input Format Counters

        Bytes Read=

    File Output Format Counters

        Bytes Written=

// :: INFO mapreduce.ExportJobBase: Transferred  bytes in 36.8371 seconds (18.894 bytes/sec)

// :: INFO mapreduce.ExportJobBase: Exported  records.

// :: INFO mapreduce.ExportJobBase: Starting to migrate data from staging table to destination.

// :: INFO manager.SqlManager: Migrated 3 records from `user_info_tmp` to `user_info_copy`
字段不对应问题
先将数据库中的表内容导入到hdfs上(但不是所有的内容都导入,而是只导入部分字段,在这里就没有导入id字段),然后再从hdfs导出到本地数据库中。
[hadoop@centpy hadoop-2.6.]$ sqoop import --connect jdbc:mysql://202.193.60.117/dataweb
> --username root
> --password-file /user/hadoop/.password
> --table user_info
> --columns name,password,intStatus //确定导入哪些字段
> --target-dir /user/hadoop/user_info
> --delete-target-dir
> --fields-terminated-by ","
> -m 1

 [hadoop@centpy hadoop-2.6.]$ hdfs dfs -cat /user/hadoop/user_info/part-m-* admin,, hello,, hahaha,haha,
可以看到我们此处导入的数据和数据库相比少了“id”这个字段,接下来,我们如果不使用上面的columns字段,仍然按照原来的方式导入,肯定会报错,因为这和我们的数据库格式和字段不匹配。如下所示:
[hadoop@centpy hadoop-2.6.]$ sqoop export \

> --connect 'jdbc:mysql://202.193.60.117/dataweb?useUnicode=true&characterEncoding=utf-8' \

> --username root \

> --password-file /user/hadoop/.password \

> --table user_info_copy \

> --export-dir /user/hadoop/user_info \

> --input-fields-terminated-by ","  \

> -m 1
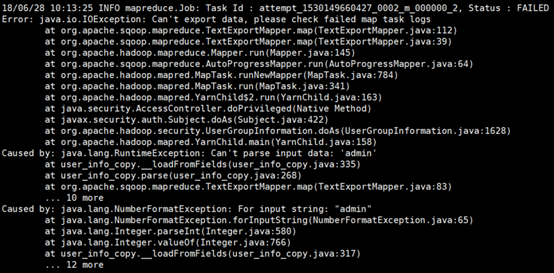
要实现字段不匹配导入必须使用columns字段导出。
[hadoop@centpy hadoop-2.6.]$ sqoop export \

> --connect 'jdbc:mysql://202.193.60.117/dataweb?useUnicode=true&characterEncoding=utf-8' \

> --username root \

> --password-file /user/hadoop/.password \

> --table user_info_copy \

> --columns name,password,intStatus \

> --export-dir /user/hadoop/user_info \

> --input-fields-terminated-by ","  \
以上就是博主为大家介绍的这一板块的主要内容,这都是博主自己的学习过程,希望能给大家带来一定的指导作用,有用的还望大家点个支持,如果对你没用也望包涵,有错误烦请指出。如有期待可关注博主以第一时间获取更新哦,谢谢!
Sqoop Export HDFS的更多相关文章
- (MySQL里的数据)通过Sqoop Import HDFS 里 和 通过Sqoop Export HDFS 里的数据到(MySQL)(五)
下面我们结合 HDFS,介绍 Sqoop 从关系型数据库的导入和导出 一.MySQL里的数据通过Sqoop import HDFS 它的功能是将数据从关系型数据库导入 HDFS 中,其流程图如下所示. ...
- (MySQL里的数据)通过Sqoop Import Hive 里 和 通过Sqoop Export Hive 里的数据到(MySQL)
Sqoop 可以与Hive系统结合,实现数据的导入和导出,用户需要在 sqoop-env.sh 中添加HIVE_HOME的环境变量. 具体,见我的如下博客: hadoop2.6.0(单节点)下Sqoo ...
- (MySQL里的数据)通过Sqoop Import HBase 里 和 通过Sqoop Export HBase 里的数据到(MySQL)
Sqoop 可以与HBase系统结合,实现数据的导入和导出,用户需要在 sqoop-env.sh 中添加HBASE_HOME的环境变量. 具体,见我的如下博客: hadoop2.6.0(单节点)下Sq ...
- sqoop导入hdfs上的数据到oracle
/opt/sqoop-/bin/sqoop export --table mytablename --connect jdbc:oracle:thin:@**.**.**.**:***:dbasena ...
- Hadoop生态组件Hive,Sqoop安装及Sqoop从HDFS/hive抽取数据到关系型数据库Mysql
一般Hive依赖关系型数据库Mysql,故先安装Mysql $: yum install mysql-server mysql-client [yum安装] $: /etc/init.d/mysqld ...
- 通过sqoop将hdfs数据导入MySQL
简介:Sqoop是一款开源的工具,主要用于在Hadoop(Hive)与传统的数据库(mysql.postgresql...)间进行数据的传递,可以将一个关系型数据库(例如 : MySQL ,Oracl ...
- Sqoop与HDFS、Hive、Hbase等系统的数据同步操作
Sqoop与HDFS结合 下面我们结合 HDFS,介绍 Sqoop 从关系型数据库的导入和导出. Sqoop import 它的功能是将数据从关系型数据库导入 HDFS 中,其流程图如下所示. 我们来 ...
- 一个sqoop export案例中踩到的坑
案例分析: 需要将hdfs上的数据导出到mysql里的一张表里. 虚拟机集群的为:centos1-centos5 问题1: 在centos1上将hdfs上的数据导出到centos1上的mysql里: ...
- sqoop从hdfs 中导出数据到mysql
bin/sqoop export \ --connect "jdbc:mysql://mini1:3306/study?useUnicode=true&characterEncodi ...
随机推荐
- Poj 2662,2909 Goldbach's Conjecture (素数判定)
一.Description In 1742, Christian Goldbach, a German amateur mathematician, sent a letter to Leonhard ...
- DSP基础
CCS V5的使用 CCS安装与设置
- POJ3468(树状数组区间维护)
A Simple Problem with Integers Time Limit: 5000MS Memory Limit: 131072K Total Submissions: 89818 ...
- idea-spark-sbt 打包jar
1.打开idea下的terminal窗口 2.只打包部分项目 sbt insight-import/clean insight-import/assembly 这表示只打包主目录下的insight- ...
- java 代码。= -=
package com.da; //toString()方法, //Object类重写... public class ty { private String name; private int ag ...
- DTP模型之一:(XA协议之一)XA协议、二阶段2PC、三阶段3PC提交
XA协议 XA是一个分布式事务协议,由Tuxedo提出.XA中大致分为两部分:事务管理器和本地资源管理器.其中本地资源管理器往往由数据库实现,比如Oracle.DB2这些商业数据库都实现了XA接口,而 ...
- 阻止文件不被上传到iCloud
转自:http://blog.csdn.net/a921800467b/article/details/38386787 http://www.cocoachina.com/bbs/read.php? ...
- Spring IOC 少
控制反转好处 IOC:控制反转也叫依赖注入,IOC利用java反射机制,AOP利用代理模式.所谓控制反转是指,本来被调用者的实例是有调用者来创建的,这样的缺点是耦合性太强,IOC则是统一交给sprin ...
- 使用CocoaLumberjack时,自定义的log文件名
CocoaLumberjack是一个功能丰富的第三方日志系统.其生成的log文件,默认是自动命名的,如果需要自定义文件名,重载两个函数即可. // Log.h#import "CocoaLu ...
- android build system resource links
总体结构,参见这里:http://www.jayway.com/2012/10/24/a-practical-approach-to-the-aosp-build-system/ 一般应用的Andro ...