WPF整理-XAML构建后台类对象
1.XAML
接触WPF的第一眼就是XAML---XAML是用来描绘界面的。其实不然!
"Actually, XAML has nothing to do with UI. It's merely a declarative way of constructing objects and setting their properties.”
XAML和UI一点关系也没有,它仅仅是一种以声明方式来构建对象,设置对象属性的一种方式而已,和code behind file作用差不多。XAML这种声明方式构建对象的好处是,程序员只管声明自己要什么,至于如何构建则不需要考虑。
XAML对WPF来讲,也不是必须的。我们可以轻松实现一个WPF工程,没有任何XAML。
XML也不是WPF才有,举个反例如在WF中XAML被用来构建工作流。
2.XAML和编译
"A XAML file is compiled by a XAML compiler that produces a binary version of the XAML, known as BAML. This BAML is stored as a resource inside the assembly and is parsed at runtime in the InitializeComponent call to create the actual objects. The result is bundled with the code behind file (the typical Window class is declared as partial, meaning there may be more source files describing the same class) to produce the final code for that class."
XAML文件首先由XAML编译器编译成二进制的BAML,并以资源的形式存储在程序集中,在运行时由InitializeComponent方法结合后台代码来构建最终的对象。
3.通过XAML来构建后台类对象-Single Object
譬如我们定义一个后台类。如下:
    class Book

    {

        public string Name { get; set; }

        public string Author { get; set; }

        public decimal Price { get; set; }

        public int YearPublished { get; set; }

    }
我们如何在XAML中访问这个类呢?
1.添加一个XAML映射,code snip如下:
<Window x:Class="CreatingCustomTypeInXaml.MainWindow"

        xmlns="http://schemas.microsoft.com/winfx/2006/xaml/presentation"

        xmlns:x="http://schemas.microsoft.com/winfx/2006/xaml"
     xmlns:local="clr-namespace:CreatingCustomTypeInXaml"
如果不在同一个程序集需要加上";assembly=程序集名称"。
2.这样使用
    <Grid>

        <Button  HorizontalAlignment="Left" Margin="129,82,0,0" VerticalAlignment="Top" Width="" Height="">

            <local:Book Name="WPF tutorial" Author="DebugLZQ" YearPublished="" Price="29.99"/>

        </Button>

    </Grid>
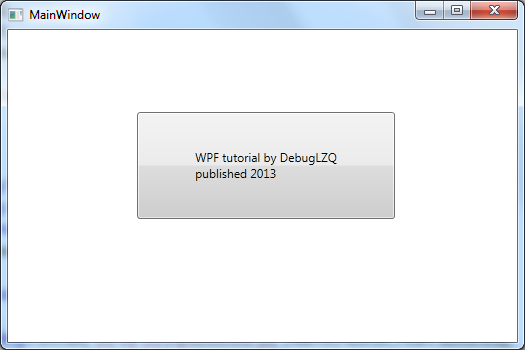
当然,为了使上面的代码正常工作,我们需要为Book类重写一个合适的ToString。
    class Book

    {

        public string Name { get; set; }

        public string Author { get; set; }

        public decimal Price { get; set; }

        public int YearPublished { get; set; }

        public override string ToString()

     {

      return string.Format("{0} by {1}\npublished {2}",Name,Author,YearPublished);

        }

    }
程序运行如下:
----
又如,可以在MVVM中可以在View中为Window的DataContent赋值ViewModel(虽不是最好的办法):
<Window x:Class="AsynchronousBindingDemo.MainWindow"

        xmlns="http://schemas.microsoft.com/winfx/2006/xaml/presentation"

        xmlns:x="http://schemas.microsoft.com/winfx/2006/xaml"

        xmlns:local="clr-namespace:AsynchronousBindingDemo"

        Title="MainWindow" Height="350" Width="525">

    <Window.DataContext>

        <local:MainWindowViewModel/>

    </Window.DataContext>

    <Grid>

        <TextBlock Text="{Binding Text1, IsAsync=True}" FontSize="60" HorizontalAlignment="Center" VerticalAlignment="Center"/>

    </Grid>

</Window>
参考DebugLZQ后续博文:
MVVM: Improve MVVM Application Performance Using Framework Features
View and ViewModel Mapping using MEFedMVVM
4.通过XAML来构建后台类对象-Collection Object
上面我们是在XAML中构建简单的Single Object,如果我们需要构建一个数组,该如何做呢?
如,我们有如下一个类:
    public class Person

    {

        public string Name { get; set; }

        public int Age { get; set; }

    }
现在我们需要用xaml构建这个类的数组。
我们在C#中新增一个类:
    public class PersonList : List<Person>

    {

    }
上面这个类的目的是用来包装泛型List<Person>,因为泛型对象是无法再xaml中构建的。
其实,我们一般不用List,而是用ObservableCollection。请参考DebugLZQ后续博文:WPF整理-Binding to a Collection
如下使用:
xmlns:local="clr-namespace:CreatingCustomTypeInXaml"
        <ListBox  DisplayMemberPath="Age">

            <ListBox.ItemsSource>

                <local:PersonList>

                    <local:Person Name="DebugLZQ1" Age="26"/>

                    <local:Person Name="DebugLZQ2" Age="26"/>

                </local:PersonList>

            </ListBox.ItemsSource>

        </ListBox>
通常,我们会把XAML构建的对象放到Resource中。如下:
    <Window.Resources>

        <local:PersonList x:Key="personList">

            <local:Person Name="DebugLZQ1" Age="26"/>

            <local:Person Name="DebugLZQ2" Age="26"/>

        </local:PersonList>

    </Window.Resources>
<ListBox ItemsSource="{StaticResource personList}" DisplayMemberPath="Name"/>
当然,List<int>、List<string>。。。。相同。
运行如下:
附:MainWindow.xaml,MainWindow.xaml.cs
<Window x:Class="CreatingCustomTypeInXaml.MainWindow"

        xmlns="http://schemas.microsoft.com/winfx/2006/xaml/presentation"

        xmlns:x="http://schemas.microsoft.com/winfx/2006/xaml"

        xmlns:local="clr-namespace:CreatingCustomTypeInXaml"

        Title="MainWindow" Height="350" Width="525">

    <Window.Resources>

        <local:PersonList x:Key="personList">

            <local:Person Name="DebugLZQ1" Age="26"/>

            <local:Person Name="DebugLZQ2" Age="26"/>

        </local:PersonList>

    </Window.Resources>

    <StackPanel>

        <Grid>

            <Button  HorizontalAlignment="Left" Margin="129,82,0,0" VerticalAlignment="Top" Width="258" Height="107">

                <local:Book Name="WPF tutorial" Author="DebugLZQ" YearPublished="2013" Price="29.99"/>

            </Button>

        </Grid>

        <ListBox ItemsSource="{StaticResource personList}" DisplayMemberPath="Name"/>

        <ListBox  DisplayMemberPath="Age">

            <ListBox.ItemsSource>

                <local:PersonList>

                    <local:Person Name="DebugLZQ1" Age="26"/>

                    <local:Person Name="DebugLZQ2" Age="26"/>

                </local:PersonList>

            </ListBox.ItemsSource>

        </ListBox>

    </StackPanel>

</Window>
using System;

using System.Collections.Generic;

using System.Linq;

using System.Text;

using System.Threading.Tasks;

using System.Windows;

using System.Windows.Controls;

using System.Windows.Data;

using System.Windows.Documents;

using System.Windows.Input;

using System.Windows.Media;

using System.Windows.Media.Imaging;

using System.Windows.Navigation;

using System.Windows.Shapes;

namespace CreatingCustomTypeInXaml

{

    /// <summary>

    /// Interaction logic for MainWindow.xaml

    /// </summary>

    public partial class MainWindow : Window

    {

        public MainWindow()

        {

            InitializeComponent();

        }

    }

    public class Person

    {

        public string Name { get; set; }

        public int Age { get; set; }

    }

    public class PersonList : List<Person>

    {

    }

}
5.通过XAML构建---Static对象
MainWindowTextSettings.cs如下:
using System.Windows.Media;

namespace StaticCliassInXamlDemo

{

    public class MainWindowTextSettings

    {

        public static double FontSize = ;

        public static string StringValue = "Customer customized value";

        public static Brush ForeGround = new SolidColorBrush(Colors.Red);

    }

}
MainWindow.xaml如下:
<Window x:Class="StaticCliassInXamlDemo.MainWindow"

        xmlns="http://schemas.microsoft.com/winfx/2006/xaml/presentation"

        xmlns:x="http://schemas.microsoft.com/winfx/2006/xaml"

        xmlns:oem="clr-namespace:StaticCliassInXamlDemo"

        Title="MainWindow" Height="350" Width="525">

    <Grid>

        <TextBlock Text="{x:Static oem:MainWindowTextSettings.StringValue}"

                    FontSize="{x:Static oem:MainWindowTextSettings.FontSize}"

                    Foreground="{x:Static oem:MainWindowTextSettings.ForeGround}"

                   TextTrimming="CharacterEllipsis"/>

    </Grid>

</Window>
效果如下: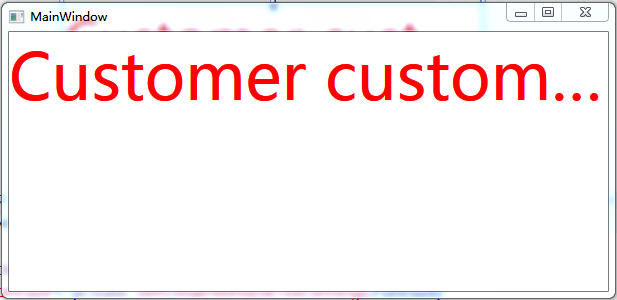
希望对你有帮助~
WPF整理-XAML构建后台类对象的更多相关文章
- WPFS数据绑定(要是后台类对象的属性值发生改变,通知在“client界面与之绑定的控件值”也发生改变须要实现INotitypropertyChanged接口)
WPFS数据绑定(要是后台类对象的属性值发生改变,通知在"client界面与之绑定的控件值"也发生改变须要实现INotitypropertyChanged接口) MainWindo ...
- WPF整理-XAML访问静态属性
"XAML provides an easy way to set values of properties—type converters and the extended propert ...
- WPF整理-自定义一个扩展标记(custom markup extension)
"Markup extensions are used to extend the capabilities of XAML, by providing declarativeoperati ...
- WPF整理-使用用户选择主题的颜色和字体
“Sometimes it's useful to use one of the selected colors or fonts the user has chosen in theWindows ...
- WPF 为资源字典 添加事件响应的后台类
原文:WPF 为资源字典 添加事件响应的后台类 前言,有许多同学在写WPF程序时在资源字典里加入了其它控件,但又想写事件来控制这个控件,但是资源字典没有CS文件,不像窗体XAML还有一个后台的CS文件 ...
- 整理:WPF中Xaml中绑定枚举的写法
原文:整理:WPF中Xaml中绑定枚举的写法 目的:在Combobox.ListBox中直接绑定枚举对象的方式,比如:直接绑定字体类型.所有颜色等枚举类型非常方便 一.首先用ObjectDataPro ...
- WPF{ComboBox绑定类对象, 下拉列显示的值,与取到的值}
DisplayMemberPath 是用来显示下拉列表的值 SelectedValuePath是用来取得选中项的值. ComboBox绑定类对象, 下拉列显示的值,与取到的值 string. Join ...
- 分享知识-快乐自己:SpringMvc整合遇到-前台传JSON参数,后台实体类对象接收
前台数据转JSON对象: /** * * @param $myFrom:from表单 * @returns {{}} */ function from($myFrom) { var ebookEntr ...
- WPF系列(1)WPF和XAML基础
终于下定决心开始更新WPF一个系列的文章,这里主要是出于两个目的,一是自己对所学的知识有一个系统的总结,二十希望能对其他人有些帮助,如果您觉得我写的不好,欢迎提意见. 那么既然我要开始写WPF,那我们 ...
随机推荐
- CentOS6.3 编译安装LAMP(4):编译安装 PHP5.3.27
所需源码包: /usr/local/src/PHP-5.3.27/libmcrypt-2.5.8.tar.gz /usr/local/src/PHP-5.3.27/mhash-0.9.9.9.tar. ...
- 在浏览器上直接输入url 时,中文传参乱码问题
这样的地址 xxx.asp?name=中国 ,通过 超链接打开这个链接 ,xxx.asp能够成才接收参数,但是如果将地址直接放到浏览器地址栏上,回车, xxx.asp就无法正确接收中文参数,一直显示 ...
- 深入浅出iOS事件机制
原文地址: http://zhoon.github.io/ios/2015/04/12/ios-event.html 本文章将讲解有关iOS事件的传递机制,如有错误或者不同的见解,欢迎留言指出. iO ...
- Redis3.0 配置文件说明
背景: 以前有篇文章已经结果过了,现在复习一下,对Redis3.0进行说明: 参数说明: #redis.conf # Redis configuration file example. # ./red ...
- 用Myeclipse,包名上有小红叉(表示错误),但是包中的类都是没有错误的+struts2继承ActionSupport时package前面出错
使用Eclipse 进行项目开发,在实现类中的方法前面如果添加@Override就提示“Multiple markers at this line”的错误,问题描述如下 应该是JDK版本的问题, 右击 ...
- MySQL通过增加用户实现远程连接数据库
命令行进入mysql.exe所在目录 mysql -uroot -padmin 例子: grant all privileges on *.* to joe@localhost identified ...
- qt creator 源代码中含有中文编译报错
Tools-Options-Text Editor-Behavior-File Encoding-Default encoding:UTF-8 Tools-Options-Text Editor-Be ...
- October 22nd Week 43rd Saturday, 2016
Beware the barrenness of a busy life. 当心忙碌的生活荒芜了人生. Recently I was busy in debugging an equipment, I ...
- 数据库SQL语句练习题
一. 设有一数据库,包括四个表:学生表(Student).课程表(Course).成绩表(Score)以及教师信息表(Teacher).四个表的结构分别如表1-1的表(一)~表( ...
- 【Java EE 学习 24 下】【注解在数据库开发中的使用】【反射+注解+动态代理在事务中的应用service层】
一.使用注解可以解决JavaBean和数据库中表名不一致.字段名不一致.字段数量不一致的问题. 1.Sun公司给jdbc提供的注解 @Table.@Column.@Id.@OneToMany.@One ...