Python-S9——Day100-Web前端框架之Vue
01 课程简介;
02 let和const;
03 箭头函数;
04 对象的单体模式;
05 nodejs介绍和npm操作;
06 webpack、babel介绍和vue的第一个案例;
07 昨日内容回顾;
08 if指令和v-on指令;
09 指令系统介绍1;
10 指令系统介绍2;
11 计算属性的使用和v-mode的实现原理;
01 课程简介;
1.1 视频呢少看,不能依赖视频,做笔记,加速看,辅助性质;
1.2 博客坚持写;
1.3 html——语义化,除了语义,基本什么都没有了,网页的结构;
1.4 css——样式表现,基本没有逻辑可言,需要记住的东西比较多,排版和布局;
1.5 Python全栈,目标前后端玩的溜溜的!
1.6 js 网页的行为,ESMAScript,JSdom,bom;
1.7 jQuery操作,适应快速开发的节奏;
1.8 Bootstrap;
1.9 Django课程(数据要展示);
1.10 前端的三大框架;
- React.js Facebook公司;
- Angular.js 谷歌公司;
- Vue.js 中国人尤雨溪发明的;语法简单,易用!尤雨溪个人采访:http://www.sohu.com/a/148644796_655394


02 let和const;
2.1 前置的准备学习;
2.1.1 ES6的简单语法;
2.1.2 强类型与弱类型的变量声明;
2.2 let和const
2.2.1 let和const.html
<!DOCTYPE html>
<html lang="en"> <head>
<meta charset="utf-8">
<meta http-equiv="X-UA-Compatible" content="IE=edge">
<meta name="viewport" content="width=device-width, initial-scale=1.0">
<title>Document</title>
</head> <body>
<script type="text/javascript">
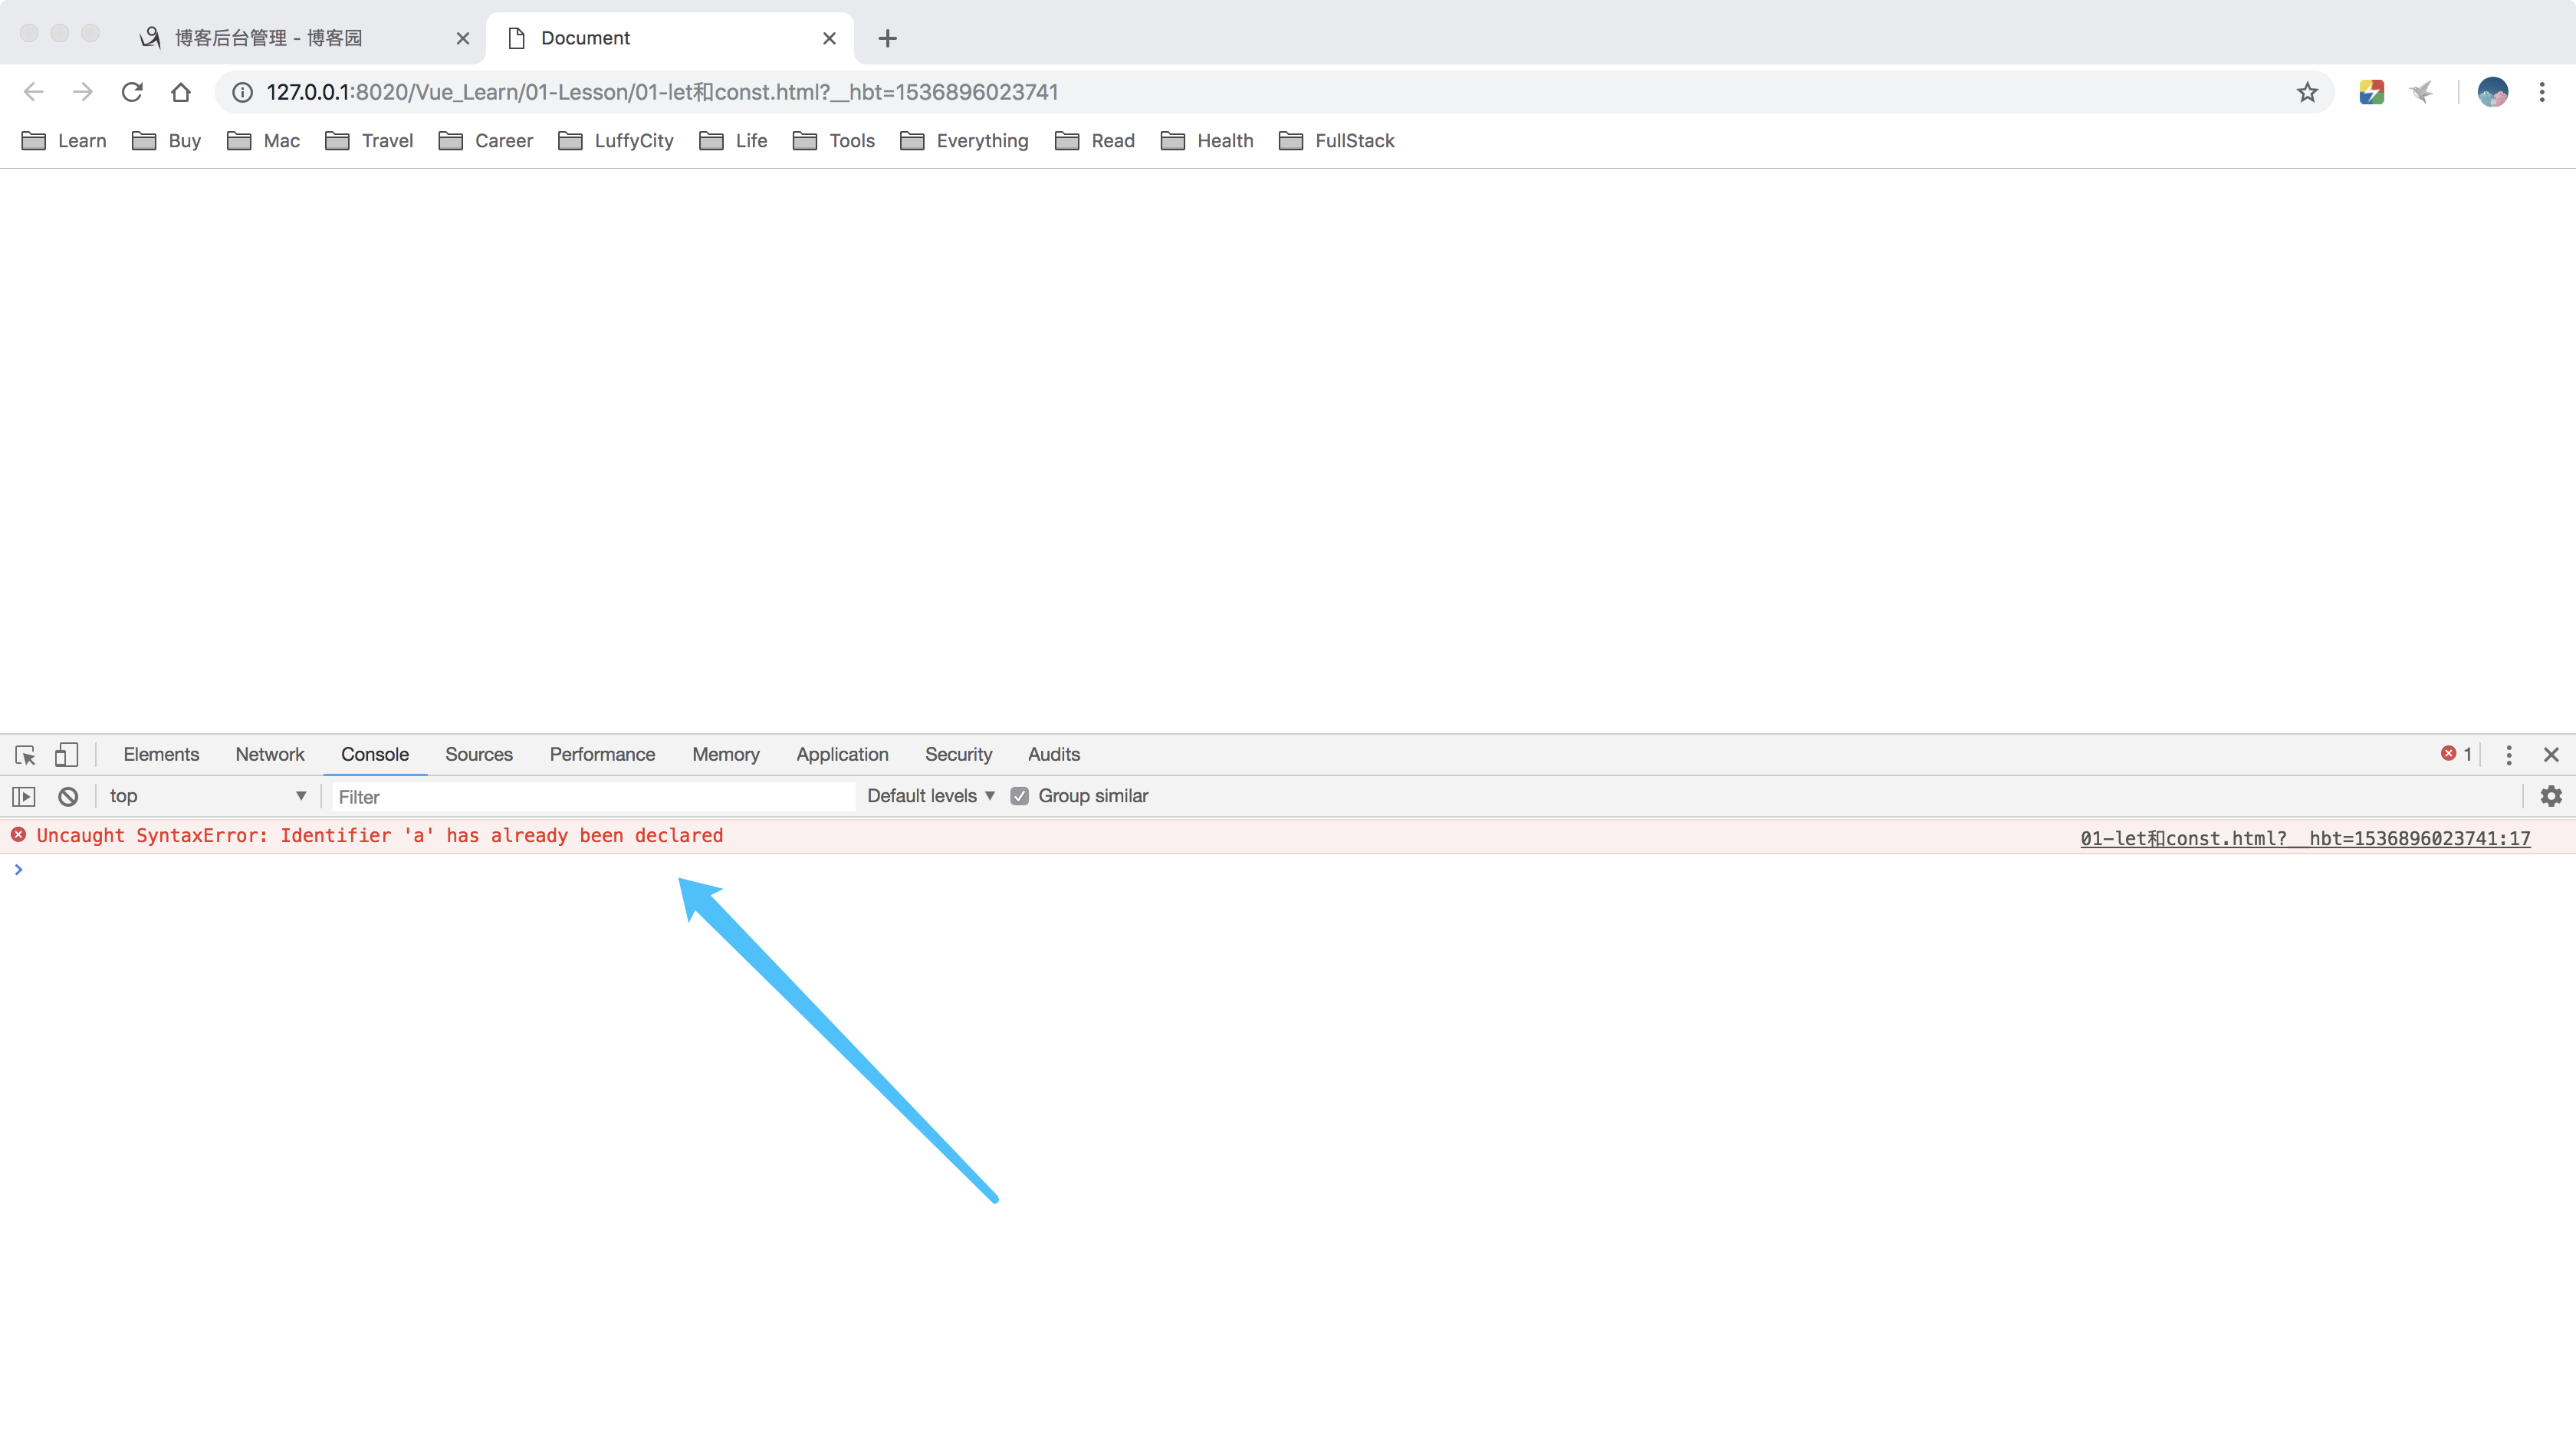
//let声明的变量是块级作用域时候,不能重复声明;
//let声明的变量,是块级作用域,不能重复声明;
{
// let a = 12;
// let a = 13;
// var a = 12;
// var a = 13;
}
//console.log(a);
// var a = [];
// for(let i = 0; i < 10; i++) {
// a[i] = function() {
// console.log(i);
// };
// }
// a[6](); //var~10,let~6;r
//let不存在变量提升;Js语言叫做“伪面向对象”;
// console.log(foo); //输出undefined;
// var foo = 2;
//const用来声明常量(即只读的变量,比如π), 一旦声明, 立即初始化, 且不能重复声明;
const PI = 3.1415926537
PI
PI = 3 //报错!Uncaught TypeError: Assignment to constant variable
</script>
</body> </html>
2.2.2 模板字符串;
<!DOCTYPE html>

<html lang="en">

    <head>

        <meta charset="utf-8">

        <meta http-equiv="X-UA-Compatible" content="IE=edge">

        <meta name="viewport" content="width=device-width, initial-scale=1.0">

        <title>Document</title>

    </head>

    <body>

        <script type="text/javascript">

            //js中拼接字符串和变量;

            var a = 1;

            var b = 2;

            var str1 = "哈哈哈" + a + "嘿嘿嘿" + b;

            //推荐使用反引号;

            var str2 = `哈哈哈${a}嘿嘿嘿${b}13811221893` ;

            console.log(str1,str2);

        </script>

    </body>

</html>
3 箭头函数
3.1 使用箭头函数的一些注意事项;
<!DOCTYPE html>

<html lang="en">

<head>

    <meta charset="utf-8">

    <meta http-equiv="X-UA-Compatible" content="IE=edge">

    <meta name="viewport" content="width=device-width, initial-scale=1.0">

    <title>03-箭头函数</title>

</head>

<body>

<script type="text/javascript">

    // var f = function (a) {

    //     return a

    //

    // };

    // f(1)

    //箭头函数;

    // var f = (a) => {

    //     return a;

    // }

    //function(){} <==> () => {}//箭头函数,联想Python的三元运算;

    //字面量方式创建对象;

    var person1 = {

        name: '日天',

        age: 30,

        fav: function () {

            //console.log('喜欢av1');//分号是结束的标记;

            //使用时候定义的对象;

            console.log(this);

            console.log(arguments);

            console.log(this.name);

        }

    };

    person1.fav();

    //以上改成箭头函数;

    //使用箭头函数的第1个坑!

    var person2 = {

        name: '日天',

        age: 30,

        fav: () => {

            //console.log('喜欢av2');//分号是结束的标记;

            //改成箭头函数后,此时,this就变成了定义时候所使用的对象;指向了我们的window;

            console.log(this);

            console.log(this.name);

        }

    };

    person2.fav();

    //使用箭头函数的第2个坑!arguments不能使用!

    var person3 = {

        name: '日天',

        age: 30,

        fav: () => {

            //console.log('喜欢av2');//分号是结束的标记;

            //改成箭头函数后,此时,this就变成了定义时候所使用的对象;指向了我们的window;

            console.log(this);

            //console.log(arguments);#Uncaught ReferenceError: arguments is not defined

            console.log(this.name);

        }

    };

    person3.fav(1, 2, 3, 4, 5);

</script>

</body>

</html>
04 对象的单体模式;
4.1 使用let、const或者箭头函数的时候,要依据使用场景;
<!DOCTYPE html>

<html lang="en">

<head>

    <meta charset="utf-8">

    <meta http-equiv="X-UA-Compatible" content="IE=edge">

    <meta name="viewport" content="width=device-width, initial-scale=1.0">

    <title>04-对象的单体模式</title>

</head>

<body>

<script type="text/javascript">

    var person = {

        name: '崔晓昭',

        age: 26,

        //Vue的课程中,有很多这样的写法;

        fav() {

            console.log(this);

        }

    };

    person.fav();

</script>

</body>

</html>
es6的面向对象;
<!DOCTYPE html>

<html lang="en">

<head>

    <meta charset="utf-8">

    <meta http-equiv="X-UA-Compatible" content="IE=edge">

    <meta name="viewport" content="width=device-width, initial-scale=1.0">

    <title>06-ES6的面向对象</title>

</head>

<body>

<script type="text/javascript">

    //构造函数的方式创建类,此方法称之为面向对象;

    // function Animal(name, age) {

    //     this.name = name;

    //     this.age = age;

    // }

    //

    // Animal.prototype.showName = function () {

    //     console.log(this.name)

    // };

    // Animal.prototype.showName = function () {

    //     console.log(this.name)

    // };

    // Animal.prototype.showName = function () {

    //     console.log(this.name)

    // };

    // Animal.prototype.showName = function () {

    //     console.log(this.name)

    // };

    // var dog = new Animal('天晴天朗', 26);

    class Animal {

        constructor(name, age) {

            this.name = name;

            this.age = age;

        }//此处没有逗号,只有在类中才有此种写法!

        showName() {

            console.log(this.name)

        }

    }

    var d = new Animal('崔晓丝', 28);

    d.showName();

</script>

</body>

</html>
05 nodejs介绍和npm操作;
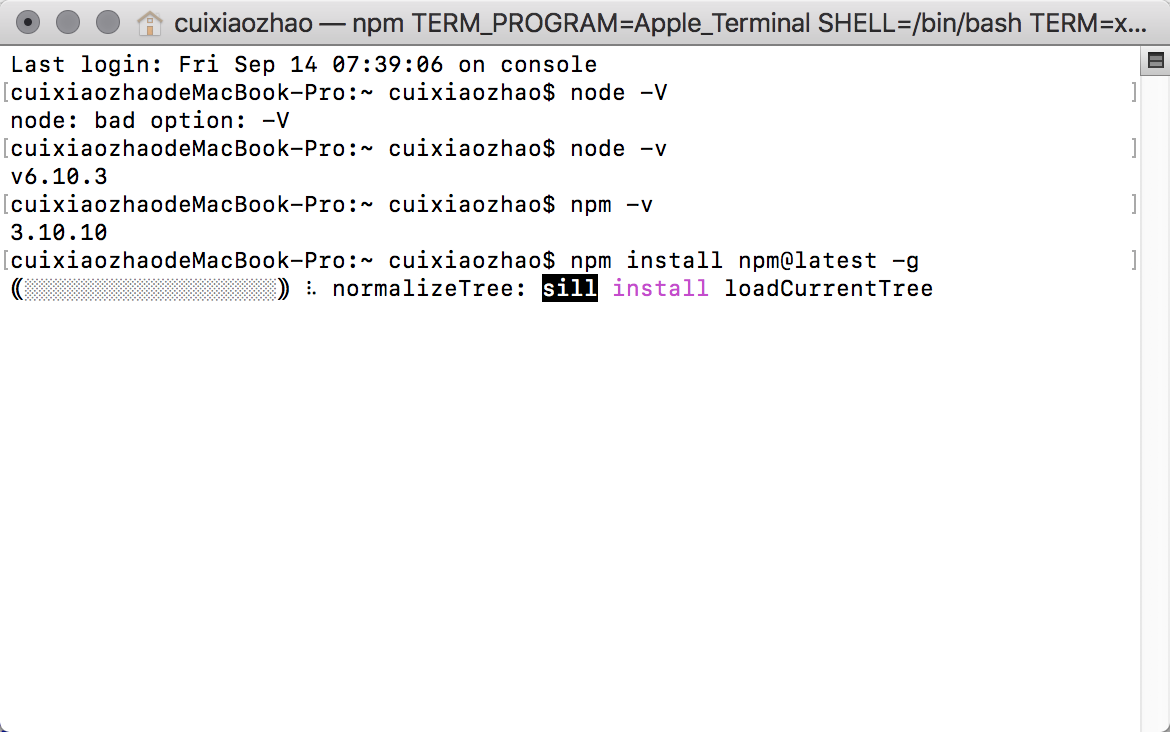
5.1 node.js的下载和安装;
https://nodejs.org/download/release/v6.10.3/
- node -v
- npm -v
- npm install npm@latest -g
5.2 npm的使用;
cuixiaozhaodeMacBook-Pro:~ cuixiaozhao$ cd /Users/cuixiaozhao/WebstormProjects/Vue_Learn/02-Lessons
cuixiaozhaodeMacBook-Pro:02-Lessons cuixiaozhao$ pwd
/Users/cuixiaozhao/WebstormProjects/Vue_Learn/02-Lessons
cuixiaozhaodeMacBook-Pro:02-Lessons cuixiaozhao$ ls
cuixiaozhaodeMacBook-Pro:02-Lessons cuixiaozhao$ mkdir images
cuixiaozhaodeMacBook-Pro:02-Lessons cuixiaozhao$ mkdir js
cuixiaozhaodeMacBook-Pro:02-Lessons cuixiaozhao$ mkdir css
cuixiaozhaodeMacBook-Pro:02-Lessons cuixiaozhao$ mkdir fonts
cuixiaozhaodeMacBook-Pro:02-Lessons cuixiaozhao$ pwd
/Users/cuixiaozhao/WebstormProjects/Vue_Learn/02-Lessons
cuixiaozhaodeMacBook-Pro:02-Lessons cuixiaozhao$ cl
-bash: cl: command not found
cuixiaozhaodeMacBook-Pro:02-Lessons cuixiaozhao$ clear cuixiaozhaodeMacBook-Pro:02-Lessons cuixiaozhao$ pwd
/Users/cuixiaozhao/WebstormProjects/Vue_Learn/02-Lessons
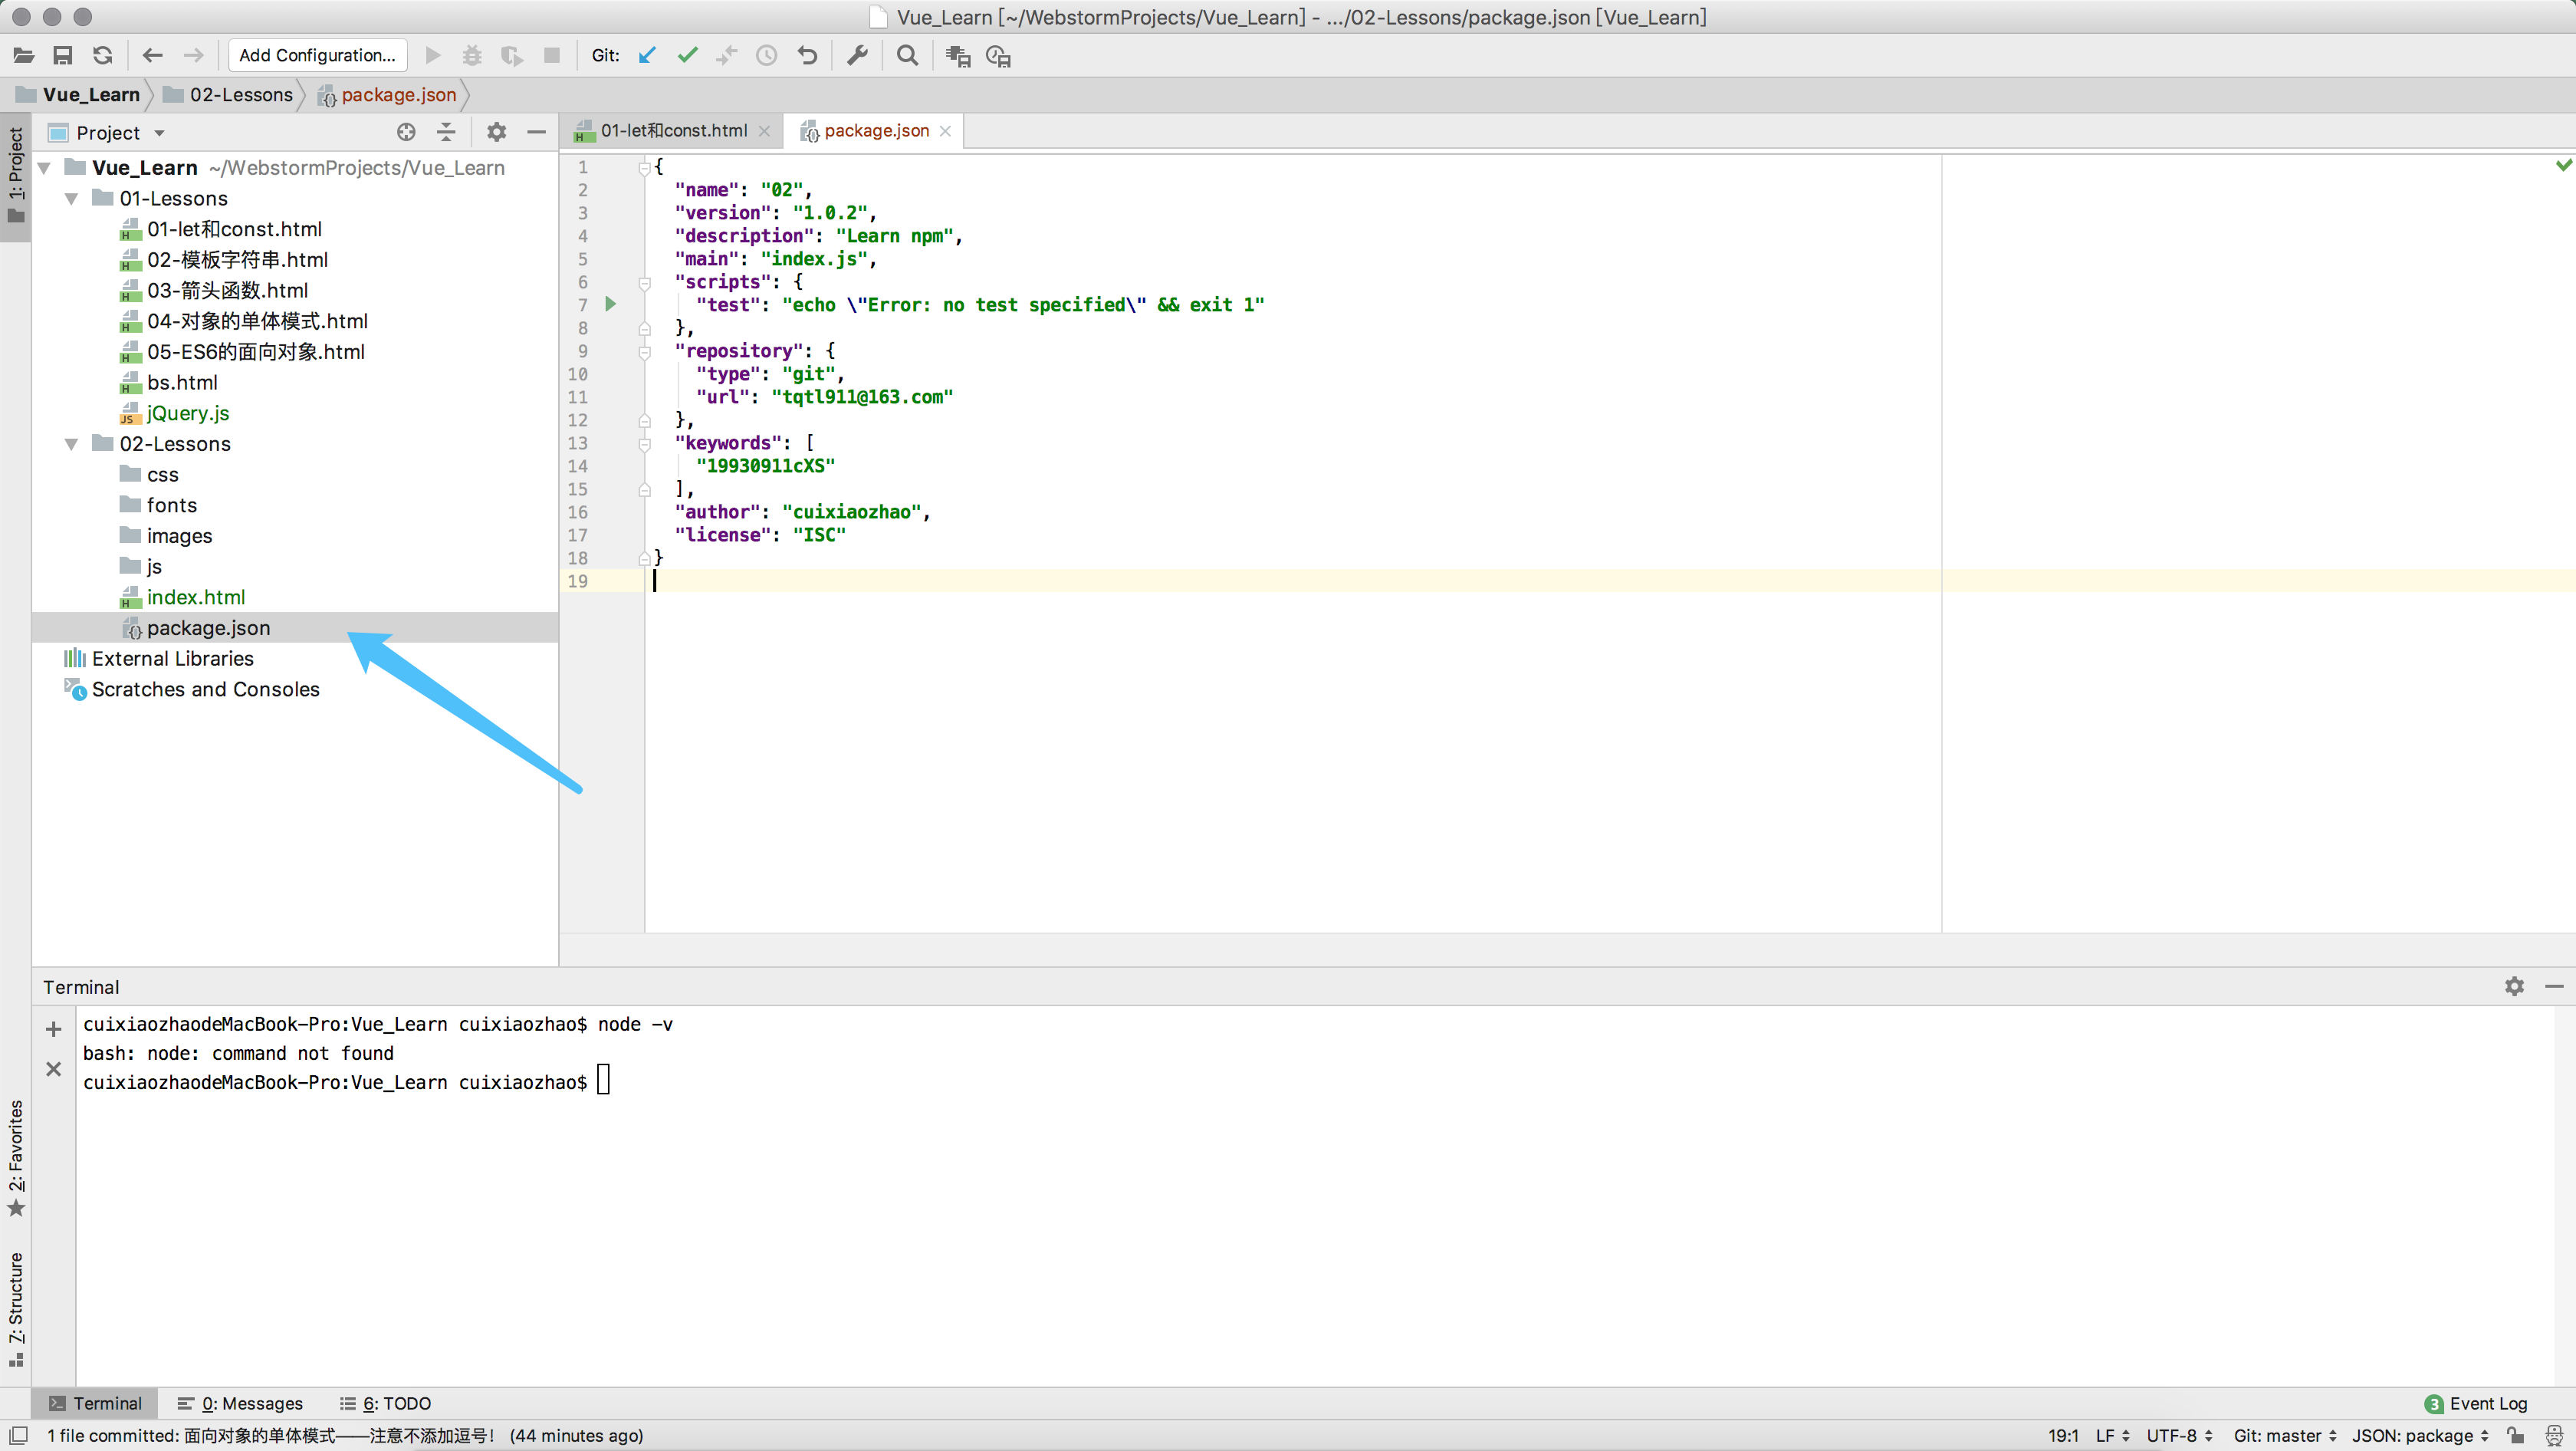
cuixiaozhaodeMacBook-Pro:02-Lessons cuixiaozhao$ npm init
This utility will walk you through creating a package.json file.
It only covers the most common items, and tries to guess sensible defaults. See `npm help json` for definitive documentation on these fields
and exactly what they do. Use `npm install <pkg>` afterwards to install a package and
save it as a dependency in the package.json file. Press ^C at any time to quit.
package name: (02-lessons) 02
version: (1.0.0) 1.0.2
description: Learn npm
entry point: (index.js)
test command:
git repository: tqtl911@163.com
keywords: 19930911cXS
author: cuixiaozhao
license: (ISC) None
Sorry, license should be a valid SPDX license expression (without "LicenseRef"), "UNLICENSED", or "SEE LICENSE IN <filename>".
license: (ISC)
About to write to /Users/cuixiaozhao/WebstormProjects/Vue_Learn/02-Lessons/package.json: {
"name": "",
"version": "1.0.2",
"description": "Learn npm",
"main": "index.js",
"scripts": {
"test": "echo \"Error: no test specified\" && exit 1"
},
"repository": {
"type": "git",
"url": "tqtl911@163.com"
},
"keywords": [
"19930911cXS"
],
"author": "cuixiaozhao",
"license": "ISC"
} Is this OK? (yes) yes
cuixiaozhaodeMacBook-Pro:02-Lessons cuixiaozhao$
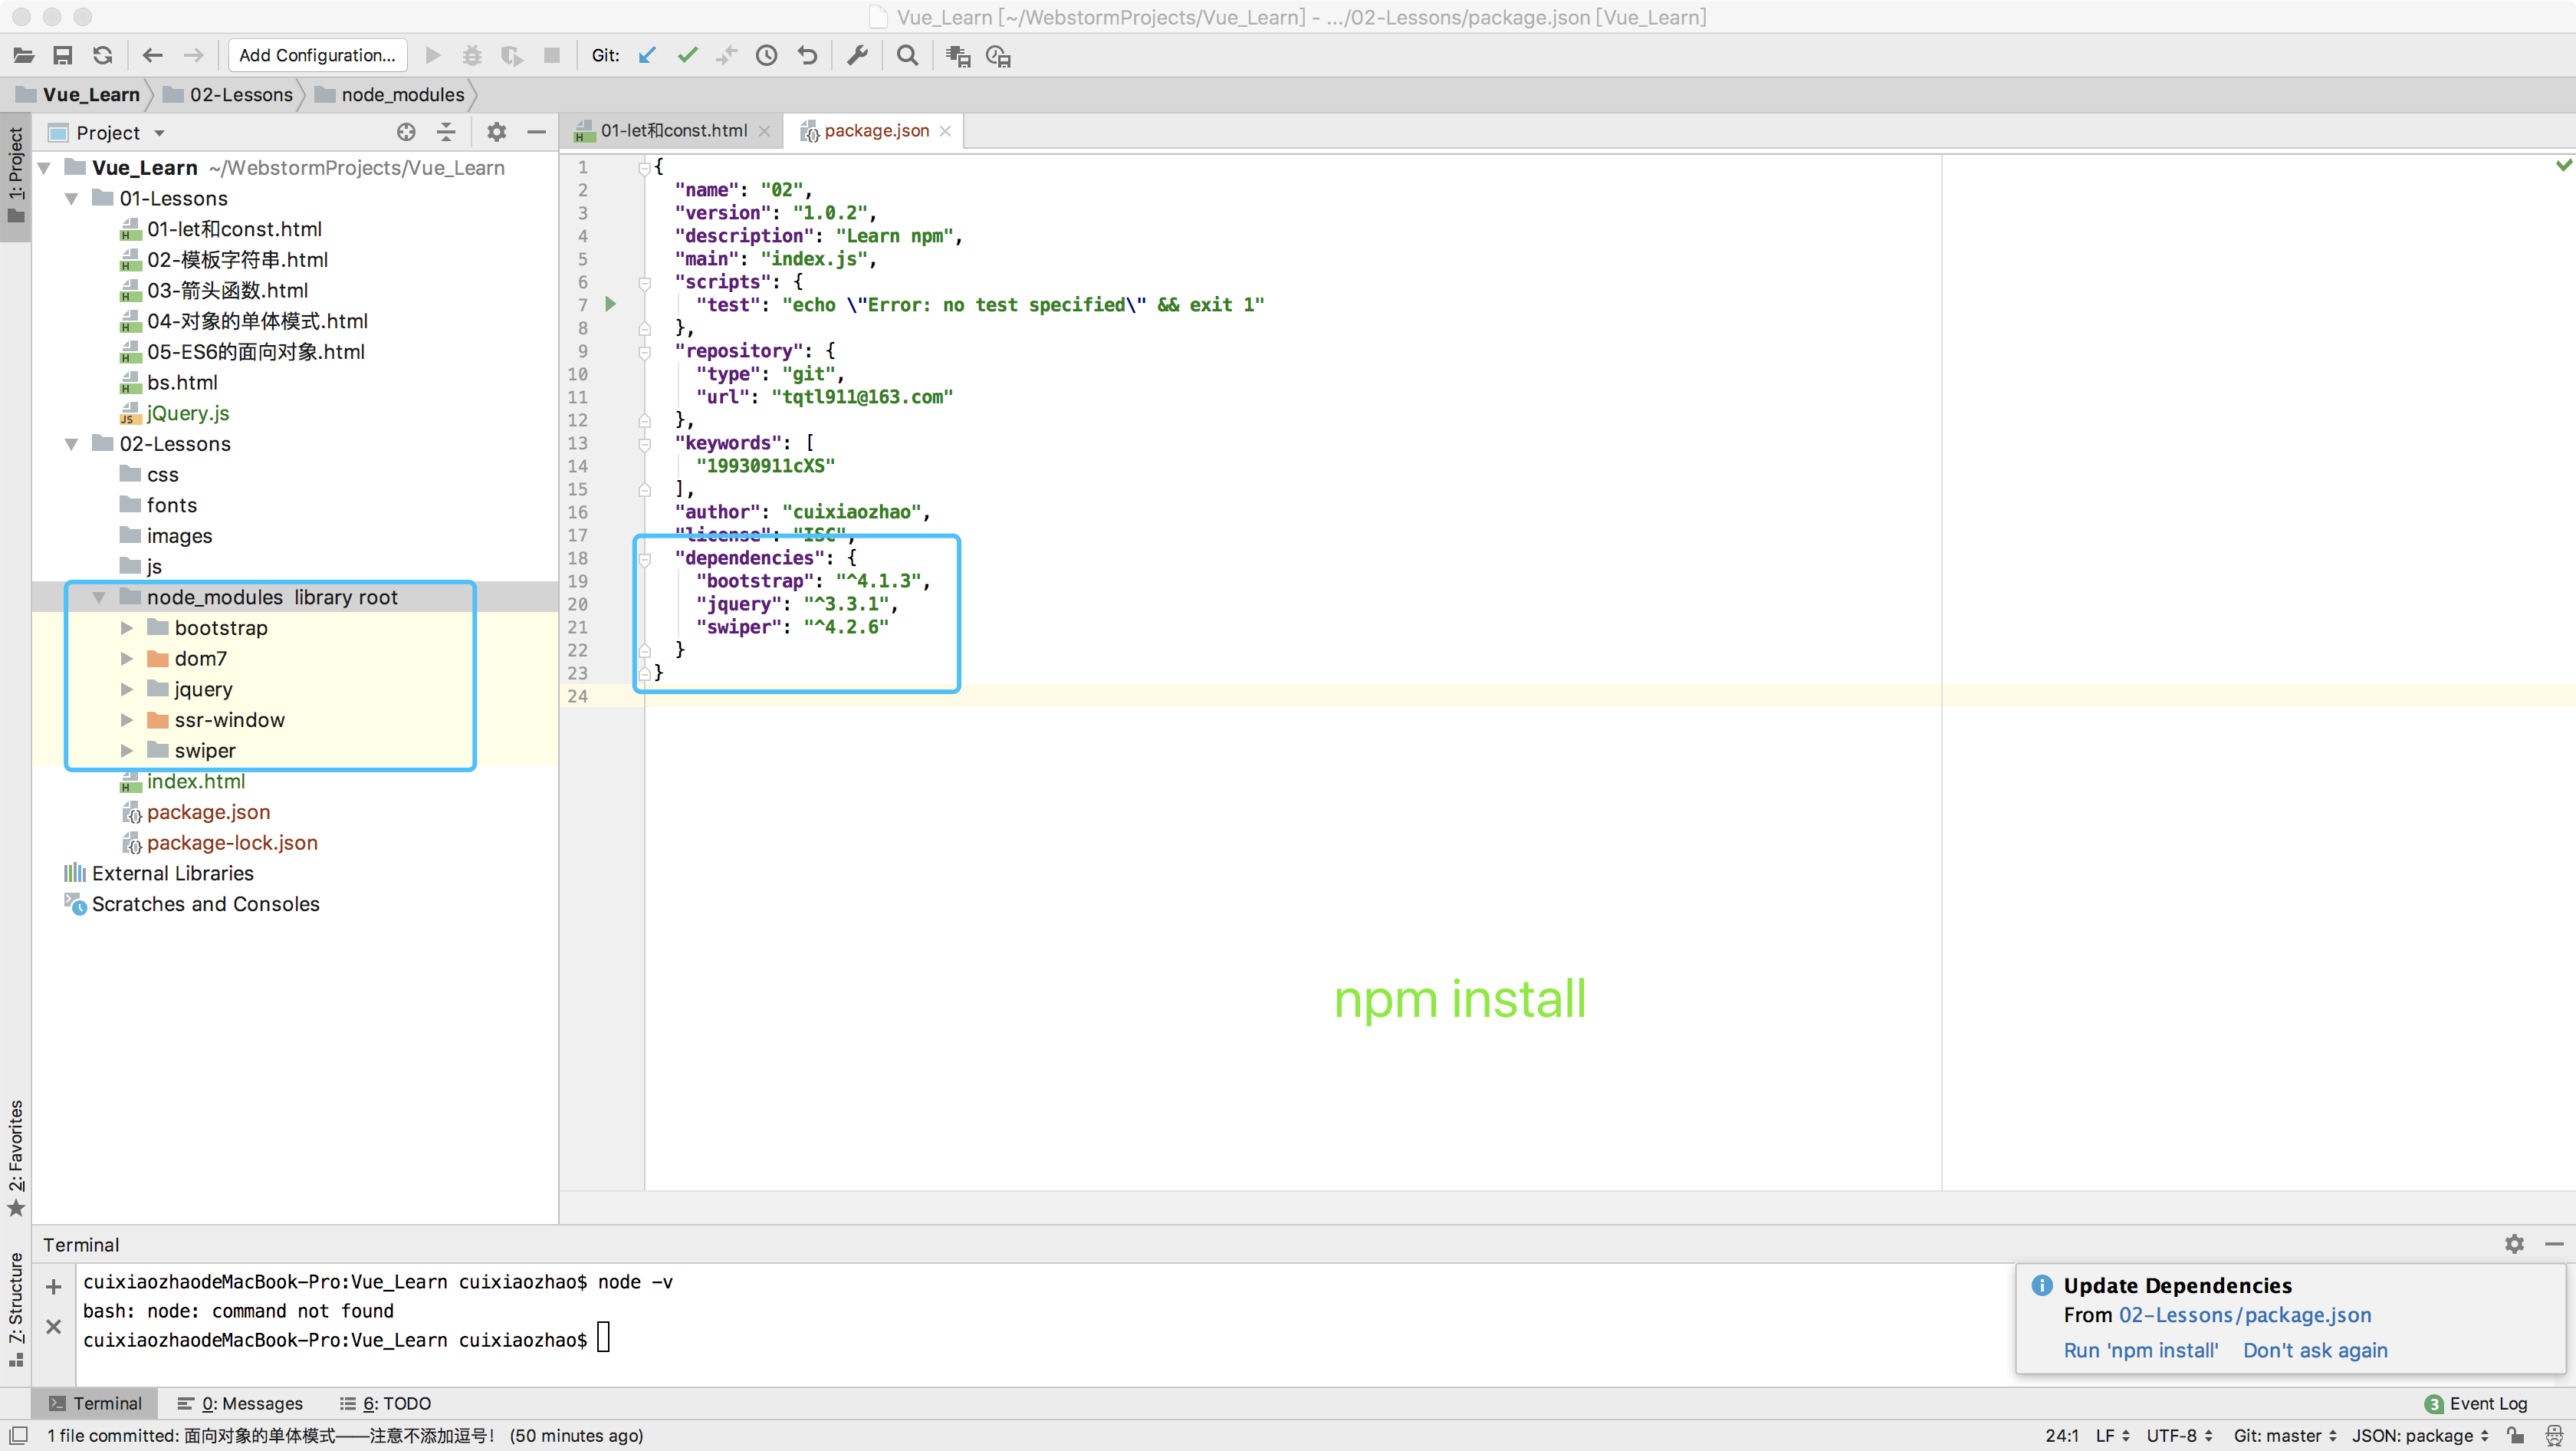
5.3 一定要有初始化的文件:package.json;
5.4 在前端中,一个js文件就是一个模块;
5.5 webpack是一个打包机,还具备编译功能;
5.6 解析代码支持多种浏览器的工具-babel,在线调试预览URL:https://babeljs.io/repl
5.7 模块化的方法;
- Commonjs;
- AMD;
- CMD;
- ES6Module;
5.8 具备自学能力!

5.9 Vue的介绍;
5.9.1 易用;
5.9.2 灵活;
5.9.3 高效;
5.10 Vue的使用;
https://cn.vuejs.org/v2/guide/installation.html
06 webpack、babel介绍和vue的第一个案例;
<!DOCTYPE html>

<html lang="en">

<head>

    <meta charset="utf-8">

    <meta http-equiv="X-UA-Compatible" content="IE=edge">

    <meta name="viewport" content="width=device-width, initial-scale=1.0">

    <title>Title</title>

</head>

<body>

<div id="app">

    <h3>{{title}}</h3>

</div>

<script src="vue.js"></script>

<script>

    //1、创建Vue实例对象;

    //2、参数;

    var app = new Vue({

        el: "#app",

        data: {

            title: "崔晓昭"

        }

    })

</script>

</body>

</html>
07 昨日内容回顾;
7.1 let和const;
7.2 模板字符串``插变量,${变量名};
7.3 箭头函数function(){} 等价于 ()=>{};
7.4 this的指向问题;
7.5 arguments不能使用;
7.6 对象的单体模式;
var person = {
name:"张三",
fav(){
}
}
7.7 ES6的面向对象;
7.8 模块化(esMoudel) export与import共存;
7.9 在前端中,一个js文件就是一个模块;
7.10 前端工具;
- webpack:打包机,它能将我们的html、css、js、png、font进行打包,放置于服务器;loader加载器;
- 插件:一个功能,js文件;
- 组件:bootstrap组件,包含js、html、css,包含插件,比如使用bootstrap前必须引入jQuery插件;
- 压缩:html、css、js以及js混淆,图片压缩——grunt、gulp
- node.js +webpack可以实现本地效果,支持热重载;
- node.js服务端语言;
- npm init --yes;
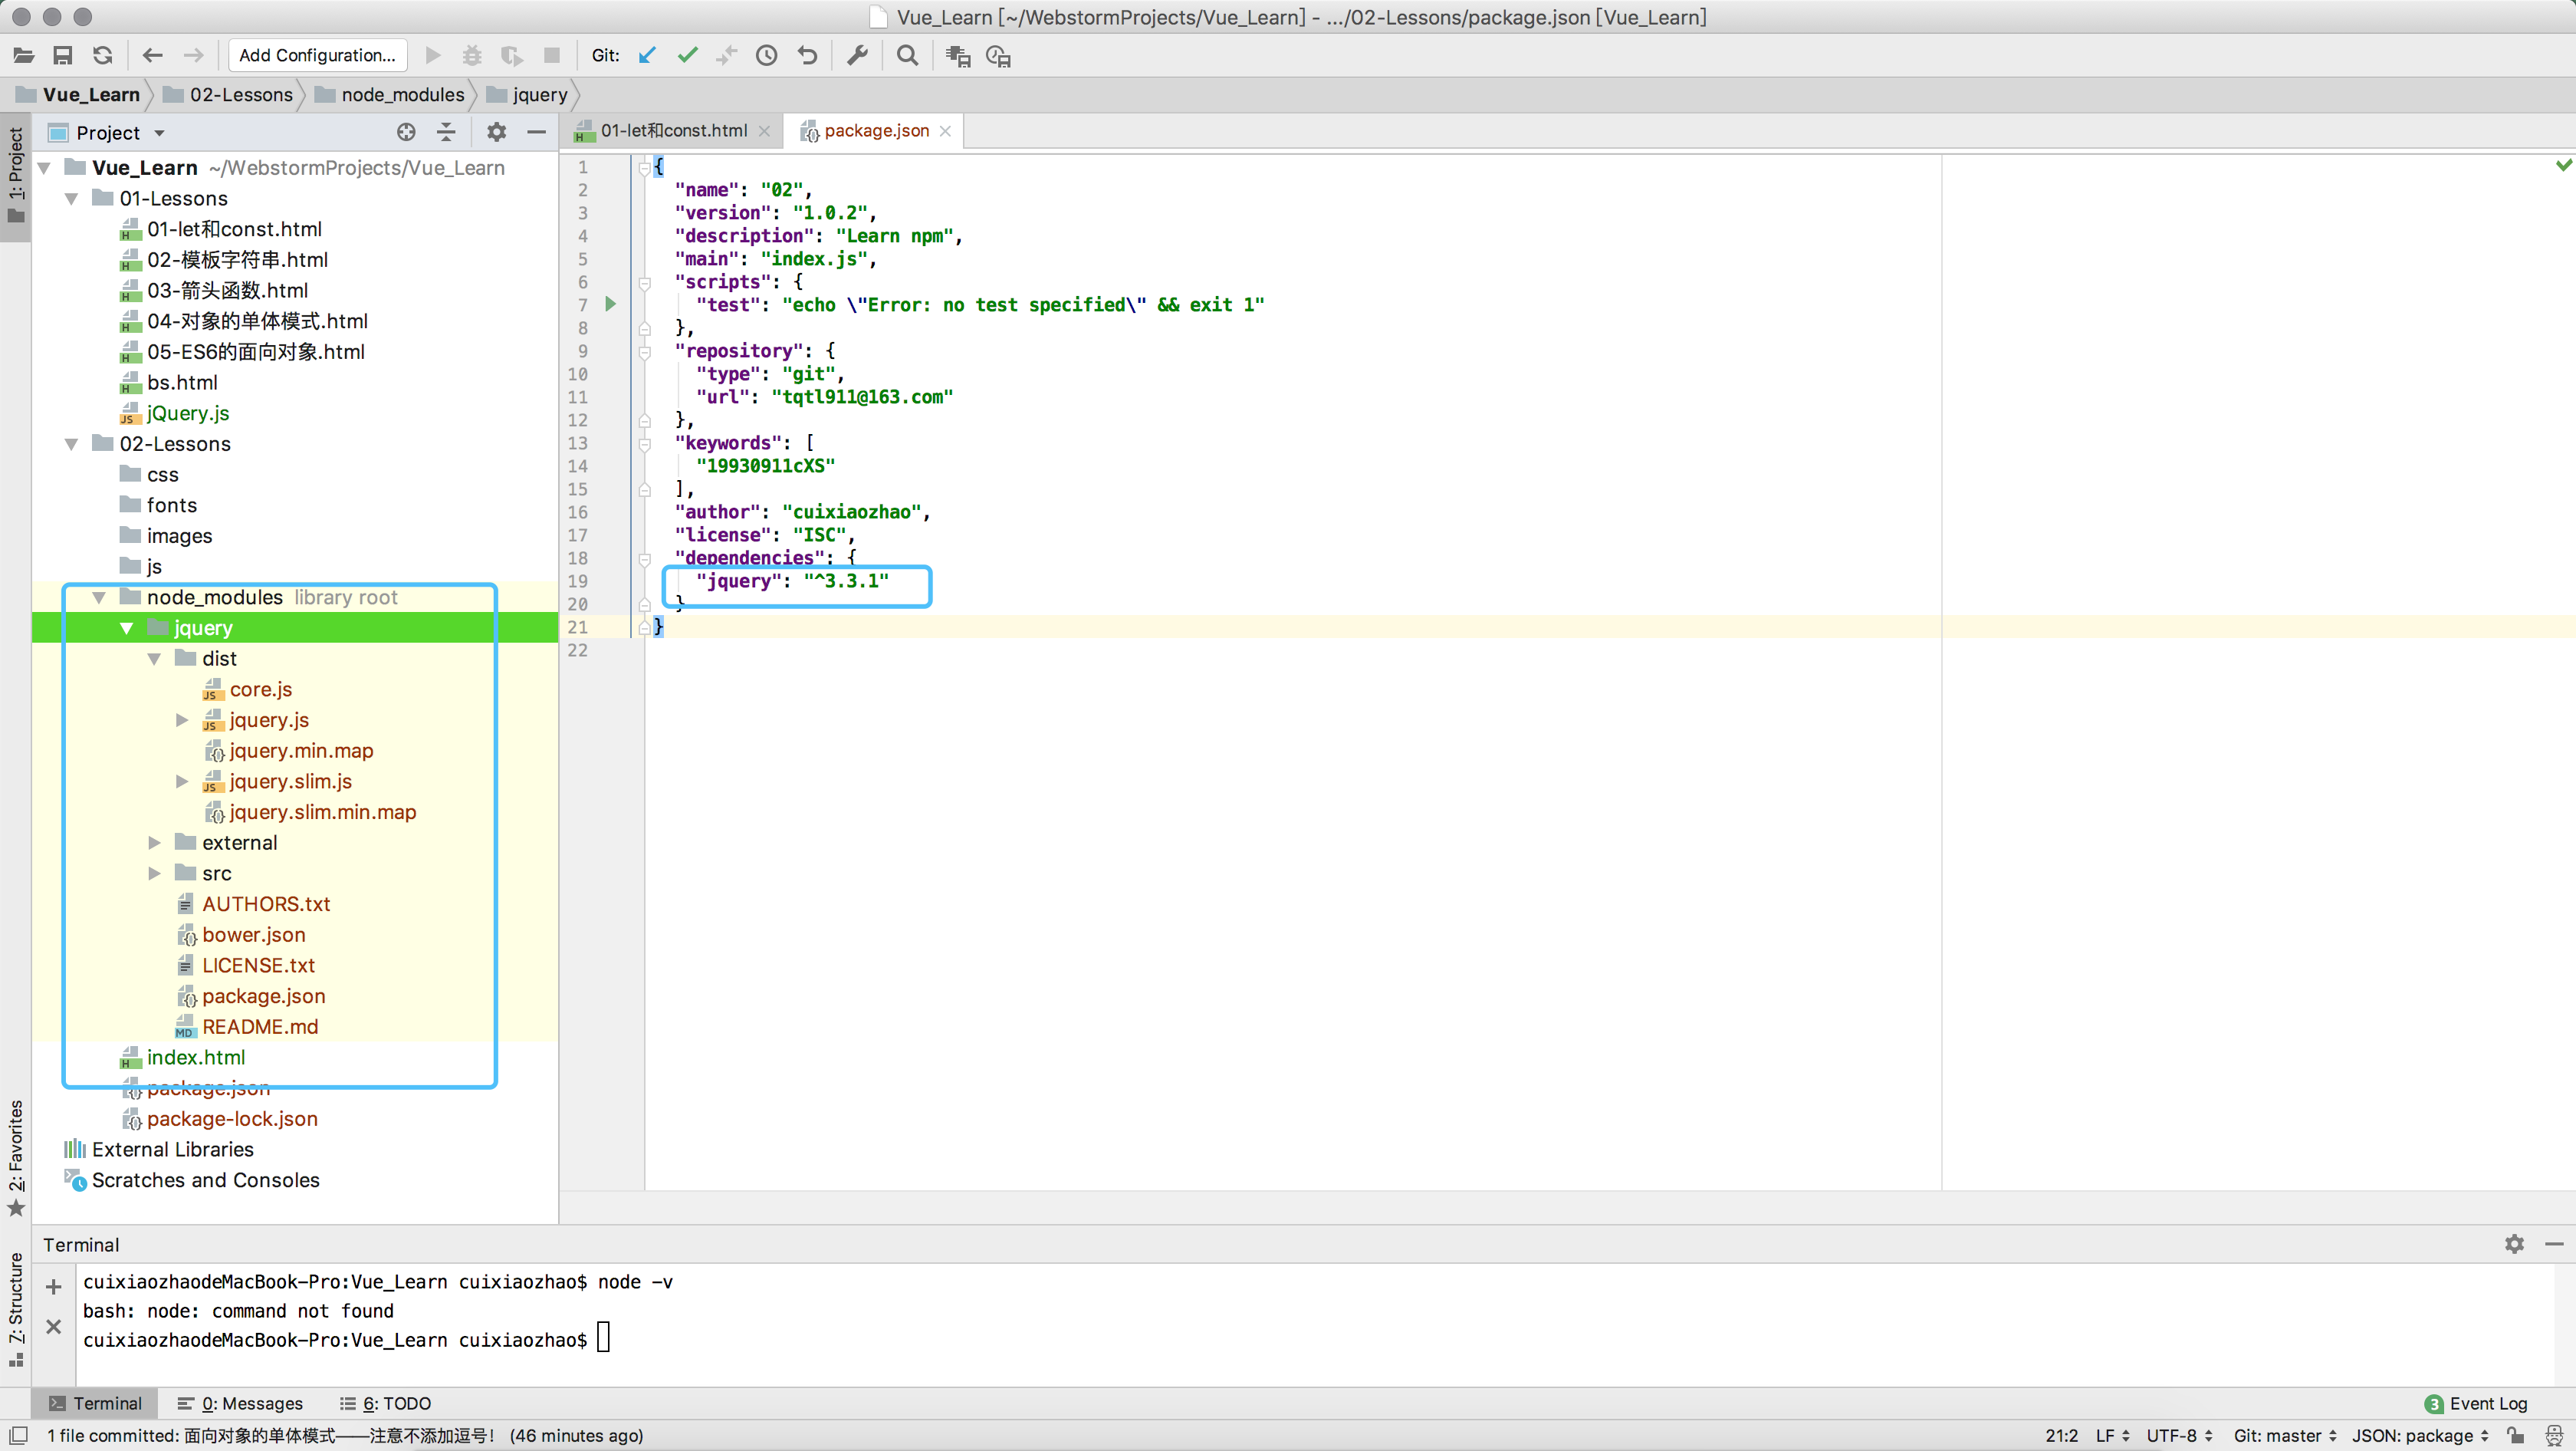
- npm install jquery --save;
- npm install webpack --save-dev;
- npm install 出错,使用npm rebuild 进行重新编译;
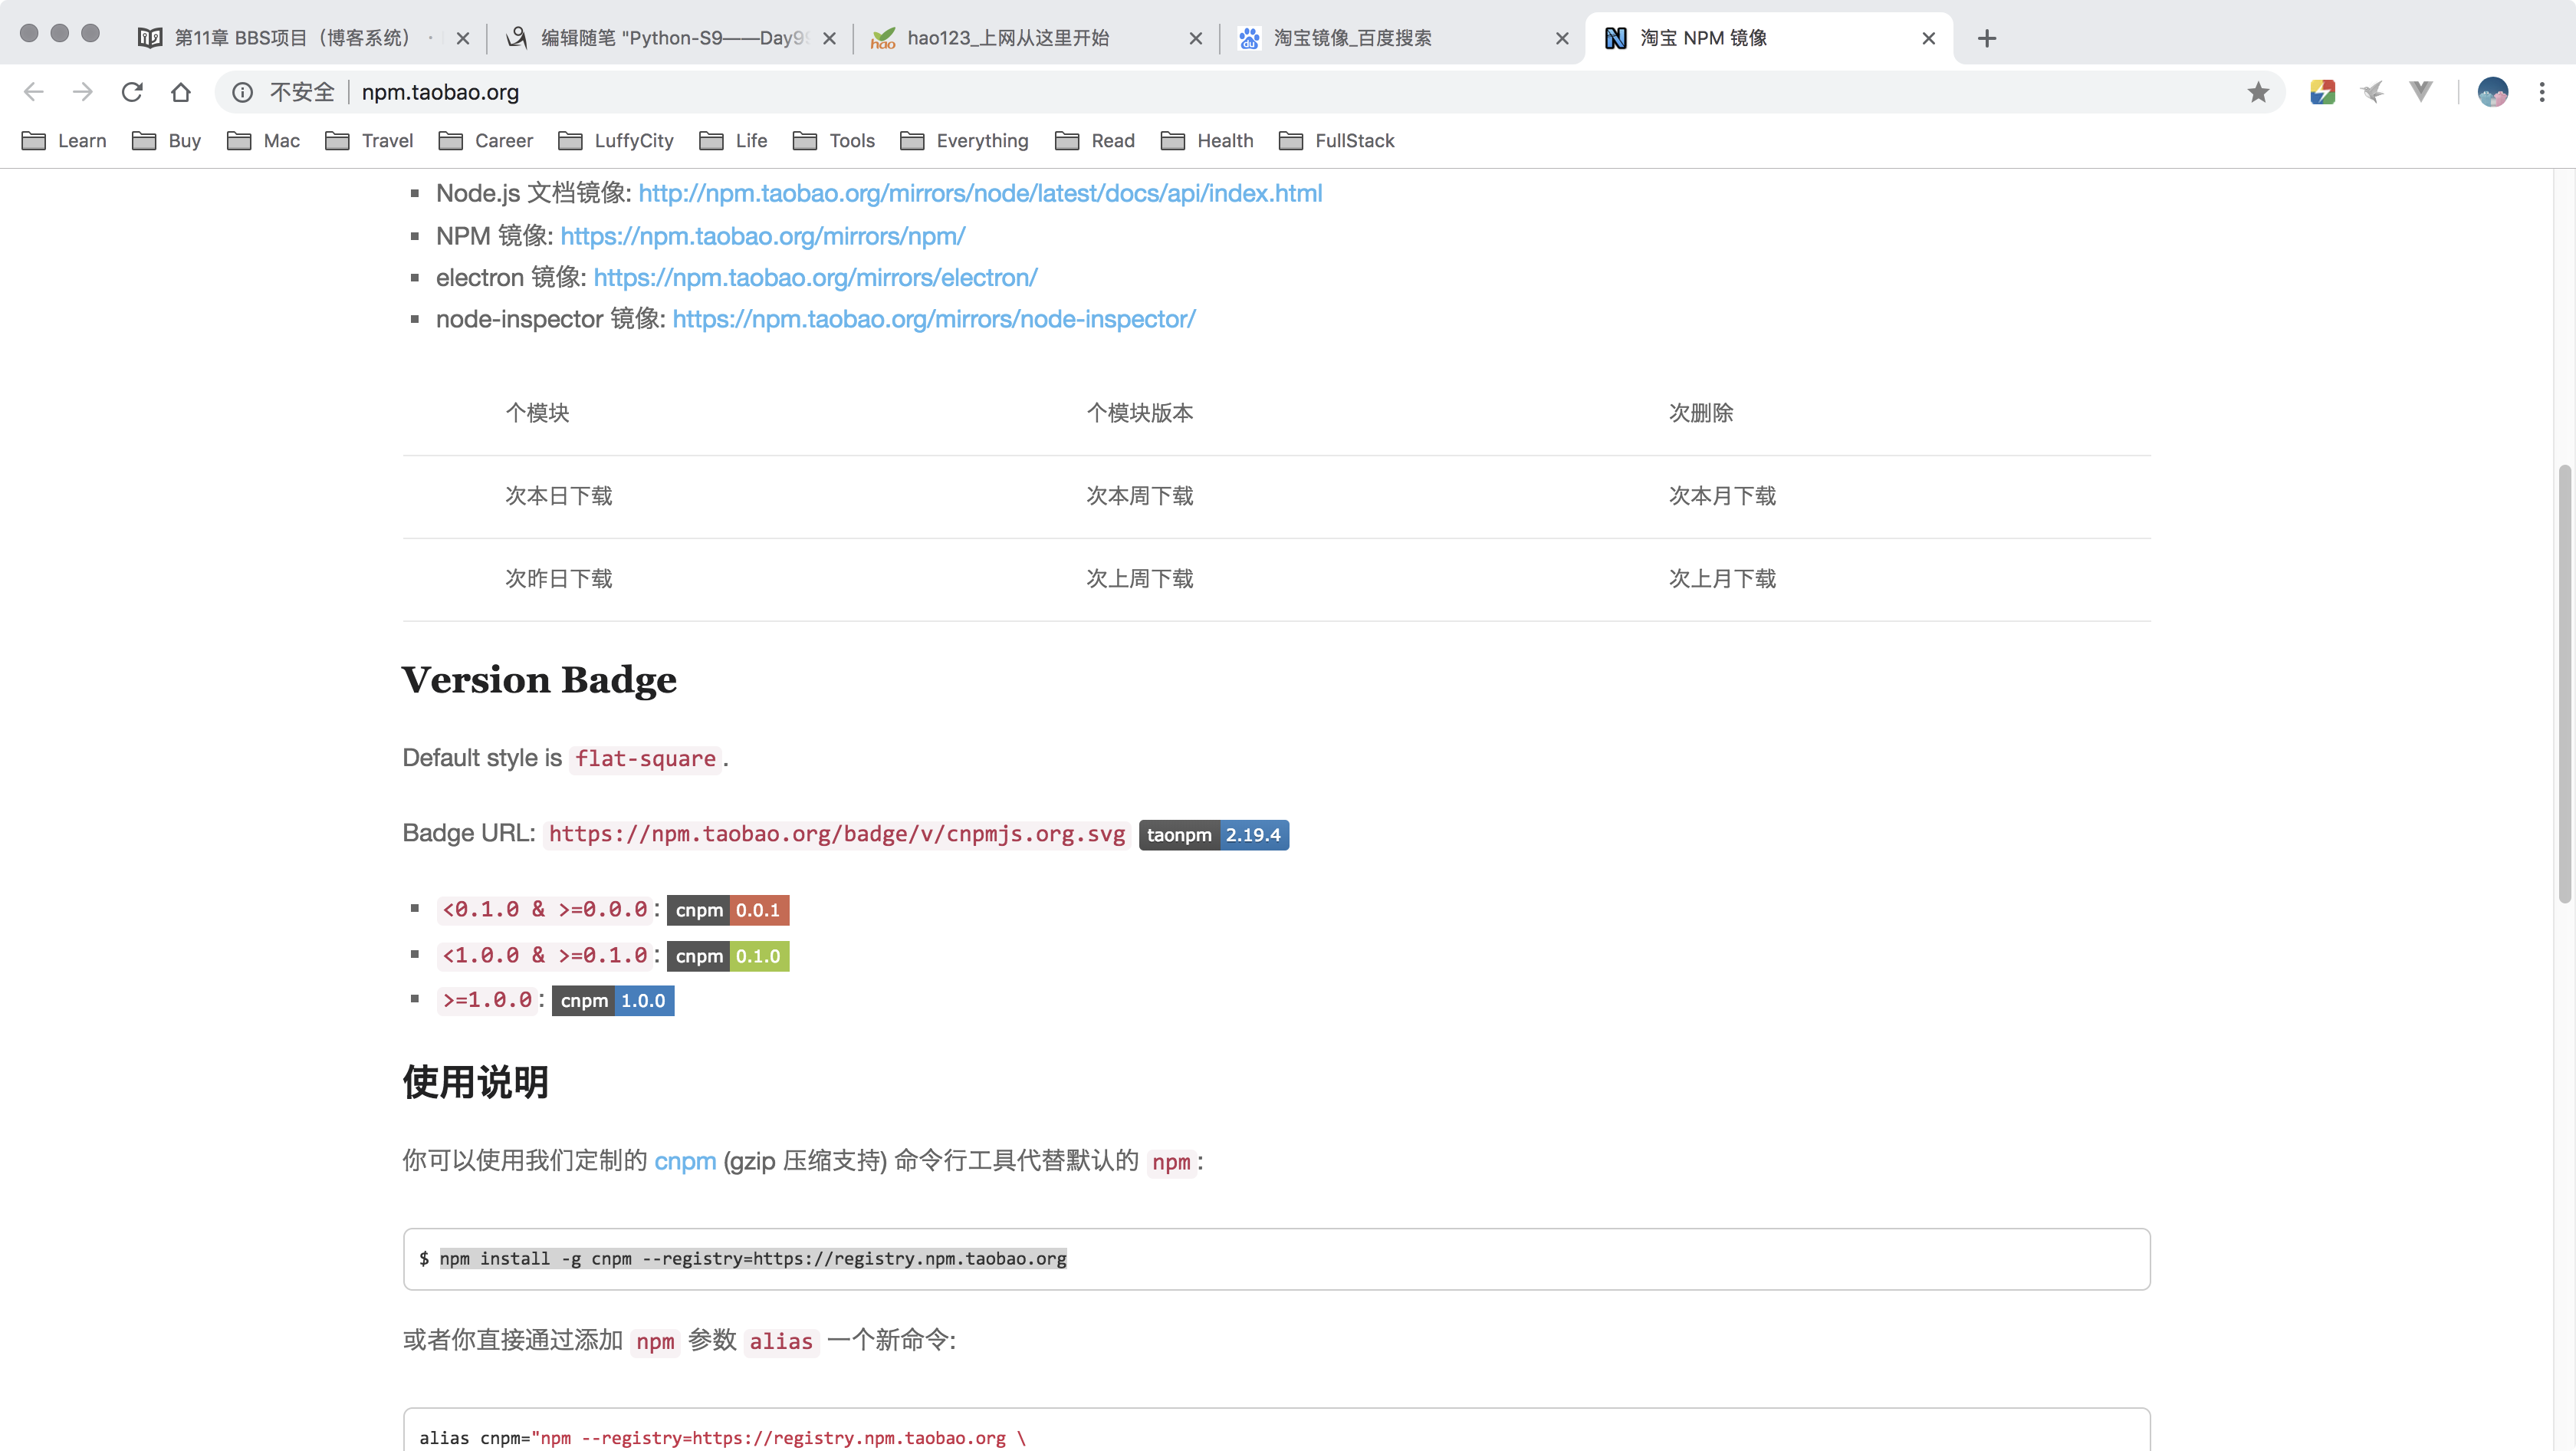
- npm 在国内的镜像——淘宝镜像地址:
Last login: Fri Sep 14 15:29:56 on ttys001

cuixiaozhaodeMacBook-Pro:~ cuixiaozhao$  npm install -g cnpm --registry=https://registry.npm.taobao.org

npm WARN deprecated socks@1.1.10: If using 2.x branch, please upgrade to at least 2.1.6 to avoid a serious bug with socket data flow and an import issue introduced in 2.1.0

/usr/local/bin/cnpm -> /usr/local/lib/node_modules/cnpm/bin/cnpm

+ cnpm@6.0.0

added 632 packages from 842 contributors in 36.206s

cuixiaozhaodeMacBook-Pro:~ cuixiaozhao$
08 if指令和v-on指令;
8.1 单页面(不是选项卡);
8.2 一级路由和二级路由;
- http://juejin.im/timeline
- http://juejin.im/timeline/android

8.3 v-if指令和v-on指令;
<!DOCTYPE html>

<html lang="en">

<head>

    <meta charset="utf-8">

    <meta http-equiv="X-UA-Compatible" content="IE=edge">

    <meta name="viewport" content="width=device-width, initial-scale=1.0">

    <title>StudyVue</title>

</head>

<body>

<div id="app">

    <!--插值语法:react {} angular{{}} {%%} <% = %>-->

    <h3>{{msg}}</h3>

    <h3>{{1>2?"真的":"假的"}}</h3>

    <div v-if='show'>哈哈哈</div>

    <button v-on:click="clickHandler">切换</button>

</div>

<script type="text/javascript" src="vue.js"></script>

<script type="text/javascript">

    //Vue的实例化对象;

    //Vue的设计模式——MVVM:Model、View、ViewModel;

    //指令系统:v-*;

    var app = new Vue({

        el: "#app",

        data: {

            msg: "今天学习Vue",

            show: false,

        },

        methods: {

            clickHandler: function () {

                // alert(11)

                console.log(this);

                this.show = !this.show

            }

        }

    });

    console.log(app);

    console.log(app.$el);

    console.log(app.msg);//此方法,不推荐,失去了使用Vue的意义!

</script>

</body>

</html>
09 指令系统介绍1;
9.1 v-bind、v-on等指令介绍;
<!DOCTYPE html>
<html lang="en">
<head>
<meta charset="utf-8">
<meta http-equiv="X-UA-Compatible" content="IE=edge">
<meta name="viewport" content="width=device-width, initial-scale=1.0">
<title>StudyVue</title>
<style type="text/css">
.box {
width: 100px;
height: 100px;
background: red;
} .box2 {
width: 100px;
height: 100px;
background: green;
} </style>
</head>
<body>
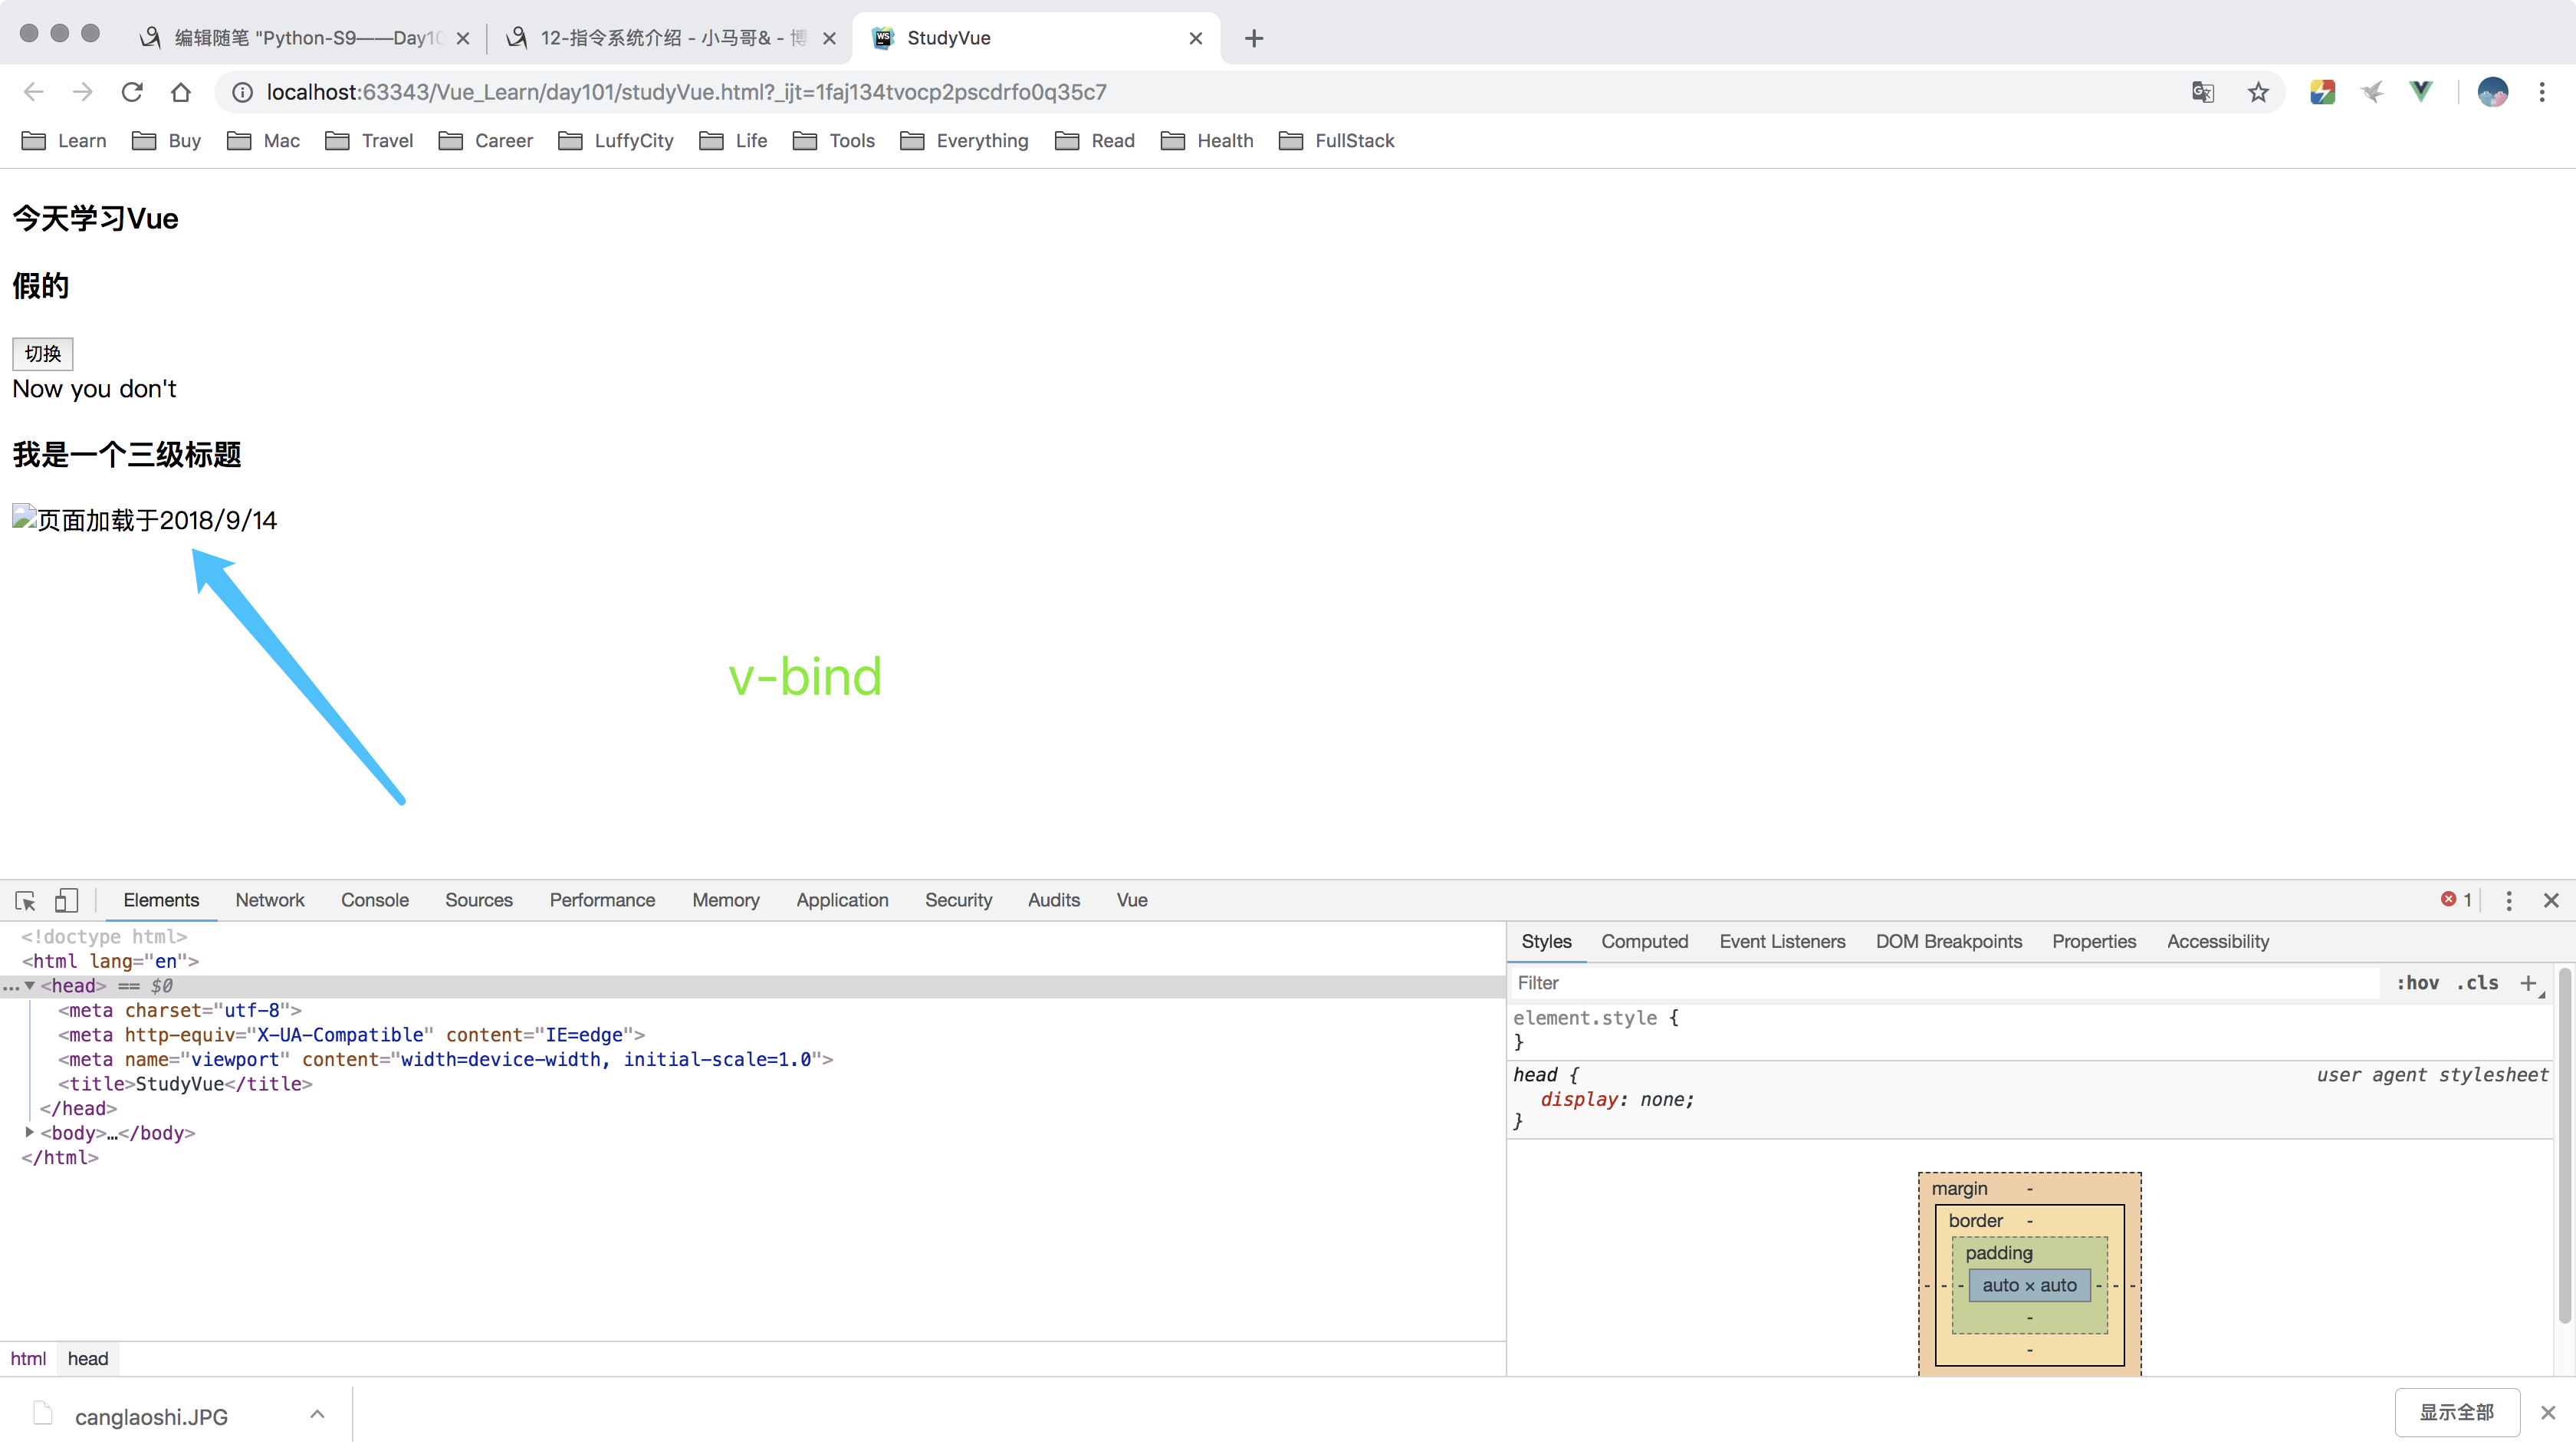
<div id="app">
<!--插值语法:react {} angular{{}} {%%} <% = %>-->
<h3>{{msg}}</h3>
<h3>{{1>2?"真的":"假的"}}</h3>
<div v-if='show'>哈哈哈</div>
<button v-on:click="clickHandler">切换</button>
<div v-if="Math.random() > 0.5 ">
Now you see me!
</div>
<div v-else>
Now you don't
</div>
<h3 v-show="isShow" v-bind:title="title">我是一个三级标题</h3>
<img v-bind:src="imgSrc" v-bind:alt="time">
<div class="box " v-bind:class="{box2:isGreen,box3:isYellow}"></div>
<button @click="changeColor">切换颜色</button>
<br>
<button v-on:click="count+=1">加上{{count}}</button>
<!--//声明式的指令:-->
<!--//命令式的指令;-->
</div>
<script type="text/javascript" src="vue.js"></script>
<script type="text/javascript">
//Vue的实例化对象;
//Vue的设计模式——MVVM:Model、View、ViewModel;
//指令系统:v-*; //Vue的核心思想:数据驱动视图!双向的数据绑定:数据《===》视图;
var app = new Vue({
el: "#app",
data: {
msg: "今天学习Vue",
show: false,
isShow: true,
title: "哈哈哈哈",
imgSrc: "./canglaoshi.JPG",
time: `页面加载于${new Date().toLocaleDateString()}`,
isGreen: true,
isYellow: true,
count: 0 },
methods: {
clickHandler: function () {
// alert(11)
console.log(this);
this.show = !this.show
},
changeColor() {
this.isGreen = !this.isGreen
}
}
});
console.log(app);
console.log(app.$el);
console.log(app.msg);//此方法,不推荐,失去了使用Vue的意义!
//简便写法即语法糖:v-bind~: v-on:click ~ @click
</script>
</body>
</html>


10 指令系统介绍2;
10.1 v-for 以及轮播图;
<!DOCTYPE html>

<html lang="en">

<head>

    <meta charset="utf-8">

    <meta http-equiv="X-UA-Compatible" content="IE=edge">

    <meta name="viewport" content="width=device-width, initial-scale=1.0">

    <title>StudyVue</title>

    <style type="text/css">

        * {

            padding: 0;

            margin: 0;

        }

        .box {

            width: 100px;

            height: 100px;

            background: red;

        }

        .box2 {

            width: 100px;

            height: 100px;

            background: green;

        }

        /*.lunbo{*/

        /*width: 180px;*/

        /*overflow: hidden;*/

        ul {

            width: 180px;

            overflow: hidden;

            list-style: none;

            margin-left: 10px;

        }

        ul li {

            float: left;

            width: 30px;

            height: 30px;

            background: purple;

            margin-left: 10px;

            text-height: 30px;

            text-align: center;

            color: white;

        }

    </style>

</head>

<body>

<div id="app">

    <!--插值语法:react {} angular{{}} {%%} <% = %>-->

    <h3>{{msg}}</h3>

    <h3>{{1>2?"真的":"假的"}}</h3>

    <div v-if='show'>哈哈哈</div>

    <button v-on:click="clickHandler">切换</button>

    <div v-if="Math.random() > 0.5 ">

        Now you see me!

    </div>

    <div v-else>

        Now you don't

    </div>

    <h3 v-show="isShow" v-bind:title="title">我是一个三级标题</h3>

    <img v-bind:src="imgSrc" v-bind:alt="time">

    <div class="box" v-bind:class="{box2:isGreen,box3:isYellow}"></div>

    <button @click="changeColor">切换颜色</button>

    <br>

    <button v-on:click="count+=1">加上{{count}}</button>

    <!--//声明式的指令:-->

    <!--//命令式的指令;-->

    <div class="lunbo">

        <img :src="currentSrc" @mouseenter="closeTimer" @mouseleave="openTimer">

        <ul>

            <li v-for="(item,i) in imgArr" @click="currentHandler(item)">{{i+1}}</li>

        </ul>

        <button @click="nextImg">下一张</button>

        <button @click="beforeImg">上一张</button>

    </div>

</div>

<script type="text/javascript" src="vue.js"></script>

<script type="text/javascript">

    //Vue的实例化对象;

    //Vue的设计模式——MVVM:Model、View、ViewModel;

    //指令系统:v-*;

    //Vue的核心思想:数据驱动视图!双向的数据绑定:数据《===》视图;

    var app = new Vue({

            el: "#app",

            //小的,假的数据库;

            data: {

                msg: "今天学习Vue",

                show: false,

                isShow: true,

                title: "哈哈哈哈",

                imgSrc: "./canglaoshi.JPG",

                time: `页面加载于${new Date().toLocaleDateString()}`,

                isGreen: true,

                isYellow: true,

                count: 0,

                imgArr: [

                    {id: 1, src: './1.jpeg'},

                    {id: 2, src: './2.jpeg'},

                    {id: 3, src: './3.jpeg'},

                    {id: 4, src: './4.jpeg'}

                ],

                currentSrc: "./1.jpeg",

                currentIndex: 0,

                timer: null,

            },

            //cookie 和session;

            // created() {

            //     this.timer = setInterval(this.nextImg, 2000)

            // },

            methods: {

                clickHandler: function () {

                    // alert(11)

                    console.log(this);

                    this.show = !this.show

                },

                changeColor() {

                    this.isGreen = !this.isGreen

                },

                currentHandler(item) {

                    this.currentSrc = item.src

                },

                nextImg() {

                    if (this.currentIndex == this.imgArr.length - 1) {

                        this.currentIndex = -1;

                    }

                    this.currentIndex++;

                    this.currentSrc = this.imgArr[this.currentIndex].src;

                },

                closeTimer() {

                    clearInterval(this.timer)

                },

                openTimer() {

                    this.timer = setInterval(this.nextImg, 1000)

                },

                beforeImg() {

                    if (this.currentIndex == this.imgArr.length - 1) {

                        this.currentIndex = -1;

                    }

                    this.currentIndex--;

                    this.currentSrc = this.imgArr[this.currentIndex].src;

                },

            }

        })

    ;

    console.log(app);

    console.log(app.$el);

    console.log(app.msg);//此方法,不推荐,失去了使用Vue的意义!

    //简便写法:v-bind~:    v-on:click ~ @click

</script>

</body>

</html>
11 计算属性的使用和v-mode的实现原理;
11.1 计算属性和侦听器;
11.2 v-model的原理实现;
<!DOCTYPE html>

<html lang="en">

<head>

    <meta charset="utf-8">

    <meta http-equiv="X-UA-Compatible" content="IE=edge">

    <meta name="viewport" content="width=device-width, initial-scale=1.0">

    <title>02-计算属性</title>

</head>

<body>

<div id="computed">

    <div>

        <!--设置模板语法的初衷是应对简单运算!-->

        <!--{{msg.split('').reverse().join('')}}-->

        <!--使用computed中的reverseStr代替;-->

        {{reverseStr}}

    </div>

    <button @click="clickHandler">修改</button>

</div>

<script type="text/javascript" src="vue.js"></script>

<script>

    var com = new Vue({

        el: "#computed",

        data: {

            msg: 'Hello World!'

        },

        methods: {

            clickHandler() {

                //this.msg = 'Hello LuffyCity!'

                console.log(this.reverseStr);

                this.reverseStr = 'Hello LuffyCity'

            }

        },

        computed: {

            //默认只有getter方法;

            //计算属性可以看做是一个watch;

            // reverseStr() {

            //     return this.msg.split('').reverse().join('');

            // }

            reverseStr: {

                set: function (newValue) {

                    this.msg = newValue

                },

                get: function () {

                    return this.msg.split().reverse().join('');

                },

            }

        }

    })

</script>

</body>

</html>
<!DOCTYPE html>

<html lang="en">

<head>

    <meta charset="utf-8">

    <meta http-equiv="X-UA-Compatible" content="IE=edge">

    <meta name="viewport" content="width=device-width, initial-scale=1.0">

    <title>02-计算属性</title>

</head>

<body>

<!--事件修饰符!-->

<form id="computed" @summit.prevent>

    <!--数据的双向绑定!-->

    <!--<input type="text" v-model="msg">-->

    <input type="text" v-model.lazy="msg">

    <input type="number" v-model.number="msg">

    <input type="submit" name="" value="提交">

    <!--<input type="text" v-bind:value='msg' @input='msgChange'>-->

    <h3>{{msg}}</h3>

</form>

<script type="text/javascript" src="vue.js"></script>

<script>

    var com = new Vue({

        el: "#computed",

        data: {

            msg: '123'

        },

        methods: {

            msgChange(e) {

                console.log(e.target.value);

                this.getValue = e.target.value;

            }

            //$.ajax() 在Vue中不使用,xmlhttpRequest axios ajax技术

        },

        computed: {

            getValue: {

                set: function (newValue) {

                    this.msg = newValue;

                },

                get: function () {

                    return this.msg;

                }

            }

        }

    })

</script>

</body>

</html>
Python-S9——Day100-Web前端框架之Vue的更多相关文章
- web前端框架之Vue hello world
[博客园cnblogs笔者m-yb原创,转载请加本文博客链接,笔者github: https://github.com/mayangbo666,公众号aandb7,QQ群927113708] http ...
- Python-S9-Day99——Web前端框架之Vue.js
01课程安排 02let和const: 03 箭头函数 04 对象的单体模式 05 Node.js介绍和npm操作 06 Webpack,babel介绍和Vue的第一个案例 01课程安排 1.1 ht ...
- React 还是 Vue: 你应该选择哪一个Web前端框架?
学还是要学的,用的多了,也就有更多的认识了,开发中遇到选择的时候也就简单起来了. 本文作者也做了总结: 如果你喜欢用(或希望能够用)模板搭建应用,请使用Vue 如果你喜欢简单和“能用就行”的东西 ...
- Web前端框架学习成本比较及学习方法
就项目中自己用过的前端框架的学习成本比较与学习心得分享 刚工作时间不长只用过这几个框架下面是难易程度比较: 不论哪个web前端框架, 究其本质都是把页面的数据传递给后台服务器语言(如java)进行处理 ...
- 国内5款优秀的WEB前端框架
1. JX(腾讯) 官网地址:http://alloyteam.github.io/JX/#home JX 是一个类似 Google Closure Library 的 Web 前端开发框架,服务于 ...
- Web前端框架与类库
Web前端框架与类库的思考 说起前端框架,我也是醉了.现在去面试或者和同行聊天,动不动就这个框架碉堡了,那个框架好犀利. 当然不是贬低框架,只是有一种杀鸡焉用牛刀的感觉.网站技术是为业务而存在的,除此 ...
- Web前端框架与移动应用开发第八章
Web前端框架与移动应用开发:制作58招聘专题页 1.html代码: <!DOCTYPE html><html><head> <meta charset=&q ...
- Python 四大主流 Web 编程框架
Python 四大主流 Web 编程框架 目前Python的网络编程框架已经多达几十个,逐个学习它们显然不现实.但这些框架在系统架构和运行环境中有很多共通之处,本文带领读者学习基于Python网络框架 ...
- 三种Web前端框架比较与介绍--Vue, react, angular
一.Angular 1.MVVM(Model)(View)(View-model): 2.模块化(Module)控制器(Contoller)依赖注入: 3.双向数据绑定:界面的操作能实时反映到数据,数 ...
- 一款简单而不失强大的前端框架——【Vue.js的详细入门教程①】
↓— Vue.js框架魅力 —↓ 前言 Vue.js 是一个构建数据驱动的 web 界面的渐进式框架.Vue.js 的目标是通过尽可能简单的 API 实现响应的数据绑定和组合的视图组件.V ...
随机推荐
- Nagios-4.1.1 (OpenLogic CentOS 7.2)
平台: CentOS 类型: 虚拟机镜像 软件包: apache2.4.6 nagios 4.1.1 php5.4.16 devops monitoring nagios open-source ph ...
- c++ STL list容器成员函数
list是一个双链表. 函数 描述 void l.assign (int n, const val) void l.assign (it first, it last) 将链表l初始化为n个相同的va ...
- PHP实现文件上传和下载(单文件上传、多文件上传、多个单文件上传)(面向对象、面向过程)
今天我们来学习用PHP进行文件的上传和下载,并且用面向过程和面向对象的方式对文件上传进行一个限制 一.简单的上传测试 1.客户端:upload.php 2.后端:doAction.php 结果: 二. ...
- win10搜索不到蓝牙设备
多半是驱动不兼容的问题. 解决方法: 此电脑右键,设备管理器,然后将蓝牙下的驱动,右键.卸载设备. 安装驱动精灵,会自动检测到缺少蓝牙驱动,安装即可.
- PPII打不开 更改I.bat
http://jingyan.baidu.com/article/3a2f7c2e7d277126afd6118d.html
- Java jvm 内存回收机制
http://blog.csdn.net/yaerfeng/article/details/51291903 在Java中,它的内存管理包括两方面:内存分配(创建Java对象的时候)和内存回收,这两方 ...
- findsmb - 列出在子网上响应SMB名称查询的主机信息
SYNOPSIS 总览 findsmb [子网广播地址] 描述 此perl脚本是Samba组件的一部分. findsmb是个用于打印出关于子网中响应SMB名字查询请求的主机信息的perl脚本.实际上它 ...
- python内置函数map/reduce/filter
python有几个内置的函数很有意 思:map/filter/reduce,都是对一个集合进行处理,filter很容易理解用于过滤,map用于映射,reduce用于归并. 是python列表方法的三架 ...
- CUDA:Supercomputing for the Masses (用于大量数据的超级计算)-第一节
原文链接 第一节 CUDA 让你可以一边使用熟悉的编程概念,一边开发可在GPU上运行的软件. Rob Farber 是西北太平洋国家实验室(Pacific Northwest National Lab ...
- linux的一些指令
linux的一些指令 █查看指令參數man 指令,如:man ls ,按q鍵退出 █查看文件列表ls -lht 按時間排序ll 列表ls 列表 目錄cd 目錄名稱 進入路徑cd .. 返回上層路徑 █ ...