CentOS7 Nginx安装及配置反向代理
背景:
Mono (Mono JIT compiler version 5.4.0.201 )
jexus-5.8.2-x64(《CentOS7 安装 jexus-5.8.2-x64》)
VirtualBox5.1.22(3个CentOS7系统) (192.168.5.147、192.168.5.182、192.168.5.183)
参考资料:
http://www.cnblogs.com/guogangj/p/4131704.html(HappyAA服务器部署笔记1(nginx+tomcat的安装与配置))
http://www.cnblogs.com/guogangj/p/5207104.html(简易nginx TCP反向代理设置)
http://www.cnblogs.com/bass6/p/5948199.html(CNginx反向代理设置 从80端口转向其他端口)
http://www.cnblogs.com/jeffzhang/p/4664457.html(Centos 7 上使用nginx为Node.js配置反向代理时错误:(13: Permission denied) while connecting to upstream)
http://www.cnblogs.com/mfrbuaa/p/4866135.html(解决Nginx的connect() to 127.0.0.1:8080 failed (13: Permission denied) while connect)
http://www.cnblogs.com/zrbfree/p/6419043.html(nginx 安装时候报错:make: *** No rule to make target `build', needed by `default'. Stop.)
写这篇文章也是为了记录我的履试不爽的过程,怕以后很久不用就忘了,感谢园子及贡献者。
1、三个CentOS7系统准备
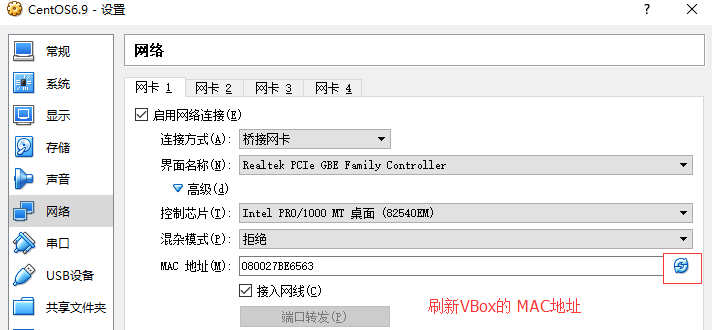
在147机子基础上完整复制了182及183,复制好后一样要刷新一下网络的MAC地址。
2、安装Jexus《CentOS7 安装 jexus-5.8.2-x64》本想只安装182:8888,183:7777,index.html内容设置不同,但因设置好后始终把错误:"502 Bad Gateway"
于是将147:8080也安装 上并设置
3、安装Nginx
#yum update
更新一些库和必要的支持,完了之后去下载一个nginx的最新版,如今我责编的版本是1.7.7:
#wget http://nginx.org/download/nginx-1.13.6.tar.gz
解压缩
#tar -zvxf nginx-1.13.6.tar.gz
#cd nginx-1.13.6
nginx有很多很多编译配置项,但由于我这是第一篇笔记,所以我基本上都使用了默认的配置:
#./configure --with-http_ssl_module --with-http_gzip_static_module
我只加了两个选项,--with-http_ssl_module表示使用ssl模块,--with-http_gzip_static_module表示使用gzip模块,其它更详细的配置就要参考nginx的文档了:http://nginx.org/en/docs/configure.html如果没configure成功(会显示XXX not found),那是因为有些依赖没有被正确安装.那么先安装一下这些依赖条件,通常是pcre,zlib这些,这么一下就基本上可以了:
#yum install gcc pcre pcre-devel zlib zlib-devel openssl openssl-devel#make
#make install可执行文件就会被安装在: /usr/sbin/nginx (默认配置)
nginx基本使用
程序位置:/usr/local/nginx/sbin/nginx
配置文件位置:/usr/local/nginx/conf/nginx.conf
启动nginx:
#cd /usr/local/nginx/sbin/
#./nginx如果运行的时候不带-c参数,那就采用默认的配置文件,即/etc/nginx/nginx.conf
查看运行进程状态:
# ps aux | grep nginx打开浏览器,访问http://localhost/看看nginx的默认页面:
停止nginx:
#./nginx -s stop重启nginx(配置文件变动后需要重启才能生效):
#./nginx -s reload检查配置文件是否正确:
#./nginx -t查看nginx的pid:
cat /usr/local/nginx/logs/nginx.pid查看nginx版本
$ ./nginx -v回头看编译配置
# ./nginx -V

4、Nginx配置
#vi /etc/nginx/nginx.conf
user nginx;
worker_processes 1;
error_log /var/log/nginx/error.log warn;
pid /var/run/nginx.pid;events {
worker_connections 1024;
}http {
include /etc/nginx/mime.types;
default_type application/octet-stream;sendfile on;
keepalive_timeout 65;
server {
listen 80;server_name localhost;
location / {
proxy_pass http://192.168.5.147:8080;
}}
}
按上面这样配置按理应该可以访问http://192.168.5.147 显示的应该是147:8080的网页内容,但 就是报错了
于是,这才查看日志
#vi /var/log/nginx/error.log
2017/11/03 05:23:53 [crit] 1331#1331: *12 connect() to 192.168.5.147:8080 failed
(13: Permission denied) while connecting to upstream, client: 192.168.5.65, server: localhost,
request: "GET / HTTP/1.1", upstream: "http://192.168.5.147:8080/", host: "192.168.5.147"
园子中搜“(13: Permission denied) while connecting to upstream, client:”就找到原因,
type=AVC msg=audit(1509701033.988:119): avc: denied { name_connect } for pid=1331
comm="nginx" dest=8080 scontext=system_u:system_r:httpd_t:s0 tcontext=system_u:object_r:http_cache_port_t:s0 tclass=tcp_socket
处理:
#setsebool -P httpd_can_network_connect 1
到这里应该就正常了,反向代理的后面设置
下面是设置两个服务器
user nginx;
worker_processes 1;error_log /var/log/nginx/error.log warn;
pid /var/run/nginx.pid;events {
worker_connections 1024;
}http {
include /etc/nginx/mime.types;
default_type application/octet-stream;log_format main '$remote_addr - $remote_user [$time_local] "$request" '
'$status $body_bytes_sent "$http_referer" '
'"$http_user_agent" "$http_x_forwarded_for"';access_log /var/log/nginx/access.log main;
sendfile on;
#tcp_nopush on;keepalive_timeout 65;
#gzip on;
upstream test {
server 192.168.5.182:8888;
server 192.168.5.183:7777;
}
server {
listen 80;
server_name localhost;location / {
proxy_pass http://test;
proxy_set_header Host $host;
proxy_set_header X-Real-IP $remote_addr;
proxy_set_header X-Forwarded-For $proxy_add_x_forwarded_for;
proxy_set_header Cookie $http_cookie;
}
}
}
nginx集群报错“upstream”directive is not allow here 错误
CentOS7 Nginx安装及配置反向代理的更多相关文章
- Nginx安装及配置反向代理
本片博客记录在ubuntu16下安装nginx,以及如何实现负载均衡 安装nginx 如果是新机器,安装相关依赖环境 sudo apt install build-essential sudo apt ...
- Nginx安装部署(反向代理与负载均衡)
一.下载安装Nginx(本文环境为windows xp 32bit环境) 下载地址:http://files.cnblogs.com/likehua/nginx-1.0.11.zip 解压nginx- ...
- 使用nginx和tomcat配置反向代理和动静分离
背景 本人主修的编程语言是Java语言,因此最开始接触的Web开发也是JSP技术.使用Java开发的Web应用需要部署在专门的服务器程序上运行,比如Tomcat.但是一般很少会有人将Tomcat作为用 ...
- CentOS 6.4下Squid代理服务器的安装与配置,反向代理
CentOS 6.4下Squid代理服务器的安装与配置 一.简介 代理服务器英文全称是Proxy Server,其功能就是代理网络用户去取得网络信息. Squid是一个缓存Internet 数据的软件 ...
- 【Asp.net Core】在 Linux 子系统中安装 nginx 并配置反向代理
上一篇鸟文中,老周已经介绍过在 Ubuntu 子系统中安装 dotnet-sdk 的方法,本文老周给大伙伴们说说安装 nginx 服务,并配置反向代理.同样,老周假设你从来没有用过 Linux,所以老 ...
- CentOS 7 安装 Nginx 配置反向代理
Linux使用Nginx Yum存储库上安装Nginx,适用于Red Hat Enterprise Linux和CentOS系统. 1.添加设置Nginx Yum存储库 在CentOS中首次安装Ngi ...
- nginx配置反向代理详细教程(windows版)
内容属于原创,如果需要转载,还请注明地址:http://www.cnblogs.com/j-star/p/8785334.html Nginx是一款轻量级的Web 服务器/反向代理服务器及电子邮件(I ...
- Nginx插件之openresty反向代理和日志滚动配置案例
Nginx插件之openresty反向代理和日志滚动配置案例 作者:尹正杰 版权声明:原创作品,谢绝转载!否则将追究法律责任. 一.openresty介绍 1>.Nginx介绍 Nginx是一款 ...
- Docker 快速安装&搭建 Ngnix 环境,并配置反向代理
欢迎关注个人微信公众号: 小哈学Java, 文末分享阿里 P8 高级架构师吐血总结的 <Java 核心知识整理&面试.pdf>资源链接!! 个人网站: https://www.ex ...
随机推荐
- html设置背景图片并自适应
<style> html{ height:100%; } body{ padding: 0; margin: 0; background: url(images/2.jpg); backg ...
- luogu 4345 Lucas的变形应用
求 sigma i由0-k C(n,i) 利用Lucas定理+整除分块将C(n/p,i/p)利用i/p分块,得到k/p-1个整块(p-1)和一个小块(k%p) 最后得到式子 F(n,k)=F(n/p, ...
- 网络学习day04_VLSM、子网划分
IP子网划分 首先,在进行子网划分的学习之前,我们先来回顾一下IP地址的相关知识,同时了解一下公有和私有IP地址: 在Internet上有千百万台主机,为了区分这些主机,人们给每台主机都分配了一个专门 ...
- 排序算法以及其java实现
一.术语了解 稳定:如果a原本在b前面,而a=b,排序之后a仍然在b的前面: 不稳定:如果a原本在b的前面,而a=b,排序之后a可能会出现在b的后面: 内排序:所有排序操作都在内存中完成: 外排序:由 ...
- Mac环境下的mongodb的安装
1.安装MongoDB brew install mongodb 这个是默认安装最新版本的 mogodb,如果想安装指定版本可以先查看 mongodb 版本 brew search mongodb m ...
- 「luogu1417」烹调方案
题目链接 :https://www.luogu.org/problemnew/show/P1417 直接背包 -> 30' 考虑直接背包的问题:在DP时第i种食材比第j种食材更优,但由于j&l ...
- vue之生命周期钩子函数之运用
一.什么是生命周期钩子函数: 每个 Vue 实例在被创建时都要经过一系列的初始化过程——例如,需要设置数据监听.编译模板.将实例挂载到 DOM 并在数据变化时更新 DOM 等.同时在这个过程中也会运行 ...
- ubuntu 32/64 bit
https://askubuntu.com/questions/454253/how-to-run-32-bit-app-in-ubuntu-64-bit how to run 32-bit app ...
- ASP.NET Core之依赖注入
本文翻译自:http://www.tutorialsteacher.com/core/dependency-injection-in-aspnet-core ASP.NET Core支持依赖注入,依赖 ...
- iOS rebuild from bitcode对ipa大小的影响
https://developer.apple.com/library/content/technotes/tn2432/_index.html 为了测试一下rebuild from bitcode的 ...