require(): open_basedir restriction in effect. File(/www/wwwroot/xcx/zerg/thinkphp/start.php) is not within the allowed path(s): (/www/wwwroot/xcx/zerg/public/:/tmp/:/proc/) in /www/wwwroot/xcx/zerg/p

解决方法:
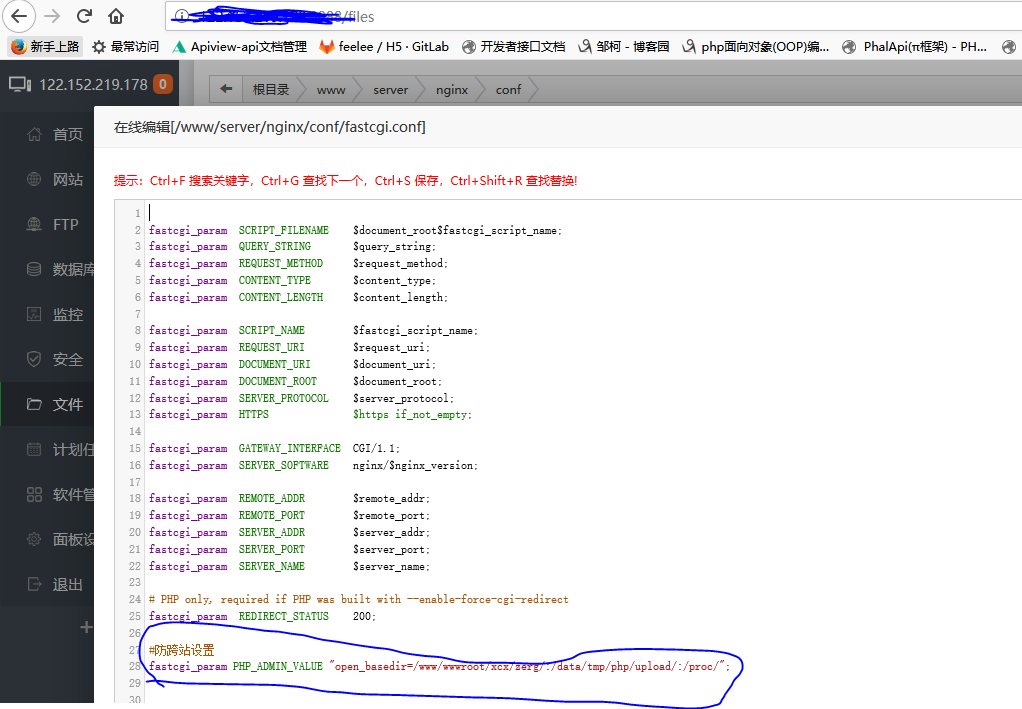
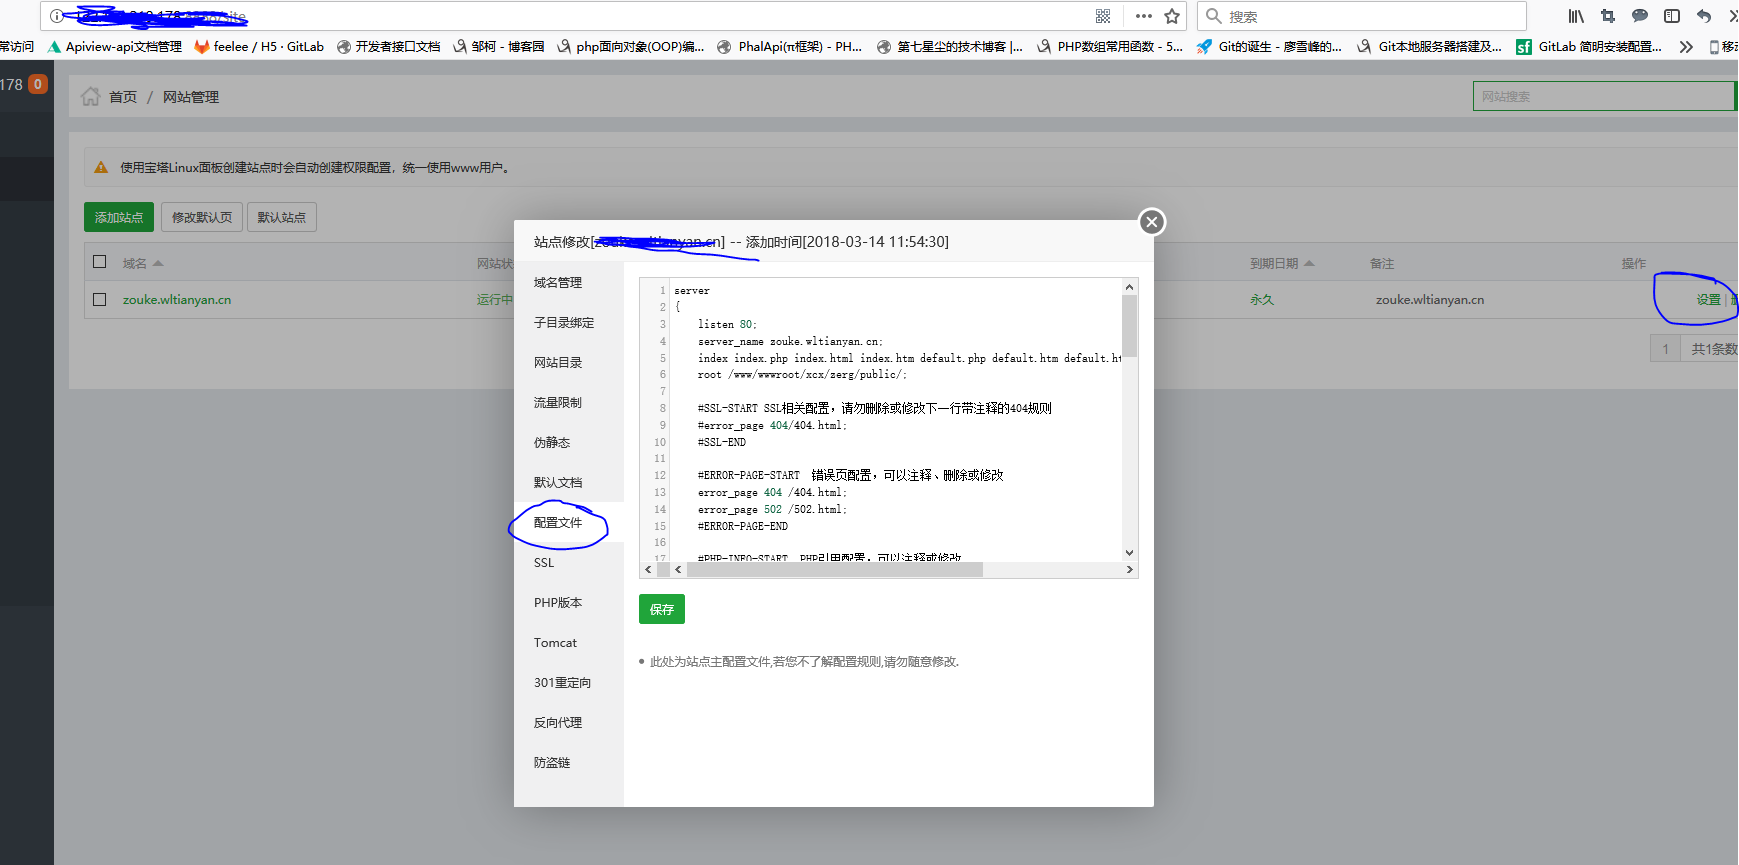
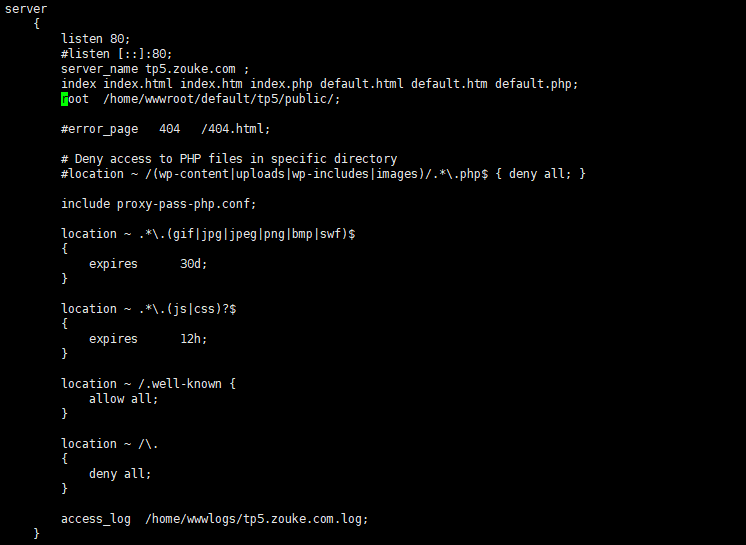
在如下文件增加一项(如图所示)
在如下文件增加一项(如图所示):
#php文件采用fastcgi解析并设置参数
location ~ \.php {
try_files $uri = 404;
fastcgi_index /index.php;
fastcgi_pass ********;
#加载fastcgi.conf文件中的参数
include fastcgi.conf;
#设置有权限目录,fastcgi.conf中默认设置就是站点目录$document_root,如果要改变就需要重新赋值
#phalcon举例
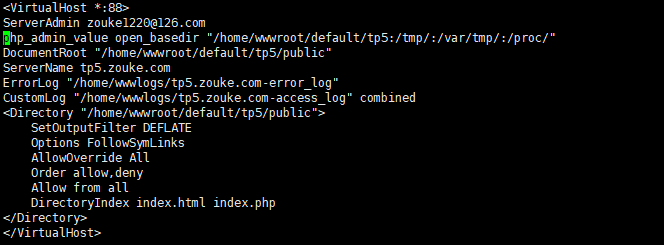
#fastcgi_param PHP_ADMIN_VALUE "open_basedir=/www/wwwroot/xcx/zerg/:/data/tmp/php/upload/:/proc/";
}
访问项目:

继续配置

location / {

          if (!-e $request_filename) {

                rewrite ^(.*)$ /index.php?s=$ last;

                break;

          }

}


圆满解决!!!!!!!!!!!!!!
参考文件:
http://blog.csdn.net/leiflyy/article/details/68063423
https://www.iamle.com/archives/1609.html
http://blog.csdn.net/slqgenius/article/details/52949191(主要解决参看的文件)

require(): open_basedir restriction in effect. File(/www/wwwroot/xcx/zerg/thinkphp/start.php) is not within the allowed path(s): (/www/wwwroot/xcx/zerg/public/:/tmp/:/proc/) in /www/wwwroot/xcx/zerg/p的更多相关文章
- thinkPHP5配置nginx环境无法打开(require(): open_basedir restriction in effect. File(/mnt/hgfs/root/tp5/thinkphp/start.php) is not within the allowed path(s)
今天想把玩一下tp5,结果怎么都无法访问,每次都是报500错误,我把错误提示都打开看到下面的错误 require(): open_basedir restriction in effect. File ...
- Warning: require(): open_basedir restriction in effect. File(/www/wwwroot/../thinkphp/start.php) is not within the allowed path(s):
Warning: require(): open_basedir restriction in effect. File(/www/wwwroot//../thinkphp/start.php) is ...
- require(): open_basedir restriction in effect. File
新安装的 lnmp 环境,将项目放上报 require(): open_basedir restriction in effect. File 的错误! 错误日志显示,访问脚本不在 open_base ...
- php Warning: require(): open_basedir restriction in effect File(/www/wwwroot/default/
解决方案如下: 一.找到修改fastcgi的配置文件 (/usr/local/nginx/conf/fastcgi.conf) 二.vi进行编辑(保存退出) 三.对虚拟主机配置进行重写在Nginx低版 ...
- require(): open_basedir restriction in effect. 解决方法
在linux服务器部署thinkphp5的时候PHP报了这个错误, 如下: Warning: require(): open_basedir restriction in effect. File(/ ...
- LNMP - Warning: require(): open_basedir restriction in effect错误解决方法
LNMP 1.4或更高版本如果不想用防跨目录或者修改.user.ini的防跨目录的目录还需要将 /usr/local/nginx/conf/fastcgi.conf 里面的fastcgi_param ...
- open_basedir restriction in effect. File() is not within the allowed path(s)
目前发现eaccelerator安装之后如果php.ini中设置open_basedir将导致open_basedir的一些报错(open_basedir restriction in effect. ...
- php 环境require(): open_basedir restriction in effect 错误
php 环境require(): open_basedir restriction in effect 错误 错误日志显示,访问脚本不在 open_basedir的限定目录里面 解决方法打开fastc ...
- lnmp 环境require(): open_basedir restriction in effect 错误
最近配置开发用的lnmp环境,环境配置完成后,爆500错误,查看nginx错误日志 open_basedir 将 PHP 所能打开的文件限制在指定的目录树,包括文件本身 错误日志显示,访问脚本不在 o ...
随机推荐
- 「SDOI2009」HH的项链
「SDOI2009」HH的项链 传送门 数据加强了,莫队跑不过了. 考虑用树状数组. 先把询问按右端点递增排序. 然后对于每一种贝壳,我们都用它最右一次出现的位置计算答案. 具体细节看代码吧. 参考代 ...
- js——form表单验证
用js实现一个简易的表单验证 效果: 代码: <html> <head> <title>js校验form表单</title> <meta char ...
- Vue下URL地址栏参数改变却不能刷新界面
在完成毕业设计(基于Vue的信息资讯展示与管理平台)的过程中,处理如下图所示的 点击左侧栏目列表跳转到对应文章列表 的问题时,初次点击可以跳转到对应的页面,但是当第二次点击时,虽然地址栏的参数改变了, ...
- C#学习之time控件和timer_tick事件 -----转载
Timer控件:Timer控件只有绑定了Tick事件,和设置Enabled=True后才会自动计时,停止计时可以用Stop()控制,通过Stop()停止之后,如果想重新计时,可以用Start()方法来 ...
- SqlParameter 类
SqlParameter 类 表示 SqlCommand 的参数,也可以是它到 DataSet 列的映射.无法继承此类. 命名空间: System.Data.SqlClient 程序集: System ...
- mybatis查询时间段
参考:https://bbs.csdn.net/topics/391838987 <!-- 查询条件:创建开始时间 --> <if test="createdBeginti ...
- java并发:原子类之AtomicLong
原子类之AtomicLong java线程中的操作,需要满足原子性.可见性等原则,比如i++这样的操作不具备原子性, A线程读取了i,另一个线程执行i++,A线程再执行i++就会引发线程安全问题 推荐 ...
- Day1-E-BZOJ1293
Description 小西有一条很长的彩带,彩带上挂着各式各样的彩珠.已知彩珠有N个,分为K种.简单的说,可以将彩带考虑为x轴,每一个彩珠有一个对应的坐标(即位置).某些坐标上可以没有彩珠,但多个彩 ...
- 小程序view标签靠右方法
第一种:不浮动靠右 text-align:right; 第二种:浮动靠右 float:right;
- 使用Spring JMS轻松实现异步消息传递
异步进程通信是面向服务架构(SOA)一个重要的组成部分,因为企业里很多系统通信,特别是与外部组织间的通信,实质上都是异步的.Java消息服务(JMS)是用于编写使用异步消息传递的JEE应用程序的API ...