ActiveMQ-模块代码-02
模块模式
p2p模式
生产者
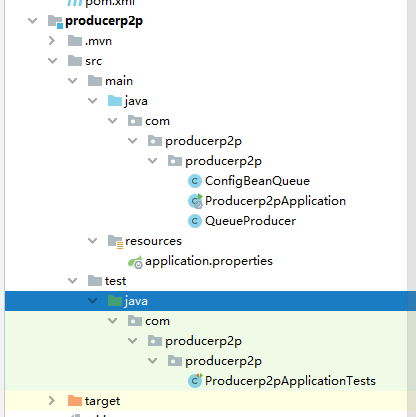
ConfigBeanQueue
package com.producerp2p.producerp2p;

import org.apache.activemq.command.ActiveMQQueue;

import org.springframework.beans.factory.annotation.Value;

import org.springframework.context.annotation.Bean;

import org.springframework.context.annotation.Configuration;

import org.springframework.jms.annotation.EnableJms;

import javax.jms.Queue;

// 配置类--配置文件(Spring的配置文件)

@Configuration

@EnableJms

public class ConfigBeanQueue {

    // 属性注入的方式

    @Value("${queue-boot-name}")

    private String queueName;

    // 创建队列Queue并设置队列名称

    @Bean

    public Queue createQueue(){

        return new ActiveMQQueue(queueName);

    }

}
QueueProducer
package com.producerp2p.producerp2p;

import org.springframework.beans.factory.annotation.Autowired;

import org.springframework.jms.core.JmsMessagingTemplate;

import org.springframework.scheduling.annotation.Scheduled;

import org.springframework.stereotype.Component;

import javax.jms.Queue;

@Component

public class QueueProducer {

    // 属性注入

    @Autowired

    private JmsMessagingTemplate jmsMessagingTemplate;

    @Autowired

    private Queue queue;

    // 发送消息

    public void sendMsg(){

        jmsMessagingTemplate.convertAndSend(queue,"QueueProducer发送消息到对列");

    }

    // 定时发送消息: 每隔3秒发送一条消息 微服务项目启动的时候自动执行使用@Scheduled修饰的方法

    @Scheduled(fixedDelay = 3000l)

    public void sendMsgScheduled(){

        jmsMessagingTemplate.convertAndSend(queue,"QueueProducer发送定时消息到队列");

        System.out.println("-------定时消息发送完成-------");

    }

}
Producerp2pApplication
package com.producerp2p.producerp2p;

import org.springframework.boot.SpringApplication;

import org.springframework.boot.autoconfigure.SpringBootApplication;

import org.springframework.scheduling.annotation.EnableScheduling;

@SpringBootApplication

@EnableScheduling

public class Producerp2pApplication {

    public static void main(String[] args) {

        SpringApplication.run(Producerp2pApplication.class, args);

    }

}
application.properties
server.port=7777

# 配置activemq连接,url

spring.activemq.broker-url=tcp://127.0.0.1:61616

spring.activemq.user=admin

spring.activemq.password=admin

# activemq的模式queue(false),topic(true)

spring.jms.pub-sub-domain=false

# 队列名称

queue-boot-name=newqueue
Producerp2pApplicationTests
package com.producerp2p.producerp2p;

import org.junit.jupiter.api.Test;

import org.springframework.beans.factory.annotation.Autowired;

import org.springframework.boot.test.context.SpringBootTest;

@SpringBootTest

class Producerp2pApplicationTests {

    @Autowired

    private QueueProducer queueProducer;

    @Test

    void testSendMsg() {

        queueProducer.sendMsg();

        System.out.println("------消息发送到队列完成-------");

    }

}
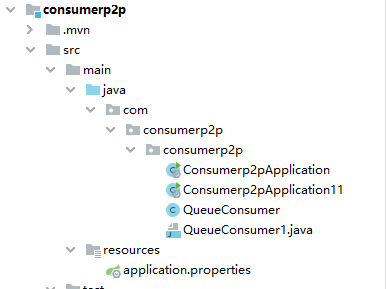
消费者
application.properties
server.port=7778

# 配置activemq连接,url

spring.activemq.broker-url=tcp://127.0.0.1:61616

spring.activemq.user=admin

spring.activemq.password=admin

# activemq的模式queue(false),topic(true)

spring.jms.pub-sub-domain=false

# 队列名称

queue-boot-name=newqueue
QueueConsumer
package com.consumerp2p.consumerp2p;

import org.springframework.jms.annotation.JmsListener;

import org.springframework.stereotype.Component;

import javax.jms.JMSException;

import javax.jms.TextMessage;

@Component

public class QueueConsumer {

    // 接收消息---设置消费者监听的目的地(队列), 如果监听到队列中有消息,通过方法的形参表示接收到的消息

    // Message:TextMessage

    @JmsListener(destination = "${queue-boot-name}")

    public void receiveMsg(TextMessage textMessage) throws JMSException {

        System.out.println("p2p模式下的消费者1接收到队列中的消息:"+textMessage.getText());

    }

}
Consumerp2pApplication
Consumerp2pApplication11
package com.consumerp2p.consumerp2p;

import org.springframework.boot.SpringApplication;

import org.springframework.boot.autoconfigure.SpringBootApplication;

@SpringBootApplication

public class Consumerp2pApplication11 {

    public static void main(String[] args) {

        SpringApplication.run(Consumerp2pApplication11.class, args);

    }

}
------------------
----------------------------------------------------------------------------------
----------------------
Topic模式
生产者
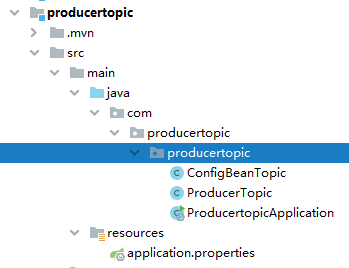
ConfigBeanTopic
package com.producertopic.producertopic;

import org.apache.activemq.command.ActiveMQTopic;

import org.springframework.beans.factory.annotation.Autowired;

import org.springframework.beans.factory.annotation.Value;

import org.springframework.context.annotation.Bean;

import org.springframework.context.annotation.Configuration;

import org.springframework.jms.annotation.EnableJms;

import javax.jms.Topic;

@Configuration

@EnableJms

public class ConfigBeanTopic {

    // 注入主题属性

    @Value("${topic-boot-name}")

    private String topicName;

    // 创建主题并设置主题名称

    @Bean

    public Topic createTopic(){

        return  new ActiveMQTopic(topicName);

    }

}
ProducerTopic
package com.producertopic.producertopic;

import org.springframework.beans.factory.annotation.Autowired;

import org.springframework.jms.core.JmsMessagingTemplate;

import org.springframework.scheduling.annotation.Scheduled;

import org.springframework.stereotype.Component;

import javax.jms.Topic;

@Component

public class ProducerTopic {

    // 属性注入

    @Autowired

    private JmsMessagingTemplate jmsMessagingTemplate;

    @Autowired

    private Topic topic;

    // 定时发送消息

    @Scheduled(fixedDelay = 2000l)

    public void sendMsg(){

        jmsMessagingTemplate.convertAndSend(topic,"发送定时消息到主题");

        System.out.println("-----主题消息发送完成------");

    }

}
ProducertopicApplication
package com.producertopic.producertopic;

import org.springframework.boot.SpringApplication;

import org.springframework.boot.autoconfigure.SpringBootApplication;

import org.springframework.scheduling.annotation.EnableScheduling;

@SpringBootApplication

@EnableScheduling

public class ProducertopicApplication {

    public static void main(String[] args) {

        SpringApplication.run(ProducertopicApplication.class, args);

    }

}
application.properties
server.port=7779

# 配置activemq连接,url

spring.activemq.broker-url=tcp://127.0.0.1:61616

spring.activemq.user=admin

spring.activemq.password=admin

# activemq的模式queue(false),topic(true)

spring.jms.pub-sub-domain=true

# 主题名称

topic-boot-name=newtopic
消费者

TopicConsumer
package com.consumertopic.consumertopic;

import org.springframework.jms.annotation.JmsListener;

import org.springframework.stereotype.Component;

import javax.jms.JMSException;

import javax.jms.TextMessage;

@Component

public class TopicConsumer {

    // 接收消息---设置消费者监听的目的地(队列), 如果监听到队列中有消息,通过方法的形参表示接收到的消息

    // Message:TextMessage

    @JmsListener(destination = "${topic-boot-name}")

    public void receiveMsg(TextMessage textMessage) throws JMSException {

        System.out.println("topic下的消费者接收到主题中的消息:"+textMessage.getText());

    }

}
application.properties
server.port=7776

# 配置activemq连接,url

spring.activemq.broker-url=tcp://127.0.0.1:61616

spring.activemq.user=admin

spring.activemq.password=admin

# activemq的模式queue(false),topic(true)

spring.jms.pub-sub-domain=true

# 主题名称

topic-boot-name=newtopic
ConsumertopicApplication
package com.consumertopic.consumertopic;

import org.springframework.boot.SpringApplication;

import org.springframework.boot.autoconfigure.SpringBootApplication;

@SpringBootApplication

public class ConsumertopicApplication {

    public static void main(String[] args) {

        SpringApplication.run(ConsumertopicApplication.class, args);

    }

}
ConsumertopicApplication2
package com.consumertopic.consumertopic;

import org.springframework.boot.SpringApplication;

import org.springframework.boot.autoconfigure.SpringBootApplication;

@SpringBootApplication

public class ConsumertopicApplication2 {

    public static void main(String[] args) {

        SpringApplication.run(ConsumertopicApplication2.class, args);

    }

}
public class ProducertopicApplication {
ActiveMQ-模块代码-02的更多相关文章
- Verilog HDL基础语法讲解之模块代码基本结构
Verilog HDL基础语法讲解之模块代码基本结构 本章主要讲解Verilog基础语法的内容,文章以一个最简单的例子"二选一多路器"来引入一个最简单的Verilog设计文件的 ...
- 彻底告别加解密模块代码拷贝-JCE核心Cpiher详解
前提 javax.crypto.Cipher,翻译为密码,其实叫做密码器更加合适.Cipher是JCA(Java Cryptographic Extension,Java加密扩展)的核心,提供基于多种 ...
- MDU某产品OMCI模块代码质量现状分析
说明 本文参考MDU系列某产品OMCI模块现有代码,提取若干实例以说明目前的代码质量,亦可作为甄别不良代码的参考. 本文旨在就事论事,而非否定前人(没有前人的努力也难有后人的进步).希望以史为鉴,不破 ...
- 【VS外接程序】利用T4模板生成模块代码
引言 记得第一次做asp.net mvc项目时,可以用model直接生成Html的增删改查页面, 没什么特殊要求都可以不用修改直接用了, 觉得很神奇,效率太高了.后来在做客户端开发时,发现很多模块都是 ...
- Excel VBA在生成副本的工作表中插入本工作簿中的VBA模块代码
即在工作簿中添加一个工作表,然后移出并存为新的工作簿,在移出前将本工作簿的一个模块的代码拷贝至新的工作簿.下面是关键代码: '===================================== ...
- OSGi-入门篇之模块层(02)
1 什么是模块化 模块层是OSGi框架中最基础的一部分,其中Java的模块化特性在这一层得到了很好的实现.但是这种实现与Java本身现有的一些模块化特性又有明显的不同. 在OSGi中模块的定义可以参考 ...
- Zepto.js库touch模块代码解析
Zepto.js也许并不陌生,专门针对移动端开发,Zepto有一些基本的触摸事件可以用来做触摸屏交互(tap事件.swipe事件),Zepto是不支持IE浏览器的. 下面来解析一些Zepto.js触摸 ...
- 问题解决:Spyder不支持OpenCV模块代码提示
在使用中遇到的问题是,Spyder的代码完成功能不支持某些编译模块(.pyd后缀),如OpenCV的Python模块cv/cv2,在编写脚本文件时,在已存在import cv&import c ...
- Linux-3.0.8中基于S5PV210的GPIO模块代码追踪和分析
编写按键驱动时,想知道内核是如何管理GPIO的,所以开始追踪代码,中间走了一些弯路,现记录于此. 追踪代码之前,我猜测:第一,这部分代码应该在系统set up阶段执行:第二,GPIO的代码应该在mac ...
- verilog HDL -模块代码基本结构
1--verilog HDL 语言的预编译指令作用:指示在编译verliog HDL源代码前,需要执行哪些操作. 2--模块内容是嵌在module 和endmodule两个语句之间.每个模块实现特定的 ...
随机推荐
- jdk1.5新特性之------->可变参数
/* jdk1.5新特性之------->可变参数 需求: 定义一个函数做加法功能(函数做几个数据 的加法功能是不确定). 可变参数的格式: 数据类型... 变量名 可变参数要 注意的细节: 1 ...
- MySQL 日志管理及备份与恢复
MySQL 日志管理及备份与恢复 1.日志管理 2.备份与恢复 1.日志管理: MySQL的默认日志保存位置为/usr/local/mysql/data 日志开启方式有两种:通过配置文件或者是通过命令 ...
- docker平时使用异常记录
GPU主机重启后,启动使用GPU的容器报错 docker: Error response from daemon: Unknown runtime specified nvidia. 解决办法:修改/ ...
- Dubbo基础二之架构及处理流程概述
Dubbo基础一之实战初体验 - 池塘里洗澡的鸭子 - 博客园 (cnblogs.com)中体验了Dubbo的使用,对于消费端对服务提供者的调用非常清晰明确.那么Dubbo是如何做到的呢?下面对Dub ...
- Spring Boot 自动配置(基本配置)
在关于Spring Boot的第一篇中就提到了其几大特性,其中关于Java配置简化属性注入在上一篇SpringBoot外部配置 - 池塘里洗澡的鸭子 - 博客园 (cnblogs.com)中已经介绍. ...
- Oracle数据库-常规中行显示0,解决方案
如图,如果当前位置显示为0 原因:Oracle不是实时的对表进行分析的,需要手动执行分析. 解决方案: 分析表 analyze table tablename compute statistics;
- python-利用shutil模块rmtree方法可以将文件及其文件夹下的内容删除
import shutil import os image_path = os.path.join(os.path.dirname(__file__),'image') # 如果存在image目录则删 ...
- k8s核心资源:精简版yaml示例
yaml语法及格式校验 详见:https://www.cnblogs.com/uncleyong/p/15437385.html 创建资源的三种方式 参考:https://www.cnblogs.co ...
- 内网安全之横向移动(冰蝎&&msf&&IPC$)
1.冰蝎介绍 冰蝎是一款目前比较流行的Webshell管理工具,在2021年更新的2021.4.20 v3.0 Beta 9 版本中去除了动态密钥协商机制,采用预共享密钥,载荷全程无明文.因其优秀的加 ...
- IP欺骗实验
实验目的 1.掌握IP欺骗的原理 2.学会利用IPSpoof软件工具进行伪造源IP地址的IP欺骗. 实验内容 使用IPSpoof进行本机IP地址修改,与目标主机通信,进行IP欺骗实验 实验环境描述 1 ...