
WPF 实现用户头像选择器
制作一个用户头像选择器仿 WeGame
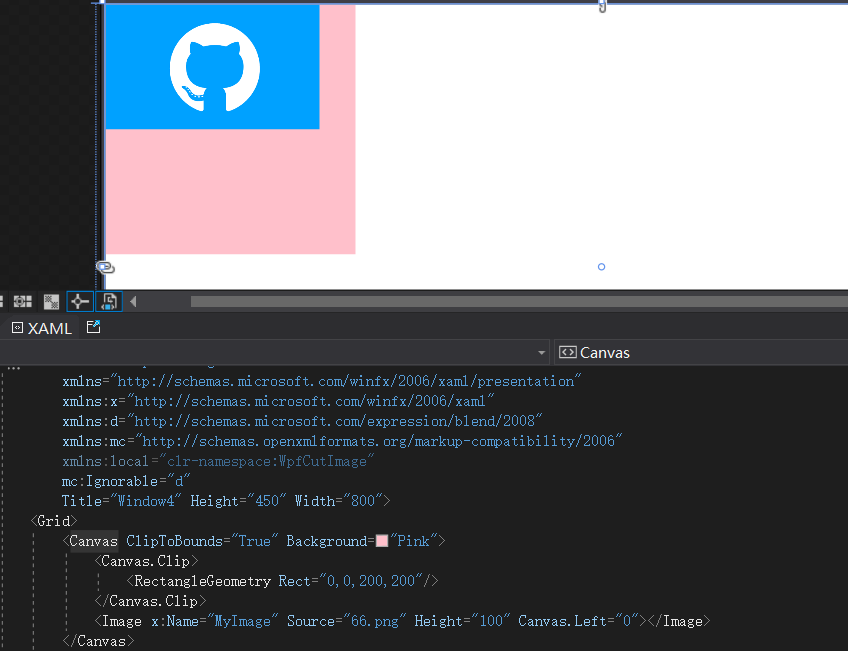
制作一个用户头像选择 Canvas为父控件所实现,展示图片使用Image,Path当作上方的蒙版;Canvas:主要用途方便移动Image,设置ClipToBounds="True"裁剪为一个正方形200x200做为主要展示区域;Image:展示需要裁剪的图片;
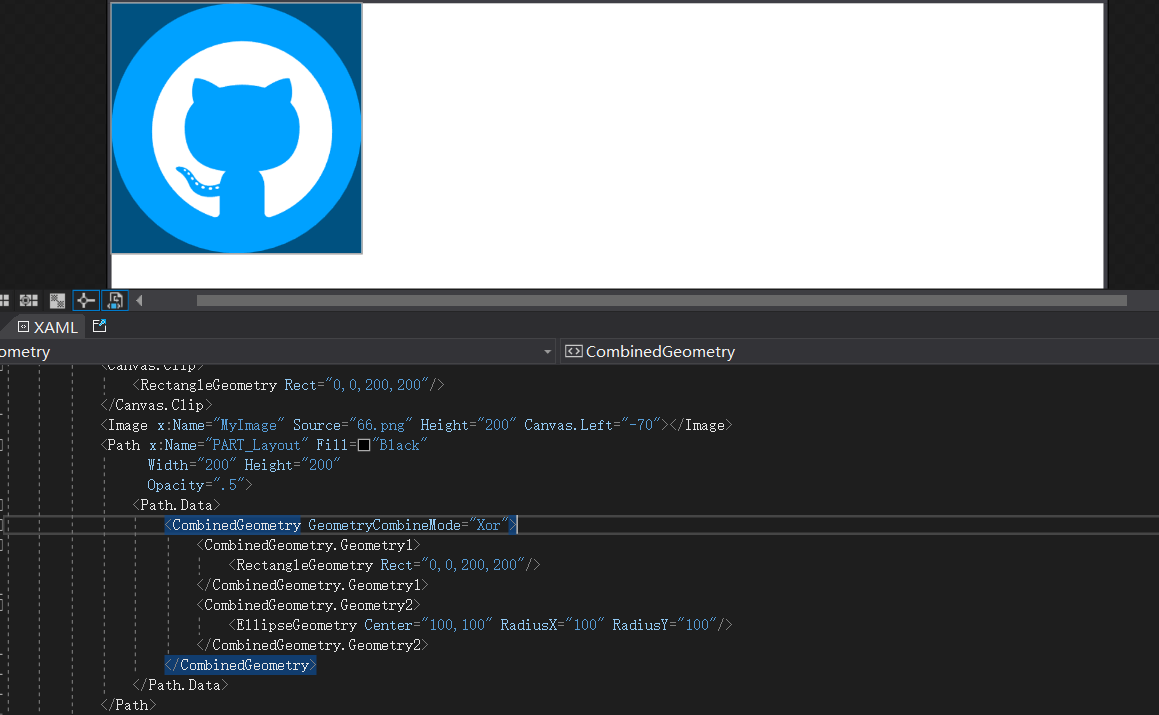
Path:CombinedGeometry[1]绘制蒙版大小200x200效果如下;
当选择一个本地图片的时候判断宽与高谁更大,谁小就将它更改为 200,另一边做等比缩放后给到DrawingVisual绘制一个新的BitmapFrame[2]给Image控件做展示;当移动图片的时候右侧展示当前区域使用CroppedBitmap[3]进行裁剪并显示; 源码Github[4] Gitee[5]

1)CropAvatar.xaml 代码如下;
<ResourceDictionary xmlns="http://schemas.microsoft.com/winfx/2006/xaml/presentation"
                    xmlns:x="http://schemas.microsoft.com/winfx/2006/xaml"
                    xmlns:controls="clr-namespace:WPFDevelopers.Controls">
    <ResourceDictionary.MergedDictionaries>
        <ResourceDictionary Source="Basic/ControlBasic.xaml"/>
    </ResourceDictionary.MergedDictionaries>

    <Style TargetType="controls:CropAvatar" BasedOn="{StaticResource ControlBasicStyle}">
        <Setter Property="Template">
            <Setter.Value>
                <ControlTemplate TargetType="{x:Type controls:CropAvatar}">
                    <Canvas x:Name="PART_Canvas" ClipToBounds="True">
                        <Image x:Name="PART_Image" Cursor="SizeAll" ></Image>
                        <Path x:Name="PART_Layout"
                              Fill="{DynamicResource BlackSolidColorBrush}"
                              Width="200" Height="200"
                              Opacity=".5">
                            <Path.Data>
                                <CombinedGeometry GeometryCombineMode="Xor">
                                    <CombinedGeometry.Geometry1>
                                        <RectangleGeometry Rect="0,0,200,200"/>
                                    </CombinedGeometry.Geometry1>
                                    <CombinedGeometry.Geometry2>
                                        <EllipseGeometry Center="100,100" RadiusX="100" RadiusY="100"/>
                                    </CombinedGeometry.Geometry2>
                                </CombinedGeometry>
                            </Path.Data>
                        </Path>
                        <Grid x:Name="PART_Grid" Width="200" Height="200">
                            <Button x:Name="PART_ReplaceButton" Style="{StaticResource PathButton}"
                                    HorizontalAlignment="Right"
                                    VerticalAlignment="Top"
                                    Width="40" Height="40" ToolTip="更换图片"
                                    Visibility="Collapsed">
                                <Button.Content>
                                    <Path Data="{StaticResource PathReplace}"
                                          Fill="{StaticResource PrimaryNormalSolidColorBrush}"
                                          Height="15"
                                          Width="15"
                                          Stretch="Fill" />
                                </Button.Content>
                            </Button>
                            <Button x:Name="PART_AddButton" Style="{StaticResource PathButton}"
                                    Width="40" Height="40" ToolTip="选择图片">
                                <Button.Content>
                                    <Path Data="{StaticResource PathAdd}"
                                          Fill="{StaticResource PrimaryNormalSolidColorBrush}"
                                          Height="20"
                                          Width="20"
                                          Stretch="Fill"
                                          RenderTransformOrigin="0.5,0.5" IsHitTestVisible="False">
                                        <Path.RenderTransform>
                                            <RotateTransform Angle="45"/>
                                        </Path.RenderTransform>
                                    </Path>
                                </Button.Content>
                            </Button>
                        </Grid>
                    </Canvas>
                </ControlTemplate>
            </Setter.Value>
        </Setter>
    </Style>

</ResourceDictionary>
2)CropAvatar.cs 代码如下;
using System;
using System.Windows;
using System.Windows.Controls;
using System.Windows.Input;
using System.Windows.Media;
using System.Windows.Media.Imaging;
using System.Windows.Shapes;
using WPFDevelopers.Helpers;

namespace WPFDevelopers.Controls
{
    [TemplatePart(Name = CanvasTemplateName, Type = typeof(Canvas))]
    [TemplatePart(Name = ImageTemplateName, Type = typeof(Image))]
    [TemplatePart(Name = PathTemplateName, Type = typeof(Path))]
    [TemplatePart(Name = GridTemplateName, Type = typeof(Grid))]
    [TemplatePart(Name = ReplaceButtonTemplateName, Type = typeof(Button))]
    [TemplatePart(Name = AddButtonTemplateName, Type = typeof(Button))]
    public partial class CropAvatar : Control
    {
        private const string CanvasTemplateName = "PART_Canvas";
        private const string ImageTemplateName = "PART_Image";
        private const string PathTemplateName = "PART_Layout";
        private const string GridTemplateName = "PART_Grid";
        private const string ReplaceButtonTemplateName = "PART_ReplaceButton";
        private const string AddButtonTemplateName = "PART_AddButton";
        private Point point;
        private const int _size = 200;
        private bool isDown;
        private bool isLeft;
        private CroppedBitmap crop;
        private Canvas canvas;
        private Image image;
        private Path path;
        private Grid grid;
        private Button replaceButton, addButton;
        private int initialX, initialY, voffsetX, voffsetY;
        private double vNewStartX, vNewStartY, _StartX, _StartY, centerX, centerY;
        private BitmapFrame bitmapFrame;

        public ImageSource OutImageSource
        {
            get { return (ImageSource)GetValue(OutImageSourceProperty); }
            set { SetValue(OutImageSourceProperty, value); }
        }

        public static readonly DependencyProperty OutImageSourceProperty =
            DependencyProperty.Register("OutImageSource", typeof(ImageSource), typeof(CropAvatar), new PropertyMetadata(null));

        static CropAvatar()
        {
            DefaultStyleKeyProperty.OverrideMetadata(typeof(CropAvatar), new FrameworkPropertyMetadata(typeof(CropAvatar)));
        }
        public override void OnApplyTemplate()
        {
            base.OnApplyTemplate();
            canvas = GetTemplateChild(CanvasTemplateName) as Canvas;
            canvas.Loaded += Canvas_Loaded;
            grid = GetTemplateChild(GridTemplateName) as Grid;
            image = GetTemplateChild(ImageTemplateName) as Image;
            image.MouseDown += Image_MouseDown;
            image.MouseMove += Image_MouseMove;
            image.MouseUp += Image_MouseUp;
            image.MouseLeave += Image_MouseLeave;
            path = GetTemplateChild(PathTemplateName) as Path;
            replaceButton = GetTemplateChild(ReplaceButtonTemplateName) as Button;
            replaceButton.Click += ReplaceButton_Click;
            addButton = GetTemplateChild(AddButtonTemplateName) as Button;
            addButton.Click += AddButton_Click;
        }

        private void Canvas_Loaded(object sender, RoutedEventArgs e)
        {
            if (sender is Canvas canvas)
            {
                var width = canvas.ActualWidth;
                var height = canvas.ActualHeight;
                centerX = (width - path.Width) / 2.0d;
                centerY = (height - path.Height) / 2.0d;
                canvas.Clip = new RectangleGeometry(new Rect(centerX, centerY, 200, 200));
                Canvas.SetLeft(path, centerX);
                Canvas.SetTop(path, centerY);
                Canvas.SetLeft(grid, centerX);
                Canvas.SetTop(grid, centerY);
            }
        }

        private void Image_MouseLeave(object sender, MouseEventArgs e)
        {
            isDown = false;
            if (isLeft)
                _StartX = Canvas.GetLeft(image);
            else
                _StartY = Canvas.GetTop(image);
        }

        private void Image_MouseUp(object sender, MouseButtonEventArgs e)
        {
            if (isDown)
            {
                var vPoint = e.GetPosition(this);
                if (isLeft)
                {
                    _StartX = Canvas.GetLeft(image);
                    initialX = voffsetX;
                }

                else
                {
                    _StartY = Canvas.GetTop(image);
                    initialY = voffsetY;
                }
            }
        }

        private void Image_MouseMove(object sender, MouseEventArgs e)
        {
            if (e.LeftButton == MouseButtonState.Pressed && isDown)
            {
                var vPoint = e.GetPosition(this);
                if (isLeft)
                {
                    var voffset = vPoint.X - point.X;
                    vNewStartX = _StartX + voffset;
                    var xPath = Canvas.GetLeft(path);
                    if (vNewStartX <= xPath && vNewStartX >= -(bitmapFrame.Width - 200 - xPath))
                    {
                        Canvas.SetLeft(image, vNewStartX);
                        voffsetX = initialX - (int)voffset;
                        voffsetX = voffsetX < 0 ? 0 : voffsetX;
                        crop = new CroppedBitmap(bitmapFrame, new Int32Rect(voffsetX, 0, _size, _size));

                    }
                }
                else
                {
                    var voffset = vPoint.Y - point.Y;
                    vNewStartY = _StartY + voffset;
                    var yPath = Canvas.GetTop(path);
                    if (vNewStartY <= yPath && vNewStartY >= -(bitmapFrame.Height - 200 - yPath))
                    {
                        Canvas.SetTop(image, vNewStartY);
                        voffsetY = initialY - (int)voffset;
                        voffsetY = voffsetY < 0 ? 0 : voffsetY;
                        crop = new CroppedBitmap(bitmapFrame, new Int32Rect(0, voffsetY, _size, _size));
                    }
                }
                OutImageSource = crop;
            }
        }

        private void Image_MouseDown(object sender, MouseButtonEventArgs e)
        {
            isDown = true;
            point = e.GetPosition(this);
        }

        private void ReplaceButton_Click(object sender, RoutedEventArgs e)
        {
            InitialImage();
        }

        private void AddButton_Click(object sender, RoutedEventArgs e)
        {
            InitialImage();
        }

        void InitialImage()
        {
            vNewStartX = 0;
            vNewStartY = 0;
            var uri = ControlsHelper.ImageUri();
            if (uri == null) return;
            var bitmap = new BitmapImage(uri);
            if (bitmap.Height > bitmap.Width)
            {
                double scale = (double)bitmap.Width / (double)path.Width;
                image.Width = _size;
                image.Height = (double)bitmap.Height / scale;
                isLeft = false;
            }
            else if (bitmap.Width > bitmap.Height)
            {
                double scale = (double)bitmap.Height / (double)path.Height;
                image.Width = (double)bitmap.Width / scale;
                image.Height = _size;
                isLeft = true;
            }
            bitmapFrame = ControlsHelper.CreateResizedImage(bitmap, (int)image.Width, (int)image.Height, 0);
            image.Source = bitmapFrame;
            if (image.Source != null)
            {
                replaceButton.Visibility = Visibility.Visible;
                addButton.Visibility = Visibility.Collapsed;
            }
            Canvas.SetLeft(grid, centerX);
            Canvas.SetTop(grid, centerY);
            _StartX = (canvas.ActualWidth - image.Width) / 2.0d;
            _StartY = (canvas.ActualHeight - image.Height) / 2.0d;
            Canvas.SetLeft(image, _StartX);
            Canvas.SetTop(image, _StartY);
            if (isLeft)
            {
                initialX = (int)(image.Width - 200) / 2;
                initialY = 0;
                crop = new CroppedBitmap(bitmapFrame, new Int32Rect(initialX, 0, _size, _size));

            }
            else
            {
                initialY = (int)(image.Height - 200) / 2;
                initialX = 0;
                crop = new CroppedBitmap(bitmapFrame, new Int32Rect(0, initialY, _size, _size));
            }
            OutImageSource = crop;
        }

    }
}
3)CropAvatarWindow.xaml使用如下;
<ws:Window x:Class="WPFDevelopers.Samples.ExampleViews.CropAvatarWindow"
        xmlns="http://schemas.microsoft.com/winfx/2006/xaml/presentation"
        xmlns:x="http://schemas.microsoft.com/winfx/2006/xaml"
        xmlns:d="http://schemas.microsoft.com/expression/blend/2008"
        xmlns:mc="http://schemas.openxmlformats.org/markup-compatibility/2006"
        xmlns:wpfdev="https://github.com/WPFDevelopersOrg/WPFDevelopers"
        xmlns:ws="https://github.com/WPFDevelopersOrg.WPFDevelopers.Minimal"
        mc:Ignorable="d"  WindowStyle="ToolWindow" ResizeMode="NoResize"
        WindowStartupLocation="CenterScreen"
        Title="WPF 开发者-头像选择器" Height="450" Width="800">
    <Grid>
        <Grid.ColumnDefinitions>
            <ColumnDefinition/>
            <ColumnDefinition/>
        </Grid.ColumnDefinitions>
        <Grid.RowDefinitions>
            <RowDefinition/>
            <RowDefinition Height="Auto"/>
        </Grid.RowDefinitions>
        <wpfdev:CropAvatar x:Name="MyCropAvatar"/>
        <Image Grid.Column="1" Name="CropAvatarImage" Source="{Binding ElementName=MyCropAvatar,Path=OutImageSource}"
               Stretch="Fill" Width="200" Height="200">
            <Image.Clip>
                <EllipseGeometry Center="100,100" RadiusX="100" RadiusY="100"/>
            </Image.Clip>
        </Image>
        <UniformGrid Grid.Row="1" Grid.ColumnSpan="2"
                     HorizontalAlignment="Center"
                     VerticalAlignment="Center">
            <Button  Content="保存" Click="btnSave_Click" Style="{StaticResource PrimaryButton}" Margin="4,0"/>
            <Button  Content="关闭" Click="btnClose_Click" Margin="4,0"/>
        </UniformGrid>
    </Grid>
</ws:Window>
4) CropAvatarWindow.xaml.cs 代码如下;
using System.Windows;

namespace WPFDevelopers.Samples.ExampleViews
{
    /// <summary>
    /// CropAvatarWindow.xaml 的交互逻辑
    /// </summary>
    public partial class CropAvatarWindow
    {
        public CropAvatarWindow()
        {
            InitializeComponent();
        }

        private void btnSave_Click(object sender, RoutedEventArgs e)
        {
            DialogResult = true;
        }

        private void btnClose_Click(object sender, RoutedEventArgs e)
        {
            DialogResult = false;
        }
    }
}
5) CropAvatarExample.xaml 使用如下;
<UserControl x:Class="WPFDevelopers.Samples.ExampleViews.CropAvatarExample"
             xmlns="http://schemas.microsoft.com/winfx/2006/xaml/presentation"
             xmlns:x="http://schemas.microsoft.com/winfx/2006/xaml"
             xmlns:mc="http://schemas.openxmlformats.org/markup-compatibility/2006"
             xmlns:d="http://schemas.microsoft.com/expression/blend/2008"
             xmlns:wpfdev="https://github.com/WPFDevelopersOrg/WPFDevelopers"
             xmlns:local="clr-namespace:WPFDevelopers.Samples.ExampleViews"
             mc:Ignorable="d"
             d:DesignHeight="450" d:DesignWidth="800">
    <Grid>
        <Grid.ColumnDefinitions>
            <ColumnDefinition/>
            <ColumnDefinition/>
        </Grid.ColumnDefinitions>
        <Button Content="图像选择器" VerticalAlignment="Center" HorizontalAlignment="Center" Click="Button_Click"/>
        <Image Grid.Column="1" Name="MyImage"
               Stretch="Fill" Width="200" Height="200">
            <Image.Clip>
                <EllipseGeometry Center="100,100" RadiusX="100" RadiusY="100"/>
            </Image.Clip>
        </Image>
    </Grid>
</UserControl>
6) CropAvatarExample.xaml.cs 代码如下;
using System.Windows.Controls;

namespace WPFDevelopers.Samples.ExampleViews
{
    /// <summary>
    /// CropAvatarExample.xaml 的交互逻辑
    /// </summary>
    public partial class CropAvatarExample : UserControl
    {
        public CropAvatarExample()
        {
            InitializeComponent();
        }

        private void Button_Click(object sender, System.Windows.RoutedEventArgs e)
        {
            var cropAvatarWindow = new CropAvatarWindow();
            if (cropAvatarWindow.ShowDialog() == true)
            {
                MyImage.Source = cropAvatarWindow.CropAvatarImage.Source;
            }
        }
    }
}
参考资料
CombinedGeometry: https://docs.microsoft.com/zh-cn/dotnet/api/system.windows.media.combinedgeometry?view=netframework-4.0
[2]
BitmapFrame: https://docs.microsoft.com/zh-cn/dotnet/api/system.windows.media.imaging.bitmapframe?view=windowsdesktop-6.0
[3]
CroppedBitmap: https://docs.microsoft.com/zh-cn/dotnet/api/system.windows.media.imaging.croppedbitmap?view=windowsdesktop-6.0
[4]
Github: https://github.com/WPFDevelopersOrg/WPFDevelopers
[5]
Gitee: https://gitee.com/WPFDevelopersOrg/WPFDevelopers
WPF 实现用户头像选择器的更多相关文章
- iOS常见用户头像的圆形图片裁剪常见的几种方法
在开发中,基本上APP的用户头像的处理都需要把用户所上传的方形图片,处理为圆形图片.在这里就总结三种常见的处理圆形图片的方法. 1.使用位图上下文 2.使用UIView的layer进行处理 3.使用r ...
- ios/iphone手机请求微信用户头像错位BUG及解决方法
转:http://www.jslover.com/code/527.html ios/iphone手机请求微信用户头像错位BUG及解决方法 发布时间:2014-12-01 16:37:01 评论数:0 ...
- 浅尝辄止WPF自定义用户控件(实现颜色调制器)
主要利用用户控件实现一个自定义的颜色调制控件,实现一个小小的功能,具体实现界面如下. 首先自己新建一个wpf的用户控件类,我就放在我的wpf项目的一个文件夹下面,因为是一个很小的东西,所以就没有用mv ...
- app如何更换用户头像信息呢?不妨这样做
对于现在的手机应用而言,要想获得更多的人的使用,就需要给用户更多的自由功能才行,这也是基于用户体验开发软件的核心思想,一切以用户为中心,想用户之所想,做用户之所需.今天我就来谈一谈刚学到的一个关于设置 ...
- android开发——用户头像
最近,小灵狐得知了一种能够加快修炼速度的绝世秘法,那便是修炼android神功.小灵狐打算用android神功做一个app,今天他的修炼内容就是头像功能.可是小灵狐是个android小白啊,所以修炼过 ...
- php制作圆形用户头像——自定义封装类源代码
思路 使用图层的方法设计,共需要创建3个图像层 1.底层:最后生成的图像 2.真实用户头像:作为中间层,用户上传的真实头像图片 3.圆形蒙版:作为最上层,在蒙版中绘制圆形,并设置为透明 如图: 代码如 ...
- App里面如何正确显示用户头像
1.说明,一般用户头像在上传的时候都会处理为正方形,如果没有处理该怎么正确显示用户头像呢?解决方案:用css强制 在线地址移动端:戳这里 <div class="main-meimg& ...
- spring--mvc添加用户及用户头像上传
spring--mvc添加用户及用户头像上传 添加用户步骤: 1.用ajax获取省份信息 2.添加用户 代码:register.jsp <meta http-equiv="Conten ...
- IOS 设置圆角用户头像
在App中有一个常见的功能,从系统相册或者打开照相机得到一张图片,然后作为用户的头像.从相册中选取的图片明明都是矩形的图片,但是展示到界面上却变成圆形图片,这个神奇的效果是如何实现的呢? 请大家跟着下 ...
随机推荐
- java.sql和javax.sql的区别
根据 JDBC 规范,javax.sql 包中的类和接口首先作为 JDBC 2.0 可选包提供.此可选程序包以前与 J2SE1.2 中的 java.sql 程序包是分开的.从 J2SE1.4 开始,这 ...
- 这 BUG,绝了
上周只上了三天班,但我也丝毫不敢懈怠,BUG 更是一个也没少写. 看着满屏幕的 ERROR,我陷入沉思.为什么我写的代如此烂,无法像大牛们写的那般优雅? 越想越自卑,越想越抑郁.我觉得这样不行,一定得 ...
- JS 的 new 是个啥?
JS 的 new 是个啥? 本文写于 2019 年 11 月 25 日 new关键字在很多语言里面,总是用于把类实例化,可是 JS 之前就没有"类"这个概念呀. 那 JS 的new ...
- 120_PowerBI堆积瀑布图_R脚本Visual
博客:www.jiaopengzi.com 焦棚子的文章目录 请点击下载附件 一.效果 二.data 三.添加字段 注意红色框标注地方 四.code # 下面用于创建数据帧并删除重复行的代码始终执行, ...
- 随笔总结:8086CPU的栈顶超界问题
我们学习编程都知道栈的超界限问题是非常严重的问题,他可能会覆盖掉其他数据,并且我们不知道这个数据是我们自己保存的用于其他用途的数据还是系统的数据,这样常常容易引发一连串的问题. 在学习汇编的时候,我们 ...
- 【Unity Shader学习笔记】Unity光照基础-半兰伯特光照
在光照无法达到的区域,模型的外观通常是全黑的,没有任何明暗变化,这会使模型的背光区域看起来就像一个平面. 使用半兰伯特光照可以解决这个问题. 逐顶点光照技术也被称为兰伯特光照模型.因为它符合兰伯特定律 ...
- salesforce零基础学习(一百一十五)记一个有趣的bug
本篇参考:https://help.salesforce.com/s/articleView?language=en_US&type=1&id=000319486 page layou ...
- Microsoft Office 代码执行漏洞临时防范方法
一.删除ms-msdt URI 注册表 1.按下键盘上的快捷组合键:win键 和 R键,打开运行(也可以在开始菜单打开运行). 2.在运行窗口中输入命令:regedit,点击确定或敲回车键就可以快速打 ...
- python实现一个加密的文字处理器
这是一个类似于记事本的文字处理器.与正常的记事本不同的是,它会将文本文档进行加密,确保无法被常规的程序打开. 由于本人是一位业余编程爱好者,对于"python之禅"之类的规则比较不 ...
- 如何用 UDP 实现可靠传输?
作者:小林coding 计算机八股文刷题网站:https://xiaolincoding.com 大家好,我是小林. 我记得之前在群里看到,有位读者字节一面的时候被问到:「如何基于 UDP 协议实现可 ...