Linux 使用nexus搭建maven私服
一、搭建
1.下载nexus
https://www.sonatype.com/download-oss-sonatype
2.上传到/root
3.解压
tar -zxvf nexus-3.12.1-01-unix.tar.gz -C /usr/local/
4.修改配置文件
♦端口
vim /usr/local/nexus-3.12.1-01/etc/nexus-default.properties
♦防火墙
vim  /etc/sysconfig/iptables
		-A INPUT -m state --state NEW -m tcp -p tcp --dport 8081 -j ACCEPT
5.登陆浏览器打开
http://192.168.56.102:8081/
	账号admin
	密码 admin123
	System Requirement: max file descriptors [4096] likely too low, increase to at least [65536].
6.修改ulimit
vim /etc/security/limits.conf
 	新增
 	* soft nofile 65535
	* hard nofile 65535
7.设置开机自启动
二、使用
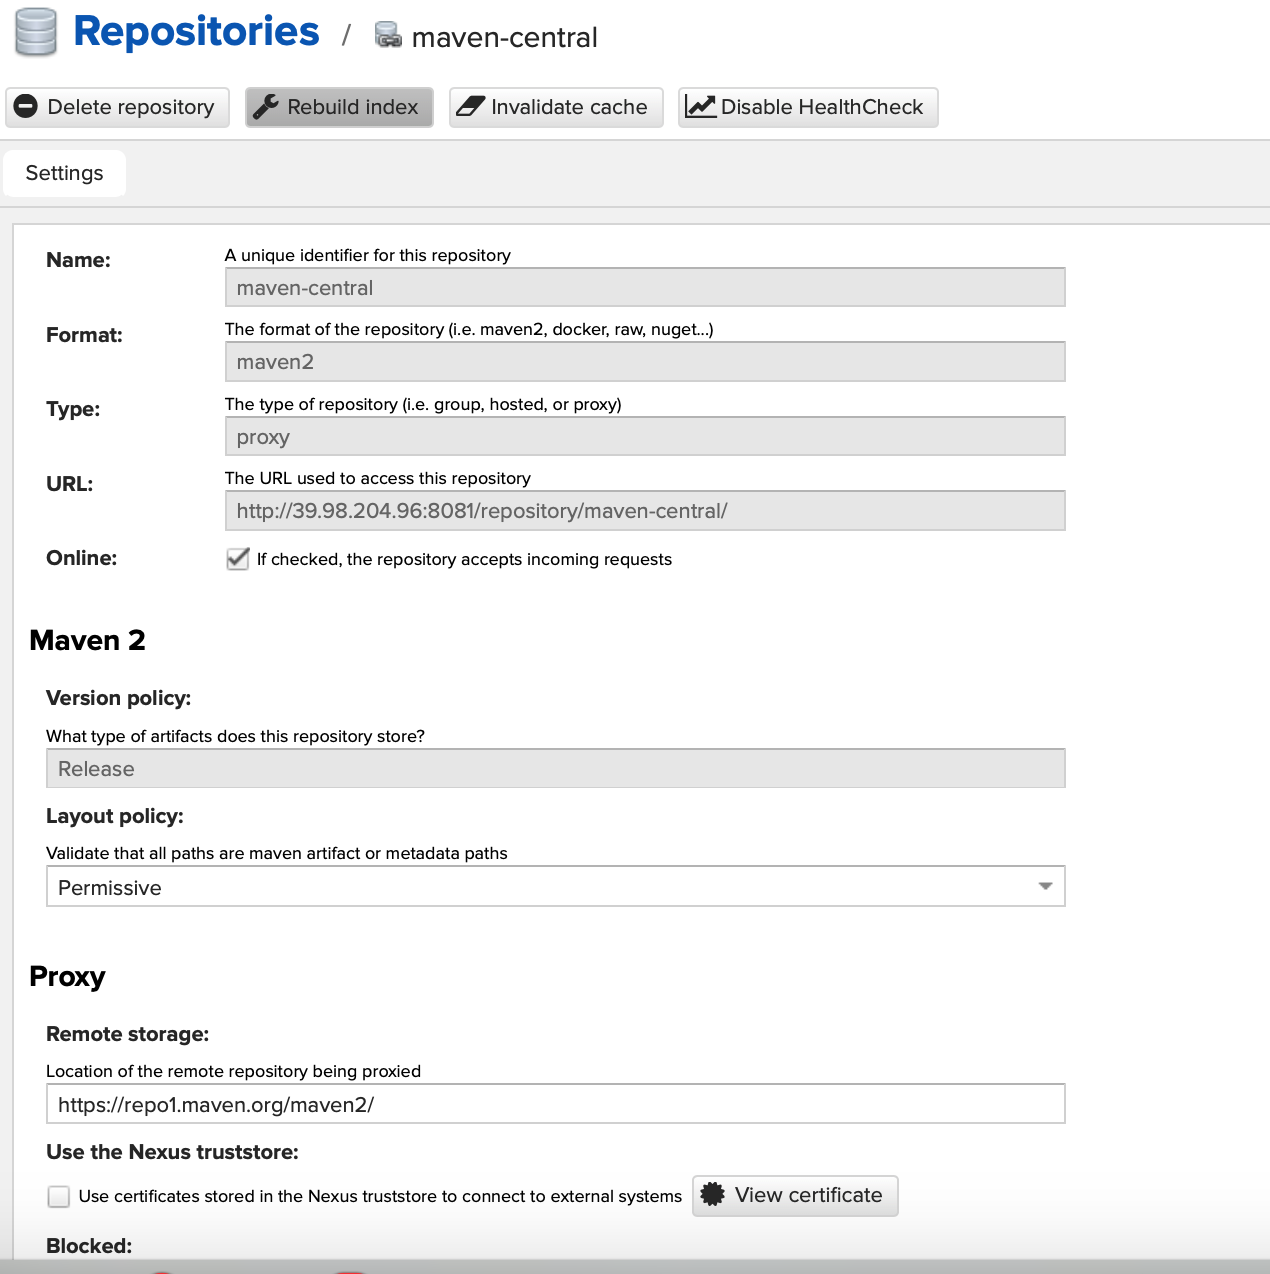
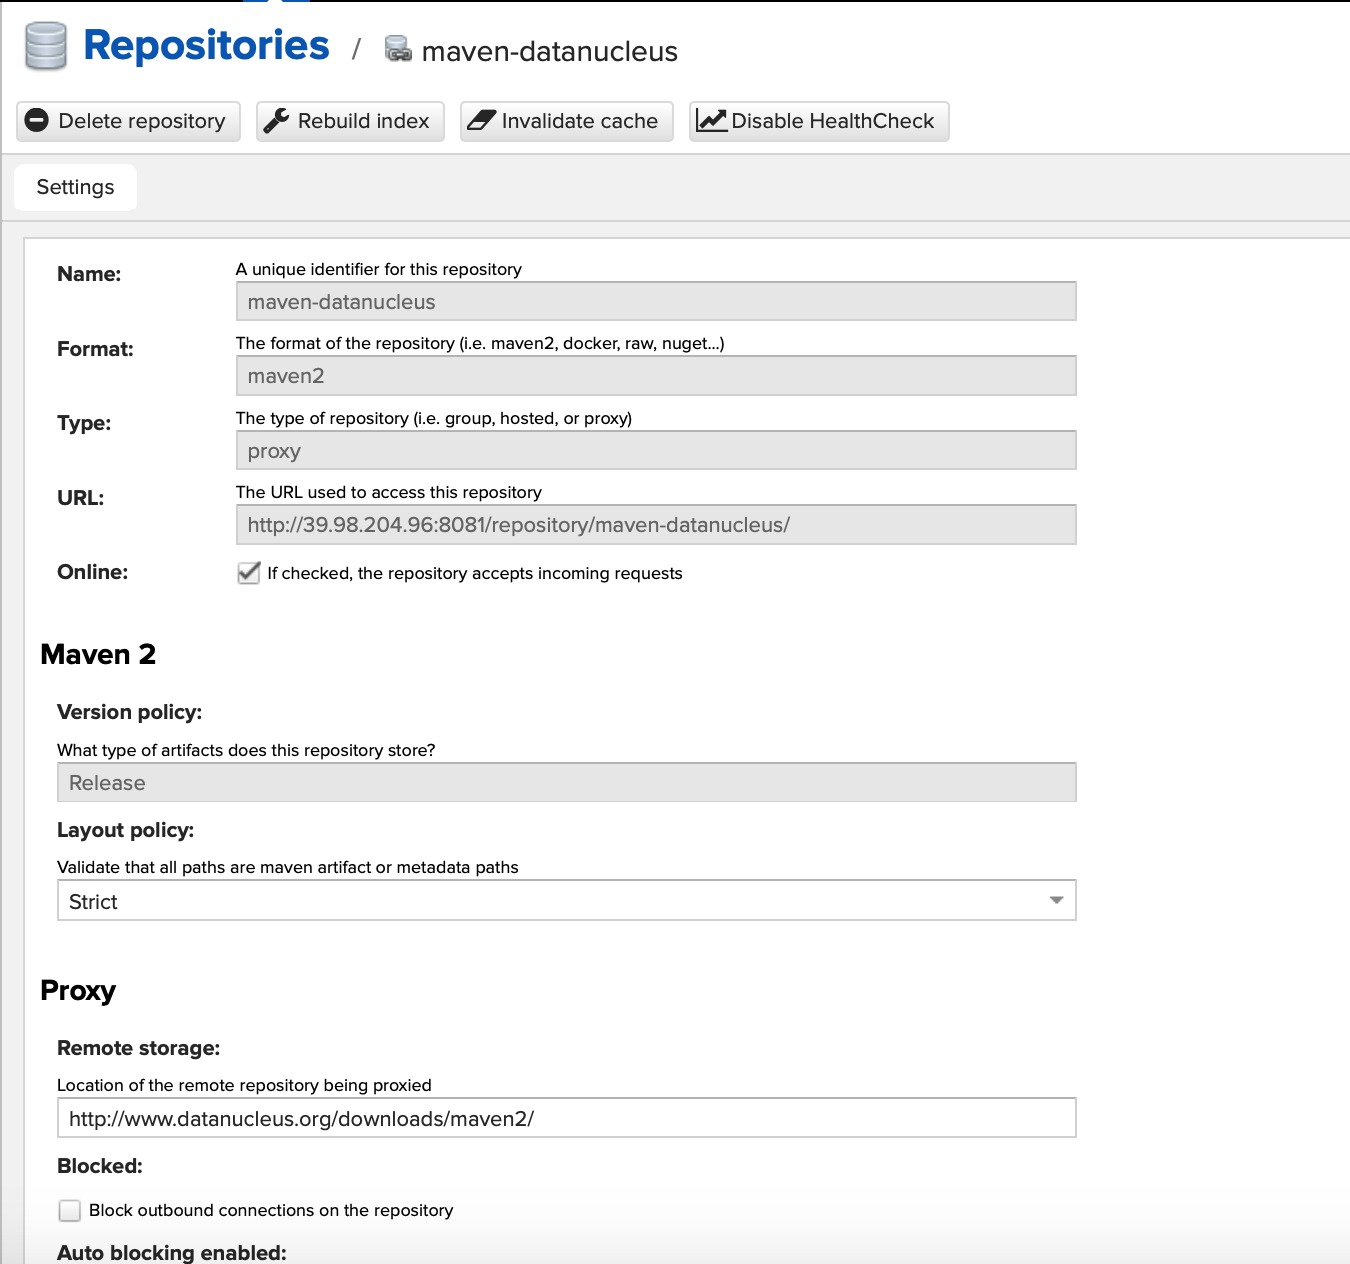
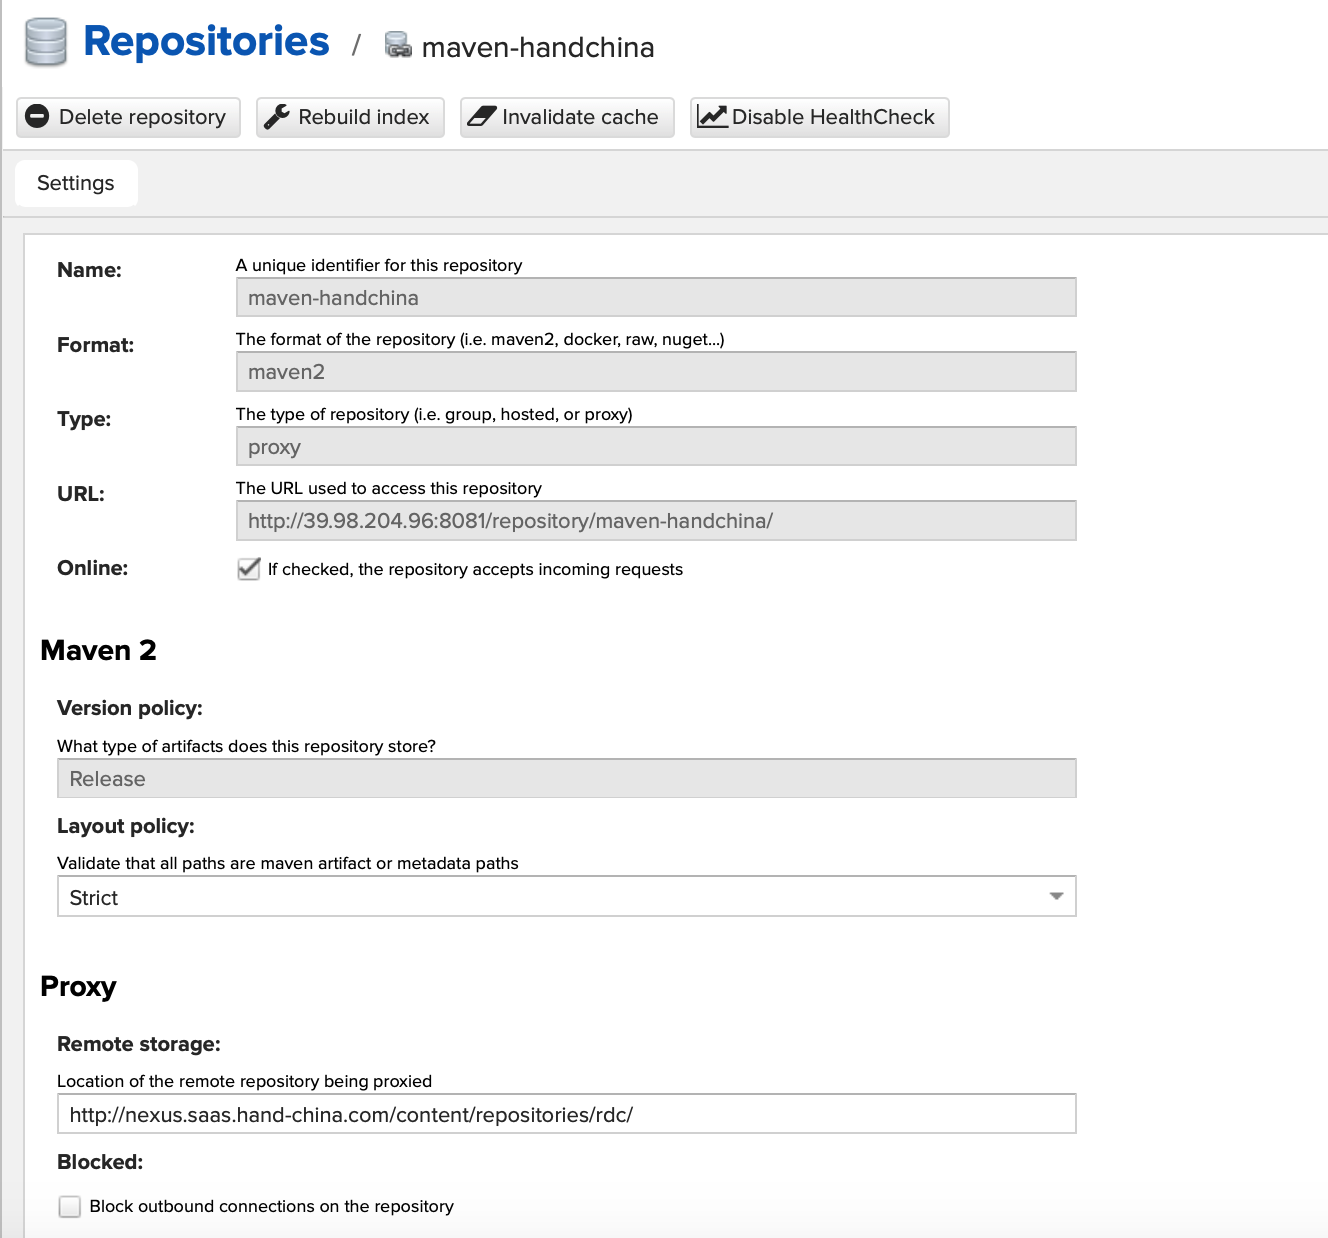
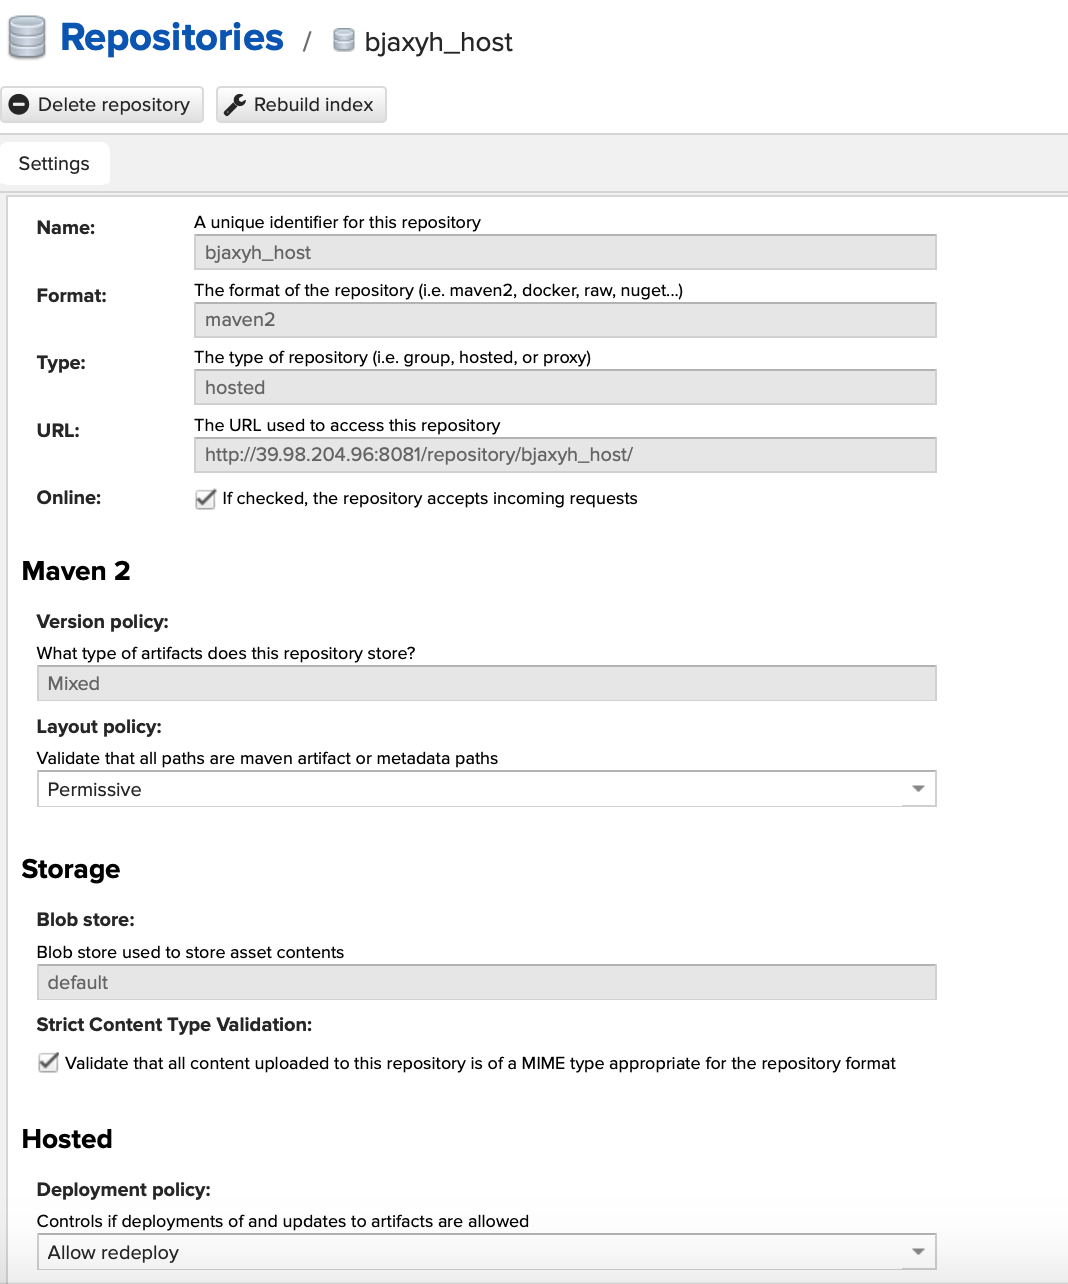
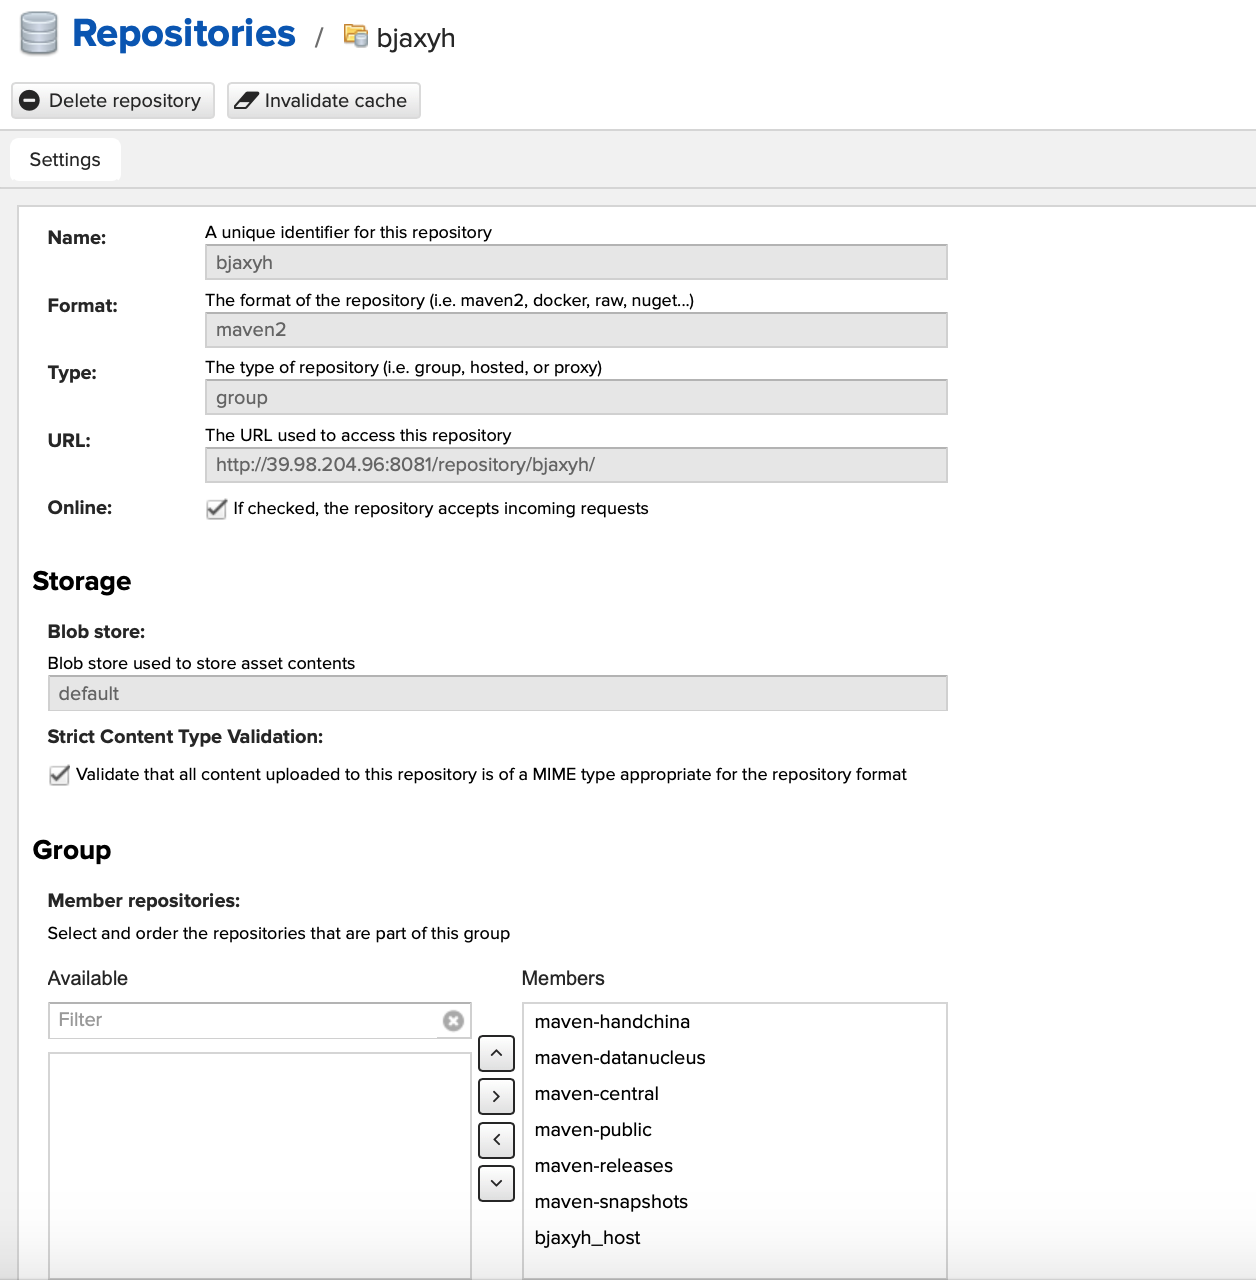
1.仓库类型
proxy:代理仓库,用于代理远程仓库
group:仓库组,通常包含了多个代理仓库和宿主仓库,在项目中只要引入仓库组就可以下载到代理仓库和宿主仓库中的包
hosted:宿主仓库,内部项目、付费jar
	releases  发布内部release版本的仓库
	snapshots 发布内部snapshots版本的仓库
	third 自建第三方jar
2.配置代理
选择阿里云http://maven.aliyun.com/nexus/content/groups/public/
3.本地maven配置
<?xml version="1.0" encoding="UTF-8"?>
<settings xmlns="http://maven.apache.org/SETTINGS/1.0.0" xmlns:xsi="http://www.w3.org/2001/XMLSchema-instance"
    xsi:schemaLocation="http://maven.apache.org/SETTINGS/1.0.0 http://maven.apache.org/xsd/settings-1.0.0.xsd">

<pluginGroups>
</pluginGroups>

<proxies>
</proxies>

<servers>
 <!-- id需要跟pom.xml的一样-->
    <server>
  	 <id>releases</id>
  	 <username>admin</username>
  	 <password>admin123</password>
  	</server>

  	<server>
  	 <id>snapshots</id>
  	  <username>admin</username>
  	 <password>admin123</password>
  	</server>
</servers>

<mirrors>
    <mirror>
      <id>repo1</id>
      <mirrorOf>*</mirrorOf>
      <name>Human Readable Name</name>
      <url>http://39.98.204.96:8081/repository/bjaxyh/</url>
    </mirror>
    <mirror>
        <id>osc</id>
        <mirrorOf>central</mirrorOf>
        <url>http://maven.aliyun.com/nexus/content/repositories/central</url>
    </mirror>

    <mirror>
        <id>osc_thirdparty</id>
        <mirrorOf>thirdparty</mirrorOf>
        <url>http://maven.aliyun.com/nexus/content/repositories/central</url>
    </mirror>
</mirrors>

<profiles>
    <profile>
 <!-- 私有库地址-->
    <repositories>
        <repository>
            <id>nexus</id> <!-- 私有仓库唯一标识-->
            <name>local private nexus</name><!--私有库名称 -->
			<!--私有库地址-->
            <url>http://39.98.204.96:8081/repository/bjaxyh/</url>
            <releases>
                <enabled>true</enabled><!--是否下载releases版本构件-->
            </releases>
            <snapshots>
                <enabled>false</enabled><!--是否下载snapshots版本构件-->
            </snapshots>
        </repository>
    </repositories>
<!--插件库地址-->
    <pluginRepositories>
        <pluginRepository>
            <id>nexus</id>
            <name>local private nexus</name>
            <url>http://39.98.204.96:8081/repository/bjaxyh/</url>
            <releases>
                <enabled>true</enabled>
            </releases>
            <snapshots>
                <enabled>false</enabled>
            </snapshots>
        </pluginRepository>
    </pluginRepositories>
    </profile>

    <profile>
        <id>osc</id>
        <activation>
            <activeByDefault>true</activeByDefault>
        </activation>

        <repositories>
            <repository>
                <id>osc</id>
                <url>http://maven.aliyun.com/nexus/content/repositories/central</url>
            </repository>
        </repositories>

        <pluginRepositories>
            <pluginRepository>
                <id>osc</id>
                <url>http://maven.aliyun.com/nexus/content/repositories/central</url>
            </pluginRepository>
        </pluginRepositories>
    </profile>
</profiles>

</settings>
4.修改pom
<!--pom.xml 远程仓库的配置  id要跟本地maven的setting.xml相同 -->
  <distributionManagement>
        <repository>
            <id>releases</id>
            <name>Ruizhi Release Repository</name>
            <url>http://192.168.56.101:8081/repository/maven-releases/</url>
        </repository>

        <snapshotRepository>
            <id>snapshots</id>
            <name>Ruizhi Snapshot Repository</name>
            <url>http://192.168.56.101:8081/repository/maven-snapshots/</url>
        </snapshotRepository>
    </distributionManagement>
5.测试是否nexus搭建成功
pom添加本地没有的依赖,看nexus会不会代理
mvn deploy 看是否成功推送至nexus
三、nexus图片观赏
四、pom.xml
<project xmlns="http://maven.apache.org/POM/4.0.0" xmlns:xsi="http://www.w3.org/2001/XMLSchema-instance"
  xsi:schemaLocation="http://maven.apache.org/POM/4.0.0 http://maven.apache.org/xsd/maven-4.0.0.xsd">
  <modelVersion>4.0.0</modelVersion>

  <groupId>axyh_springboot</groupId>
  <artifactId>axyh_springboot</artifactId>
  <packaging>jar</packaging>

  <parent>
    <groupId>com.anxinyiheng</groupId>
    <artifactId>axyh_parent</artifactId>
    <version>0.0.1-SNAPSHOT</version>
    <relativePath /> <!-- lookup parent from repository -->
  </parent>

  <properties>
    <project.build.sourceEncoding>UTF-8</project.build.sourceEncoding>
  </properties>

  <dependencies>

  </dependencies>

 <distributionManagement>
         <repository>
             <!--此id要与setting.xml里面server的id对应-->
             <id>releases</id>
             <name>releases Repository</name>
             <url>http://39.98.204.96:8081/repository/maven-releases/</url>
         </repository>
         <snapshotRepository>
             <id>snapshots</id>
             <name>snapshots</name>
             <url>http://39.98.204.96:8081/repository/maven-snapshots/</url>
         </snapshotRepository>
     </distributionManagement>
 <build>
    <plugins>
      <plugin>
        <groupId>org.springframework.boot</groupId>
        <artifactId>spring-boot-maven-plugin</artifactId>
        <executions>
          <execution>
            <goals>
              <goal>repackage</goal><!--可以把依赖的包都打包到生成的Jar包中 -->
            </goals>
          </execution>
        </executions>
      </plugin>
    </plugins>
  </build>

</project>
Linux 使用nexus搭建maven私服的更多相关文章
- Linux使用nexus搭建maven私服
一.准备工作 系统:LINUX JDK:已安装(未安装详见jdk安装教程:http://www.cnblogs.com/muzi1994/p/5818099.html) ...
- Maven-004-使用 Nexus 搭建 maven 私服
从去年至今,自己一直在学习自动化测试工具,想利用自动化工具尽可能的将重复的.关键的.耗时耗力的工作实现自动化,减轻日常测试工作,提升测试效率.在学习的过程中,将 maven 作为了项目开发管理工具,进 ...
- Maven使用笔记(五)Sonatype Nexus 搭建Maven 私服
1. 为什么使用Nexus 如果没有私服,我们所需的所有构件都需要通过maven的中央仓库和第三方的Maven仓库下载到本地, 而一个团队中的所有人都重复的从maven仓库下载构件无疑加大了仓库的负载 ...
- Maven——使用Nexus搭建Maven私服
原文:http://www.cnblogs.com/xdp-gacl/p/4068967.html Maven学习总结(九)--使用Nexus搭建Maven私服 一.搭建nexus私服的目的 为什么要 ...
- (转)Maven学习总结(九)——使用Nexus搭建Maven私服
孤傲苍狼只为成功找方法,不为失败找借口! Maven学习总结(九)——使用Nexus搭建Maven私服 一.搭建nexus私服的目的 为什么要搭建nexus私服,原因很简单,有些公司都不提供外网给项目 ...
- Maven学习二:使用Nexus搭建Maven私服及相关配置
处于安全等原因的考虑,一些企业内部网络是不允许访问外部网络的,但是项目内部搭建的项目又是Maven架构,这样就需要企业在内部网络中搭建自己的Maven仓库服务,再者一些大型企业或者内部模块化组件化划分 ...
- 使用Nexus搭建Maven私服问题总结
#业务场景 最近项目要交付给客户了,之前项目开发和测试一直都是使用公司内部的一套环境,项目交付后客户购置了大量服务器,也要将整套测试环境迁移至客户的服务器上,后续的需求变更以及新需求的开发都会在客户服 ...
- nexus搭建maven私服及私服jar包上传和下载
nexus搭建maven私服及私服jar包上传和下载 标签: nexus管理maven库snapshot 2017-06-28 13:02 844人阅读 评论(0) 收藏 举报 分类: Maven(1 ...
- nexus 搭建 maven 私服
nexus 搭建 maven 私服 本机环境 Win 8 JDK 7 Maven 3.2 Nexus 2.11 版本选择 http://www.sonatype.org/nexus/archivedn ...
随机推荐
- HTML float 和 absolute
block元素和inline元素在文档流中的排列方式: block元素通常被现实为独立的一块,独占一行,多个block元素会各自新起一行,默认block元素宽度自动填满其父元素宽度.block元素可以 ...
- 获取邮箱的DNS和MX 工具类
1.导入Maven DNS 包: <dependency> <groupId>dnsjava</groupId> <artifactId>dnsja ...
- 小程序问题集:保存失败:Error: ENOENT: no such file or directory, open
问题如图: 当编译的时候 会提示找不到这个文件(index),但是确信项目目录里已经删除了该页面路径,并且app.json的pages列表中也没有该页面: 这时候需要看一下当前已经打开的文件中是否 ...
- PostgreSQL date_trunc() 和timestamp
timestamp 01.SELECT now()::timestamp + '1 year'; 02.SELECT now()::timestamp + '1 month'; 03.SELECT n ...
- 手把手教你全家桶之React(三)--完结篇
前言 本篇主要是讲一些全家桶的优化与完善,基础功能上一篇已经讲得差不多了.直接开始: Source Maps 当javaScript抛出异常时,我们会很想知道它发生在哪个文件的哪一行.但是webpac ...
- aspectj eclipse4.6下载地址
http://www.eclipse.org/ajdt/downloads/#46zips
- spring4笔记----web.xml中2.4以上版本Listener的配置
基本上没用过Servlet2.4以下版本,所以2.4版本以下不必学了 <?xml version="1.0" encoding="UTF-8"?> ...
- SQL2008无法附加数据库,提示“无法显示请求的对话框”(nColIndex实际值是-1)图文解决方法
SQL2008无法附加数据库,提示“无法显示请求的对话框”(nColIndex实际值是-1)图文解决方法 SQL2008无法附加数据库,提示“无法显示请求的对话框”(nColIndex实际值是-1)图 ...
- linux下objdump应用
<a href="http://www.maomao365.com/?p=952" > linux命令objdump的用法 http://www.maomao365. ...
- python Django 文件下载示例
from django.http import StreamingHttpResponse#文件流 def big_file_download(request): # do something... ...