JMeter Building a Database Test Plan
| Building a Database Test Plan | |
|
|
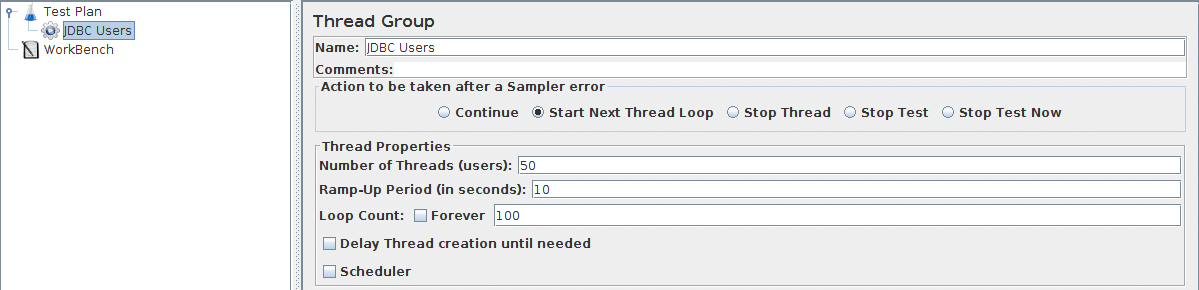
| 7.1 Adding Users | ||||
|
||||

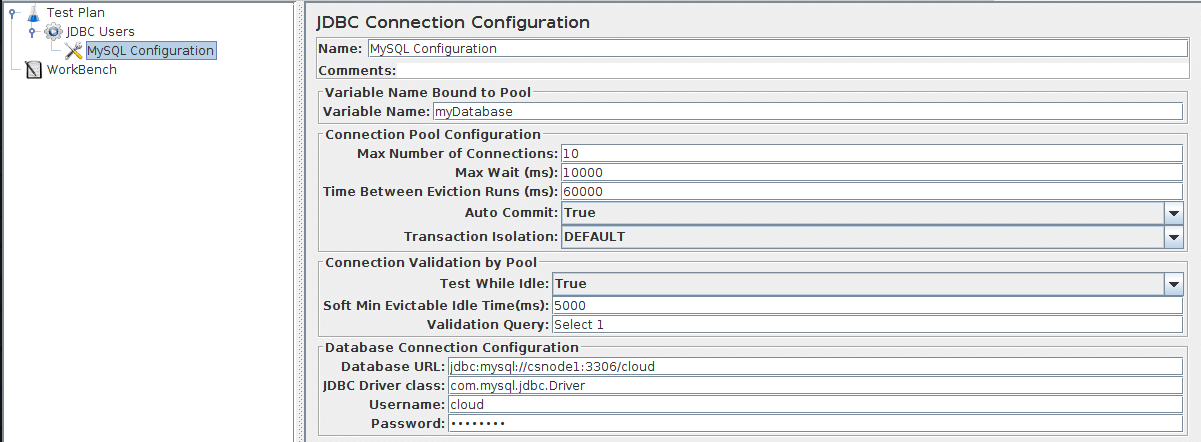
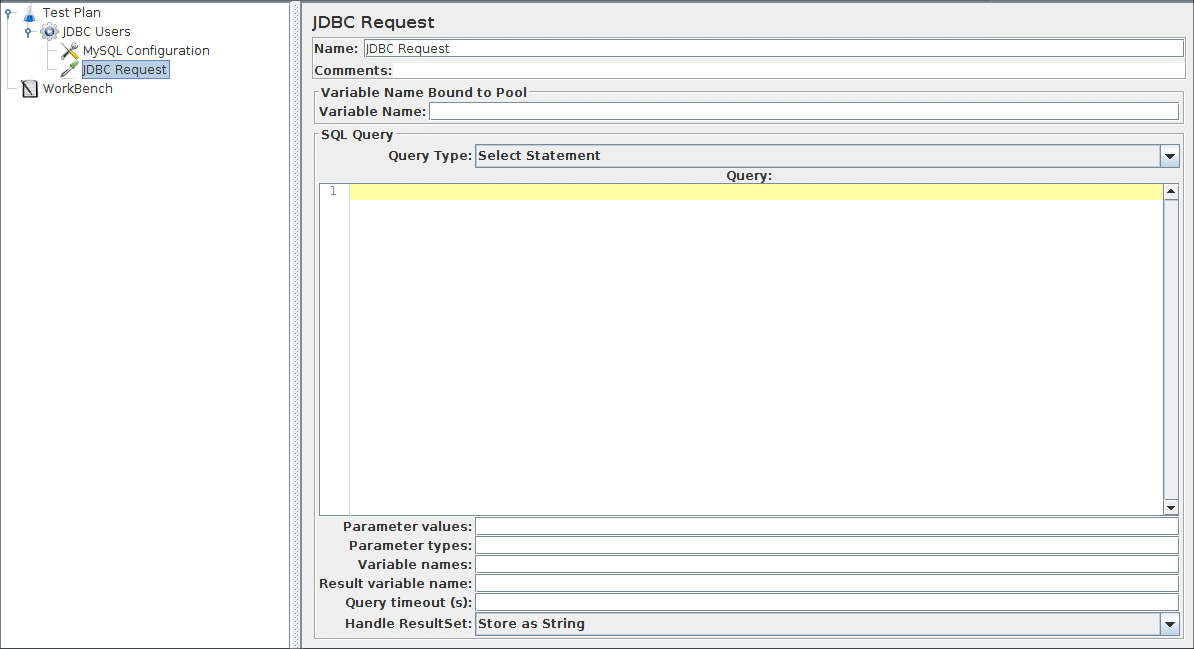
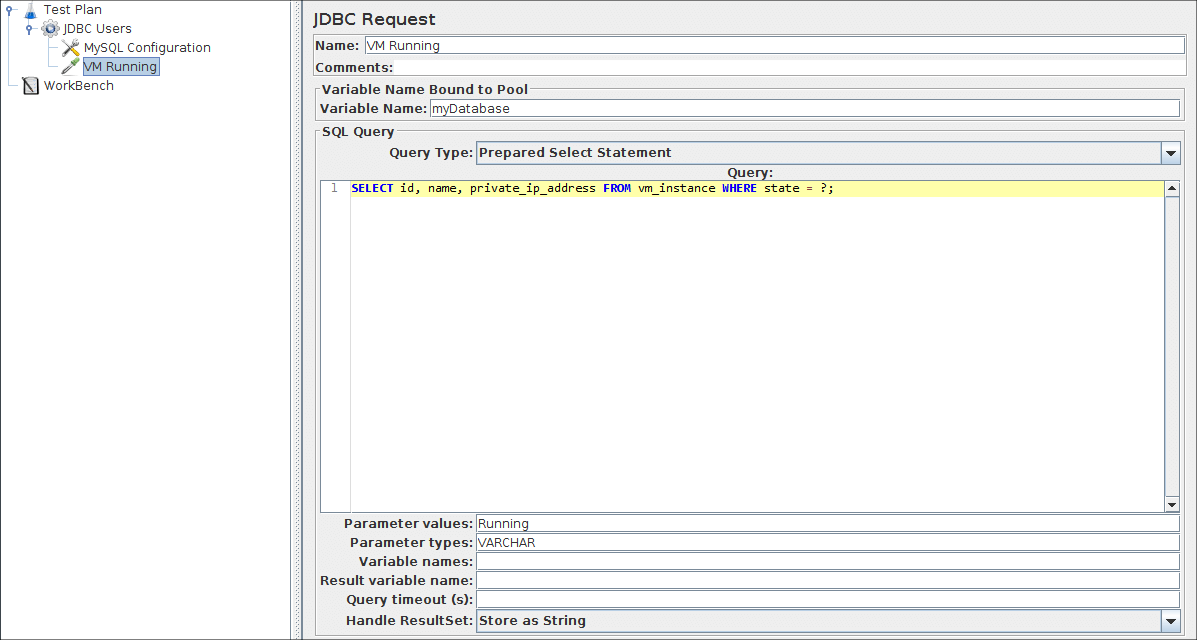
| 7.2 Adding JDBC Requests | |||||
|
|||||

| 7.3 Adding a Listener to View/Store the Test Results | |
|

JMeter Building a Database Test Plan的更多相关文章
- Building An Effective Marketing Plan
“New ideas are a dime a dozen,” observes Arthur R. Kydd, “and so are new products and new technologi ...
- Building an FTP Test Plan
参考:http://jmeter.apache.org/usermanual/build-ftp-test-plan.html 1.创建一个线程组 2.线程组--->添加--->配置元件- ...
- Jmeter 建立数据库测试计划
建立数据库测试计划(Building a Database Test Plan) 在本节中,将学习如何创建测试数据库服务器一个简单的测试计划.您将创建五十个用户向数据库服务器发送2个SQL请求.并且, ...
- Database 2 Day DBA guide_Chapter3
Chapter 3: Getting Started with Oracle Enterprise Manager 第三章:开始oracle企业管理器. Purpose(目的) This chapte ...
- 性能测试--Jmeter随机生成/随机选取/csv读取关键字
Jmeter随机生成/随机选取/csv读取关键字 一.随机生成关键字 随机生成关键字,需要组件:随机变量配置元件(Random Variable) 该组件的作用是生成字符+随机数字格式的字符串,并保 ...
- 性能测试--初识Jmeter
初识Jmeter Apache JMeter是Apache组织开发的基于Java的压力测试工具.用于对软件做压力测试,它最初被设计用于Web应用测试,但后来扩展到其他测试领域. 它可以用于测试静态和动 ...
- Apache Kafka - How to Load Test with JMeter
In this article, we are going to look at how to load test Apache Kafka, a distributed streaming plat ...
- Automatically generating nice graphs at end of your Load Test with Apache JMeter and JMeter-Plugins
Update as of November 2017: Since JMeter 3.0, last version being 3.3, JMeter provides Out Of The Box ...
- Apache JMeter
https://en.wikipedia.org/wiki/Apache_JMeter Apache JMeter 是 Apache 的一个项目,它是一个负载测试工具可以用于进行各种服务器的性能测试分 ...
随机推荐
- 定时改变App主题的方案
1.将接口返回的图片缓存到本地,由于写data到本地是耗时操作,为了不阻塞主线程,可开启子线程来做此操作 dispatch_queue_t queue = dispatch_queue_create( ...
- Linux的VI/VIM
参考自:http://www.cnblogs.com/itech/archive/2009/04/17/1438439.html 作者:iTech 出处:http://itech.cnblogs.co ...
- [Linux命令]tar命令
tar 命令的解释: tar(bsdtar): manipulate archive files First option must be a mode specifier: -c Create -r ...
- 关于Lambda表达式的理解
在.NET 1.0的时候,大家都知道我们经常用到的是委托.有了委托呢,我们就可以像传递变量一样的传递方法.在一定程序上来讲,委托是一种强类型的托管的方法指 针,曾经也一时被我们用的那叫一个广泛呀,但是 ...
- 【nodejs学习】2.网络相关
1.官方文档的一个小例子 //http是内置模块 var http = require('http'); http.createServer(function(request, response){ ...
- java学习笔记(4):内存管理
在内存的方面,Java自身带有垃圾运行机制,表面上好像我们可以忽略不计,但是如果我们对其加以理解的话,说不定有时会达到事半功倍的效果. 所以自己花些时间整理一些此类的资料. 一.基本概念 1.栈 对于 ...
- [置顶] chinayaosir近10年来所阅读的世界著名IT书籍-图文并茂
1.人生观(包括做人原则,心理学,投资,销售) 一个人从来到世上,很多东西都是空白, 阅读一些正能量的书籍,把里面的理论用于生活,不断的应用它, 这些观念就会如同软件一样,不断的升级你的大脑, 合理的 ...
- PHP echo, print, printf, sprintf函数的区别和使用
1. echo函数: 输出函数,是命令,不能返回值.echo后面可以跟很多个参数,之间用分号隔开,如: echo $myvar1; echo 1,2,$myvar,"<b>bol ...
- SQL Server 2005无法远程连接的解决方法
以前一直连接本地的数据库,连接SQL Server 2005是小菜的... 做项目也是老师搭好了服务器端,打上IP去访问就行...也不用考虑太多. 今天自己在公司搭SQL Server 2005服务器 ...
- NodeJs简单七行爬虫--爬取自己Qzone的说说并存入数据库
没有那么难的,嘿嘿,说起来呢其实挺简单的,或者不能叫爬虫,只需要将自己的数据加载到程序里再进行解析就可以了,如果说你的Qzone是向所有人开放的,那么就有一个JSONP的接口,这么说来就简单了,也就不 ...