activity与service进程内通信
package com.example.binbin.testbinder;

import android.app.Service;

import android.content.Intent;

import android.os.Binder;

import android.os.IBinder;

import android.support.annotation.Nullable;

import android.util.Log;

import android.widget.Toast;

/**

 * Created by binbin on 2016/7/29.

 */

public class MyService extends Service {

    //自定义的binder,包含了我们所需的操作

    class myBinder extends Binder{

        //要在Service进行的操作

        public void sayHello(){

            Log.d("TAG","sayHello");

            Toast.makeText(MyService.this,"Hello",Toast.LENGTH_SHORT).show();

        }

        public void sayBye(){

            Log.d("TAG","sayBye");

            Toast.makeText(MyService.this,"Bye",Toast.LENGTH_SHORT).show();

        }

    };

    @Nullable

    @Override

    //绑定服务和进行通信的时候,一定要返回一个自定义的Binder

    public IBinder onBind(Intent intent) {

        Log.d("TAG","onBind");

        return new myBinder();

    }

    @Override

    public void onCreate() {

        super.onCreate();

        Log.d("TAG","onCreate");

    }

    @Override

    public int onStartCommand(Intent intent, int flags, int startId) {

        Log.d("TAG","onStartCommand");

        return super.onStartCommand(intent, flags, startId);

    }

    @Override

    public void onDestroy() {

        super.onDestroy();

        Log.d("TAG","onDestroy");

    }

    @Override

    public boolean onUnbind(Intent intent) {

        Log.d("TAG","onUnbind");

        return super.onUnbind(intent);

    }

}
自定义了myBinder,在Activity与Service绑定的时候,返回myBinder的实例,Activity就可以操作Service里面的方法了(sayHello和sayBye)。
Activity里面必须要有两个实例,一个是myBinder,用于与Service通信的。另一个是ServiceConnection,代表了activity与服务的连接,在后面绑定的时候要传入这个类的实例,只有两个方法,我们要重写。第一个是连接成功时要干什么,肯定是要把binder返回给activity里面的binder啦。
public class MainActivity extends AppCompatActivity {

    //四个按钮

    Button start, stop, bind, unbind,sayHello,sayBye;

    //自定义的Binder对象

    private MyService.myBinder binder;

    //绑定服务要添加的对象,ServiceConnection代表与服务的连接,系统自己会调用,我们只需要实现,不需要显示调用

    //绑定的时候要把这个对象传进去。

    private ServiceConnection conn = new ServiceConnection() {

        //连接成功

        @Override

        public void onServiceConnected(ComponentName name, IBinder service) {

            Log.d("TAG","Connect!");

            binder = (MyService.myBinder) service;  //获取其实例

            //binder.sayHello();                  //调用其方法

        }

        //连接失败

        @Override

        public void onServiceDisconnected(ComponentName name) {

        }

    };

    /**

     * ATTENTION: This was auto-generated to implement the App Indexing API.

     * See https://g.co/AppIndexing/AndroidStudio for more information.

     */

    private GoogleApiClient client;

    @Override

    protected void onCreate(Bundle savedInstanceState) {

        super.onCreate(savedInstanceState);

        setContentView(R.layout.activity_main);

        start = (Button) findViewById(R.id.Start);

        stop = (Button) findViewById(R.id.Stop);

        bind = (Button) findViewById(R.id.Bind);

        unbind = (Button) findViewById(R.id.unBind);

        sayHello = (Button) findViewById(R.id.hello);

        sayBye = (Button) findViewById(R.id.bye);

        start.setOnClickListener(new View.OnClickListener() {

            @Override

            public void onClick(View view) {

                Intent intent = new Intent(MainActivity.this, MyService.class);

                startService(intent);

            }

        });

        stop.setOnClickListener(new View.OnClickListener() {

            @Override

            public void onClick(View view) {

                Intent intent = new Intent(MainActivity.this, MyService.class);

                stopService(intent);

            }

        });

        bind.setOnClickListener(new View.OnClickListener() {

            @Override

            public void onClick(View view) {

                Intent intent = new Intent(MainActivity.this,MyService.class);

                //传进去了conn对象

                bindService(intent,conn,BIND_AUTO_CREATE);

            }

        });

        unbind.setOnClickListener(new View.OnClickListener() {

            @Override

            public void onClick(View view) {

                //解除只需要传入连接对象

                unbindService(conn);

            }

        });

        sayHello.setOnClickListener(new View.OnClickListener() {

            @Override

            public void onClick(View view) {

                binder.sayHello();

            }

        });

        sayBye.setOnClickListener(new View.OnClickListener() {

            @Override

            public void onClick(View view) {

                binder.sayBye();

            }

        });

        // ATTENTION: This was auto-generated to implement the App Indexing API.

        // See https://g.co/AppIndexing/AndroidStudio for more information.

        client = new GoogleApiClient.Builder(this).addApi(AppIndex.API).build();

    }
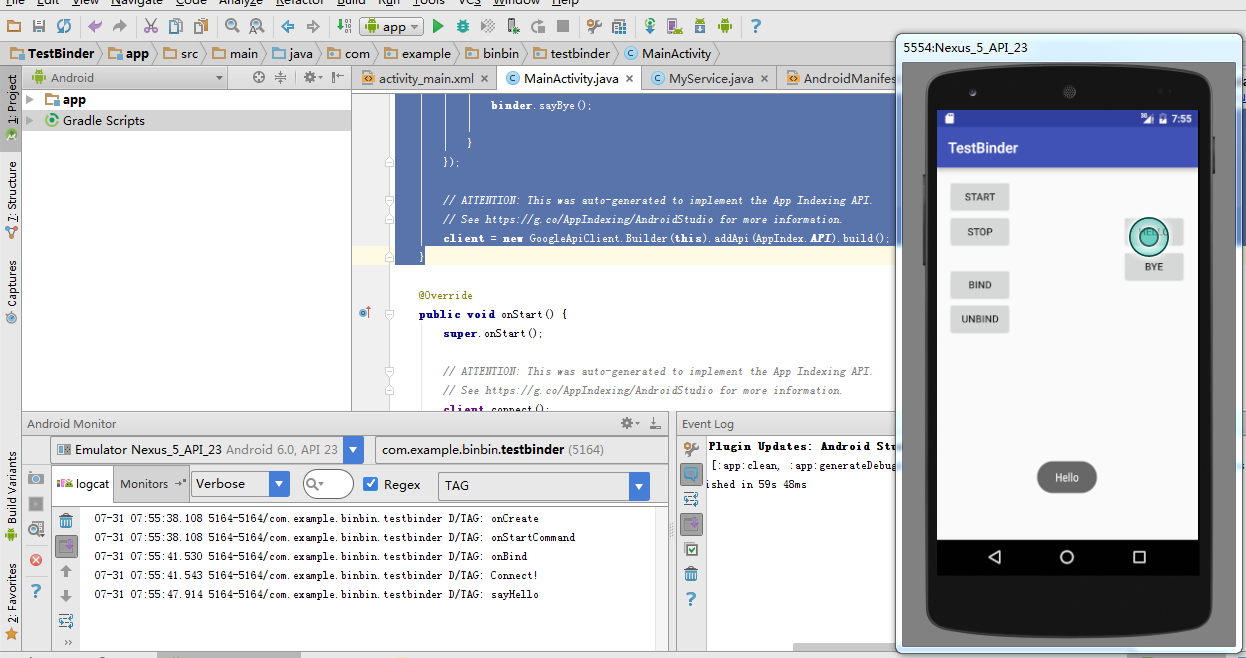
开启和绑定服务之后,按Hello,就可以使用服务里面的sayHello方法了。
activity与service进程内通信的更多相关文章
- MXNet源码分析 | KVStore进程内通信
本文主要基于MXNet1.6.0版本进行分析. MXNet的KVStore模块下有几个比较重要的类.KVStore是一个抽象类,提供了一些通用的API,例如Init.Push和Pull等.因为KVSo ...
- activity 与 service 之间的通信
activity和service通信:通过binder 举个我实际项目中的例子:在service中下载更新应用 首先是下载更新apk的service: public class UpdateVersi ...
- 通过messenger实现activity与service的相互通信
布局: <RelativeLayout xmlns:android="http://schemas.android.com/apk/res/android" xmlns:to ...
- 201709012工作日记--activity与service的通信机制
service生命周期 Service主要包含本地类和远程类. Service不是Thread,Service 是android的一种机制,当它运行的时候如果是Local Service,那么对应的 ...
- Android中Activity、Service和线程之间的通信
Activity.Service和线程应该是Android编程中最常见的几种类了,几乎大多数应用程序都会涉及到这几个类的编程,自然而然的,也就会涉及到三者之间的相互通信,本文就试图简单地介绍一下这三者 ...
- activity与service之间的通信方式
Activity之间的通信 1.activity与activity的通信可以通过Intent来封装数据,startActivityForResult()来实现,当跳转的activity调用finish ...
- Activity与Service通信(不同进程之间)
使用Messenger 上面的方法只能在同一个进程里才能用,如果要与另外一个进程的Service进行通信,则可以用Messenger. 其实实现IPC(Inter-Process Communicat ...
- Activity和Service是否是在同一个进程中运行。
一般情况下,Activity和Service在同一个包名内,并且没有设定属性android:process=":remote",两者在同一个进程中. 因为一个进程只有一个UI线程, ...
- Activity与Service通信的方式有三种:
在博客园看到的,看着挺不错的,借来分享下 继承Binder类 这个方式仅仅有当你的Acitivity和Service处于同一个Application和进程时,才干够用,比方你后台有一个播放背景音乐的S ...
随机推荐
- caffe中的Local Response Normalization (LRN)有什么用,和激活函数区别
http://stats.stackexchange.com/questions/145768/importance-of-local-response-normalization-in-cnn ca ...
- Buildroot 使用默认配置
/******************************************************************************** * Buildroot 使用默认配置 ...
- HDU1496 Equations 卡时间第二题
Consider equations having the following form: a*x1^2+b*x2^2+c*x3^2+d*x4^2=0 a, b, c, d are integers ...
- BZOJ1030 JSOI2007 文本生成器 【AC自动机】【DP】*
BZOJ1030 JSOI2007 文本生成器 Description JSOI交给队员ZYX一个任务,编制一个称之为"文本生成器"的电脑软件:该软件的使用者是一些低幼人群,他们现 ...
- python 正则表达式字符说明
. 元字符 说明 . 代表任意字符 | 逻辑或操作符 [ ] 匹配内部的任一字符或子表达式 [^] 对字符集和取非 - 定义一个区间 \ 对下一字符取非(通常是普通变特殊,特殊变普通) * 匹配前面的 ...
- SecureCRT导入已有会话
如果别人有完整的环境信息,我们想拿过来,怎么导入?或者别人想要我的会话配置信息,怎么导出?对SecureCRT这个工具来说很easy,根本不需要去找什么导入.导出按钮,直接文件操作. 假如我的Secu ...
- python 怎么和命令行交互
http://www.cyberciti.biz/faq/python-run-external-command-and-get-output/ http://stackoverflow.com/qu ...
- Asp.net Mvc 过滤器执行顺序
Asp.net Mvc 过滤器执行顺序: IAuthorizationFilter(OnAuthorization)----->IActionFilter(OnActionExecuting)- ...
- hash一致性算法
一致性hash算法是,1097麻省理工提出的分布式hashDHT实现算法,极倔internet的热点问题 平衡性 hash结果尽可能的分布到所有的缓存中去,缓冲空间利用率最高 单调性 保持已有的缓存能 ...
- MySql触发器实现数据同步学习
触发器实现:(增.删.改操作事件触发数据单向同步)数据库触发器教程:https://www.cnblogs.com/phpper/p/7587031.html同步代码: DELIMITER $ DRO ...