elasticsearch与kibana安装过程(linux)
elasticsearch与kibana安装
下载
Elasticsearch 官网:https://www.elastic.co/,elastic search应用本质就是一个jvm进程,所以需要Java环境,请先配置windows | linux中的Java环境。接着在https://www.elastic.co/downloads/elasticsearch页下载相应的es版本,Linux or Windows均有,我这里以linux为例,下载了elasticsearch-6.6.1。
为了方便与es交互,我们使用 Kibana的 Dev Tools窗口,所以接着下载kibana,下载路径:https://www.elastic.co/downloads/kibana,我这里还是下载的linux版的kibana-6.6.1,双击/kibana-6.61/bin/kibana.bat即可启动,默认端口为5601,启动后浏览器访问http://ip:5601。
下载完成后将其上传至linux服务器即可,我这里存放的地址是 /usr/local/myinstall/elasticsearch.
安装
①解压(先到文件存放的位置)
 tar -zxvf elasticsearch-6.6.1.tar.gz

 tar -zxvf kibana-6.6.1-linux-x86_64.tar.gz
②修改配置
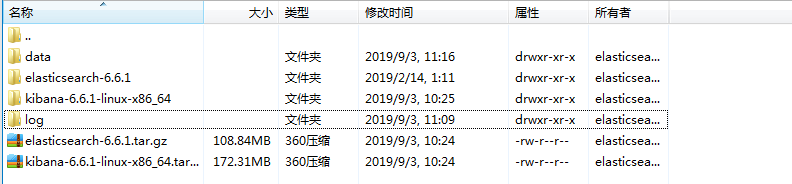
elasticsearch需要使用的过程中,两个文件目录用来存放数据,一个是用来存放index数据的data目录,另一个是用来存放日志文件的log目录。(文件夹名字不固定)
以下是我的目录结构:
②编辑 elasticsearch.yml 配置
vim /usr/local/myinstall/elasticsearch/elasticsearch-6.6.1/config/elasticsearch.yml
# ======================== Elasticsearch Configuration =========================

#

# NOTE: Elasticsearch comes with reasonable defaults for most settings.

#       Before you set out to tweak and tune the configuration, make sure you

#       understand what are you trying to accomplish and the consequences.

#

# The primary way of configuring a node is via this file. This template lists

# the most important settings you may want to configure for a production cluster.

#

# Please consult the documentation for further information on configuration options:

# https://www.elastic.co/guide/en/elasticsearch/reference/index.html

#

# ---------------------------------- Cluster -----------------------------------

#

# Use a descriptive name for your cluster:

#

cluster.name: my-es-application-0

#

# 节点名称同理,可自动生成也可手动配置

 node.name: myProjectName-0

# 允许一个节点是否可以成为一个master节点,es是默认集群中的第一台机器为master,如果这台机器停止就会重新选举master.

 node.master: true

# 允许该节点存储数据(默认开启)

 node.data: true

# # 新增索引

 node.ingest: true

#

# ------------------------------------ Node ------------------------------------

#

# Use a descriptive name for the node:

#

#node.name: node-1

#

# Add custom attributes to the node:

#

#node.attr.rack: r1

#

# ----------------------------------- Paths ------------------------------------

#

# Path to directory where to store the data (separate multiple locations by comma):

#

#path.data: /path/to/data

#

# Path to log files:

#

#path.logs: /path/to/logs

#

# 数据存储目录

 path.data: /usr/local/myinstall/elasticsearch/data

#日志存储目录

 path.logs: /usr/local/myinstall/elasticsearch/log

#

# ----------------------------------- Memory -----------------------------------

#

# Lock the memory on startup:

#

#bootstrap.memory_lock: true

#

# Make sure that the heap size is set to about half the memory available

# on the system and that the owner of the process is allowed to use this

# limit.

#

# Elasticsearch performs poorly when the system is swapping the memory.

# 设置memory_lock来锁定进程的物理内存地址,避免交换(swapped)来提高性能

 bootstrap.memory_lock: false

 bootstrap.system_call_filter: false

# ---------------------------------- Network -----------------------------------

#

# Set the bind address to a specific IP (IPv4 or IPv6):

#

#network.host: 192.168.0.1

#

# Set a custom port for HTTP:

#

#http.port: 9200

#

# For more information, consult the network module documentation.

# 设置外网访问

 network.host: 0.0.0.0

# 端口

 http.port: 9200

# 是否支持跨域,默认为false

 http.cors.enabled: true

# 当设置允许跨域,默认为*,表示支持所有域名,如果我们只是允许某些网站能访问,那么可以使用正则表达式。比如只允许本地地址。

 http.cors.allow-origin: "*"

# --------------------------------- Discovery ----------------------------------

#

# Pass an initial list of hosts to perform discovery when new node is started:

# The default list of hosts is ["127.0.0.1", "[::1]"]

#

#discovery.zen.ping.unicast.hosts: ["host1", "host2"]

#

# Prevent the "split brain" by configuring the majority of nodes (total number of master-eligible nodes / 2 + 1):

#

#discovery.zen.minimum_master_nodes:

#

# For more information, consult the zen discovery module documentation.

#

# ---------------------------------- Gateway -----------------------------------

#

# Block initial recovery after a full cluster restart until N nodes are started:

#

#gateway.recover_after_nodes: 3

#

# For more information, consult the gateway module documentation.

#

# ---------------------------------- Various -----------------------------------

#

# Require explicit names when deleting indices:

#

#action.destructive_requires_name: true

#
③设置每个进程最大同时打开文件数
vim /etc/security/limits.conf
在文件最后,可修改如下配置:
 root        hard     nofile      65535

 root        soft      nofile      65535

    *         soft      nproc      65535

    *         hard     nproc      65535
④可以修改 JVM参数,设置堆大小
vim /usr/local/myinstall/elasticsearch/elasticsearch-6.6.1/config/jvm.options
在文件种,增加如下配置:
-Xms512m

-Xmx512m
⑤设置用户拥有的内存权限大小
 1.编辑sysctl.conf文件

  vim /etc/sysctl.conf

 2.在文件最后,增加如下配置:

  vm.max_map_count=655360

3. 添加完毕之后,执行下面命令,使配置生效

  sysctl -p
⑥设置用户权限
es出于系统安全考虑设置的条件,不允许使用root用户启动,因此需要创建一个用户来启动es。
1、创建用户:elasticsearch

 adduser elasticsearch

2、创建用户密码,需要输入两次

 passwd elasticsearch

3、将对应的文件夹权限赋给该用户

 chown -R elasticsearch /usr/local/myinstall/elasticsearch

4、切换至elasticsearch用户

 su elasticsearch

5、进入es的bin目录启动 (后台启动)

./elasticsearch &

6、启动后测试

 输入ip:9200,如果返回一个json数据说明启动成功
⑦启动报错
ERROR: [2] bootstrap checks failed

[1]: max file descriptors [65535] for elasticsearch process is too low, increase to at least [65536]
[2]: max number of threads [3896] for user [elasticsearch] is too low, increase to at least [4096]
解决:
[1]的错误去vim /etc/security/limits.conf 修改为65536即可
 root        hard     nofile      65536

 root        soft      nofile      65536

    *         soft      nproc      65536

    *         hard     nproc      65536
[2]的错误。启动时报错:max number of threads [3896] for user [elasticsearch] is too low, increase to at least [4096];查资料后,查看服务器当前用户的最大线程数为3895,修改配置文件/etc/security/limits.d/20-nproc.conf(Centos7)中的nproc为4096后,切换到elasticsearch用户查看当前最大线程数还是为3895。修改没效,Elasticsearch启动要求最大线程数至少为4096。
解决:有的服务器修改 /etc/security/limit.d/20-nproc.conf 配置文件中的 * soft nproc 的值为4096即可,像我上述的情况修改了也没有作用,需要再加一句 * hard nproc 4096,然后完美解决问题。如下:
*          hard    nproc     4096

*          soft     nproc     4096

root       soft    nproc     unlimited
⑧启动
启动到es目录的bin目录下使用 ./elasticsearch & 即可。浏览器访问地址: ip:9200 ,页面返回一段json就成功了。
kibana安装
kibana的安装与配置只需要解压,然后到config目录下修改kibana.yml文件:
 server.port: 9100

 #设置外网访问
然后到bin目录下启动即可。./kibana &
elasticsearch与kibana安装过程(linux)的更多相关文章
- Elasticsearch和Kibana安装
Elasticsearch安装 Elasticsearch至少需要Java 8.在撰写本文时,建议你使用Oracle JDK版本1.8.0_131.Java安装因平台而异,所以在这里不再赘述.Orac ...
- Elasticsearch 及 Kibana 安装篇
简介 官网-安装介绍 这里记载了各个软件包的安装方法,Linux Mac Windows-- 本文记载的是在 CentOS 系统安装 Elasticsearch 7.0.0 版本的步骤. 安装 Jav ...
- ELK 架构之 Elasticsearch 和 Kibana 安装配置
阅读目录: 1. ELK Stack 简介 2. 环境准备 3. 安装 Elasticsearch 4. 安装 Kibana 5. Kibana 使用 6. Elasticsearch 命令 最近在开 ...
- ELK(Elasticsearch/Logstash/Kibana)安装时常见错误总结
问题一: [2016-11-06T16:27:21,712][WARN ][o.e.b.JNANatives ] unable to install syscall filter: Java.lang ...
- 全文检索工具elasticsearch和kibana安装
一.安装elasticsearch 1.拷贝elasticsearch-5.6.4.rpm到/opt目录下「cenos7」 systemctl list-unit-files|grep elastic ...
- elasticsearch之kibana安装
我用的elasticsearch版本是5.2.2的,kibana也要对应的版本 下载kibana 下载网址:https://artifacts.elastic.co/downloads/kibana/ ...
- elasticsearch和kibana安装后,外网无法访问
问题描述: 现在解压elasticsearch之后,启动,通过http://localhost:9200可以访问的到,但是http://ip:9200访问不到 解决方法: 修改elasticsearc ...
- 键盘侠Linux干货| ELK(Elasticsearch + Logstash + Kibana) 搭建教程
前言 Elasticsearch + Logstash + Kibana(ELK)是一套开源的日志管理方案,分析网站的访问情况时我们一般会借助 Google / 百度 / CNZZ 等方式嵌入 JS ...
- ELK 架构之 Elasticsearch、Kibana、Logstash 和 Filebeat 安装配置汇总(6.2.4 版本)
相关文章: ELK 架构之 Elasticsearch 和 Kibana 安装配置 ELK 架构之 Logstash 和 Filebeat 安装配置 ELK 架构之 Logstash 和 Filebe ...
随机推荐
- Java基础第二天--多态、接口
多态 多态的概述 同一个对象,在不同时刻表现出来的不同形态 多态的前提和体现 有继承/实现关系 有方法重写关系 有父类引用指向子类对象 public class Animal { public voi ...
- 客户端注册Cannot execute request on any known server解决
在对eureka注册中心服务端添加安全验证后,新版本springcloud出现一个问题就是,在客户端注册到服务中心时报了一个错:Cannot execute request on any known ...
- HBASE学习笔记(五)
一.HBase的RowKey设计原则 1.我们知道HBase是三维有序存储的,通过RowKey(行键),ColumnKey(Column family和qualifier)和TimeStamp(时间戳 ...
- 能当壁纸用的Git常用命令速查表
使用Microsoft Office 2016手工绘制. 链接: https://pan.baidu.com/s/18KsH-u5T2iSTHaXd6iQWGA 提取码: w8da 复制这段内容后打开 ...
- Samba passwd smbpasswd and tdbsam
ome commands to convert samba backend password-databases. If you use "passdb backend = smbpassw ...
- 解决 Grep 的多次管道过滤问题
解决 Grep 的多次管道过滤问题 这是个问题,解决了 tail -f crazy.log | grep --line-buffered Hello | grep Time 解决 Grep 的多次管道 ...
- deep_learning_cross_entropy
交叉熵损失函数 交叉熵代价函数(Cross-entropy cost function)是用来衡量人工神经网络(ANN)的预测值与实际值的一种方式.与二次代价函数相比,它能更有效地促进ANN的训练.在 ...
- BLE各版本新功能总结
文章转载自:http://www.sunyouqun.com/2017/04/ 协议发布时间 协议版本 2016/12 Bluetooth 5 2014/12 Bluetooth 4.2 2013/1 ...
- Web Api(4)
参考原文链接https://www.cnblogs.com/JamelAr/,本文大部分内容是根据这位博主进行实验测试的,非常感谢分享,另外也参考了https://www.cnblogs.com/vi ...
- 第二章 Vue快速入门--7 讲解v-cloak、v-text、v-html的基本使用
7 讲解v-cloak.v-text.v-html的基本使用 <!DOCTYPE html> <html lang="en"> <head> & ...