Jenkins+Ansible+Gitlab自动化部署三剑客
一、gitlab安装
环境:centos 7 x64
1、关闭防火墙
systemctl stop firewalld

systemctl disable firewalld
2、禁用selinux
vim /etc/selinux/config

# This file controls the state of SELinux on the system.

# SELINUX= can take one of these three values:

#     enforcing - SELinux security policy is enforced.

#     permissive - SELinux prints warnings instead of enforcing.

#     disabled - No SELinux policy is loaded.

SELINUX=enforcing

# SELINUXTYPE= can take one of three values:

#     targeted - Targeted processes are protected,

#     minimum - Modification of targeted policy. Only selected processes are protected.

#     mls - Multi Level Security protection.

SELINUXTYPE=targeted

改为SELINUX=disabled,然后重启服务器,使用getenforce进行验证
3、安装环境依赖
yum install curl policycoreutils openssh-server openssh-clients postfix
4、下载仓库文件
curl -sS https://packages.gitlab.com/install/repositories/gitlab/gitlab-ce/script.rpm.sh | sudo bash
5、启动邮件服务
systemctl start postfix

systemctl enable postfix
6、安装gitlab-ce
yum install -y gitlab-ce
7、配置ssl
mkdir /etc/gitlab/ssl

cd /etc/gitlab/ssl

openssl genrsa -out /etc/gitlab/ssl/gitlab.example.com.key

openssl req -new -key "gitlab.example.com.key" -out "gitlab.example.com.csr"

openssl x509 -req -days  -in "gitlab.example.com.csr" -signkey "gitlab.example.com.key" -out "gitlab.example.com.crt"

openssl dhparam -out dhparams.pem

chmod  *
8、配置gitlab.rb
vim /etc/gitlab/gitlab.rb

external_url 'https://gitlab.example.com'
//external_url 'https://192.168.71.128'
nginx['redirect_http_to_https'] = true nginx['ssl_certificate'] = "/etc/gitlab/ssl/gitlab.example.com.crt" nginx['ssl_certificate_key'] = "/etc/gitlab/ssl/gitlab.example.com.key" nginx['ssl_dhparam'] = "/etc/gitlab/ssl/dhparams.pem" # Path to dhparams.pem, eg. /etc/gitlab/ssl/dhparams.pem

gitlab-ctl reconfigure
9、配置nginx
server {

  listen *:;

  server_name gitlab.example.com;

  //server_name 192.168.71.128;

  rewrite ^(.*)$ https://$host$1 permanent;

  server_tokens off; ## Don't show the nginx version number, a security best practice
10、运维工程师使用
a、新建项目

b、用户维护,创建regular用户
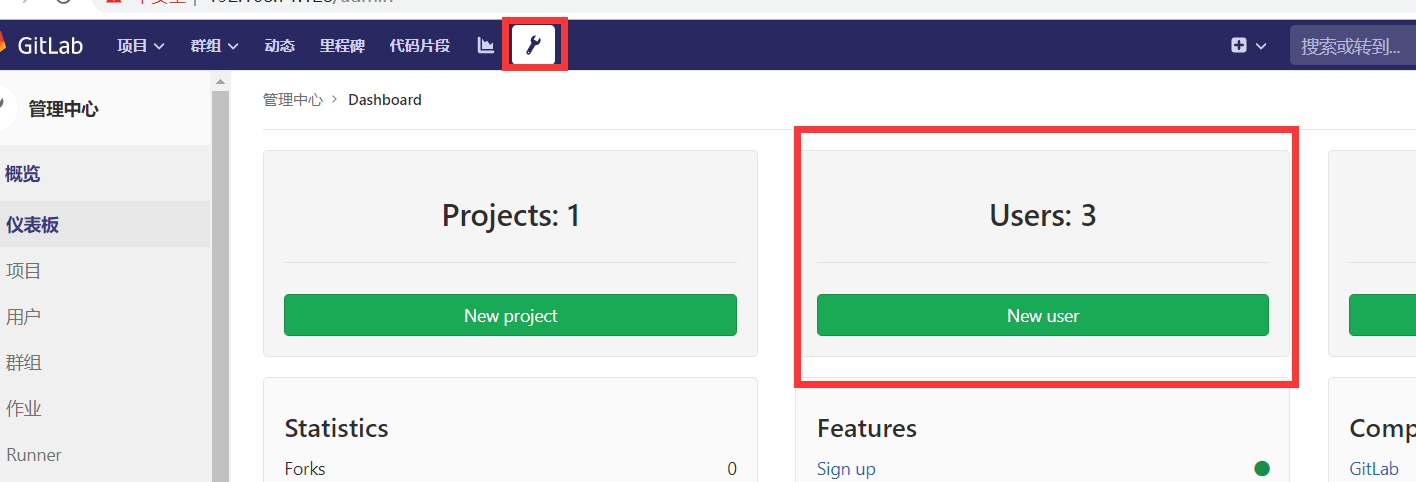
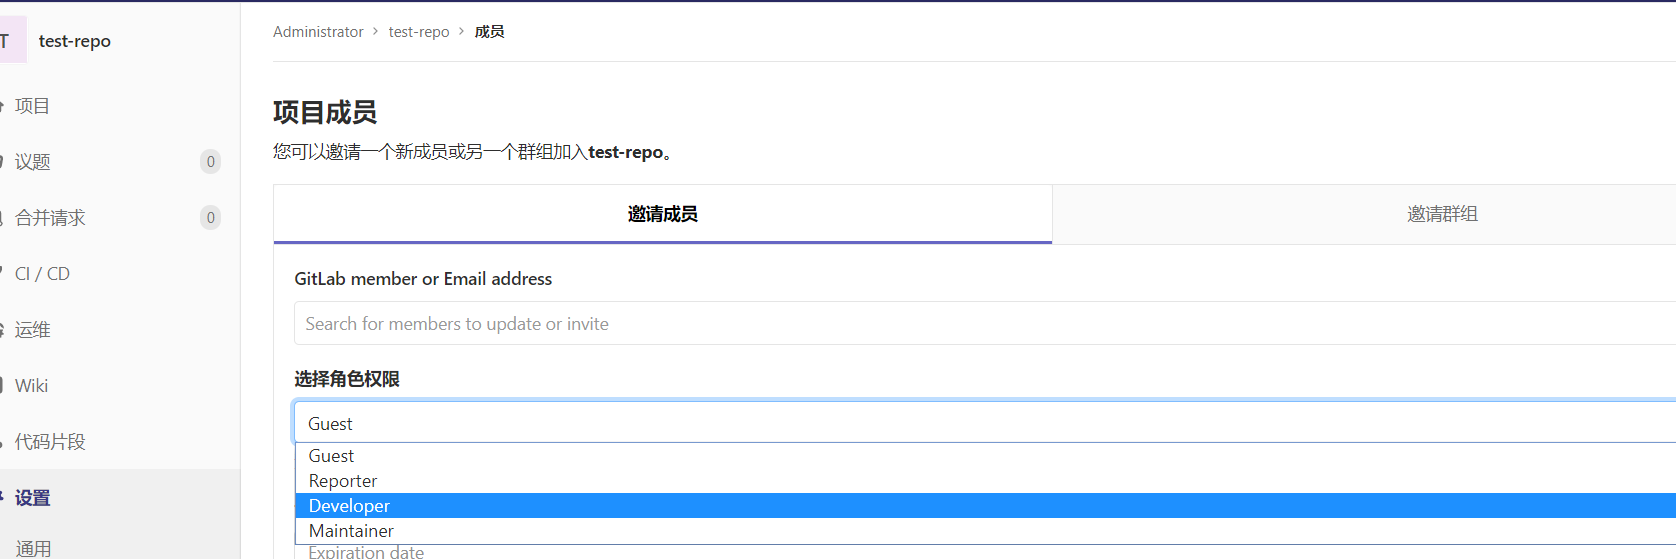
c、给项目分配用户及权限,分配dev用户和maintainer用户

11、开发组长使用
//克隆仓库
git -c http.sslverify=false clone https://192.168.71.128/root/test-repo.git
处理合并申请
12、开发人员使用
git -c http.sslverify=false clone https://192.168.71.128/root/test-repo.git
创建分支合并申请

二、ansible安装
1、环境准备(python3.6.5安装及virtualenvwrapper管理虚拟环境)
详见:https://www.cnblogs.com/hougang/p/11423083.html
2、pip安装
mkvirtualenv -p python3 env36

pip install ansible
3、git安装
root用户安装git

yum -y install git nss curl

切换到普通用户

su deploy

cd ~

git clone ansible(可以将github源导入码云,然后再clone码云上的ansible,不然下载会很慢或失败)

git clone https://github.com/ansible/ansible.git

进入env36环境

workon env36

安装ansible依赖包

pip install paramiko PyYAML jinja2

将ansible移动到虚环境目录下

mv ansible ~/.virtualenvs/env36.ansible/

cd ~/.virtualenvs/env36.ansible/ansible

切换分支

git checkout stable-2.5

安装

source ~/.virtualenvs/env36.ansible/ansible/hacking/env-setup -q

验证

ansible --version
3、ansible使用
ansible主机:192.168.71.132
ssh-keygen -t rsa
ssh-copy-id -i id_rsa.pub root@192.168.71.133
测试机:192.168.71.133
Jenkins+Ansible+Gitlab自动化部署三剑客的更多相关文章
- Jenkins+Ansible+Gitlab自动化部署三剑客-Ansible本地搭建
可以通过git bash连接linux 关闭防火墙,禁用防火墙开机启动,并更爱selinux文件,重启 重新登录并检查禁用 getenforce 安装git yum -y install git ns ...
- Jenkins+Ansible+Gitlab自动化部署三剑客-gitlab本地搭建
实际操作 准备linux初始环境 关闭防火墙 systemctl stop firewalld 开机自己关闭 systemctl disable firewalld 设置安全配置 为关闭 vim /e ...
- Jenkins+Ansible+Gitlab自动化部署三剑客-Jenkins本地搭建
后面需要shell基础,目前没有,等有了,再更
- Jenkins Ansible GitLab 自动化部署
Jenkins Ansible GitLab 自动化部署 DevOps https://www.cnblogs.com/yangjianbo/articles/10393765.html https: ...
- Jenkins+maven+gitlab自动化部署之基础环境部署(一)
从一个二线城市,来到上海,刚入职,老大就给任务,为了减少开发打包部署时间,需要搭建一套自动化部署环境.接到任务后,赶紧上网查找资料,以及了解jenkins作用等等,用了一周时间,了解了个大概,由于都是 ...
- Jenkins+maven+gitlab自动化部署之docker发布sprint boot项目(七)
Jenkins发布docker应用与发布java应用配置基本一致,需要配置Dockerfile及构建的步骤,步骤如下: 1.jenkins主机构建应用为jar包 2.jenkins主机把生产的jar包 ...
- Jenkins+maven+gitlab自动化部署之前端构建发布(六)
前端项目构建,需要在jenkins主机部署node服务,网上有说介绍说安装对应的nodejs插件进行前端项目构建,我这里是直接调用系统npm命令,进行前端打包.具体node部署参考:Centos7部署 ...
- Jenkins+maven+gitlab自动化部署之构建Java应用(五)
前面几篇文章介绍jenkins部署以及配置,接下来我们,就介绍下如何使用jenkins发布应用. 1)新建项目 jenkins首页,点击左上新建任务,出现下图,填写对应信息,然后点击确定: 2)项目参 ...
- Jenkins+maven+gitlab自动化部署之Jenkins部署(三)
本章开始正式搭建Jenkins: 公司现在使用的jenkins版本是2.150.3,但是本次实验安装的版本我们选择最新的 2.164.3(当然,当你阅读这篇文章时,此版本已经不是最新),jenkins ...
随机推荐
- Eclipse中给jar包导入JavaDoc注释文档的方法
原文链接:http://www.apkbus.com/android-124056-1-1.html 第一步:将jar加入到Referenced Libraries 右键点击jar --> 选择 ...
- qt触摸屏隐藏鼠标指针
方法1:运行加参数-nomouse 方法2:QWidget::setCursor(QCursor(Qt::BlankCursor) 例:this->setCursor(Qt::BlankCurr ...
- Python2.x与3.x版本区别Ⅲ
八进制字面量表示 八进制数必须写成0o777,原来的形式0777不能用了:二进制必须写成0b111. 新增了一个bin()函数用于将一个整https://www.xuanhe.net/数转换成二进制字 ...
- luogu 2982 [USACO10FEB]慢下来Slowing down dfs序+树状数组
将要查询的信息放到 dfs 序上并用树状数组查一个前缀和即可. #include <bits/stdc++.h> #define N 100004 #define setIO(s) fre ...
- Hibernate 4 升级到 Hibernate 5 的时候 SessionFactory 不能使用
在 Hibernate 4 升级到 5 的时候老的 sessionFactory 出现错误. public static SessionFactory initSession() { Configur ...
- Love to be loved by you & Just one last dance
http://baike.baidu.com/link?url=wOnBuPncIH5b5oWc0ZREXCU8x6XPYqlZazTLarTjE8eOpdtpv57YMeB_kgXQq4BcCeh2 ...
- Jury Compromise
K - Jury Compromise 参考:ACM POJ 1015 Jury Compromise(陪审团的人选,动态规划题,难) 说实话真有点难想,用一个DP[i][j]来表示在选取i个人,辩控 ...
- JVM----双亲委派模型
加载类的开放性 我们在了解双亲委派模型之前,不得不先了解一下什么是类加载器.虚拟机设计团队之初是希望类加载过程“通过一个类的全限定名来获取描述该类的二进制字节流”这个动作能放到虚拟机外部实现,以便于让 ...
- Linux设备驱动程序 之 度量时间差
概述 内核通过定时器中断来跟踪事件流: 时钟中断由系统定时硬件以及周期性的间隔产生,这个间隔由内核根据HZ的值设定,HZ是一个细节结构有关的常数:作为一般性规则,即使知道对应平台上的确切HZ值,也不应 ...
- jquery+ajax 实现搜索框提示
<!DOCTYPE html> <html lang="en"> <head> <meta charset="UTF-8&quo ...