实现UILabel渐变色效果
实现UILabel渐变色效果

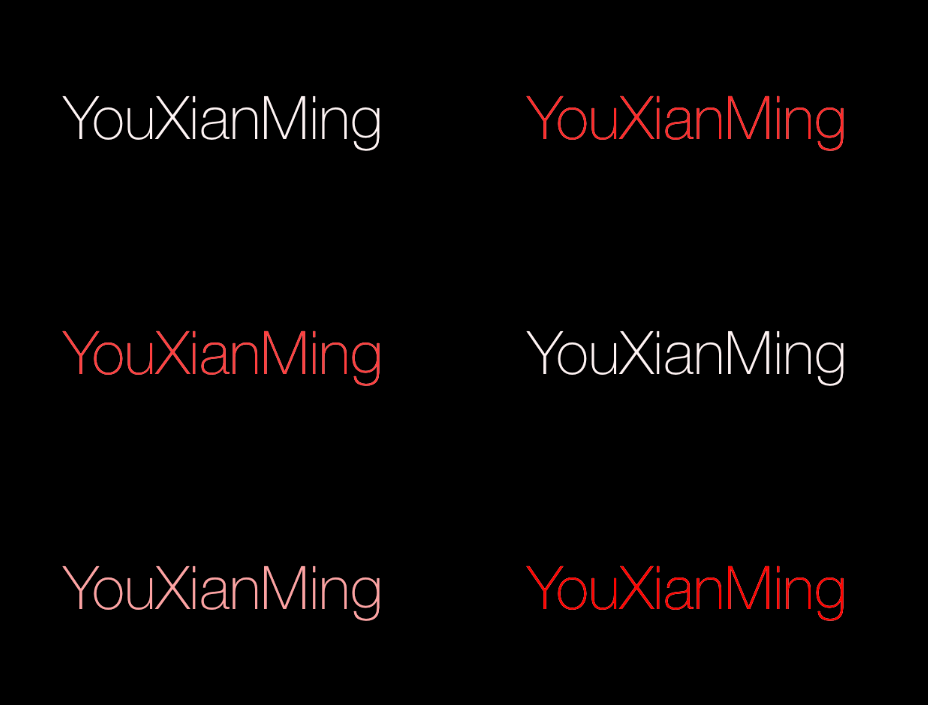
效果如下图:


源码:
//

//  CombinationView.h

//  ChangeColorLabel

//

//  Created by YouXianMing on 14/11/15.

//  Copyright (c) 2014年 YouXianMing. All rights reserved.

//

#import <UIKit/UIKit.h>

@interface CombinationView : UIView

/**

 *  上面的view与下面的view

 */

@property (nonatomic, strong) UIView  *bottomView;

@property (nonatomic, strong) UIView  *aboveView;

/**

 *  上面view的透明度

 */

@property (nonatomic, assign) CGFloat  aboveViewAlpha;

@end
//

//  CombinationView.m

//  ChangeColorLabel

//

//  Created by YouXianMing on 14/11/15.

//  Copyright (c) 2014年 YouXianMing. All rights reserved.

//

#import "CombinationView.h"

typedef enum : NSUInteger {

    Above_View = 0x11,

    Bottom_View,

} ENUM_VIEW;

@implementation CombinationView

#pragma mark - 上面的view与下面的view

@synthesize bottomView     = _bottomView;

@synthesize aboveView      = _aboveView;

@synthesize aboveViewAlpha = _aboveViewAlpha;

- (void)setBottomView:(UIView *)bottomView {

    self.bounds      = bottomView.bounds;

    bottomView.frame = bottomView.bounds;

    _bottomView      = bottomView;

    _aboveView.tag  = Above_View;

    _bottomView.tag = Bottom_View;

    [self addSubview:bottomView];

    [self bringSubviewToFront:[self viewWithTag:Above_View]];

}

- (UIView *)bottomView {

    return _bottomView;

}

- (void)setAboveView:(UIView *)aboveView {

    self.bounds     = aboveView.bounds;

    aboveView.frame = aboveView.bounds;

    _aboveView      = aboveView;

    _aboveView.tag  = Above_View;

    _bottomView.tag = Bottom_View;

    [self addSubview:aboveView];

    [self bringSubviewToFront:[self viewWithTag:Above_View]];

}

- (UIView *)aboveView {

    return _aboveView;

}

- (void)setAboveViewAlpha:(CGFloat)aboveViewAlpha {

    _aboveView.alpha = aboveViewAlpha;

}

- (CGFloat)aboveViewAlpha {

    return _aboveView.alpha;

}

@end
显示时候的源码:
//

//  ViewController.m

//  ChangeColorLabel

//

//  Created by YouXianMing on 14/11/15.

//  Copyright (c) 2014年 YouXianMing. All rights reserved.

//

#import "ViewController.h"

#import "CombinationView.h"

@interface ViewController ()

@property (nonatomic, strong) NSTimer         *timer;

@property (nonatomic, strong) CombinationView *tmpView;

@end

@implementation ViewController

- (void)viewDidLoad {

    [super viewDidLoad];

    self.view.backgroundColor = [UIColor blackColor];

    // 普通label

    UILabel *label      = [[UILabel alloc] initWithFrame:CGRectMake(, , , )];

    label.center        = self.view.center;

    label.textAlignment = NSTextAlignmentCenter;

    label.font          = [UIFont fontWithName:@"HelveticaNeue-Thin" size:];

    label.text          = @"YouXianMing";

    label.textColor     = [UIColor whiteColor];

    // 截图

    UIView *snapShot = [label snapshotViewAfterScreenUpdates:YES];

    // 更新的label

    label.textColor = [UIColor redColor];

    // 组合器

    self.tmpView             = [CombinationView new];

    self.tmpView.aboveView   = label;

    self.tmpView.bottomView  = snapShot;

    self.tmpView.center      = self.view.center;

    // 添加view

    [self.view addSubview:self.tmpView];

    // 定时器

    _timer = [NSTimer scheduledTimerWithTimeInterval:3.5f

                                              target:self

                                            selector:@selector(doAnimation)

                                            userInfo:nil

                                             repeats:YES];

}

- (void)doAnimation {

    // 做动画测试

    [UIView animateWithDuration:1.5 animations:^{

        self.tmpView.aboveViewAlpha = .f;

    } completion:^(BOOL finished) {

        [UIView animateWithDuration:1.5 animations:^{

            self.tmpView.aboveViewAlpha = .f;

        } completion:^(BOOL finished) {

        }];

    }];

}

@end
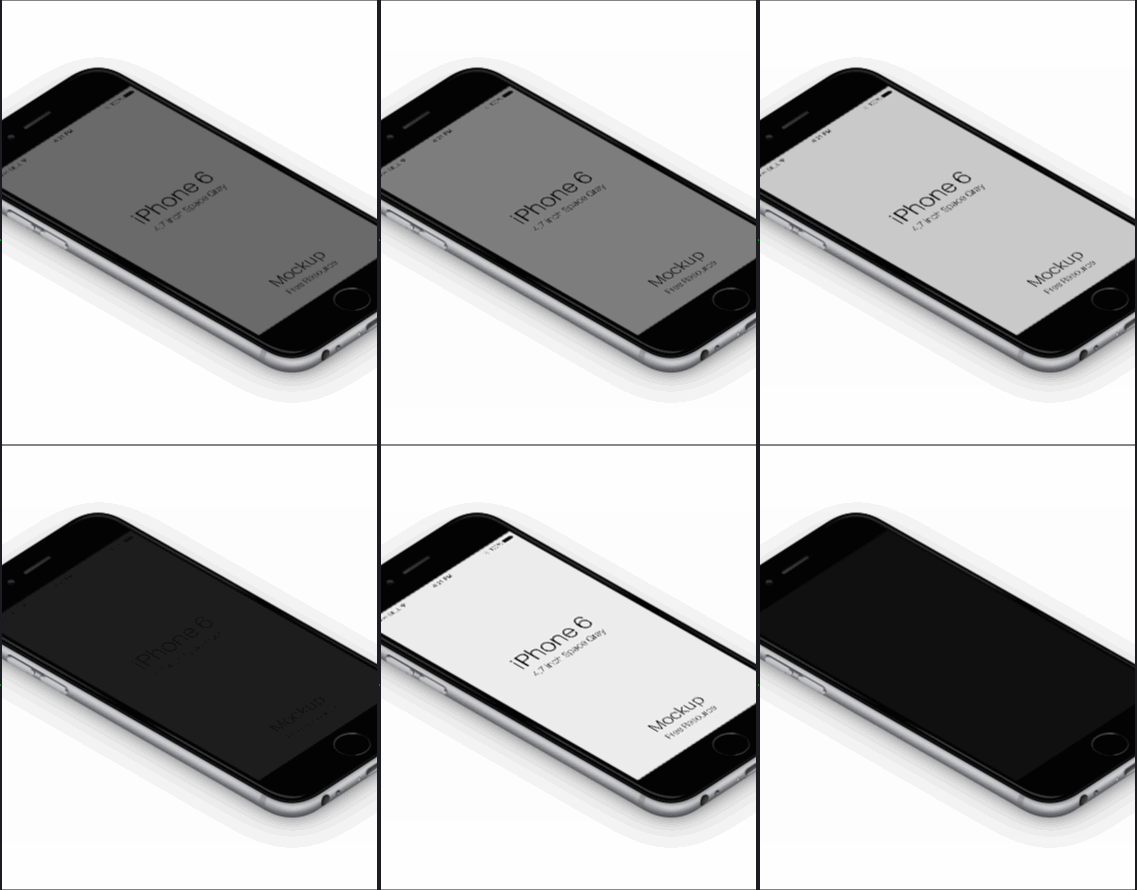
手机图片源码:
//

//  ViewController.m

//  ChangeColorLabel

//

//  Created by YouXianMing on 14/11/15.

//  Copyright (c) 2014年 YouXianMing. All rights reserved.

//

#import "ViewController.h"

#import "CombinationView.h"

@interface ViewController ()

@property (nonatomic, strong) NSTimer         *timer;

@property (nonatomic, strong) CombinationView *tmpView;

@end

@implementation ViewController

- (void)viewDidLoad {

    [super viewDidLoad];

    self.view.backgroundColor = [UIColor blackColor];

    UIImageView *imageView1 = [[UIImageView alloc] initWithImage:[UIImage imageNamed:@"iPhone"]];

    UIImageView *imageView2 = [[UIImageView alloc] initWithImage:[UIImage imageNamed:@"iPhoneOne"]];

    // 组合器

    self.tmpView             = [CombinationView new];

    self.tmpView.aboveView   = imageView1;

    self.tmpView.bottomView  = imageView2;

    self.tmpView.center      = self.view.center;

    // 添加view

    [self.view addSubview:self.tmpView];

    // 定时器

    _timer = [NSTimer scheduledTimerWithTimeInterval:3.5f

                                              target:self

                                            selector:@selector(doAnimation)

                                            userInfo:nil

                                             repeats:YES];

}

- (void)doAnimation {

    // 做动画测试

    [UIView animateWithDuration:1.5 animations:^{

        self.tmpView.aboveViewAlpha = .f;

    } completion:^(BOOL finished) {

        [UIView animateWithDuration:1.5 animations:^{

            self.tmpView.aboveViewAlpha = .f;

        } completion:^(BOOL finished) {

        }];

    }];

}

@end
实现UILabel渐变色效果的更多相关文章
- 通过CAGradientLayer制作渐变色效果(转)
转载自:http://blog.it985.com/7986.html 看了极客学院的视频之后写的一篇博客,觉得不错,还是作为笔记使用. 简单介绍一下CAGradientLayer吧. Gradien ...
- iOS高仿微信项目、阴影圆角渐变色效果、卡片动画、波浪动画、路由框架等源码
iOS精选源码 iOS高仿微信完整项目源码 Khala: Swift 编写的iOS/macOS 路由框架 微信左滑删除效果的实现与TableViewCell的常用样式介绍 实现阴影圆角并存,渐变色背景 ...
- Android背景渐变色效果
Android设置背景色可以通过在res/drawable里定义一个xml,如下: [代码]xml代码: 1 <?xml version="1.0" encoding=&qu ...
- css实现背景渐变色效果
webkit内核的浏览器,例如(chrome,safari等) background:-webkit-gradient(linear,0 0,0 100%,from(#000000),to(#ffff ...
- 兼容主流浏览器的css渐变色
网页中的渐变色区域,渐变色背景,一般都是通过ps图片方法来实现,但是图片放得多了会影响网页的打开速度,本文介绍的就是用纯 CSS 实现 IE .Firefox.Chrome 和 和Safari都支持的 ...
- iOS - AutoLayout
前言 NS_CLASS_AVAILABLE_IOS(6_0) @interface NSLayoutConstraint : NSObject @available(iOS 6.0, *) publi ...
- asp.net 创建文字特效
相信word 中的 艺术字 功能大家都不陌生.今天, 我们就利用C#来制作几款自己的艺术字, 可能会对我们了解字体图像的制作原理有一些帮助. 至于有没有使用价值我保持沉默. 一. 投影效果 程序运行效 ...
- C#制作艺术字
相信 Word 中的 艺术字 功能大家都不陌生, 前面这个 "Word" 单词就是它所为. 今天, 我们就利用C#来制作几款自己的艺术字, 可能会对我们了解字体图像的制作原理有一 ...
- iOS中常用技术链接
1.弹幕技术 http://www.jianshu.com/p/f39b8abc8008 2.通过CAGradientLayer制作渐变色效果 http://blog.it985.com/7986.h ...
随机推荐
- Ubuntu下配置安装Hadoop 2.2
---恢复内容开始--- 这两天玩Hadoop,之前在我的Mac上配置了好长时间都没成功的Hadoop环境,今天想在win7 虚拟机下的Ubuntu12.04 64位机下配置, 然后再建一个组群看一看 ...
- 微服务~Consul服务注册与发现
服务发现是基于微服务架构的关键原则之一.尝试配置每个客户端或某种形式的约定可能非常困难,可以非常脆弱.Consul通过HTTP API和DNS提供服务发现服务.Spring Cloud Consul利 ...
- OSI与TCP/IP协议区别
1 OSI参考模型 谈到网络不能不谈OSI参考模型,虽然OSI参考模型的实际应用意义不是很大,但其的确对于理解网络协议内部的运作很有帮助,也为我们学习网络协议提供了一个很好的参考.在现实网络世界里,T ...
- Java 合并两个有序链表
编程实现合并两个有序(假定为降序)单链表的函数,输入为两个有序链表的头结点,函数返回合并后新的链表的头节点, 要求:不能另外开辟新的内存存放合并的链表. 递归方式: /* * 递归方式 */ publ ...
- 1.7 js基础,字符串、数组小结
一.arguments 实参参数的数组 实参[实际的值],形参[形式上的参数] 当参数个数不固定的时候使用. 示例: script> var g ...
- Xshell关闭导致jar服务终止,使Jar在CentOS后台运行
环境:Xsehll6,CentOS7 在项目文件夹新建一个runjar.sh 在sh中写入(举例说明) nohup java -Dfile.encoding=UTF- -jar fin-mgmt-.j ...
- Truncated incorrect DOUBLE value: 'NO_REFUND'
解决办法:Mysql中,如果一个字段是字符串,则一定要加单引号 问题原因: `item_refund_state` ) NOT NULL item_refund_state字段的类型是varchar但 ...
- ASP.NET MVC4 新手入门教程特别篇之一----Code First Migrations更新数据库结构(数据迁移)修改Entity FrameWork 数据结构(不删除数据)
背景 code first起初当修改model后,要持久化至数据库中时,总要把原数据库给删除掉再创建(DropCreateDatabaseIfModelChanges),此时就会产生一个问题,当我们的 ...
- Spring 中任意位置获取 session 和 request
在web.xml中添加监听: <listener> <listener-class>org.springframework.web.context.ContextLoaderL ...
- 流畅的python和cookbook学习笔记(七)
1.读写压缩数据文件 使用 gzip 和 bz2 模块来读写压缩文件,不过需要注意文件的模式,默认格式为二进制. # 读取压缩文件 import gzip with gzip.open('somefi ...
