Windows下的Jupyter Notebook 安装与自定义启动
1、Jupyter Notebook 和 pip
为了更加方便地写 Python 代码,还需要安装 Jupyter notebook。 利用 pip 安装 Jupyter notebook。
为什么要使用 Jupyter?参考: https://www.zhihu.com/question/37490497
pip: Python 的包管理工具,安装 Python 的同时已经安装好了。
Jupyter notebook: 一个交互式笔记本,支持运行 40 多种编程语言。 利用她来写 Python,代码和运行结果都可以保存下载,十分方便。
2、Jupyter notebook 安装
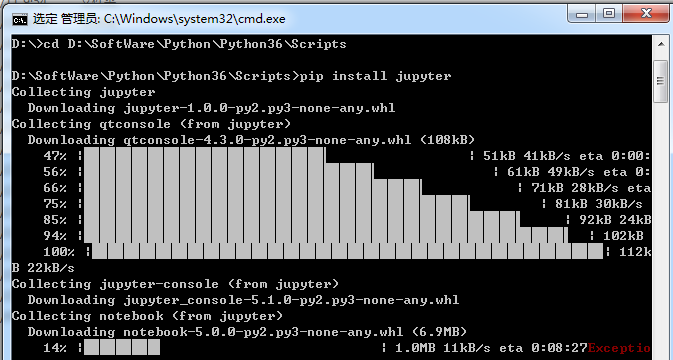
命令行窗口输入: pip install jupyter
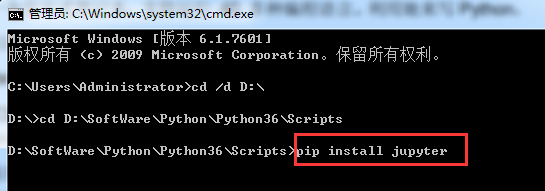
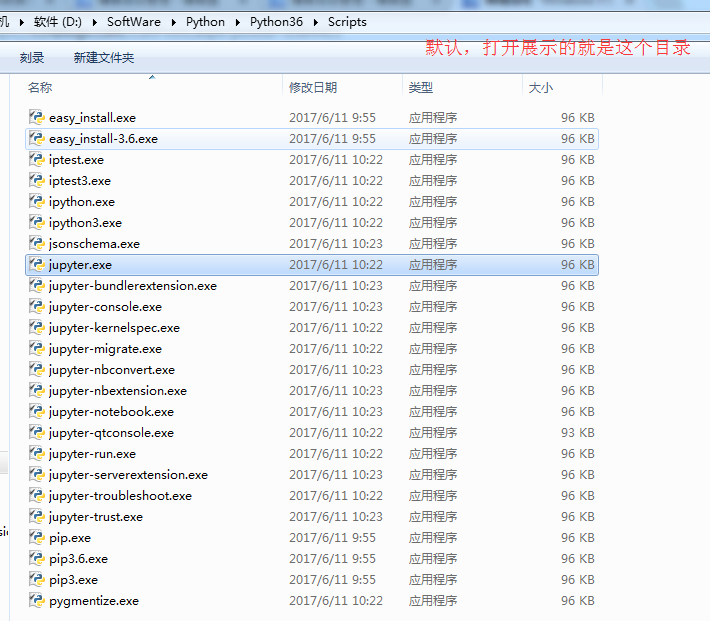
切换到 D:\SoftWare\Python\Python36\Scripts目录下,
当然,若大家是默认安装的话,则在C:\Users\Administrator\AppData\Local\Programs\Python\Python36\Scripts 目录下 。
或者将该目录添加到 path,就不用切换了。
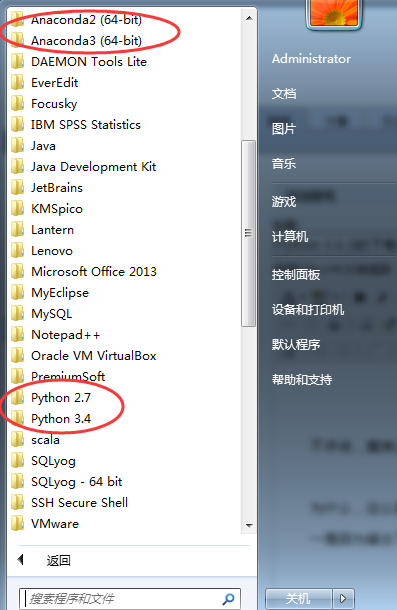
我这里,因为考虑到机器学习深度学习那边,已经安装了Anaconda2和Anaconda3,所以这边的数据分析所用的python3.6.1就不添加到path了。每次去切换到这个目录来,也不麻烦。

Microsoft Windows [版本 6.1.7601]

版权所有 (c) 2009 Microsoft Corporation。保留所有权利。

C:\Users\Administrator>cd /d D:\

D:\>cd D:\SoftWare\Python\Python36\Scripts

D:\SoftWare\Python\Python36\Scripts>pip install jupyter

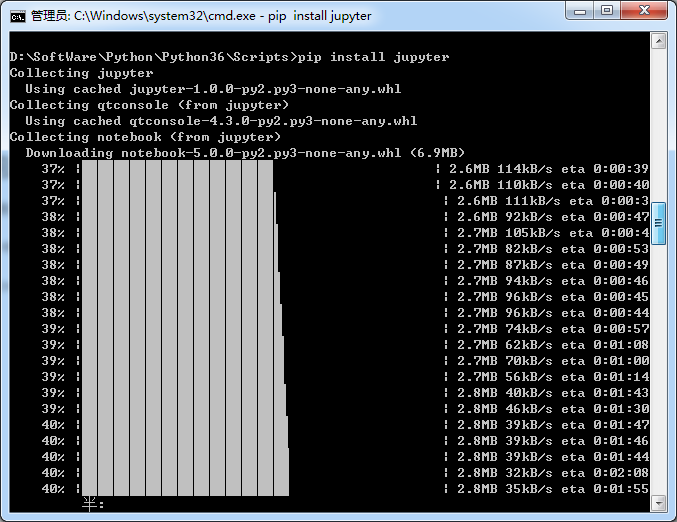


安装成功。
3、 jupyter notebook的启动
命令行窗口输入: jupyter notebook
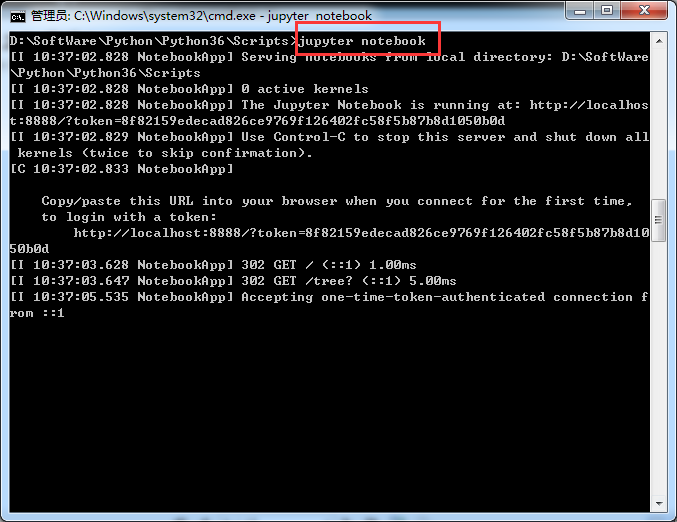
D:\SoftWare\Python\Python36\Scripts>jupyter notebook

[I 10:37:02.828 NotebookApp] Serving notebooks from local directory: D:\SoftWare

\Python\Python36\Scripts

[I 10:37:02.828 NotebookApp] 0 active kernels

[I 10:37:02.828 NotebookApp] The Jupyter Notebook is running at: http://localhos

t:8888/?token=8f82159edecad826ce9769f126402fc58f5b87b8d1050b0d

[I 10:37:02.829 NotebookApp] Use Control-C to stop this server and shut down all

 kernels (twice to skip confirmation).

[C 10:37:02.833 NotebookApp]

    Copy/paste this URL into your browser when you connect for the first time,

    to login with a token:

        http://localhost:8888/?token=8f82159edecad826ce9769f126402fc58f5b87b8d10

50b0d

[I 10:37:03.628 NotebookApp] 302 GET / (::1) 1.00ms

[I 10:37:03.647 NotebookApp] 302 GET /tree? (::1) 5.00ms

[I 10:37:05.535 NotebookApp] Accepting one-time-token-authenticated connection f

rom ::1
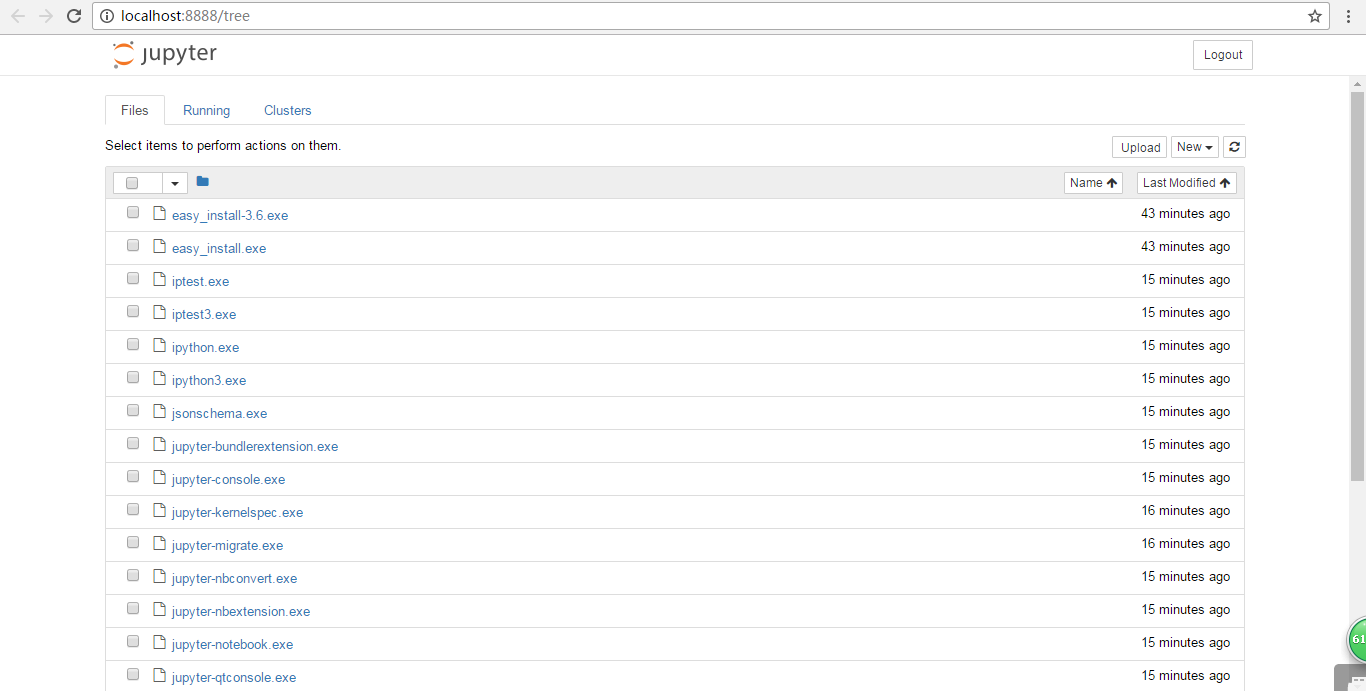
同时,默认浏览器会打开 Jupyter notebook 窗口。 说明 Jupyter notebook 安装成功了。
4、配置 Jupyter notebook
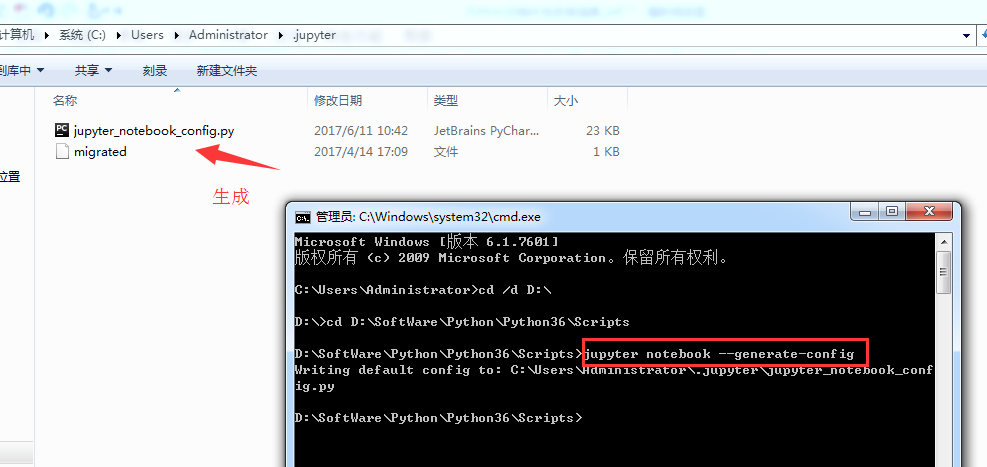
jupyter notebook --generate-config
运行之前
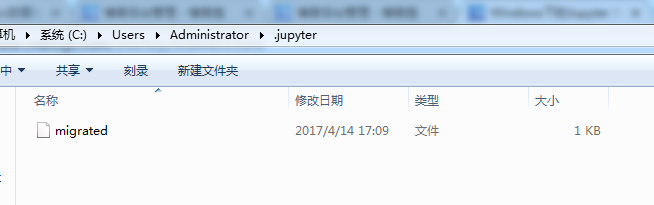
打开“.jupyter”文件夹,可以看到里面有个配置文件。
Microsoft Windows [版本 6.1.7601]

版权所有 (c) 2009 Microsoft Corporation。保留所有权利。

C:\Users\Administrator>cd /d D:\

D:\>cd D:\SoftWare\Python\Python36\Scripts

D:\SoftWare\Python\Python36\Scripts>jupyter notebook --generate-config

Writing default config to: C:\Users\Administrator\.jupyter\jupyter_notebook_conf

ig.py

D:\SoftWare\Python\Python36\Scripts>
修改jupyter_notebook_config.py配置文件
打开这个配置文件,找到“c.NotebookApp.notebook_dir=……”,把路径改成自己的工作目录。

比如,这里要变更为
## The directory to use for notebooks and kernels.
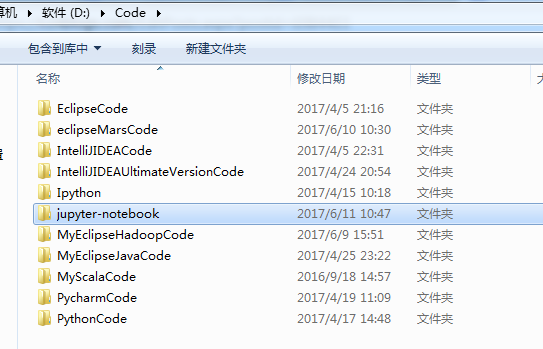
c.NotebookApp.notebook_dir = 'D:\Code\jupyter-notebook'
,当然,文件夹 jupyter-notebook 需要自己创建好。

配置文件修改完成后, 以后在 jupyter notebook 中写的代码等都会保存在自己创建的目录中。
jupyter notebook的自定义启动(变了)
配置文件修改成后,就可以启动 jupyter notebook 了,命令行窗口中输入 jupyter notebook,
默认浏览器就会打开一个页面
jupyter notebook的启动
命令行窗口输入: jupyter notebook
以前是
D:\SoftWare\Python\Python36\Scripts>jupyter notebook

[I 10:37:02.828 NotebookApp] Serving notebooks from local directory: D:\SoftWare

\Python\Python36\Scripts

[I 10:37:02.828 NotebookApp] 0 active kernels

[I 10:37:02.828 NotebookApp] The Jupyter Notebook is running at: http://localhos

t:8888/?token=8f82159edecad826ce9769f126402fc58f5b87b8d1050b0d

[I 10:37:02.829 NotebookApp] Use Control-C to stop this server and shut down all

 kernels (twice to skip confirmation).

[C 10:37:02.833 NotebookApp]

    Copy/paste this URL into your browser when you connect for the first time,

    to login with a token:

        http://localhost:8888/?token=8f82159edecad826ce9769f126402fc58f5b87b8d10

50b0d

[I 10:37:03.628 NotebookApp] 302 GET / (::1) 1.00ms

[I 10:37:03.647 NotebookApp] 302 GET /tree? (::1) 5.00ms

[I 10:37:05.535 NotebookApp] Accepting one-time-token-authenticated connection f

rom ::1
现在是
Microsoft Windows [版本 6.1.7601]
版权所有 (c) 2009 Microsoft Corporation。保留所有权利。 C:\Users\Administrator>cd /d D:\ D:\>cd D:\SoftWare\Python\Python36\Scripts
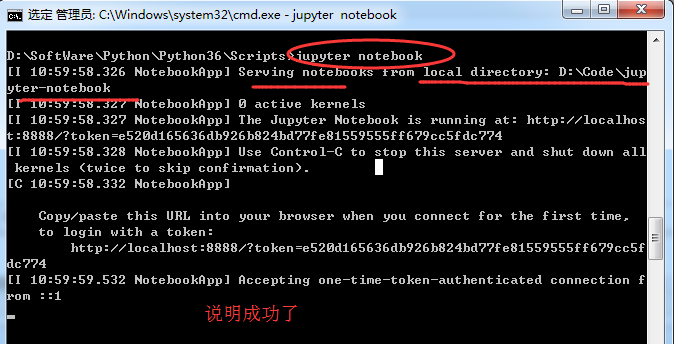
D:\SoftWare\Python\Python36\Scripts>jupyter notebook
[I 10:59:58.326 NotebookApp] Serving notebooks from local directory: D:\Code\jup
yter-notebook
[I 10:59:58.327 NotebookApp] 0 active kernels
[I 10:59:58.327 NotebookApp] The Jupyter Notebook is running at: http://localhos
t:8888/?token=e520d165636db926b824bd77fe81559555ff679cc5fdc774
[I 10:59:58.328 NotebookApp] Use Control-C to stop this server and shut down all
kernels (twice to skip confirmation).
[C 10:59:58.332 NotebookApp] Copy/paste this URL into your browser when you connect for the first time,
to login with a token:
http://localhost:8888/?token=e520d165636db926b824bd77fe81559555ff679cc5f
dc774
[I 10:59:59.532 NotebookApp] Accepting one-time-token-authenticated connection f
rom ::1

当然,其实啊,这个玩意非常的简单和方便。关于修改名字、上传等操作,后续关注的我博客。
常见问题及解决方案
如何添加 Path?
计算机-右击-单机“属性”
单机“高级系统设置”
单机“环境变量”
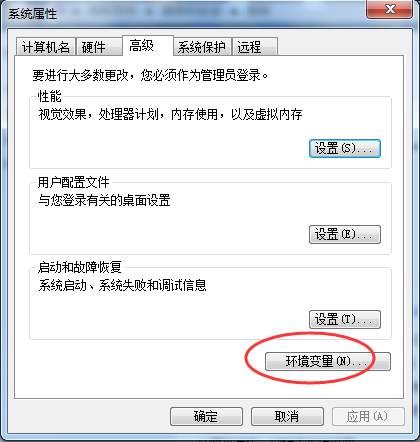
找到系统变量 path,编辑
在最后加上 2 个路径:
C:\Users\Administrator\AppData\Local\Programs\Python\Python36
C:\Users\Administrator\AppData\Local\Programs\Python\Python36\Scripts
说明:以上默认安装路径,每个电脑上是类似的,找到复制这个路径加到 Path 中即可
我的路径是已经改了,在下面的这篇博客里,可以看到
Windows下的Python 3.6.1的下载与安装(适合32bits和64bits)(图文详解)
这是我自定义的Python 的安装目录 (D:\SoftWare\Python\Python36\Scripts)
jupyter notebook 闪退
解决办法:更换默认浏览器。 ,建议用谷歌浏览器或者火狐浏览器
Windows下的Jupyter Notebook 安装与自定义启动的更多相关文章
- Windows下的Jupyter Notebook 安装与自定义启动(图文详解)
不多说,直接上干货! 前期博客 Windows下的Python 3.6.1的下载与安装(适合32bits和64bits)(图文详解) 这是我自定义的Python 的安装目录 (D:\SoftWare\ ...
- Windows下的Jupyter Notebook 的介绍(写给新手)(图文详解)
不多说,直接上干货! Windows下的Python 3.6.1的下载与安装(适合32bits和64bits)(图文详解) Windows下的Jupyter Notebook 安装与自定义启动(图文详 ...
- Anaconda下的 Jupyter Notebook 安装 多python环境
装完 Anaconda 会自带一个pyhon环境 也会自带Jupyter Notebook 可以点击开始中的Jupyter Notebook 打开 浏览器 我这里是 3.x 想要装个2.7 的 ...
- Windows下使用service.bat安装tomcat服务, 启动停止tomcat服务
在项目开发过程中,以前只是在Eclipse中配置.启动.停止tomcat服务器 如果只想在机器中使用tomcat服务器,而不想安装MyEclipse,可以使用service.bat 将tomcat安装 ...
- 全真教程:Windows环境Jupyter Notebook安装、运行和工作文件夹配置
全真教程:Windows环境Jupyter Notebook安装.运行和工作文件夹配置 @ 目录 全真教程:Windows环境Jupyter Notebook安装.运行和工作文件夹配置 一.Jupyt ...
- ubuntu下设置jupyter notebook 2017年07月29日 19:28:34 小旋锋 阅读数:8329 标签: ubuntu 更多 个人分类: python 二三事 来源:http://blog.csdn.net/suzyu12345/article/details/51037905 Ipython Notebook现在已经改名为Ipython jupyter,是最知名最好用的
ubuntu下设置jupyter notebook 来源:http://blog.csdn.net/suzyu12345/article/details/51037905 Ipython No ...
- 在windows端使用jupyter notebook,服务器充当后台计算云端 简化描述
在CentOS7服务器端启动jupyter notebook服务,在windows端使用jupyter notebook,服务器充当后台计算云端 简化描述 CentOS7服务器端 jupyter no ...
- 在CentOS7服务器端启动jupyter notebook服务,在windows端使用jupyter notebook,服务器充当后台计算云端
在CentOS7服务器端启动jupyter notebook服务,在windows端使用jupyter notebook,服务器充当后台计算云端 在服务器端启动jupyter notebook服务,在 ...
- 2分钟 windows下sublime text 3安装git插件:
12:35 2015/11/182分钟 windows下sublime text 3安装git插件:推荐博客:http://blog.csdn.net/naola2001/article/detail ...
随机推荐
- $.serializeArray()获取不到input的value值bug问题
今天修改form表单,发现有好几个input值保存不上,上网搜索了一下是$.serializeArray()获取不到disabled的值.如果想要让input元素变为不可用,可以把input设为rea ...
- 脱壳系列—— *加密脱壳(Android使用手册破解)
作者:i春秋作家HAI_ZHU 0×00 前言 好久没有写文了,要好好开动一下了.很多事情要忙.这篇文章本来很早之前就要写的,但是因为很多事情就拖了很久. 前置内容 HAI_使用手册 知识总结 0×0 ...
- Java基础加强-泛型
/*泛型*/ (泛型是给编译器看的) 泛型是提供给 /*javac编译器使用的*/,可以限定集合中的输入类型,让编译器挡住源程序中的非法输入,编译器编译带类型带类型说明的集合时,会去掉 "类 ...
- 【SpringMVC】入门
一.概述 1.1 SpringMVC是什么 1.2 MVC在b/s系统的应用 1.3 SpringMVC 原理 二.入门程序 2.1 需求 2.2 引入依赖 2.3 前端控制器 2.4 springm ...
- JAVA连接Derby数据库
其实,JAVA连接Derby数据库也很简单,和一般的数据库操作一样:1.加载驱动2.获取连接3.进行数据库操作4.记得关闭连接 示例如下: import java.sql.ResultSet; imp ...
- 2018/7/31-zznuoj-问题 A: A + B 普拉斯【二维字符串+暴力模拟+考虑瑕疵的题意-0的特例】
问题 A: A + B 普拉斯 在计算机中,数字是通过像01像素矩阵来显示的,最终的显示效果如下: 现在我们用01来构成这些数字 当宝儿姐输入A + B 时(log10(A)<50,log10 ...
- 玩深度学习选哪块英伟达 GPU?有性价比排名还不够!
本文來源地址:https://www.leiphone.com/news/201705/uo3MgYrFxgdyTRGR.html 与“传统” AI 算法相比,深度学习(DL)的计算性能要求,可以说完 ...
- [ 原创 ] Map之HashMap的使用方法
import java.util.HashMap;import java.util.Iterator;import java.util.Map;import java.util.Map.Entry;/ ...
- i p _ i n s e r t o p t i o n s函数
i p _ o u t p u t函数接收一个分组和选项.当 i p _ f o r w a r d调用该函数时,选项已经是分组的一部分,所以 i p _ f o r w a r d总是把一个空选项指 ...
- postgresql backup
#!/bin/sh # Database backup script # Backup use postgres pg_dump command: # pg_dump -U <user> ...