
EasyUI第一章Application之Basic CRUD(增删改查)
先看效果图:

增加:

修改:

删除:
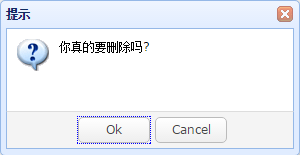
具体实现:
html与js代码:
@{

    Layout = null;

}

<!DOCTYPE html>

<html>

<head>

    <meta charset="UTF-8">

    <title>Basic CRUD Application - jQuery EasyUI CRUD Demo</title>

    <link rel="stylesheet" type="text/css" href="http://www.jeasyui.com/easyui/themes/default/easyui.css">

    <link rel="stylesheet" type="text/css" href="http://www.jeasyui.com/easyui/themes/icon.css">

    <link rel="stylesheet" type="text/css" href="http://www.jeasyui.com/easyui/themes/color.css">

    <link rel="stylesheet" type="text/css" href="http://www.jeasyui.com/easyui/demo/demo.css">

    <script type="text/javascript" src="http://code.jquery.com/jquery-1.6.min.js"></script>

    <script type="text/javascript" src="http://www.jeasyui.com/easyui/jquery.easyui.min.js"></script>

</head>

<body>

    <table id="dg" title="用户列表" class="easyui-datagrid" style="width:700px;height:250px"

           url="/Home/GetUserInfo"

           toolbar="#toolbar" pagination="true"

           rownumbers="true" fitcolumns="true" singleselect="true">

        <thead>

            <tr>

                <th field="FirstName" width="50">First Name</th>

                <th field="LastName" width="50">Last Name</th>

                <th field="Phone" width="50">Phone</th>

                <th field="Email" width="50">Email</th>

            </tr>

        </thead>

    </table>

    <div id="toolbar">

        <a href="javascript:void(0)" class="easyui-linkbutton" iconcls="icon-add" plain="true" onclick="newUser()">新建</a>

        <a href="javascript:void(0)" class="easyui-linkbutton" iconcls="icon-edit" plain="true" onclick="editUser()">修改</a>

        <a href="javascript:void(0)" class="easyui-linkbutton" iconcls="icon-remove" plain="true" onclick="destroyUser()">删除</a>

    </div>

    <div id="dlg" class="easyui-dialog" style="width:400px"

         closed="true" buttons="#dlg-buttons">

        <form id="fm" method="post" novalidate style="margin:0;padding:20px 50px">

            <div style="margin-bottom:20px;font-size:14px;border-bottom:1px solid #ccc">用户信息</div>

            <div style="margin-bottom:10px">

                <input name="FirstName" class="easyui-textbox" required="true" label="First Name:" style="width:100%">

            </div>

            <div style="margin-bottom:10px">

                <input name="LastName" class="easyui-textbox" required="true" label="Last Name:" style="width:100%">

            </div>

            <div style="margin-bottom:10px">

                <input name="Phone" class="easyui-textbox" required="true" label="Phone:" style="width:100%">

            </div>

            <div style="margin-bottom:10px">

                <input name="Email" class="easyui-textbox" required="true" validtype="email" label="Email:" style="width:100%">

            </div>

        </form>

    </div>

    <div id="dlg-buttons">

        <a href="javascript:void(0)" class="easyui-linkbutton c6" iconcls="icon-ok" onclick="saveUser()" style="width:90px">保存</a>

        <a href="javascript:void(0)" class="easyui-linkbutton" iconcls="icon-cancel" onclick="javascript:$('#dlg').dialog('close')" style="width:90px">取消</a>

    </div>

    <script type="text/javascript">

        var url;

        //新建

        function newUser() {

            $('#dlg').dialog('open').dialog('center').dialog('setTitle', '新建用户'); //打开、居中、设置标题

            $('#fm').form('clear'); //清除表单数据

            url = '/Home/SaveUsers';

        }

        //编辑

        function editUser() {

            var row = $('#dg').datagrid('getSelected'); //获取选中的行

            if (row) {

                $('#dlg').dialog('open').dialog('center').dialog('setTitle', 'Edit User');

                $('#fm').form('load', row);

                url = '/Home/SaveUsers';

            } else {

                $.messager.alert({

                    title: '系统提示',

                    msg: '请选择需要修改的行'

                });

            }

        }

        //保存

        function saveUser() {

            $('#fm').form('submit', {

                url: url,

                onSubmit: function () {

                    return $(this).form('validate');

                },

                success: function (result) {

                    var result = eval('(' + result + ')');

                    if (result.IsSuccess) {

                        $.messager.show({

                            title: '系统提示',

                            msg: result.Message

                        });

                        $('#dg').datagrid('reload');    // 刷新

                    } else {

                        $.messager.show({

                            title: '系统提示',

                            msg: "保存失败"

                        });

                    }

                }

            });

        }

        //删除

        function destroyUser() {

            var row = $('#dg').datagrid('getSelected');

            if (row) {

                //提示用户是否真的删除

                $.messager.confirm('提示', '你真的要删除吗?', function (r) {

                    if (r) {

                        $.post('/Home/DeleteUsers', { id: row.Id }, function (result) {

                            if (result.IsSuccess) {

                                $.messager.show({    //错误提示

                                    title: '系统提示',

                                    msg: result.Message

                                });

                                $('#dg').datagrid('reload');    // 刷新已经删除的记录

                            } else {

                                $.messager.show({    //错误提示

                                    title: '系统提示',

                                    msg: "删除失败"

                                });

                            }

                        }, 'json');

                    }

                });

            } else {

                $.messager.alert({

                    title: '系统提示',

                    msg: '请选择要删除的数据'

                });

            }

        }

    </script>

</body>

</html>
后台CS代码:
public class HomeController : Controller

{

    public ActionResult Index()

    {

        return View();

    }

    public ActionResult ApplicationBasicCRUD()

    {

        return View();

    }

    [HttpPost]

    public JsonResult GetUserInfo()

    {

        EasyUiPages easyUiPages = new EasyUiPages();

        List<UserInfo> userInfo = new List<UserInfo>();

        userInfo.Add(new UserInfo() { Id = , FirstName = "Tom", LastName = "Jim", Phone = "", Email = "AA@qq.com" });

        userInfo.Add(new UserInfo() { Id = , FirstName = "AAA", LastName = "TTT", Phone = "", Email = "BB@qq.com" });

        userInfo.Add(new UserInfo() { Id = , FirstName = "BBB", LastName = "VVV", Phone = "", Email = "CC@qq.com" });

        easyUiPages.total = userInfo.Count();

        easyUiPages.rows = userInfo;

        return Json(easyUiPages);

    }

    public ActionResult SaveUsers()

    {

        ResultState resultState = new ResultState();

        resultState.IsSuccess = true;

        resultState.Message = "保存成功";

        return Json(resultState);

    }

    public ActionResult DeleteUsers()

    {

        ResultState resultState = new ResultState();

        resultState.IsSuccess = true;

        resultState.Message = "删除成功";

        return Json(resultState);

    }

}

public class ResultState

{

    public bool IsSuccess { get;set;}

    public string Message { get; set; }

}
UserInfo类:
public class UserInfo

{

    public int Id { get; set; }

    public string FirstName { get; set; }

    public string LastName { get; set; }

    public string Phone { get; set; }

    public string Email { get; set; }

}

public class EasyUiPages

{

    /// <summary>

    /// 所有数据

    /// </summary>

    public object rows { get; set; }

    /// <summary>

    /// 总行数

    /// </summary>

    public object total { get; set; }

}
EasyUI第一章Application之Basic CRUD(增删改查)的更多相关文章
- 使用ASP.NET Core MVC 和 Entity Framework Core 开发一个CRUD(增删改查)的应用程序
使用ASP.NET Core MVC 和 Entity Framework Core 开发一个CRUD(增删改查)的应用程序 不定时更新翻译系列,此系列更新毫无时间规律,文笔菜翻译菜求各位看官老爷们轻 ...
- 前端的CRUD增删改查的小例子
前端的CRUD增删改查的小例子 1.效果演示 2.相关代码: <!DOCTYPE html> <html lang="en"> <head> & ...
- 【EF6学习笔记】(二)操练 CRUD 增删改查
本篇原文链接: Implementing Basic CRUD Functionality 说明:学习笔记参考原文中的流程,为了增加实际操作性,并能够深入理解,部分地方根据实际情况做了一些调整:并且根 ...
- EF6 学习笔记(二):操练 CRUD 增删改查
EF6学习笔记总目录 ASP.NET MVC5 及 EF6 学习笔记 - (目录整理) 接上篇: EF6 学习笔记(一):Code First 方式生成数据库及初始化数据库实际操作 本篇原文链接: I ...
- abp(net core)+easyui+efcore仓储系统——展现层实现增删改查之控制器(六)
abp(net core)+easyui+efcore仓储系统目录 abp(net core)+easyui+efcore仓储系统——ABP总体介绍(一) abp(net core)+easyui+e ...
- yii2-basic后台管理功能开发之二:创建CRUD增删改查
昨天实现了后台模板的嵌套,今天我们可以试着创建CRUD模型啦 刚开始的应该都是“套用”,不再打算细说,只把关键的地方指出来. CRUD即数据库增删改查操作.可以理解为yii2为我们做了一个组件,来实现 ...
- 创建支持CRUD(增删改查)操作的Web API(二)
一:准备工作 你可以直接下载源码查看 Download the completed project. 下载完整的项目 CRUD是指“创建(C).读取(R).更新(U)和删除(D)”,它们是四个 ...
- python全栈开发中级班全程笔记(第二模块、第三章)(员工信息增删改查作业讲解)
python全栈开发中级班全程笔记 第三章:员工信息增删改查作业代码 作业要求: 员工增删改查表用代码实现一个简单的员工信息增删改查表需求: 1.支持模糊查询,(1.find name ,age fo ...
- Hibernate第一个程序(最基础的增删改查) --Hibernate
本例实现Hibernate的第一个程序,Hibernate的优点我想大家都很清楚,在这里不做过多赘述.总之,使用Hibernate对数据库操作,也就是来操作实体对象的! 项目目录: 一.第一步要做的就 ...
随机推荐
- B - Ignatius and the Princess IV DP
#include<iostream> #include<vector> using namespace std; ]; int main() { int time,n,limi ...
- 显式意图启动一个Activity
显式意图主要是通过指定包名和类名开启一个组件,主要用于安全性要求高的,且不想被其他应用开启,可以不配置应用过滤器. 1.创建意图对象 Intent intent = new Intent(); 2.指 ...
- hbase-0.94 Java API
Hierarchy For Package org.apache.hadoop.hbase Package Hierarchies: All Packages Class Hierarchy java ...
- Servlet和JSP学习指导与实践(三):JSP助阵
前言: JSP(Java Server Page)虽然作为一门服务端的语言,但它并没有创新新的语言标准.有些人一接触jsp之后发现易学易懂.实际上,jsp的内部原理仍然是基于Servlet,它是Ser ...
- 鼠标拖动在picturebox上画圆时
注意MouseDown MouseMove MouseUp三个事件: MouseMove事件中要实现实时绘制和下次绘制时自动清除重绘 需要: pictureBox1.Invalidate(); pi ...
- html5图片异步上传/ 表单提交相关
1 form 表单 get/post提交时候. action地址(或者啥ajax的url地址) 会涉及到跨域问题 常见跨域问题http://www.cnblogs.com/rainman/archiv ...
- <<< List<HashMap<String, Object>> 及 HashMap<String, Object> 的用法
//(赋值)最简单的一种hashMap赋值方式 List<HashMap<String, Object>> aMap= new ArrayList<HashMap< ...
- DataTable的过滤需要的数据
DataView dv = datatable.DefaultView; (1) dv.RowFilter = "RowsId>3"; //此 ...
- Python之路【第十九篇】自定义分页实现(模块化)
自定义分页 1.目的&环境准备 目的把分页写成一个模块的方式然后在需要分页的地方直接调用模块就行了. 环境准备Django中生成一个APP并且注册,配置URL&Views 配置URL ...
- 查看修改Linux时区和时间
查看/修改Linux时区和时间 一.时区 1. 查看当前时区 date -R 2. 修改设置时区 方法(1) tzselect 方法(2) 仅限于RedHat Linux 和 CentOS timec ...