从 Vue 1.x 迁移 — Vue.js
闲聊:
又到周五啦,明天不用上班啦哈哈哈哈哈,想想就好开心啊,嘻嘻,小颖这周三的早晨做个一个美梦,把自己愣是笑醒了,梦的大概剧情我忘记了,总之宝宝是被笑醒的,醒了之后还傻笑了一段时间,真希望每天早上都能梦到这样的梦,估计当时我家仔仔看着我傻笑内心是崩溃的,估计在想,这傻妞又做什么梦了,太能折腾了,哭醒、笑醒、从床上掉下去 摔醒,估计也就我家铲屎的有这技能。哈哈哈哈

目录:
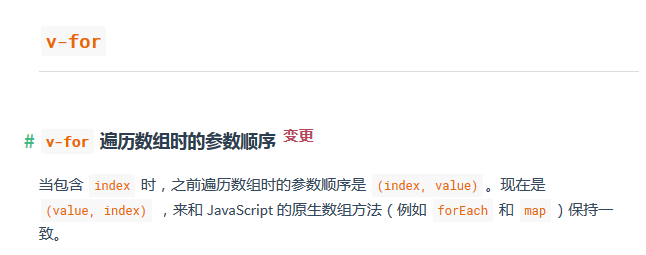
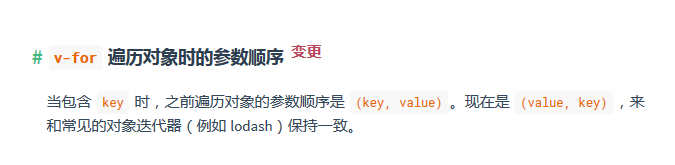
1.v-for

vue1.0例子:
效果图:
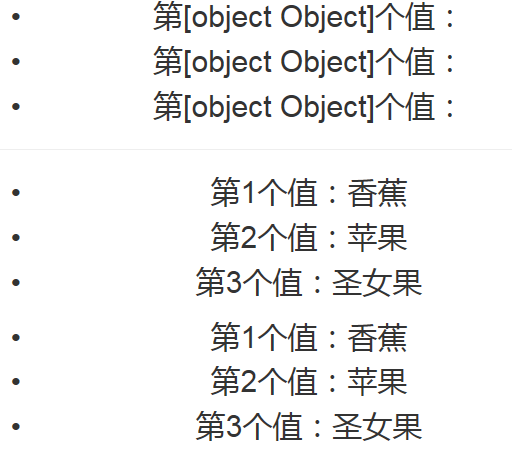
vue1.0中的 v-for 的用法:
<template>

<div class="father-container">

    <ul>

        <li v-for='(val,index) in fruitData'>第{{index}}个值:{{val.name}}</li>

    </ul>

    <hr>

    <ul>

        <li v-for='(index,val) in fruitData'>第{{index+1}}个值:{{val.name}}</li>

    </ul>

    <ul>

        <li v-for='val in fruitData'>第{{$index+1}}个值:{{val.name}}</li>

    </ul>

</div>

</template>

<script>

export default {

    components: {},

    methods: {},

    watch: {},

    data() {

        return {

            fruitData: [{

                name: '香蕉'

            }, {

                name: '苹果'

            }, {

                name: '圣女果'

            }]

        }

    }

}

</script>
vue2.0例子:
效果图:
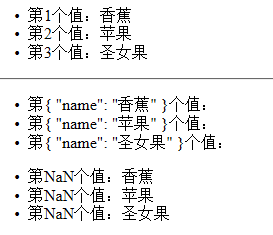
vue2.0中 v-for 的用法:
<template>

<div class="father-container">

    <ul>

        <li v-for='(val,index) in fruitData'>第{{index+1}}个值:{{val.name}}</li>

    </ul>

    <hr>

    <ul>

        <li v-for='(index,val) in fruitData'>第{{index}}个值:{{val.name}}</li>

    </ul>

    <ul>

        <li v-for='val in fruitData'>第{{$index+1}}个值:{{val.name}}</li>

    </ul>

</div>

</template>

<script>

export default {

    components: {},

    methods: {},

    data() {

        return {

            fruitData: [{

                name: '香蕉'

            }, {

                name: '苹果'

            }, {

                name: '圣女果'

            }]

        }

    }

}

</script>
2.twoWay-Prop-的参数-移除
小颖在之前用vue1.的时候子组件可以通过Prop中twoWay的参数,直接修改父组件的值,但是现在不行了。
光看,可能大家不太理解,下面小颖就做个demo,帮大家更好的理解。嘻嘻,
目录:
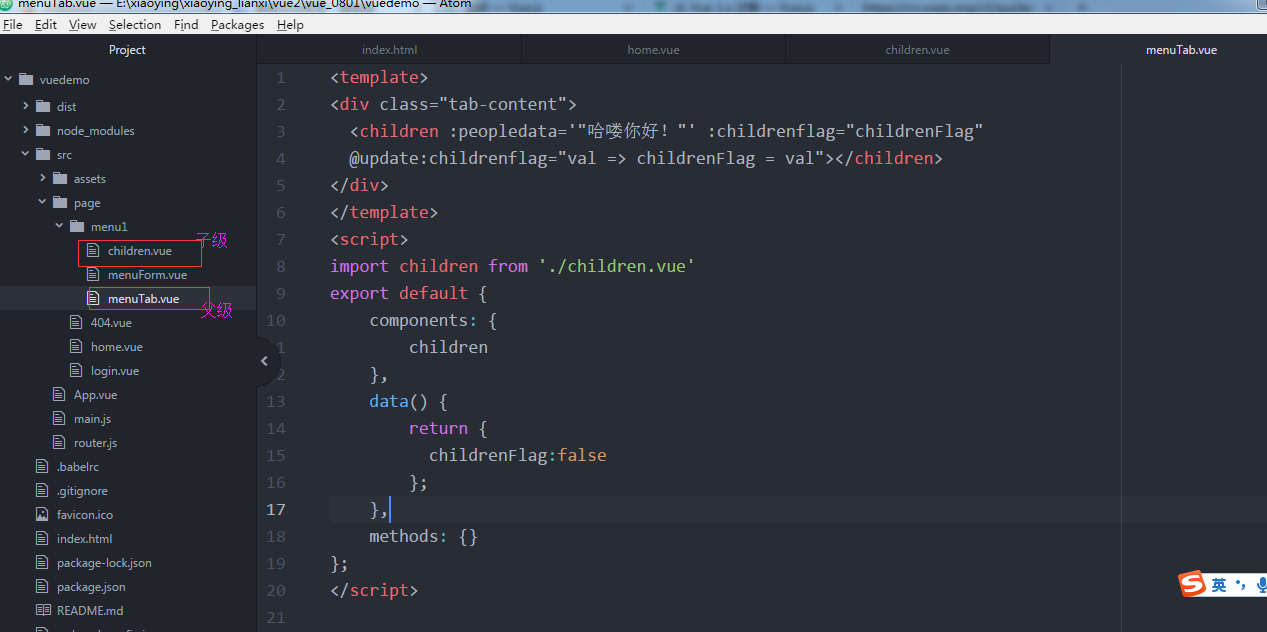
父组件:
<template>

<div class="tab-content">

  <children :peopledata='"哈喽你好!"' :childrenflag="childrenFlag"

  @update:childrenflag="val => childrenFlag = val"></children>

</div>

</template>

<script>

import children from './children.vue'

export default {

    components: {

        children

    },

    data() {

        return {

          childrenFlag:false

        };

    },

    methods: {}

};

</script>

<style lang="css">

</style>
子组件:
<template lang="html">
<div class="children-content" v-if='childrenflag'>{{peopledata}}
<div class="fruit-content">
<ul v-for='fruit in fruitData'>
<li>{{fruit.name}}</li>
</ul>
</div>
</div>
</template> <script>
export default {
components: {},
props: {
peopledata: {
type: String
},
childrenflag: {
type: Boolean
}
},
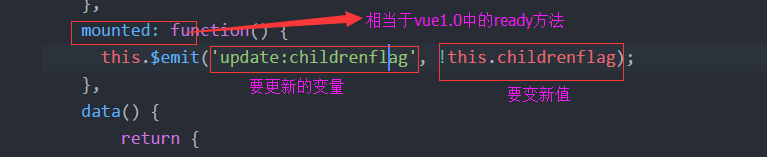
mounted: function() {
this.$emit('update:childrenflag', !this.childrenflag);
},
data() {
return {
fruitData: [{
name: '香蕉'
}, {
name: '苹果'
}, {
name: '圣女果'
}]
}
}
}
</script> <style lang="css">
</style>
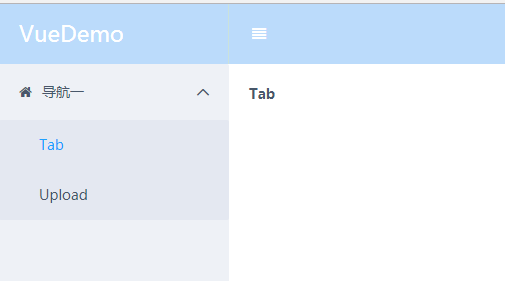
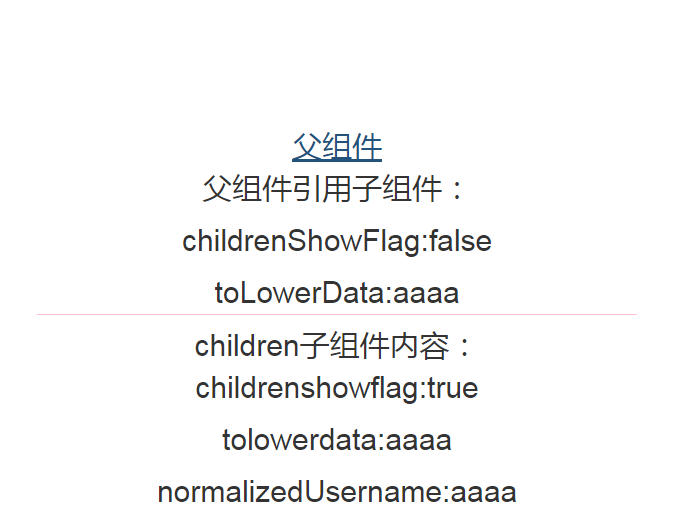
当父组件的值 childrenFlag:false 时: 当父组件的值 childrenFlag:true 时:

这是怎么实现的呢?
在父组件中:

在子组件中:
或者用 parent 来实现子组件修改父组件的值。
代码:
父组件调用子组件的时候直接调用,传好参数,别的不用改。

子组件中:

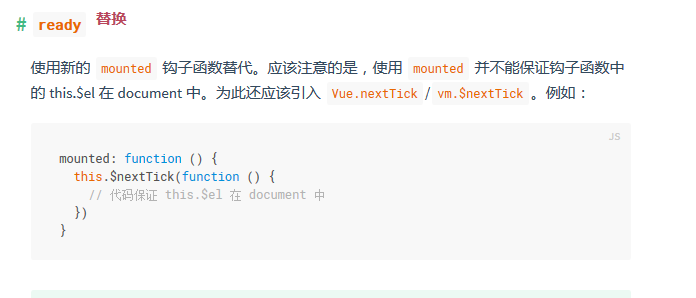
3.ready-替换
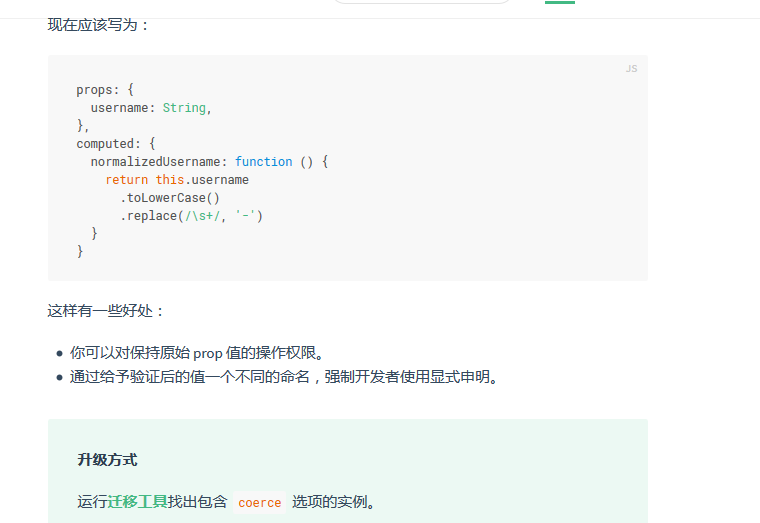
以前的写法:
vue2.0的写法:
4.coerce-Prop的参数-移除
vue1.0:
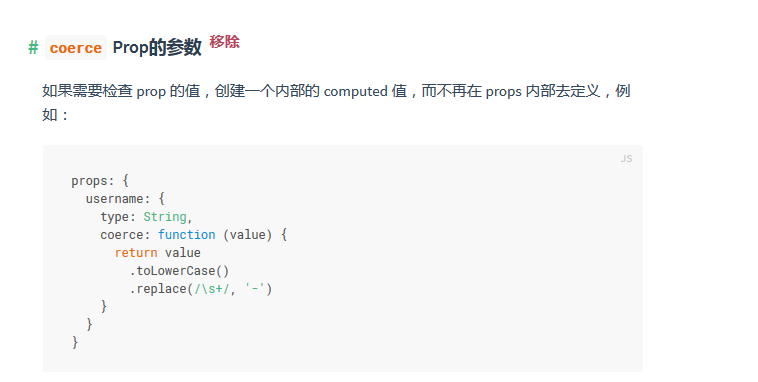
vue2.0
vue1.0例子:
效果图:
App.vue
<style>

div#app {

    width: 600px;

    text-align: center;

    margin: 200px auto 0;

}

</style>

<template>

<div class='all-page-container'>

    <a v-link='"/father"'>父组件</a>

    <router-view transition='animation' class='content' keep-alive></router-view>

</div>

</template>

<script>

import father from './page/father.vue'

export default {

    components: {

        father

    },

    methods: {},

    data() {

        return {}

    }

}

</script>
father.vue
<style>

.last-p {

    border-bottom: 1px solid pink;

}

</style>

<template>

<div class="father-container">

    <p>父组件引用子组件:</p>

    <p>childrenShowFlag:{{childrenShowFlag}}</p>

    <p class="last-p">toLowerData:{{toLowerData}}</p>

    <children :childrenshowflag.sync='childrenShowFlag' :tolowerdata.sync='toLowerData'></children>

</div>

</template>

<script>

import children from './children.vue'

export default {

    components: {

        children

    },

    methods: {},

    watch: {},

    data() {

        return {

            childrenShowFlag: false,

            toLowerData: 'AAAA'

        }

    }

}

</script>
children.vue
<template>
<div class='children-container'>
children子组件内容:
<p>childrenshowflag:{{childrenshowflag}}</p>
<p>tolowerdata:{{tolowerdata}}</p>
<p>normalizedUsername:{{normalizedUsername}}</p>
</div>
</template> <script>
export default {
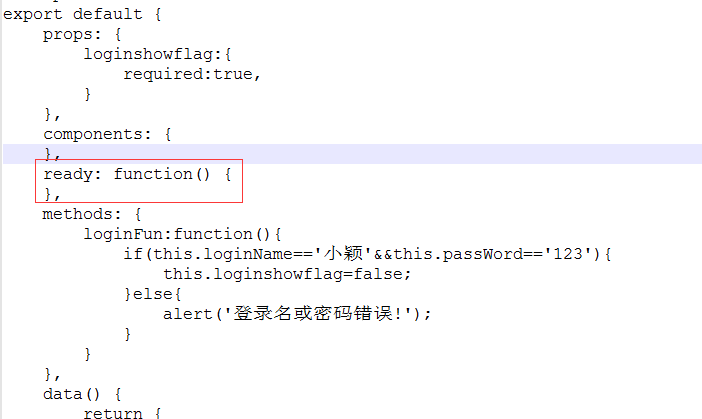
props: {
childrenshowflag: {
required: true,
coerce: function(value) {
return !value;
}
},
tolowerdata: {
type: String
}
},
computed: {
normalizedUsername: function() {
this.tolowerdata = this.tolowerdata.toLowerCase();
return this.tolowerdata.toLowerCase();
}
},
components: {},
ready: function() {},
methods: {},
data() {
return {}
}
}
</script>
通过上面的示例,大家应该发现coerce-Prop的参数只会改变子组件中的值,父组件的值不变,即使是在vue1.0中父组件和子组件是用twoWay的方式绑定的,但在computed中改变子组件的值,父组件的值也会发生变化。
vue2.0例子:
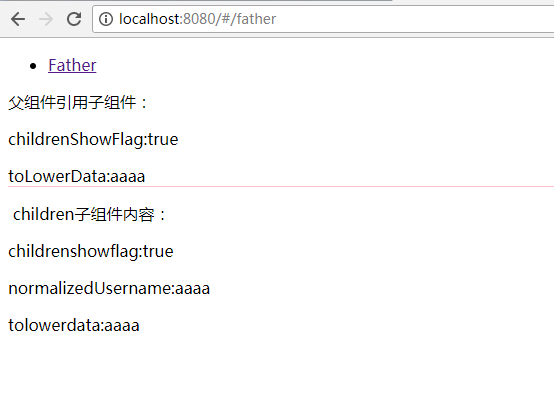
效果图:
App.vue
<template>

<div id="app">

    <ul>

        <li>

            <router-link to="/father">Father</router-link>

        </li>

    </ul>

    <router-view></router-view>

</div>

</template>

<script>

export default {}

</script>
father.vue
<style>

.last-p {

    border-bottom: 1px solid pink;

}

</style>

<template>

<div class="father-container">

    <p>父组件引用子组件:</p>

    <p>childrenShowFlag:{{childrenShowFlag}}</p>

    <p class="last-p">toLowerData:{{toLowerData}}</p>

    <children :childrenshowflag='childrenShowFlag' :tolowerdata='toLowerData'

    @update:tolowerdata="val => toLowerData = val"></children>

</div>

</template>

<script>

import children from './children.vue'

export default {

    components: {

        children

    },

    methods: {},

    data() {

        return {

            childrenShowFlag: false,

            toLowerData: 'AAAA'

        }

    }

}

</script>
children.vue
<style>

.last-p {

    border-bottom: 1px solid pink;

}

</style>

<template>

<div class="father-container">

    <p>父组件引用子组件:</p>

    <p>childrenShowFlag:{{childrenShowFlag}}</p>

    <p class="last-p">toLowerData:{{toLowerData}}</p>

    <children :childrenshowflag='childrenShowFlag' :tolowerdata='toLowerData'

    @update:tolowerdata="val => toLowerData = val"></children>

</div>

</template>

<script>

import children from './children.vue'

export default {

    components: {

        children

    },

    methods: {},

    data() {

        return {

            childrenShowFlag: false,

            toLowerData: 'AAAA'

        }

    }

}

</script>
通过上面的示例,大家会发现:
当父组件和子组件通过

实现子组件改变父组件的值时,子组件中:
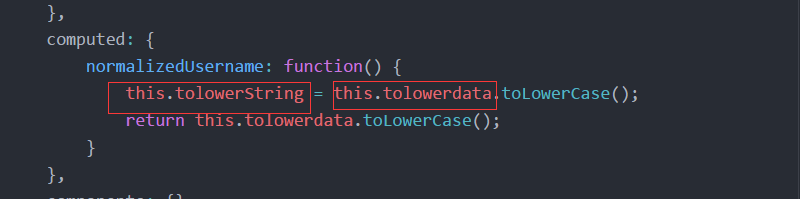
在computed中就不能再用:this.tolowerdata = this.tolowerdata.toLowerCase();
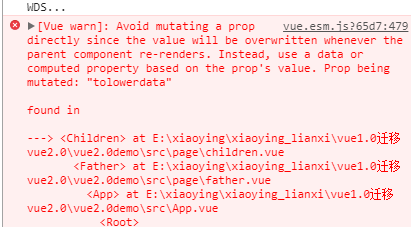
所以小颖给其重新定义了一个变量,改变这个变量的值然后再 this.$emit('update:tolowerdata', this.tolowerString); 在这个例子中,其实子组件的值改变后,父组件的值也发生了变化。
5.#v-el-和v-ref-替换
vue1.0用法:
请看小颖之前写的一篇文章:vue实例属性(vm.$els)
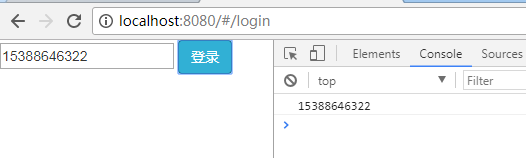
vue2.0用法:
<script>

export default {

    methods: {

        //点击登录页面中的登录按钮,实现用户登录

        loginFun: function() {

            var userPhone = this.$refs.phone.value;

            console.log(userPhone);

        }

    },

    data() {

        return {

            userData: {

                userPhone: '15388646322',

                passWord: 'yy1028'

            }

        }

    }

}

</script>
(未完待续..............................................................................................)
从 Vue 1.x 迁移 — Vue.js的更多相关文章
- vue脚手架使用swiper /引入js文件/引入css文件
1.安装vue-cli 参考地址:https://github.com/vuejs/vue-cli 如果不使用严格语法需要在后三项打no:(加了挺头疼的,老是报错,但是对自己的代码规范性也是有很大的帮 ...
- Vue框架下的node.js安装教程
Vue框架下的node.js安装教程 python服务器.php ->aphche.java ->tomcat. iis -->它是一个可以运行JAVASCRIPTR 的运行环 ...
- 从壹开始前后端分离 [ Vue2.0+.NET Core2.1] 十七 ║Vue基础:使用Vue.js 来画博客首页+指令(一)
缘起 书说前两篇文章<十五 ║ Vue前篇:JS对象&字面量&this>和 <十六 ║ Vue前篇:ES6初体验 & 模块化编程>,已经通过对js面向对 ...
- 导航栏中各按钮在点击当前按钮变色其他按钮恢复为原有色的实现方法(vue、jq、原生js)
一.vue如何实现? 代码: <!DOCTYPE html> <html lang="en"> <head> <meta charset= ...
- vue 调用常量的config.js文件
我遇到问题,就是有很多常量需要应用的项目里面.所以需要打算设置一个config.js文件 1.填写config.js 文件 //常量配置 //快递公司名单 对应的页面为: src/pages/othe ...
- vue引入swiper vue使用swiper vue脚手架使用swiper /引入js文件/引入css文件
vue引入swiper vue使用swiper vue脚手架使用swiper /引入js文件/引入css文件 ------------------------------------------- ...
- 基于Vue的通用框架Nuxt.js
问题:最近有些朋友问我写官网,用Vue框架实现好不好? 相信很多使用Vue的小伙伴们一样疑惑这个问题,其实从这个问题就可以知道你对Vue这个框架是否真的熟悉了.其实单单使用Vue这个框架来做官网的,其 ...
- [vue] vue服务端渲染nuxt.js
初始化 使用脚手架工具 create-nuxt-app 快速创建 npx create-nuxt-app <项目名> npx create-nuxt-app 执行一些选择 在集成的服务器端 ...
- vue使用案例,vue初始化,vue初始化方法,vue条件语句,vue在js里面添加元素调用vue方法
<div id="main" > <button id='but1' type="button" v-on:click="save ...
随机推荐
- Microsoft Excel 自动取数据库数据
1.下载安装mysql-connector-odbc-5.1.5-win32.msi 2.打开控制面板.搜索数据 3.点击添加→MySQL ODBC 5.1 Driver→完成 4.填写名称.IP地址 ...
- 统计dir_path下所有文件类型的文件数量
#!/bin/bash #!文件名为countfile.sh ]; then echo "Usage is $0 basepath"; exit fi path=$ declare ...
- TortoiseGit使用SSH
Windows TortoiseGit使用SSH连接 1 找到TortoiseGit自带的Puttygen工具 2.1 如果未生成过SSHKey,选择Generate(生成的过程中记得移动鼠标) 2. ...
- 用JS来实现于截取中英文混合字符串方法(转载)
网站制作过程中,提示层文字超出,需要JS做字符串截取,但是呢,我们常常会烦恼文字中英文混合如何判断,因为我们知道在JS中 string.length这个值是不考虑中英文的,但是计算机对中英文的识别是 ...
- js将时间戳转成格式化的时间
function getLocalTime(nS){ return new Date(parseInt(nS) * 1000).toLocaleString().replace(/年|月/g, &qu ...
- Python 实现 Discuz论坛附件下载权限绕过漏洞
背景:最近压力有些大,想玩点游戏放松下,去Mac论坛下载,发现需要各种权限,于是蛋疼了. 所以,上网查了discuz! x3.1破解,手动替换,发现出现“链接已过期”.所以写了下面程序. 0.将下列代 ...
- 3.sublime vue 语法高亮插件安装
默认情况下,Vue.js 的单文件组件(*.vue)在 sublime 编辑器中是不被识别的.若要想高亮显示,需要安装插件 Vue Syntax Hightlight.安装步骤如下: 第一,在 s ...
- 统计学习方法 三 kNN
KNN (一)KNN概念: K近邻算法是一种回归和分类算法,这主要讨论其分类概念: K近邻模型三要素: 1,距离: 2,K值的选择: K值选择过小:模型过复杂,近似误差减小,估计误差上升,出现过拟合 ...
- 网络流入门—用于最大流的Dinic算法
"网络流博大精深"-sideman语 一个基本的网络流问题 最早知道网络流的内容便是最大流问题,最大流问题很好理解: 解释一定要通俗! 如右图所示,有一个管道系统,节点{1,2,3 ...
- Debian 8添加kali更新源并安装metasploit
一.Debian 8添加kali更新源 中科大kali更新源: deb http://mirrors.ustc.edu.cn/kali kali-rolling main non-free contr ...