Entity Framework Code-First(21):Automated Migration
Automated Migration:
Entity framework 4.3 has introduced Automated Migration so that you don't have to process database migration manually in the code file, for each change you make in your domain classes. You just need to run a command in Package Manger Console to accomplish this.
Let's see how you can use the automated migration.
As you know, you don't have a database when you start writing your Code-First application. For example, we start writing an application with Student and Course entity classes. Before running the application, which does not have its database created yet, you have to enable automated migration by running the 'enable-migrations' command in Package Manager Console, as shown below:
First, open the package manager console from Tools → Library Package Manager → Package Manager Console and then run "enable-migrations –EnableAutomaticMigration:$true" command (make sure that the default project is the project where your context class is)

Once the command runs successfully, it creates an internal sealed Configuration class in the Migration folder in your project:
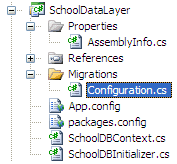
If you open this and see the class shown below, then you will find AutomaticMigrationsEnabled = true in the constructor.
internal sealed class Configuration : DbMigrationsConfiguration<SchoolDataLayer.SchoolDBContext>

    {

        public Configuration()

        {

            AutomaticMigrationsEnabled = true;

        }

        protected override void Seed(SchoolDataLayer.SchoolDBContext context)

        {

            //  This method will be called after migrating to the latest version.

            //  You can use the DbSet<T>.AddOrUpdate() helper extension method

            //  to avoid creating duplicate seed data. E.g.

            //

            //    context.People.AddOrUpdate(

            //      p => p.FullName,

            //      new Person { FullName = "Andrew Peters" },

            //      new Person { FullName = "Brice Lambson" },

            //      new Person { FullName = "Rowan Miller" }

            //    );

            //

        }

    }
You also need to set the database initializer in the context class with the new DB initialization strategy MigrateDatabaseToLatestVersion, as shown below:
public class SchoolDBContext: DbContext

{

    public SchoolDBContext(): base("SchoolDBConnectionString")

    {

        Database.SetInitializer(new MigrateDatabaseToLatestVersion<SchoolDBContext, SchoolDataLayer.Migrations.Configuration>("SchoolDBConnectionString"));

    }

    public DbSet<Student> Students { get; set; }

    public DbSet<Course> Courses { get; set; }

    protected override void OnModelCreating(DbModelBuilder modelBuilder)

    {

        base.OnModelCreating(modelBuilder);

    }

}
As you can see in the code shown above, we have passed the Configuration class name, which was created by command, along with the context class name.
Now you are set for automated migration. It will automatically take care of migration, when you change the model. Run the application and look at the created database:
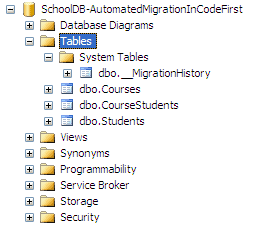
You will find that it has created one system table __MigrationHistory along with other tables. This is where automated migration maintains the history of database changes.
Now let's add a Standard entity class. Run the application again and you will see that it has automatically created a Standard table.
Wait a minute, this works if you add a new entity class or remove an entity class, but what about adding or removing properties from the entity class? To try that, let's remove the Description property from Standard class and run the application.
Oops…. an error message will appear:
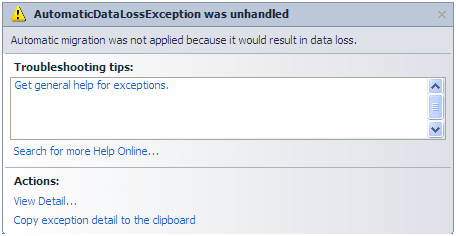
This is because you will lose data in description column, if you remove it from the Standard class. So to handle this kind of scenario, you have to set AutomaticMigrationDataLossAllowed = true in the configuration class constructor, along with AutomaticMigrationsEnabled = true.
Note: You can find more information about parameters that we can pass to the enable-migrations command using the "get-help enable-migrations" command. For more detailed help use "get-help enable-migrations –detailed"
Thus, migration can be handled automatically.
Entity Framework Code-First(21):Automated Migration的更多相关文章
- Entity Framework Tutorial Basics(21):CRUD Operation in Connected Scenario
CRUD Operation in Connected Scenario: CRUD operation in connected scenario is a fairly easy task bec ...
- Entity Framework Code first(转载)
一.Entity Framework Code first(代码优先)使用过程 1.1Entity Framework 代码优先简介 不得不提Entity Framework Code First这个 ...
- Entity Framework Code First (三)Data Annotations
Entity Framework Code First 利用一种被称为约定(Conventions)优于配置(Configuration)的编程模式允许你使用自己的 domain classes 来表 ...
- Entity Framework Code First (二)Custom Conventions
---------------------------------------------------------------------------------------------------- ...
- Entity Framework Code First (一)Conventions
Entity Framework 简言之就是一个ORM(Object-Relational Mapper)框架. Code First 使得你能够通过C#的类来描述一个模型,模型如何被发现/检测就是通 ...
- Entity Framework Tutorial Basics(11):Code First
Code First development with Entity Framework: Entity Framework supports three different development ...
- Entity Framework Code First (七)空间数据类型 Spatial Data Types
声明:本文针对 EF5+, Visual Studio 2012+ 空间数据类型(Spatial Data Types)是在 EF5 中引入的,空间数据类型表现有两种: Geography (地理学上 ...
- Entity Framework Code First (四)Fluent API - 配置属性/类型
上篇博文说过当我们定义的类不能遵循约定(Conventions)的时候,Code First 提供了两种方式来配置你的类:DataAnnotations 和 Fluent API, 本文将关注 Flu ...
- Entity Framework Code First (八)迁移 Migrations
创建初始模型和数据库 在开始使用迁移(Migrations)之前,我们需要一个 Project 和一个 Code First Model, 对于本文将使用典型的 Blog 和 Post 模型 创建一个 ...
随机推荐
- HTML实用案例(1)—— 左侧菜单,右侧内容的布局(带左侧菜单点击隐藏显示效果)
效果图 代码部分 <!DOCTYPE html> <html> <head> <meta http-equiv="Content-Type" ...
- Docker-安装与部署
本文在CentsOS下安装Docker 1.安装前准备工作 系统要求: 在CentOS下需要64位的CentsOS 7 OS requirements To install Docker, you ...
- nodepad++的python环境变量设置
转:http://blog.csdn.net/memray/article/details/42041975
- htaccess不起作用的解决方法,AllowOverride All打开后出现403错误时解决办法
在php程序的目录下有一个htaccess文件,这个文件起着对url重写的作用,但是不巧的,在我的应用程序里不起作用,baidu了一下,发现是 AllowOverride All, 这个选项没有打开 ...
- Python collections系列之可命名元组
可命名元组(namedtuple) 根据nametuple可以创建一个包含tuple所有功能以及其他功能的类 1.创建一个坐标类 import collections # 创建类, defaultd ...
- 布同:使用ghost备份或者还原的往事
我大学的时候经常折腾电脑,安装了不少莫名其妙的东西.当时对各种小软件特别感兴趣,本着毕业后可以做客户端开发的初衷去做事情.不过很多小软件会恶意安装各种东西,修改注册表,时间一长就会导致C盘很臃肿,必须 ...
- Azure CLI的Query
Azure CLI 2.0是基于Python的命令行.其命令直观,使用非常方便. 其输出有四种模式: --output -o : Output format. Allowed values: json ...
- Regexp:template
ylbtech-Regexp: 1.返回顶部 1. 2. 2.返回顶部 3.返回顶部 4.返回顶部 5.返回顶部 6.返回顶部 7.返回顶部 8.返回顶部 9.返回 ...
- SQL命令优化
与数据库交互的基本语言是sql,数据库每次解析和执行sql语句多需要执行很多步骤.以sql server为例,当数据库收到一条查询语句时,语法分析器会扫描sql语句并将其分成逻辑单元(如关键词.表达式 ...
- springmvc----demo---login---bai
web.xml配置: <?xml version="1.0" encoding="UTF-8"?> <web-app version=&quo ...