Spring Boot整合JPA、Redis和Swagger2
好久没有总结了,最近也一直在学习。今天就把spring boot与其它技术的整合做个小总结,主要是jpa、redis和swagger2。公司里有用到这些,整合起来也很简单。
首先,新建一个Spring Boot 的项目,我这里用的是之前一篇Spring Boot学习笔记---Spring Boot 基础及使用idea搭建项目
是同一个项目。这里我就不重新建项目了。
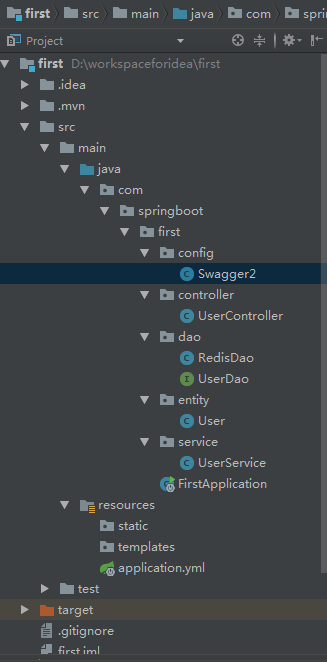
项目目录
1.Spring Boot整合JPA
JPA我用的不是很多,但是在学习springboot和cloud的时候,都是用的jpa进行数据库的操作,如果感觉兴趣可以去学习一下。
1. 添加依赖
<dependency>

			<groupId>org.springframework.boot</groupId>

			<artifactId>spring-boot-starter-web</artifactId>

		</dependency>

		<dependency>

			<groupId>org.springframework.boot</groupId>

			<artifactId>spring-boot-starter-test</artifactId>

			<scope>test</scope>

		</dependency>

		<dependency>

			<groupId>org.springframework.boot</groupId>

			<artifactId>spring-boot-starter-data-jpa</artifactId>

		</dependency>

		<dependency>

			<groupId>mysql</groupId>

			<artifactId>mysql-connector-java</artifactId>

			<version>5.1.38</version>

			<scope>runtime</scope>

		</dependency>
2.配置数据源
之前项目的配置文件是application.properties格式的,这里我换成了application.yml格式的文件。作用是一样的。
    spring:

      datasource:

        driver-class-name: com.mysql.jdbc.Driver

        url: jdbc:mysql://localhost:3306/spring-cloud?useUnicode=true&characterEncoding=utf8&characterSetResults=utf8

        username: root

        password: 1111

      jpa:

        hibernate:

          ddl-auto: create #第一次建表 create 后面用update

        show-sql: true
3.创建实体对象,jpa根据注解自动建表
 package com.springboot.first.entity;

import javax.persistence.*;

/**

 * @Package main.java.com.jpa.jpastart.entity

 * @Description: 用户

 * @auther MZ

 * @create 2018/5/30 21:11

 */

@Entity

public class User {

    @Id

    @GeneratedValue(strategy = GenerationType.IDENTITY)

    private Long id;

    @Column(nullable = false, unique = true)

    private String username;

    @Column

    private String password;

    //……省略

}
4.创建Dao层
package com.springboot.first.dao;

import com.springboot.first.entity.User;

import org.springframework.data.jpa.repository.JpaRepository;

/**

 *

 */

public interface UserDao extends JpaRepository<User, Long> {

    User findByUsername(String username);

}
5.创建service层
package com.springboot.first.service;

import com.springboot.first.dao.UserDao;

import com.springboot.first.entity.User;

import org.springframework.beans.factory.annotation.Autowired;

import org.springframework.stereotype.Service;

import java.util.List;

/**

 * @Package main.java.com.jpa.jpastart.service

 * @Description: 用户service

 * @auther MZ

 * @create 2018/5/30 21:21

 */

@Service

public class UserService {

    @Autowired

    private UserDao userDao;

    public User findUserByName(String username) {

        return userDao.findByUsername(username);

    }

}
6.创建controller层
package com.springboot.first.controller;

import com.springboot.first.entity.User;

import com.springboot.first.service.UserService;

import io.swagger.annotations.ApiOperation;

import org.springframework.beans.factory.annotation.Autowired;

import org.springframework.web.bind.annotation.*;

import java.util.List;

/**

 * @Package main.java.com.jpa.jpastart.controller

 * @Description: 控制器

 * @auther MZ

 * @create 2018/5/30 21:23

 */

@RequestMapping("/user")

@RestController

public class UserController {

    @Autowired

    UserService userService;

    @GetMapping("/{username}")

    public User getUser(@PathVariable("username") String username) {

        return userService.findUserByName(username);

    }

}
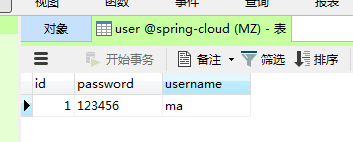
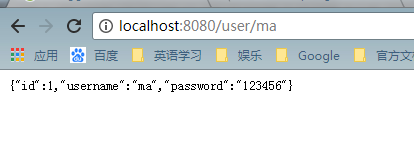
7.运行项目,查看结果,表建好后,可以插入几条测试数据,方便查看。
2.Spring Boot整合Redis
关于redis的安装,可以参考Redis学习-redis概述
1.添加依赖
<dependency>

			<groupId>org.springframework.boot</groupId>

			<artifactId>spring-boot-starter-data-redis</artifactId>

		</dependency>
2.添加配置信息
spring:

    redis:

        host: localhost

        port: 6379

        password:

        database: 1

        pool:

            max-active: 8

            max-wait: -1

            max-idle : 500
3.添加RedisDao类,通过注解@Repository注入Spring IoC容器中。
package com.springboot.first.dao;

import org.springframework.beans.factory.annotation.Autowired;

import org.springframework.data.redis.core.StringRedisTemplate;

import org.springframework.data.redis.core.ValueOperations;

import org.springframework.stereotype.Repository;

import java.util.concurrent.TimeUnit;

/**

 * @Package com.springboot.first.dao

 * @Description: redis测试

 * @auther MZ

 * @create 2018/5/31 20:56

 */

@Repository

public class RedisDao {

    @Autowired

    private StringRedisTemplate template;

    public void setKey(String key, String value) {

        ValueOperations<String, String > ops = template.opsForValue();

        ops.set(key,value,1, TimeUnit.MINUTES);

    }

    public String getValue(String key) {

        ValueOperations<String, String> ops = this.template.opsForValue();

        return ops.get(key);

    }

}
4.在FirstApplicationTests 添加测试方法

package com.springboot.first;

import com.springboot.first.dao.RedisDao;

import org.junit.Test;

import org.junit.runner.RunWith;

import org.springframework.beans.factory.annotation.Autowired;

import org.springframework.boot.test.context.SpringBootTest;

import org.springframework.test.context.junit4.SpringRunner;

@RunWith(SpringRunner.class)

@SpringBootTest

public class FirstApplicationTests {

	@Test

	public void contextLoads() {

	}

	@Autowired

	RedisDao redisDao;

	@Test

	public void testRedis(){

		redisDao.setKey("name","ma");

		redisDao.setKey("age","24");

		System.out.println(redisDao.getValue("name"));

		System.out.println(redisDao.getValue("age"));

	}

}
5.运行

3.Spring Boot整合Swagger2,搭建Restful Api在线文档
Swagger是一个功能强大的在线API文档的框架,公司整合用来开发对外接口。
1.添加依赖
<dependency>

			<groupId>io.springfox</groupId>

			<artifactId>springfox-swagger2</artifactId>

			<version>2.6.1</version>

		</dependency>

		<dependency>

			<groupId>io.springfox</groupId>

			<artifactId>springfox-swagger-ui</artifactId>

			<version>2.6.1</version>

		</dependency>
2.配置Swagger2,新建一个java类,做为配置类。
package com.springboot.first.config;

import org.springframework.context.annotation.Bean;

import org.springframework.context.annotation.Configuration;

import springfox.documentation.builders.ApiInfoBuilder;

import springfox.documentation.builders.PathSelectors;

import springfox.documentation.builders.RequestHandlerSelectors;

import springfox.documentation.service.ApiInfo;

import springfox.documentation.spi.DocumentationType;

import springfox.documentation.spring.web.plugins.Docket;

import springfox.documentation.swagger2.annotations.EnableSwagger2;

/**

 * @Package com.springboot.first.config

 * @Description: swagger2配置

 * @auther MZ

 * @create 2018/6/1 21:12

 */

@Configuration

@EnableSwagger2

public class Swagger2 {

    @Bean

    public Docket createRestApi() {

        return new Docket(DocumentationType.SWAGGER_2)

                .apiInfo(apiInfo())

                .select()

                .apis(RequestHandlerSelectors.basePackage("com.springboot.first.controller"))

                .paths(PathSelectors.any())

                .build();

    }

    private ApiInfo apiInfo() {

        return new ApiInfoBuilder()

                .title("springboot利用swagger构建api文档")

                .description("学习使用,https://home.cnblogs.com/u/black-spike/")

                .termsOfServiceUrl("https://home.cnblogs.com/u/black-spike/")

                .version("1.0")

                .build();

    }

}
3.文档注解
Swagger2通过注解来生成API接口文档,文档信息包括接口名、请求方法、参数、返回信息等。通常情况下生成的API文档,以下接口可以满足基本的需求:
- @Api:修饰整个类,用于描述Controller类。
- @ApiOperation:描述类的方法,或者说一个接口。
- @ApiParam:单个参数描述。
- @ApiModel:用于对象来接收参数。
- @ApiProperty:用对象接收参数时,描述对象的一个字段。
- @ApiResponse:HTTP响应一个描述。
- @ApiResponses:HTTP响应的整体描述
- @APiIgnore:使用该注解,表述Swagger2忽略这个API。
- @ApiError:发生错误返回的信息。
- @ApiParamImplicit:一个请求参数。
11.@ApiParamsImplicit:多个请求参数。
4.在userservice中添加方法
public List<User> findAll() {

        return userDao.findAll();

    }
5.在UserController中添加一个RESTful风格的API接口
@ApiOperation(value = "用户列表", notes = "用户列表")

    @RequestMapping(value = {""}, method = RequestMethod.GET)

    public List<User> getUsers() {

        List<User> users = userService.findAll();

        return users;

    }
6.运行,在页面输入http://localhost:8080/swagger-ui.html

小结
一直学习,但是都没有好好的去总结。感觉这以后会用的到,到时候就方便一下了。
Spring Boot整合JPA、Redis和Swagger2的更多相关文章
- spring boot 系列之四:spring boot 整合JPA
上一篇我们讲了spring boot 整合JdbcTemplate来进行数据的持久化, 这篇我们来说下怎么通过spring boot 整合JPA来实现数据的持久化. 一.代码实现 修改pom,引入依赖 ...
- Spring Boot 整合 JPA 使用多个数据源
介绍 JPA(Java Persistence API)Java 持久化 API,是 Java 持久化的标准规范,Hibernate 是持久化规范的技术实现,而 Spring Data JPA 是在 ...
- Spring Boot2 系列教程(二十五)Spring Boot 整合 Jpa 多数据源
本文是 Spring Boot 整合数据持久化方案的最后一篇,主要和大伙来聊聊 Spring Boot 整合 Jpa 多数据源问题.在 Spring Boot 整合JbdcTemplate 多数据源. ...
- Spring Boot2 系列教程(二十四)Spring Boot 整合 Jpa
Spring Boot 中的数据持久化方案前面给大伙介绍了两种了,一个是 JdbcTemplate,还有一个 MyBatis,JdbcTemplate 配置简单,使用也简单,但是功能也非常有限,MyB ...
- 手把手教你Spring Boot整合Mybatis Plus和Swagger2
前言:如果你是初学者,请完全按照我的教程以及代码来搭建(文末会附上完整的项目代码包,你可以直接下载我提供的完整项目代码包然后自行体验!),为了照顾初学者所以贴图比较多,请耐心跟着教程来,希望这个项目D ...
- spring boot 整合JPA多数据源
上个文章介绍了spring boot在使用Mybatis持久化技术的时候如何使用多数据源,今天再补充一个使用spring data jpa实现多数据源的使用情况,JPA是一套数据库持久化规范,或者称之 ...
- Spring Boot从入门到精通之:二、Spring Boot整合JPA
springboot-jpa 开发工具 系统: windows10 开发工具: Intellij IDEA 2018.2.6 springboot: 2.0.6.RELEASE jdk: 1.8.0_ ...
- spring boot - 整合jpa
<dependency> <groupId>org.springframework.boot</groupId> <artifactId>spring- ...
- spring boot 整合JPA bean注入失败
有时候报的错误让你匪夷所思,找错误得学会找根.源头在哪里? 比如:我们刚开始看的错误就是 org.springframework.beans.factory.UnsatisfiedDependency ...
随机推荐
- WHY C++ ?(by Herb Sutter) & C++17 standard
WHY C++ ? C++
- getopt_long
http://blog.csdn.net/lanyan822/article/details/7692013 在程序中难免需要使用命令行选项,可以选择自己解析命令行选项,但是有现成的,何必再造轮子.下 ...
- Python高手之路【十一】python基础之面向对象
创建类和对象 面向对象编程是一种编程方式,此编程方式的落地需要使用 “类” 和 “对象” 来实现,所以,面向对象编程其实就是对 “类” 和 “对象” 的使用. 类就是一个模板,模板里可以包含多个函数, ...
- [转]extern与头文件(*.h)的区别和联系
用#include可以包含其他头文件中变量.函数的声明,为什么还要extern关键字? 如果我想引用一个全局变量或函数a,我只要直接在源文件中包含#include<xxx.h> (xxx. ...
- Asp.net 中,在服务端向客户端写脚本的常用方法
在Asp.net 服务端处理脚本,一般都用 ClientScriptManager ,即web窗体服务端的this.ClientScript.该对象比较常用的方法: 1.RegisterArrayDe ...
- 【CC2530强化实训02】普通延时函数实现按键的长按与短按
[CC2530强化实训02]普通延时函数实现按键的长按与短按 [题目要求] 用一个按键实现单击与双击的功能已经是很多嵌入式产品的常用手法.使用定时器的间隔定时来计算按键按下的时间是通用的做法 ...
- 列表函数&方法
列表(list)的基本操作,方法及属性.
- 【译】第一篇 Integration Services:SSIS是什么
本篇文章是Integration Services系列的第一篇,详细内容请参考原文. Integration Services是一种在SQL Server中最受欢迎的子系统.允许你在各种数据源之间提取 ...
- java7与java8中计算两个日期间隔多少年多少月多少天的实现方式
最近工作中碰到个新需求,计算每个员工入职公司的时长,要求形式为多少年多少月多少天形式,某个值为0就跳过不显示,因为前段时间学习过java8新特性,对于这个需求,java8的新时间日期API可以直接解决 ...
- java 多线程 Future callable
面向对象5大设计原则 1.单一职责原则 一个类只包含它相关的方法,增删改查.一个方法只包含单一的功能,增加.一个类最多包含10个方法,一个方法最多50行,一个类最多500行.重复的代码进行封装,Do ...