
Python调用云服务器AWVS13API接口批量扫描(指哪打哪)
最近因为实习的原因,为了减少一部分的工作量,在阿里云服务器上搭建了AWVS扫描器 方便摸鱼
但是发现AWVS貌似没有批量添加的方法,作者只好把整理的URL.txt捏了又捏

手动输入是不可能手动输入的,去查了查网上关于AWVS扫描器API的使用,找到两篇文章:
https://blog.csdn.net/wy_97/article/details/106872773
https://blog.csdn.net/sinat_25449961/article/details/82985638
然后花一个小时的时间整理了一下,因为作者只需要添加任务,以及让扫描任务启动,所以我们也从这两个功能入手,查看API接口。
添加任务接口是:
Method:POST

URL: /api/v1/targets
| 发送参数 | 类型 | 说明 |
|---|---|---|
| address | string | 目标网址:需http或https开头 |
| criticality | Int | 危险程度;范围:[30,20,10,0];默认为10 |
| description | string | 备注 |
具体的使用如下:
'''

    create_target函数

    功能:

        AWVS13

        新增任务接口

    Method : POST

    URL : /api/v1/targets

    发送参数:

        发送参数     类型     说明

        address     string   目标网址:需要http或https开头

        criticality int      危险程度;范围:[30,20,10,0];默认为10

        description string   备注

'''

def create_target(address,description,int_criticality):

    url = 'https://' + IP + ':13443/api/v1/targets'

    headers = {"X-Auth": API_KEY, "content-type": "application/json", 'User-Agent': 'curl/7.53.1'}

    values = {

        'address': address,

        'description': description,

        'criticality': int_criticality,

    }

    data = bytes(json.dumps(values), 'utf-8')

    request = urllib.request.Request(url, data, headers)

    html = urllib.request.urlopen(request).read().decode('utf-8')

    return html
在create_target()函数中,如服务器IP是全局变量,即搭建AWVS的服务器的IP,后面接的端口需要根据实际情况修改。
可以看到现在还没有任务:
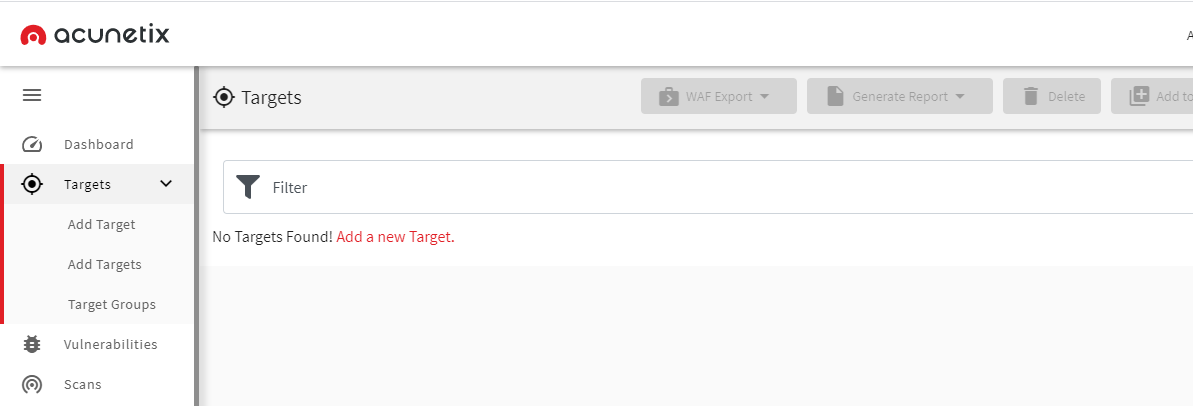
简单调用:
#这两处需要修改为你自己的

IP = ''

API_KEY = ''

def main():

    testurl='https://www.zsjjob.com/'

    description="null"

    int_criticality=10

    print(create_target(testurl,description,int_criticality))

if __name__=='__main__':

    main()
运行返回结果为:
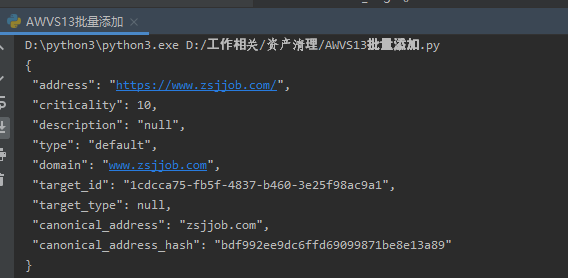
接着我们查看AWVS添加的任务里面
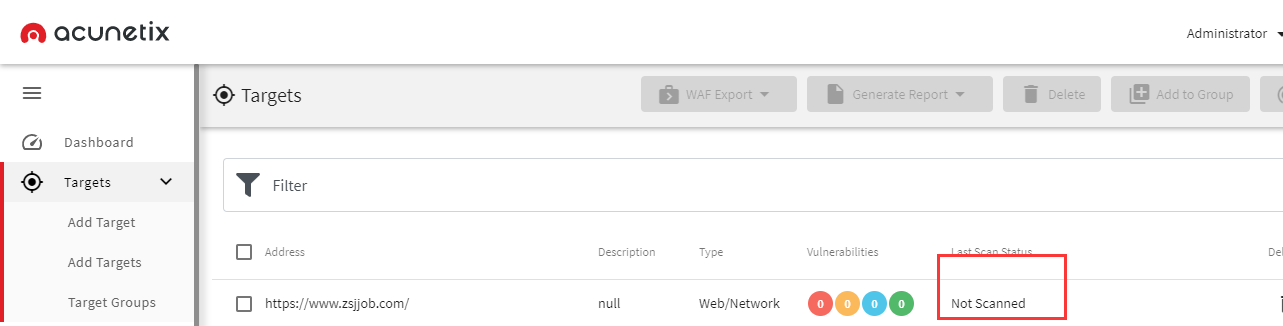
可以看到只是添加到了任务中,还未进行扫描,接着我们查看开始扫描的API:
Method:POST

URL: /api/v1/scans
| 发送参数 | 类型 | 说明 |
| profile_id | string | 扫描类型 |
| ui_session_i | string | 可不传 |
| schedule | json | 扫描时间设置(默认即时) |
| report_template_id | string | 扫描报告类型(可不传) |
| target_id | string | 目标id |
可以看到必选的就是 扫描类型,扫描时间设置,目标id
而扫描类型 profile_id 可以选择的有:
| 扫描类型 | 值 | 翻译 |
| Full Scan | 11111111-1111-1111-1111-111111111111 | 完全扫描 |
| High Risk Vulnerabilities | 11111111-1111-1111-1111-111111111112 | 高风险漏洞 |
| Cross-site Scripting Vulnerabilities | 11111111-1111-1111-1111-111111111116 | XSS漏洞 |
| SQL Injection Vulnerabilities | 11111111-1111-1111-1111-111111111113 | SQL注入漏洞 |
| Weak Passwords | 11111111-1111-1111-1111-111111111115 | 弱口令检测 |
| Crawl Only | 11111111-1111-1111-1111-111111111117 | Crawl Only |
| Malware Scan | 11111111-1111-1111-1111-111111111120 | 恶意软件扫描 |
我们在代码中使用的是扫描类型对应的值,一般都是直接使用完全扫描
扫描时间设置我们按照默认值设置,目标 id 我们之前已经看到过了,即:
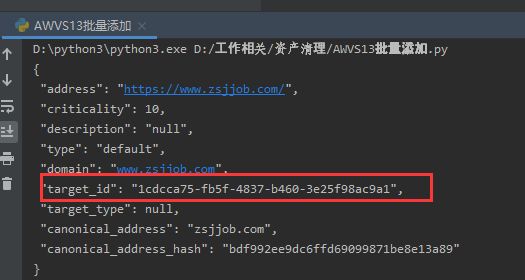
所以我们只要将获取到的target_id和其他两个参数丢进去就行了。
具体使用如下:
'''

    start_target

    功能:

        AWVS13

        启动扫描任务接口

    Method : POST

    URL : /api/v1/scans

    发送参数:

        发送参数         类型     说明

        profile_id      string   扫描类型

        ui_session_i    string   可不传

        schedule        json     扫描时间设置(默认即时)

        report_template string   扫描报告类型(可不传)

        target_id       string   目标id

'''

def start_target(target_id,profile_id):

    url = 'https://' + IP + ':13443/api/v1/scans'

    # schedule={"disable": False, "start_date": None, "time_sensitive": False}

    headers = {"X-Auth": API_KEY, "content-type": "application/json", 'User-Agent': 'curl/7.53.1'}

    values = {

        'target_id': target_id,

        'profile_id': profile_id,

        'schedule': {"disable":False,"start_date":None,"time_sensitive":False}

    }

    data = bytes(json.dumps(values), 'utf-8')

    request = urllib.request.Request(url, data, headers)

    html = urllib.request.urlopen(request).read().decode('utf-8')

    # return html

    return "now scan {}".format(target_id)
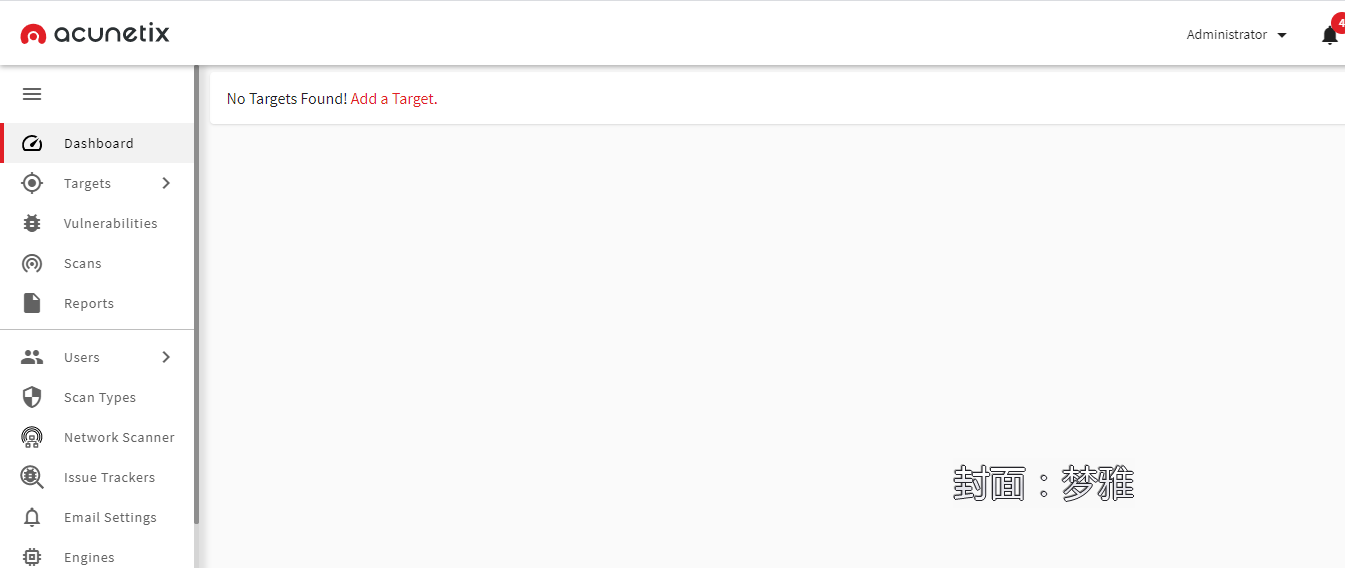
然后先将AWVS上面的任务清空一下,然后整合和调用之前的所有代码。
清空后的AWVS如图:
整合调用的全部代码为(作者去掉了IP和API_KEY,需要读者按照自己的搭建自行添加,另外还需要注意端口的问题)
import json

import ssl

import urllib.request

import os

ssl._create_default_https_context = ssl._create_unverified_context

#os.environ['http_proxy'] = 'http://127.0.0.1:8080'

#os.environ['https_proxy'] = 'https://127.0.0.1:8080'

IP = ''

API_KEY = ''

'''

    create_target函数

    功能:

        AWVS13

        新增任务接口

    Method : POST

    URL : /api/v1/targets

    发送参数:

        发送参数     类型     说明

        address     string   目标网址:需要http或https开头

        criticality int      危险程度;范围:[30,20,10,0];默认为10

        description string   备注

'''

def create_target(address,description,int_criticality):

    url = 'https://' + IP + ':13443/api/v1/targets'

    headers = {"X-Auth": API_KEY, "content-type": "application/json", 'User-Agent': 'curl/7.53.1'}

    values = {

        'address': address,

        'description': description,

        'criticality': int_criticality,

    }

    data = bytes(json.dumps(values), 'utf-8')

    request = urllib.request.Request(url, data, headers)

    html = urllib.request.urlopen(request).read().decode('utf-8')

    return html

def get_target_list():

    url = 'https://' + IP + ':3443/api/v1/targets'

    headers = {"X-Auth": API_KEY, "content-type": "application/json", 'User-Agent': 'curl/7.53.1'}

    request = urllib.request.Request(url=url, headers=headers)

    html = urllib.request.urlopen(request).read().decode('utf-8')

    return html

def profiles_list():

    url = 'https://' + IP + ':3443/api/v1/scanning_profiles'

    headers = {"X-Auth": API_KEY, "content-type": "application/json", 'User-Agent': 'curl/7.53.1'}

    request = urllib.request.Request(url=url, headers=headers)

    html = urllib.request.urlopen(request).read().decode('utf-8')

    return html

'''

    start_target

    功能:

        AWVS13

        启动扫描任务接口

    Method : POST

    URL : /api/v1/scans

    发送参数:

        发送参数         类型     说明

        profile_id      string   扫描类型

        ui_session_i    string   可不传

        schedule        json     扫描时间设置(默认即时)

        report_template string   扫描报告类型(可不传)

        target_id       string   目标id

'''

def start_target(target_id,profile_id):

    url = 'https://' + IP + ':13443/api/v1/scans'

    # schedule={"disable": False, "start_date": None, "time_sensitive": False}

    headers = {"X-Auth": API_KEY, "content-type": "application/json", 'User-Agent': 'curl/7.53.1'}

    values = {

        'target_id': target_id,

        'profile_id': profile_id,

        'schedule': {"disable":False,"start_date":None,"time_sensitive":False}

    }

    data = bytes(json.dumps(values), 'utf-8')

    request = urllib.request.Request(url, data, headers)

    html = urllib.request.urlopen(request).read().decode('utf-8')

    # return html

    return "now scan {}".format(target_id)

def stop_target(target_id):

    url = 'https://' + IP + ':3443/api/v1/scans/' + target_id + '/abort'

    headers = {"X-Auth": API_KEY, "content-type": "application/json", 'User-Agent': 'curl/7.53.1'}

    request = urllib.request.Request(url=url, headers=headers)

    html = urllib.request.urlopen(request).read().decode('utf-8')

    print(html)

def target_status(target_id):

    url = 'https://' + IP + ':3443/api/v1/scans/' + target_id

    headers = {"X-Auth": API_KEY, "content-type": "application/json", 'User-Agent': 'curl/7.53.1'}

    request = urllib.request.Request(url=url, headers=headers)

    html = urllib.request.urlopen(request).read().decode('utf-8')

    print(html)

def get_target_result(target_id, scan_session_id):

    url = 'https://' + IP + ':3443/api/v1/scans/' + target_id + '/results/' + scan_session_id + '/vulnerabilities '

    headers = {"X-Auth": API_KEY, "content-type": "application/json", 'User-Agent': 'curl/7.53.1'}

    request = urllib.request.Request(url=url, headers=headers)

    html = urllib.request.urlopen(request).read().decode('utf-8')

    print(html)

'''

    主要使用批量添加与启动扫描任务的功能

    即create_target()函数与start_target()函数

'''

def main():

    testurl='https://www.zsjjob.com/'

    description="null"

    int_criticality=10

    target_id=create_target(testurl,description,int_criticality).split('"')[21]

    print(start_target(target_id,'11111111-1111-1111-1111-111111111111'))

if __name__=='__main__':

    main()
运行之
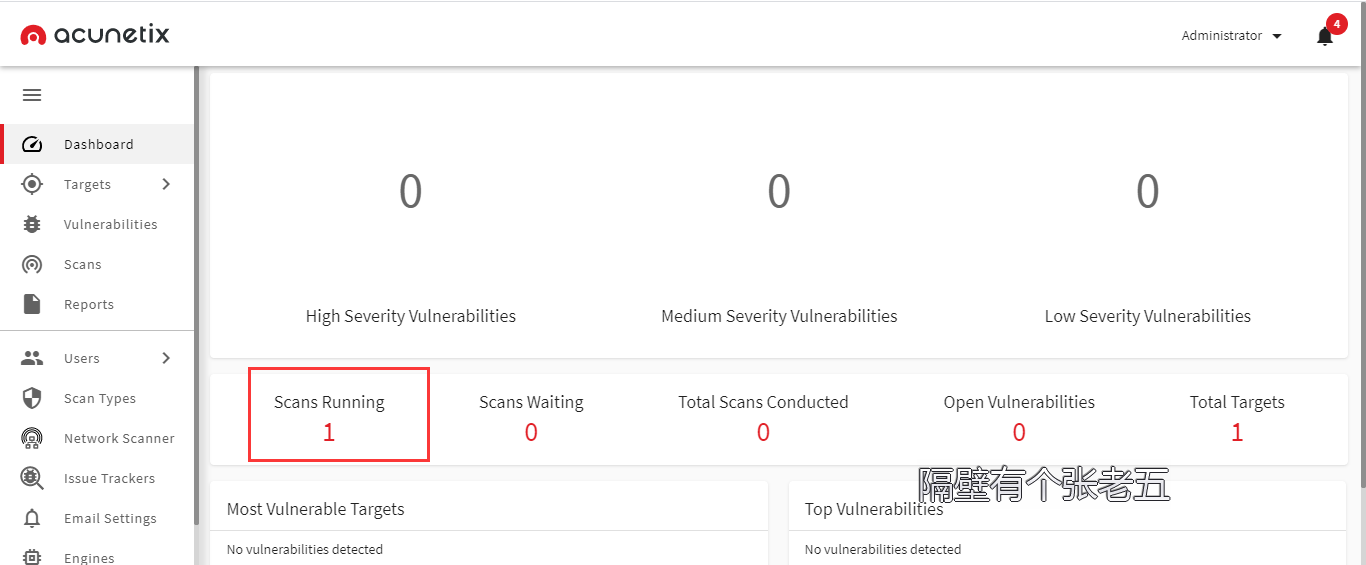
可以看到任务已经自动运行起来了,读者可以根据自己的URL.txt,修改上述代码,使其更符合业务需求。
另外需要注意的是,AWVS的批量添加URL中,都是需要http或者https开头的!!
以上(开始快乐批量扫描趴)
参考链接:
https://blog.csdn.net/sinat_25449961/article/details/82985638
https://blog.csdn.net/wy_97/article/details/106872773
Python调用云服务器AWVS13API接口批量扫描(指哪打哪)的更多相关文章
- Python调用7zip命令实现文件批量解压
Python调用7zip命令实现文件批量解压 1.输入压缩文件所在的路径 2.可以在代码中修改解压到的文件路径和所需要解压的类型,列入,解压文件夹下面所有的mp4格式的文件 3.cmd 指的就是Pyt ...
- express:webpack dev-server开发中如何调用后端服务器的接口?
开发环境: 前端:webpack + vue + vue-resource,基于如下模板创建的开发环境: https://github.com/vuejs-templates/webpack ...
- Python实现云服务器防止暴力密码破解
云服务器防止暴力密码破解 云服务器暴露在公网上,每天都有大量的暴力密码破解,更换端口,无济于事,该脚本监控安全日志,获取暴力破解的对方ip,加入hosts黑名单 路径说明 描述 路径 登录安全日志 / ...
- 在windows下用python调用darknet的yolo接口
0,目标 本人计算机环境:windows7 64位,安装了vs2015专业版,python3.5.2,cygwin,opencv3.3,无gpu 希望实现用python调用yolo函数,实现物体检测. ...
- Python调用百度地图API实现批量经纬度转换为实际省市地点(api调用,json解析,excel读取与写入)
1.获取秘钥 调用百度地图API实现得申请百度账号或者登陆百度账号,然后申请自己的ak秘钥.链接如下:http://lbsyun.baidu.com/apiconsole/key?applicatio ...
- 简单实现Python调用有道API接口(最新的)
# ''' # Created on 2018-5-26 # # @author: yaoshuangqi # ''' import urllib.request import urllib.pars ...
- python调用nmap进行扫描
#coding=utf-8 import nmap import optparse import threading import sys import re ''' 需安装python_nmap包, ...
- 用Python调用华为云API接口发短信
[摘要] 用Python调用华为云API接口实现发短信,当然能给调用发短信接口前提条件是通过企业实名认证,而且有一个通过审核的短信签名,话不多说,showcode #!/usr/bin/python3 ...
- python调用腾讯云短信接口
目录 python调用腾讯云短信接口 账号注册 python中封装腾讯云短信接口 python调用腾讯云短信接口 账号注册 去腾讯云官网注册一个腾讯云账号,通过实名认证 然后开通短信服务,创建短信应用 ...
随机推荐
- C# 9.0 正式发布了(C# 9.0 on the record)
翻译自 Mads Torgersen 2020年11月10日的博文<C# 9.0 on the record> [1],Mads Torgersen 是微软 C# 语言的首席设计师,也是微 ...
- Java实现FTP跨服务器文件操作
在过去的几年工作中,曾经多次需要把文件上传到单独的服务器,而程序是在单独的服务器上部署的,在进行文件操作的时候就需要跨服务器进行操作包括:文件上传.文件下载.文件删除等.跨服务器文件操作一般是需要FT ...
- 用 Cloud Performance Test怎么录制测试脚本
Cloud Performance Test 云压力测试平台(以下简称:CPT)可以提供一站式全链路云压力测试服务,通过分布式压力负载机,快速搭建系统高并发运行场景,按需模拟千万级用户实时访问,并结合 ...
- mds的cpu占用问题分析以及解决办法
前言 mds是ceph里面处理文件接口的组件,一旦使用文件系统,不可避免的会出现一种场景就是目录很多,目录里面的文件很多,而mds是一个单进程的组件,现在虽然有了muti mds,但稳定的使用的大部分 ...
- 一张900w的数据表,16s执行的SQL优化到300ms?
一,前言 证实 有一张财务流水表,未分库分表,目前的数据量为9555695,分页查询使用到了limit,优化之前的查询耗时16 s 938 ms (execution: 16 s 831 ms, fe ...
- 通过shodan搜索相同favicon.ico的网站
0x01 根据favicon.ico生成hash python2,想改python3折腾了半天不得 import mmh3 import requests response = requests.ge ...
- webug第十四关:存储型XSS
第十四关:存储型XSS 打开发现是评论区 留言加入xss语句
- 如何用Vegas完成视频编辑中的自动跟踪换图
Vegas作为一款专业的视频剪辑软件,剪辑速度快捷,拥有各种实用工具和特效,同样也可以为用户实现视频换图的需求.今天小编就为大家讲解,如何利用Vegas自动跟踪进行换图,让视频能够更加便捷的呈现. 本 ...
- FL Studio在线面板的作用
FL Studio的在线面板主要是用来显示其自身与Image-Line公司相关的新闻.我们点击它后会看到一个新闻列表菜单,其中每一个项目都包含日期.标题.简介以及URL.详细的内容我们将在下文介绍,一 ...
- 如何在MathType输入手写体a
作为强大的数学公式编辑器,MathType中还能设置各种样式,还支持自定义设置,给大家编辑公式提供了更多的便利.那么有用户问:要如何将输入的字母a变为手写体呢?下面就来一起学习. 输入手写体a的步骤如 ...