Qt 学习之路 2(66):访问网络(2)
Qt 学习之路 2(66):访问网络(2)
上一章我们了解了NetWorker类的简单实现。不仅如此,我们还提到了几个 C++ 开发时常用的设计模式。这些在接下来得代码中依然会用到。
现在我们先来研究下 OpenWeatherMap 的相关 API。之所以选择 OpenWeatherMap,主要是因为这个网站提供了简洁的 API 接口,非常适合示例程序,并且其开发也不需要额外申请 App ID。OpenWeatherMap 的 API 可以选择返回 JSON 或者 XML,这里我们选择使用 JSON 格式。在进行查询时,OpenWeatherMap 支持使用城市名、地理经纬度以及城市 ID,为简单起见,我们选择使用城市名。我们先来看一个例子:http://api.openweathermap.org/data/2.5/weather?q=Beijing,cn&mode=json&units=metric&lang=zh_cn。下面是这个链接的参数分析:
| 参数名字 | 传入值 | 说明 |
| q | Beijing,cn | 查询中国北京的天气 |
| mode | json | 返回格式为 JSON |
| units | metric | 返回单位为公制 |
| lang | zh_cn | 返回语言为中文 |
点击链接,服务器返回一个 JSON 字符串(此时你应该能够使用浏览器看到这个字符串):
|
1
|
{"coord":{"lon":116.397232,"lat":39.907501},"sys":{"country":"CN","sunrise":1381530122,"sunset":1381570774},"weather":[{"id":800,"main":"Clear","description":"晴","icon":"01d"}],"base":"gdps stations","main":{"temp":20,"pressure":1016,"humidity":34,"temp_min":20,"temp_max":20},"wind":{"speed":2,"deg":50},"clouds":{"all":0},"dt":1381566600,"id":1816670,"name":"Beijing","cod":200}
|
我们从这里找到 JSON 各个字段的含义。现在我们关心的是:时间(dt);气温(temp);气压(pressure);湿度(humidity)和天气状况(weather)。基于此,我们设计了WeatherInfo类,用于封装服务器返回的信息:
|
1
2
3
4
5
6
7
8
9
10
11
12
13
14
15
16
17
18
19
20
21
22
23
24
25
26
27
28
29
30
31
32
33
34
35
36
37
38
39
40
41
42
43
44
45
46
47
48
49
50
51
52
53
|
class WeatherDetail
{
public:
WeatherDetail();
~WeatherDetail();
QString desc() const;
void setDesc(const QString &desc);
QString icon() const;
void setIcon(const QString &icon);
private:
class Private;
friend class Private;
Private *d;
};
class WeatherInfo
{
public:
WeatherInfo();
~WeatherInfo();
QString cityName() const;
void setCityName(const QString &cityName);
quint32 id() const;
void setId(quint32 id);
QDateTime dateTime() const;
void setDateTime(const QDateTime &dateTime);
float temperature() const;
void setTemperature(float temperature);
float humidity() const;
void setHumidity(float humidity);
float pressure() const;
void setPressure(float pressure);
QList<WeatherDetail *> details() const;
void setDetails(const QList<WeatherDetail *> details);
private:
class Private;
friend class Private;
Private *d;
};
QDebug operator <<(QDebug dbg, const WeatherDetail &w);
QDebug operator <<(QDebug dbg, const WeatherInfo &w);
|
WeatherInfo和WeatherDetail两个类相互合作存储我们所需要的数据。由于是数据类,所以只有单纯的 setter 和 getter 函数,这里不再把源代码写出来。值得说明的是最后两个全局函数:
|
1
2
|
QDebug operator <<(QDebug dbg, const WeatherDetail &w);
QDebug operator <<(QDebug dbg, const WeatherInfo &w);
|
我们重写了<<运算符,以便能够使用类似qDebug() << weatherInfo;这样的语句进行调试。它的实现是这样的:
|
1
2
3
4
5
6
7
8
9
10
11
12
13
14
15
16
17
18
19
20
21
22
23
24
25
26
|
QDebug operator <<(QDebug dbg, const WeatherDetail &w)
{
dbg.nospace() << "("
<< "Description: " << w.desc() << "; "
<< "Icon: " << w.icon()
<< ")";
return dbg.space();
}
QDebug operator <<(QDebug dbg, const WeatherInfo &w)
{
dbg.nospace() << "("
<< "id: " << w.id() << "; "
<< "City name: " << w.cityName() << "; "
<< "Date time: " << w.dateTime().toString(Qt::DefaultLocaleLongDate) << ": " << endl
<< "Temperature: " << w.temperature() << ", "
<< "Pressure: " << w.pressure() << ", "
<< "Humidity: " << w.humidity() << endl
<< "Details: [";
foreach (WeatherDetail *detail, w.details()) {
dbg.nospace() << "( Description: " << detail->desc() << ", "
<< "Icon: " << detail->icon() << "), ";
}
dbg.nospace() << "] )";
return dbg.space();
}
|
这两个函数虽然比较长,但是很简单,这里不再赘述。
下面我们来看主窗口:
|
1
2
3
4
5
6
7
8
9
10
11
12
|
class MainWindow : public QMainWindow
{
Q_OBJECT
public:
MainWindow(QWidget *parent = 0);
~MainWindow();
private:
class Private;
friend class Private;
Private *d;
};
|
正如前面所说的,这里依然使用了 d 指针模式。头文件没有什么可说的。MainWindow::Private的实现依旧简单:
|
1
2
3
4
5
6
7
8
9
10
11
12
13
14
15
|
class MainWindow::Private
{
public:
Private()
{
netWorker = NetWorker::instance();
}
void fetchWeather(const QString &cityName) const
{
netWorker->get(QString("http://api.openweathermap.org/data/2.5/weather?q=%1&mode=json&units=metric&lang=zh_cn").arg(cityName));
}
NetWorker *netWorker;
};
|
我们将MainWindow所需要的NetWorker作为MainWindow::Private的一个成员变量。MainWindow::Private提供了一个fetchWeather()函数。由于NetWorker提供的函数都是相当底层的,为了提供业务级别的处理,我们将这样的函数封装在MainWindow::Private中。当然,你也可以在NetWorker中直接提供类似的函数,这取决于你的系统分层设计。
|
1
2
3
4
5
6
7
8
9
10
11
12
13
14
15
16
17
18
19
20
21
22
23
24
25
26
27
28
29
30
31
32
33
34
35
36
37
38
39
40
41
42
43
44
45
46
47
48
49
50
51
52
53
54
55
56
57
58
59
60
61
62
63
64
65
66
67
68
69
70
71
72
73
74
75
76
|
MainWindow::MainWindow(QWidget *parent)
: QMainWindow(parent),
d(new MainWindow::Private)
{
QComboBox *cityList = new QComboBox(this);
cityList->addItem(tr("Beijing"), QLatin1String("Beijing,cn"));
cityList->addItem(tr("Shanghai"), QLatin1String("Shanghai,cn"));
cityList->addItem(tr("Nanjing"), QLatin1String("Nanjing,cn"));
QLabel *cityLabel = new QLabel(tr("City: "), this);
QPushButton *refreshButton = new QPushButton(tr("Refresh"), this);
QHBoxLayout *cityListLayout = new QHBoxLayout;
cityListLayout->setDirection(QBoxLayout::LeftToRight);
cityListLayout->addWidget(cityLabel);
cityListLayout->addWidget(cityList);
cityListLayout->addWidget(refreshButton);
QVBoxLayout *weatherLayout = new QVBoxLayout;
weatherLayout->setDirection(QBoxLayout::TopToBottom);
QLabel *cityNameLabel = new QLabel(this);
weatherLayout->addWidget(cityNameLabel);
QLabel *dateTimeLabel = new QLabel(this);
weatherLayout->addWidget(dateTimeLabel);
QWidget *mainWidget = new QWidget(this);
QVBoxLayout *mainLayout = new QVBoxLayout(mainWidget);
mainLayout->addLayout(cityListLayout);
mainLayout->addLayout(weatherLayout);
setCentralWidget(mainWidget);
resize(320, 120);
setWindowTitle(tr("Weather"));
connect(d->netWorker, &NetWorker::finished, [=] (QNetworkReply *reply) {
qDebug() << reply;
QJsonParseError error;
QJsonDocument jsonDocument = QJsonDocument::fromJson(reply->readAll(), &error);
if (error.error == QJsonParseError::NoError) {
if (!(jsonDocument.isNull() || jsonDocument.isEmpty()) && jsonDocument.isObject()) {
QVariantMap data = jsonDocument.toVariant().toMap();
WeatherInfo weather;
weather.setCityName(data[QLatin1String("name")].toString());
QDateTime dateTime;
dateTime.setTime_t(data[QLatin1String("dt")].toLongLong());
weather.setDateTime(dateTime);
QVariantMap main = data[QLatin1String("main")].toMap();
weather.setTemperature(main[QLatin1String("temp")].toFloat());
weather.setPressure(main[QLatin1String("pressure")].toFloat());
weather.setHumidity(main[QLatin1String("humidity")].toFloat());
QVariantList detailList = data[QLatin1String("weather")].toList();
QList<WeatherDetail *> details;
foreach (QVariant w, detailList) {
QVariantMap wm = w.toMap();
WeatherDetail *detail = new WeatherDetail;
detail->setDesc(wm[QLatin1String("description")].toString());
detail->setIcon(wm[QLatin1String("icon")].toString());
details.append(detail);
}
weather.setDetails(details);
cityNameLabel->setText(weather.cityName());
dateTimeLabel->setText(weather.dateTime().toString(Qt::DefaultLocaleLongDate));
}
} else {
QMessageBox::critical(this, tr("Error"), error.errorString());
}
reply->deleteLater();
});
connect(refreshButton, &QPushButton::clicked, [=] () {
d->fetchWeather(cityList->itemData(cityList->currentIndex()).toString());
});
}
MainWindow::~MainWindow()
{
delete d;
d = 0;
}
|
接下来我们来看MainWindow的构造函数和析构函数。构造函数虽然很长但是并不复杂,主要是对界面的构建。我们这里略过这些界面的代码,直接看两个信号槽的连接。
|
1
2
3
4
5
6
7
8
9
10
11
12
13
14
15
16
17
18
19
20
21
22
23
24
25
26
27
28
29
30
31
32
33
34
35
36
37
|
connect(d->netWorker, &NetWorker::finished, [=] (QNetworkReply *reply) {
QJsonParseError error;
QJsonDocument jsonDocument = QJsonDocument::fromJson(reply->readAll(), &error);
if (error.error == QJsonParseError::NoError) {
if (!(jsonDocument.isNull() || jsonDocument.isEmpty()) && jsonDocument.isObject()) {
QVariantMap data = jsonDocument.toVariant().toMap();
WeatherInfo weather;
weather.setCityName(data[QLatin1String("name")].toString());
QDateTime dateTime;
dateTime.setTime_t(data[QLatin1String("dt")].toLongLong());
weather.setDateTime(dateTime);
QVariantMap main = data[QLatin1String("main")].toMap();
weather.setTemperature(main[QLatin1String("temp")].toFloat());
weather.setPressure(main[QLatin1String("pressure")].toFloat());
weather.setHumidity(main[QLatin1String("humidity")].toFloat());
QVariantList detailList = data[QLatin1String("weather")].toList();
QList<WeatherDetail *> details;
foreach (QVariant w, detailList) {
QVariantMap wm = w.toMap();
WeatherDetail *detail = new WeatherDetail;
detail->setDesc(wm[QLatin1String("description")].toString());
detail->setIcon(wm[QLatin1String("icon")].toString());
details.append(detail);
}
weather.setDetails(details);
cityNameLabel->setText(weather.cityName());
dateTimeLabel->setText(weather.dateTime().toString(Qt::DefaultLocaleLongDate));
}
} else {
QMessageBox::critical(this, tr("Error"), error.errorString());
}
reply->deleteLater();
});
connect(refreshButton, &QPushButton::clicked, [=] () {
d->fetchWeather(cityList->itemData(cityList->currentIndex()).toString());
});
|
由于使用了 Qt5,我们选择新的连接语法。第一个connect()函数中,我们按照 API 文档中描述的那样对服务器返回的 JSON 字符串进行解析,然后将数据填充到一个WeatherInfo的对象。然后操作界面的两个控件显示数据。值得注意的是函数的最后一行,reply->deleteLater();。当网络请求结束时,delete 服务器返回的QNetworkReply对象是用户的责任。用户需要选择一个恰当的时机进行 delete 操作。但是,我们不能直接在finiahed()信号对应的槽函数中调用delete运算符。相反,我们需要使用deleteLater()函数,正如前面代码中显示的那样。第二个槽函数则相对简单,仅仅是重新获取新的数据。
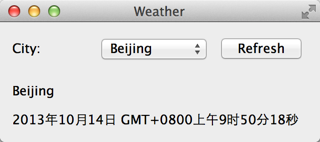
选择我们可以运行下程序了:
Qt 学习之路 2(66):访问网络(2)的更多相关文章
- .Net程序员安卓学习之路2:访问网络API
做应用型的APP肯定是要和网络交互的,那么本节就来实战一把Android访问网络API,还是使用上节的DEMO: 一.准备API: 一般都采用Json作为数据交换格式,目前各种语言均能输出Json串. ...
- Qt 学习之路 2(67):访问网络(3)
Qt 学习之路 2(67):访问网络(3) 豆子 2013年11月5日 Qt 学习之路 2 16条评论 上一章我们了解了如何使用我们设计的NetWorker类实现我们所需要的网络操作.本章我们将继续完 ...
- Qt 学习之路 2(68):访问网络(4)
Home / Qt 学习之路 2 / Qt 学习之路 2(68):访问网络(4) Qt 学习之路 2(68):访问网络(4) 豆子 2013年11月7日 Qt 学习之路 2 19条评论 前面几章我们了 ...
- Qt 学习之路 2(65):访问网络(1)
Home / Qt 学习之路 2 / Qt 学习之路 2(65):访问网络(1) Qt 学习之路 2(65):访问网络(1) 豆子 2013年10月11日 Qt 学习之路 2 18条评论 现在 ...
- Qt 学习之路 2(72):线程和事件循环
Qt 学习之路 2(72):线程和事件循环 <理解不清晰,不透彻> -- 有需求的话还需要进行专题学习 豆子 2013年11月24日 Qt 学习之路 2 34条评论 前面一章我 ...
- Qt 学习之路 2(71):线程简介
Qt 学习之路 2(71):线程简介 豆子 2013年11月18日 Qt 学习之路 2 30条评论 前面我们讨论了有关进程以及进程间通讯的相关问题,现在我们开始讨论线程.事实上,现代的程序中,使用线程 ...
- Qt 学习之路 2(70):进程间通信
Qt 学习之路 2(70):进程间通信 豆子 2013年11月12日 Qt 学习之路 2 16条评论 上一章我们了解了有关进程的基本知识.我们将进程理解为相互独立的正在运行的程序.由于二者是相互独立的 ...
- Qt 学习之路 2(69):进程
Qt 学习之路 2(69):进程 豆子 2013年11月9日 Qt 学习之路 2 15条评论 进程是操作系统的基础之一.一个进程可以认为是一个正在执行的程序.我们可以把进程当做计算机运行时的一个基础单 ...
- Qt 学习之路 2(35):文件
Qt 学习之路 2(35):文件 豆子 2013年1月5日 Qt 学习之路 2 12条评论 文件操作是应用程序必不可少的部分.Qt 作为一个通用开发库,提供了跨平台的文件操作能力.从本章开始,我们来了 ...
随机推荐
- xcode恢复语法高亮
[xcode恢复语法高亮] 非常简单,在Organizer中删除derivedData.
- js 事件冒泡、事件捕获及事件委托
简介 事件冒泡:从触发事件的节点一直到document,自下而上的去触发事件. 事件捕获:从document到触发事件的节点,自上而下的去触发事件. 事件委托:事件委托就是利用事件冒泡,只指定一个事件 ...
- YII2 模型关联之 一对多
需求,一个用户有多篇文章全部查询出来 文章表 用户表 //首先查找出一个用户出来 $user=Users::find()->'])->one(); //第一个参数还是关联的模型,第二个依旧 ...
- 关于使用sessionStorage报SecurityError错误的问题
localStorage 永久保存 不同页面和标签页可以共享 关闭浏览器不会清除 sessionStorage 会话保存 不同页面和标签页不能共享 关闭浏览器会清除 遇到的问题:在firefox中报S ...
- struts2 与 spring 整合
1. 首先把所有jar包导入工程 2.在struts2的核心配置文件(在src文件目录下)中添加如下配置: <!-- 将Struts的对象交给Spring管理 所以需要导入Spring和Stru ...
- Hadoop完全分别式环境搭建
为学习大数据,需搭建Hadoop大数据环境,在此记录,以备以后查阅,同时分享出来,供需要者参考. 这里分几部分进行整理. 提纲: 一.说明和准备 二.设置免密登陆 分段网址:https://www.c ...
- CF 1091E New Year and the Factorisation Collaboration
昨晚Good Bye 2018D题没做出来,车翻大了…… 官方题解 传送门 初赛知识:一个无向图所有顶点度数之和为偶数.然而这东西还有一个高端的名字:Handshaking lemma 但是 ...
- Ajax——三种数据传输格式
一.HTML HTML由一些普通文本组成.如果服务器通过XMLHTTPRequest发送HTML,文本将存储在responseText属性中. 从服务器端发送的HTML的代码在浏览器端不需要用Java ...
- Shiro——认证概述
认证流程 身份认证流程 首先调用 Subject.login(token) 进行登录,其会自动委托给SecurityManager SecurityManager 负责真正的身份验证逻辑:它会委托给A ...
- JAVA的IO处理【转】
I/O简介 IO是输入和输出的简称,在实际的使用时,输入和输出是有方向的.就像现实中两个人之间借钱一样,例如A借钱给B,相对于A来说是借出,而相对于B来说则是借入.所以在程序中提到输入和输出时,也需要 ...