Android动态添加碎片
我们编写一个能够用过按钮动态更替碎片的APP,首先在主页上显示第一个碎片,点击按钮后可以替换到第二个碎片,或者删除已经替换掉的第二个碎片。
一.MainActivity.java
import androidx.fragment.app.FragmentActivity;

import androidx.fragment.app.FragmentManager;

import androidx.fragment.app.FragmentTransaction;

import android.os.Bundle;

import android.util.Log;

import android.view.View;

import android.widget.Button;

public class MainActivity extends FragmentActivity {

    public MainActivity() {

        Log.e("TAG", "MainActivity()..");

    }

    @Override

    protected void onCreate(Bundle savedInstanceState) {

        Log.e("TAG", "MainActivity onCreate()..");

        super.onCreate(savedInstanceState);

        setContentView(R.layout.activity_main);//重写onCreate()方法

        // 创建Fragment对象

        final MyFragment1 fragment1 = new MyFragment1();

        // 得到FragmentManager

        FragmentManager manager = getSupportFragmentManager();

        // 得到FragmentTransacation

        FragmentTransaction transaction = manager.beginTransaction();

        // 添加Fragment对象并提交

        transaction.add(R.id.ll_main, fragment1).commit();

        Button button1=(Button)findViewById(R.id.fragment_1);

        button1.setOnClickListener(new View.OnClickListener() {

            @Override

            public void onClick(View view) {

                showFragment2();

            }

        });

        Button button2=(Button)findViewById(R.id.fragment_2);

        button2.setOnClickListener(new View.OnClickListener() {

            @Override

            public void onClick(View view) {

                deleteFragment2();

            }

        });

    }

    private MyFragment2 fragment2;

    public void showFragment2() {

        // 创建Fragment对象

        fragment2 = new MyFragment2();

        // 得到FragmentManager

        FragmentManager manager = getSupportFragmentManager();

        // 得到FragmentTransacation

        FragmentTransaction transaction = manager.beginTransaction();

        //将当前操作添加到回退栈, 这样点击back回到上一个状态

        transaction.addToBackStack(null);

        // 替换Fragment对象并提交

        transaction.replace(R.id.ll_main, fragment2).commit();

    }

    public void deleteFragment2() {

        // 得到FragmentManager

        FragmentManager manager = getSupportFragmentManager();

        // 得到FragmentTransacation

        FragmentTransaction transaction = manager.beginTransaction();

        // 移除Fragment对象并提交

        transaction.remove(fragment2).commit();

    }

}
二.activity_main.xml
<?xml version="1.0" encoding="utf-8"?>

<LinearLayout xmlns:android="http://schemas.android.com/apk/res/android"

    xmlns:app="http://schemas.android.com/apk/res-auto"

    xmlns:tools="http://schemas.android.com/tools"

    android:layout_width="match_parent"

    android:layout_height="match_parent"

    android:orientation="vertical"

    tools:context=".MainActivity">

    <LinearLayout

        android:orientation="horizontal"

        android:layout_width="match_parent"

        android:layout_height="wrap_content">

<Button

    android:id="@+id/fragment_1"

    android:text="切换至第二个碎片"

    android:layout_width="0dp"

    android:layout_weight="1"

    android:layout_height="wrap_content" />

    <Button

        android:id="@+id/fragment_2"

        android:text="删除第二个碎片"

        android:layout_width="0dp"

        android:layout_weight="1"

        android:layout_height="wrap_content" />

    </LinearLayout>

<LinearLayout

    android:id="@+id/ll_main"

    android:orientation="horizontal"

    android:layout_width="match_parent"

    android:layout_height="match_parent">

</LinearLayout>

</LinearLayout>
编写好的界面如下图所示: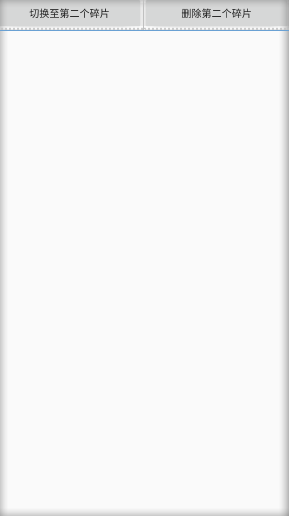
三.MyFragment1.java
import android.os.Bundle;

import androidx.fragment.app.Fragment;

import android.util.Log;

import android.view.LayoutInflater;

import android.view.View;

import android.view.ViewGroup;

import android.widget.TextView;

public class MyFragment1 extends Fragment {

    public MyFragment1() {

        // Required empty public constructor

    }

    @Override

    public void onCreate(Bundle savedInstanceState) {

        super.onCreate(savedInstanceState);

    }

    @Override

    public View onCreateView(LayoutInflater inflater, ViewGroup container,

                             Bundle savedInstanceState) {

        // Inflate the layout for this fragment

        return inflater.inflate(R.layout.fragment_my_fragment1, container,false);

    }

}
四.MyFragment2.java
import android.os.Bundle;

import androidx.fragment.app.Fragment;

import android.util.Log;

import android.view.LayoutInflater;

import android.view.View;

import android.view.ViewGroup;

import android.widget.TextView;

public class MyFragment2 extends Fragment {

    public MyFragment2() {

        // Required empty public constructor

    }

    @Override

    public void onCreate(Bundle savedInstanceState) {

        super.onCreate(savedInstanceState);

    }

    @Override

    public View onCreateView(LayoutInflater inflater, ViewGroup container,

                             Bundle savedInstanceState) {

        // Inflate the layout for this fragment

        return inflater.inflate(R.layout.fragment_my_fragment2, container,false);

    }

}
五.fragment1.xml
<?xml version="1.0" encoding="utf-8"?>

<FrameLayout xmlns:android="http://schemas.android.com/apk/res/android"

    xmlns:tools="http://schemas.android.com/tools"

    android:layout_width="match_parent"

    android:layout_height="match_parent"

    tools:context=".MyFragment1">

    <!-- TODO: Update blank fragment layout -->

    <TextView

        android:layout_width="match_parent"

        android:layout_height="match_parent"

        android:text="这是第一个碎片" />

</FrameLayout>
六.fragment2.xml
<?xml version="1.0" encoding="utf-8"?>

<FrameLayout xmlns:android="http://schemas.android.com/apk/res/android"

    xmlns:tools="http://schemas.android.com/tools"

    android:layout_width="match_parent"

    android:layout_height="match_parent"

    tools:context=".MyFragment2">

    <!-- TODO: Update blank fragment layout -->

    <TextView

        android:layout_width="match_parent"

        android:layout_height="match_parent"

        android:text="这是第二个碎片" />

</FrameLayout>
完毕
Android动态添加碎片的更多相关文章
- Android — — —动态添加碎片
<?xml version="1.0" encoding="utf-8"?><LinearLayout xmlns:android=" ...
- Android中如何动态添加碎片
Android中的开发需要兼容手机和平板,两个方面.这就引入了碎片的概念.(注意:这里用的Fragment强烈建议使用support-v4库中的Fragment) 碎片:是一种可以嵌入在活动当中的UI ...
- Android动态添加Device Admin权限
/********************************************************************** * Android动态添加Device Admin权限 ...
- Android 动态添加Spinner(.java文件内实现) 实现 改变spinner 内文字属性
动态添加spinner 控件 Spinner s = new Spinner(this); String []items={"自己定义的要显示的数组"}; my_SpinnerAd ...
- Android动态添加和移除布局
package com.hyang.administrator.studentproject; import android.os.Bundle; import android.support.v7. ...
- android动态添加TextView或者ImageView
动态添加 text1=new TextView(this); text1.setText("动态添加"); ((LinearLayout) this.findViewById(R. ...
- Android -- 动态添加布局
在做项目的时候,遇到了scrollView与listView结合的使用,导致了滑动的混乱,但是有一个办法可以解决掉这个问题,就是手写listView的高度,还有另外一种方法,传送门:<Andro ...
- Android 动态添加删除ExpandableListView的item的例子
这个例子可以学习到如下几点: 1.通过自定义Dialog(单独布局的xml文件进行弹出显示) 2.通过menu点击监听添加,删除view中的items 3.点击ExpandableListView中g ...
- Android动态添加布局
//1.利用LayoutInflater的inflate动态加载XML mLinearLayout = (LinearLayout)findViewById(R.id.LinearLayout_ID) ...
随机推荐
- linux basic
一:date 语法: 打印日期:date [OPTION]..... [+FORMAT] 设定日期:date [MMDDhhmm] [[cc][YY][.ss] 创建带实时日期的文件 touch $ ...
- android clipChildren 的使用与遇到的困难
案例 在一次我写画板模块的时候,布局比较普通,但是需要子元素溢出父元素.其中一小块布局如下所示: 红色部分需要溢出,这个时候我想到了clipChildren. clipChildren 就是说我可以不 ...
- 最全最新🇨🇳中国【省、市、区县、乡镇街道】json,csv,sql数据
中华人民共和国行政区划代码 中华人民共和国行政区划(五级):省级.地级.县级.乡级和村级. 来自中华人民共和国民政部,用于查询中国省,市和区数据的网站. 中华人民共和国行政区划代码,更新时间:2019 ...
- python基本文件操作
python文件操作 python的文件操作相对于java复杂的IO流简单了好多,只要关心文件的读和写就行了 基本的文件操作 要注意的是,当不存在某路径的文件时,w,a模式会自动新建此文件夹,当读模式 ...
- Mac SourceTree配置Beyond Compare
一 首先下载正版的Beyond Compare 地址:https://www.scootersoftware.com/download.php 二 如果bin文件夹下没有bcomp,打开终端命 ...
- 使用IDEA2017.3.5搭建SSM框架
转载自博客园,附上原文地址https://www.cnblogs.com/hackyo/p/6646051.html?utm_source=itdadao&utm_medium=referra ...
- shell一键部署nginx+tomcat
1.首先拉取环境 tomcat需要用到jdk环境 提前准备好nginx源码包,放于指定目录下 vim test.sh #!/bin/bash yum -y install gcc gcc-c++ z ...
- shell脚本编程基础--文本比较
1.概述 允许测试Linux文件系统上文件的目录和状态. 2.详解 2.1 检查目录 -d测试会检查指定的目录是否存在于系统中.当我们打算将文件写入目录或是准备切换到该目录时,先进行测试是比较好的做法 ...
- 暗灰色的圆形按钮.html
宝宝 <!DOCTYPE html> <html> <head> <meta charset="UTF-8"> <title& ...
- HC大会,华为联合合作伙伴发布一站式物联网IoT开发工具小熊派BearPi
传统的物联网产品开发步骤复杂,涉及硬件开发.软件开发.云端开发等众多流程.而且产品的开发周期长.开发成本高.产品稳定性不佳.维护成本高.而物联网设备本身市场竞争激烈,价格低,设备更新迭代快,所以在保证 ...