
ReactNative: 使用Image图片组件
一、简介
在应用程序中,图片组件非常常见,不论是缩略图、大图、还是小图标等等,都需要使用图片组件进行显示。在Web开发中提供了<img/>标签显示图片,在iOS中提供了UIImageView显示图片,而在RN中,则使用Image组件显示图片。同样的道理,Image组件既可以显示本地图片(磁盘、相册),也可以显示网络图片。
二、详情
1、属性
//枚举类型,表示图片的适应模模式

//cover:覆盖  contain:包含  stretch:平铺

resizeMode

//图片的引用地址,网络资源值为{uri:string},静态资源值为require('image!name')

source

//iOS支持的属性,表示默认图片,相当于占位图,网络图片加载完成后被替换

defaultSource
2、事件
//iOS支持的属性,表示在图片加载成功时触发该函数

onLoad

//iOS支持的属性,表示在图片开始加载时触发该函数

onLoadStart

//iOS支持的属性,表示在图片加载不管成功还是失败都会触发该函数

onLoadEnd

//iOS支持的属性,显示加载图片的进度

onProgress
3、加载
//网络图片

<Image source = {{uri: "https://www.xxx.png"}} />

//本地图片

//1、加载项目文件夹中的图片

<Image source=require('../xx/xx/iconName')>

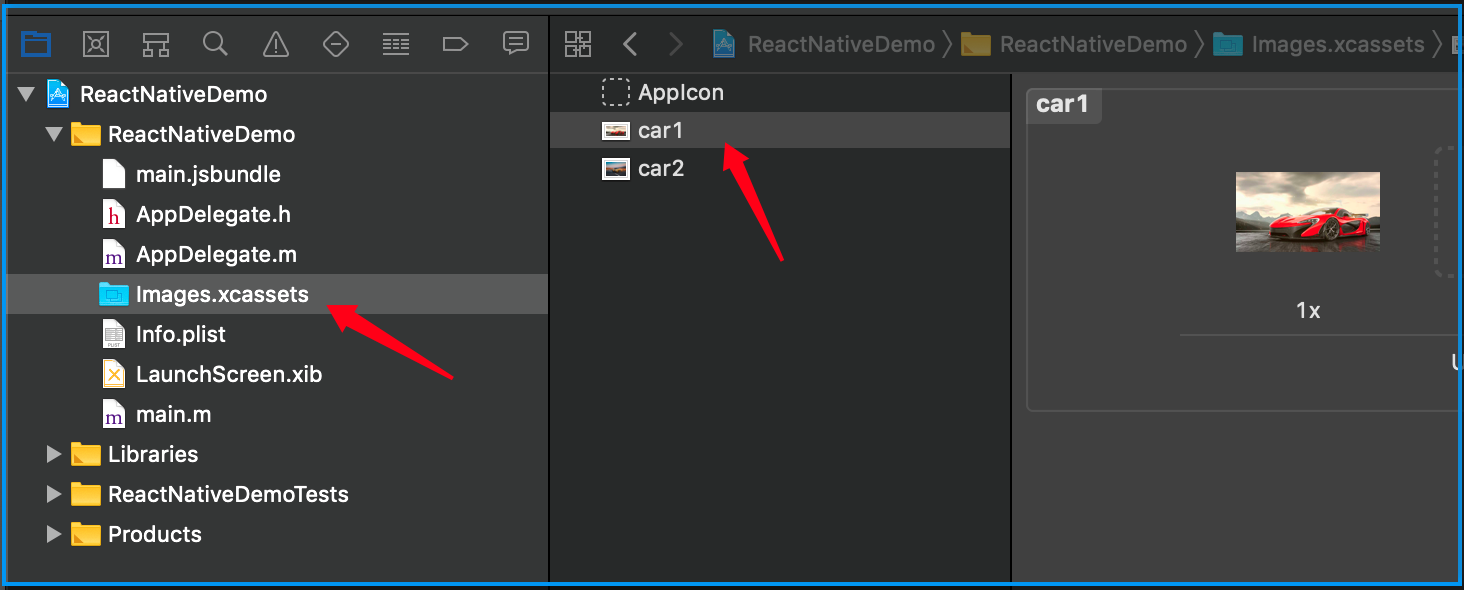
//2、加载(APP)Xcode中的图片

<Image source={{uri:'iconName'}}>

//-----------------------------------注意事项-------------------------------------------//

//1、一些老文章和教程提到的require('image!xxx')的写法已经从0.40版本开始不再支持!,例如:

<Image source = require('image!iconName') />

//2、为了使新的图片资源机制正常工作,require中的图片名字必须是一个静态字符创(不能使用变量!因为require是在编译时期执行,而非运行时期执行!)如下所示:

//正确

<Image source = require('./iconName.png) />

//正确

var icon = showBigIcon ? require('./bigIconName.png') : require('smallIconName.png');

<Image source={icon} />

//错误

var icon = showBigIcon ?  'bigIconName' : 'smallIconName';

<Image source={require('./' + icon + '.png')} />
三、使用
1、网络图片【注意:需要在Xcode的plist中设置NSAppTransportSecuriyt的Allow Arbitrary Loads=YES】
ImageView.js
import React, { Component } from 'react';

import {

    StyleSheet,

    View,

    Text,

    Image,

    TouchableOpacity,

} from 'react-native'

export default class ImageView extends  Component{

    //默认属性放在state中

    constructor(){

        super();

        this.state = {

            index:0,

            images:[

                "http://img.souutu.com/2019/1031/20191031103506146.jpg.260.343.jpg",

                "http://img.mm8mm8.com/thumb/279x210/11/19/1119263f972f1d4cc2aff85fa199fe11.jpeg"

            ]

        }

    }

    //下一张

    next = () => {

        const {index,images} = this.state;

        const count = images.length-1;

        if (index+1 > count) {

            alert("图片已经到最后一张");

            return;

        }

        const current = index+1;

        this.setState({index:current})

    };

    //上一张

    previous = () => {

        const {index} = this.state;

        if (index-1 <){

            alert("图片已经到第一张");

            return;

        }

        const current = index-1;

        this.setState({index:current})

    };

    render(){

        let {images,index} = this.state;

        return (

            <View style={styles.flex}>

                <View style={styles.container}>

                    <Image

                        style={styles.image}

                        source={{uri:images[index]}}

                    />

                </View>

                <View style={styles.flexDirection}>

                    <View style={[styles.previous,styles.center]}>

                        <TouchableOpacity onPress={this.previous.bind(this)}>

                            <View>

                                <Text style={styles.font}>上一张</Text>

                            </View>

                        </TouchableOpacity>

                    </View>

                    <View style={[styles.next,styles.center]}>

                        <TouchableOpacity activeOpacity={0.2} onPress={this.next.bind(this)}>

                            <View>

                                <Text style={styles.font}>下一张</Text>

                            </View>

                        </TouchableOpacity>

                    </View>

                </View>

            </View>

        )

    }

}

const styles = StyleSheet.create({

    flex: {

        flex: 1

    },

    container: {

        marginTop: 30,

        height: 300,

        marginLeft: 10,

        marginRight: 10,

        borderColor: 'red',

        borderWidth: 1,

        borderRadius: 4,

        justifyContent: 'center',

        alignItems: 'center'

    },

    image: {

        width: 200,

        height: 250

    },

    flexDirection: {

        flexDirection: 'row',

        justifyContent: 'center',

        alignItems: 'center'

    },

    next: {

        height: 45,

        width: 80,

        backgroundColor: 'green',

        marginLeft: 20,

        marginTop: 20,

        borderWidth: 1,

        borderRadius: 4,

        borderColor: 'green'

    },

    previous: {

        height: 45,

        width: 80,

        backgroundColor: 'green',

        marginRight: 20,

        marginTop: 20,

        borderWidth: 1,

        borderRadius: 4,

        borderColor: 'green'

    },

    center: {

        justifyContent: 'center',

        alignItems: 'center'

    },

    font: {

        fontWeight: 'bold',

        fontSize: 20,

        textAlign: 'center',

        color: 'white'

    }

});
index.ios.js
/**

 * Sample React Native App

 * https://github.com/facebook/react-native

 * @flow

 */

import React, { Component } from 'react';

import ImageView from './src/ImageView'

import {

    AppRegistry,

} from 'react-native';

export default class ReactNativeDemo extends Component {

    render() {

        return (

            <ImageView/>

        );

    }

}

AppRegistry.registerComponent('ReactNativeDemo', () => ReactNativeDemo);
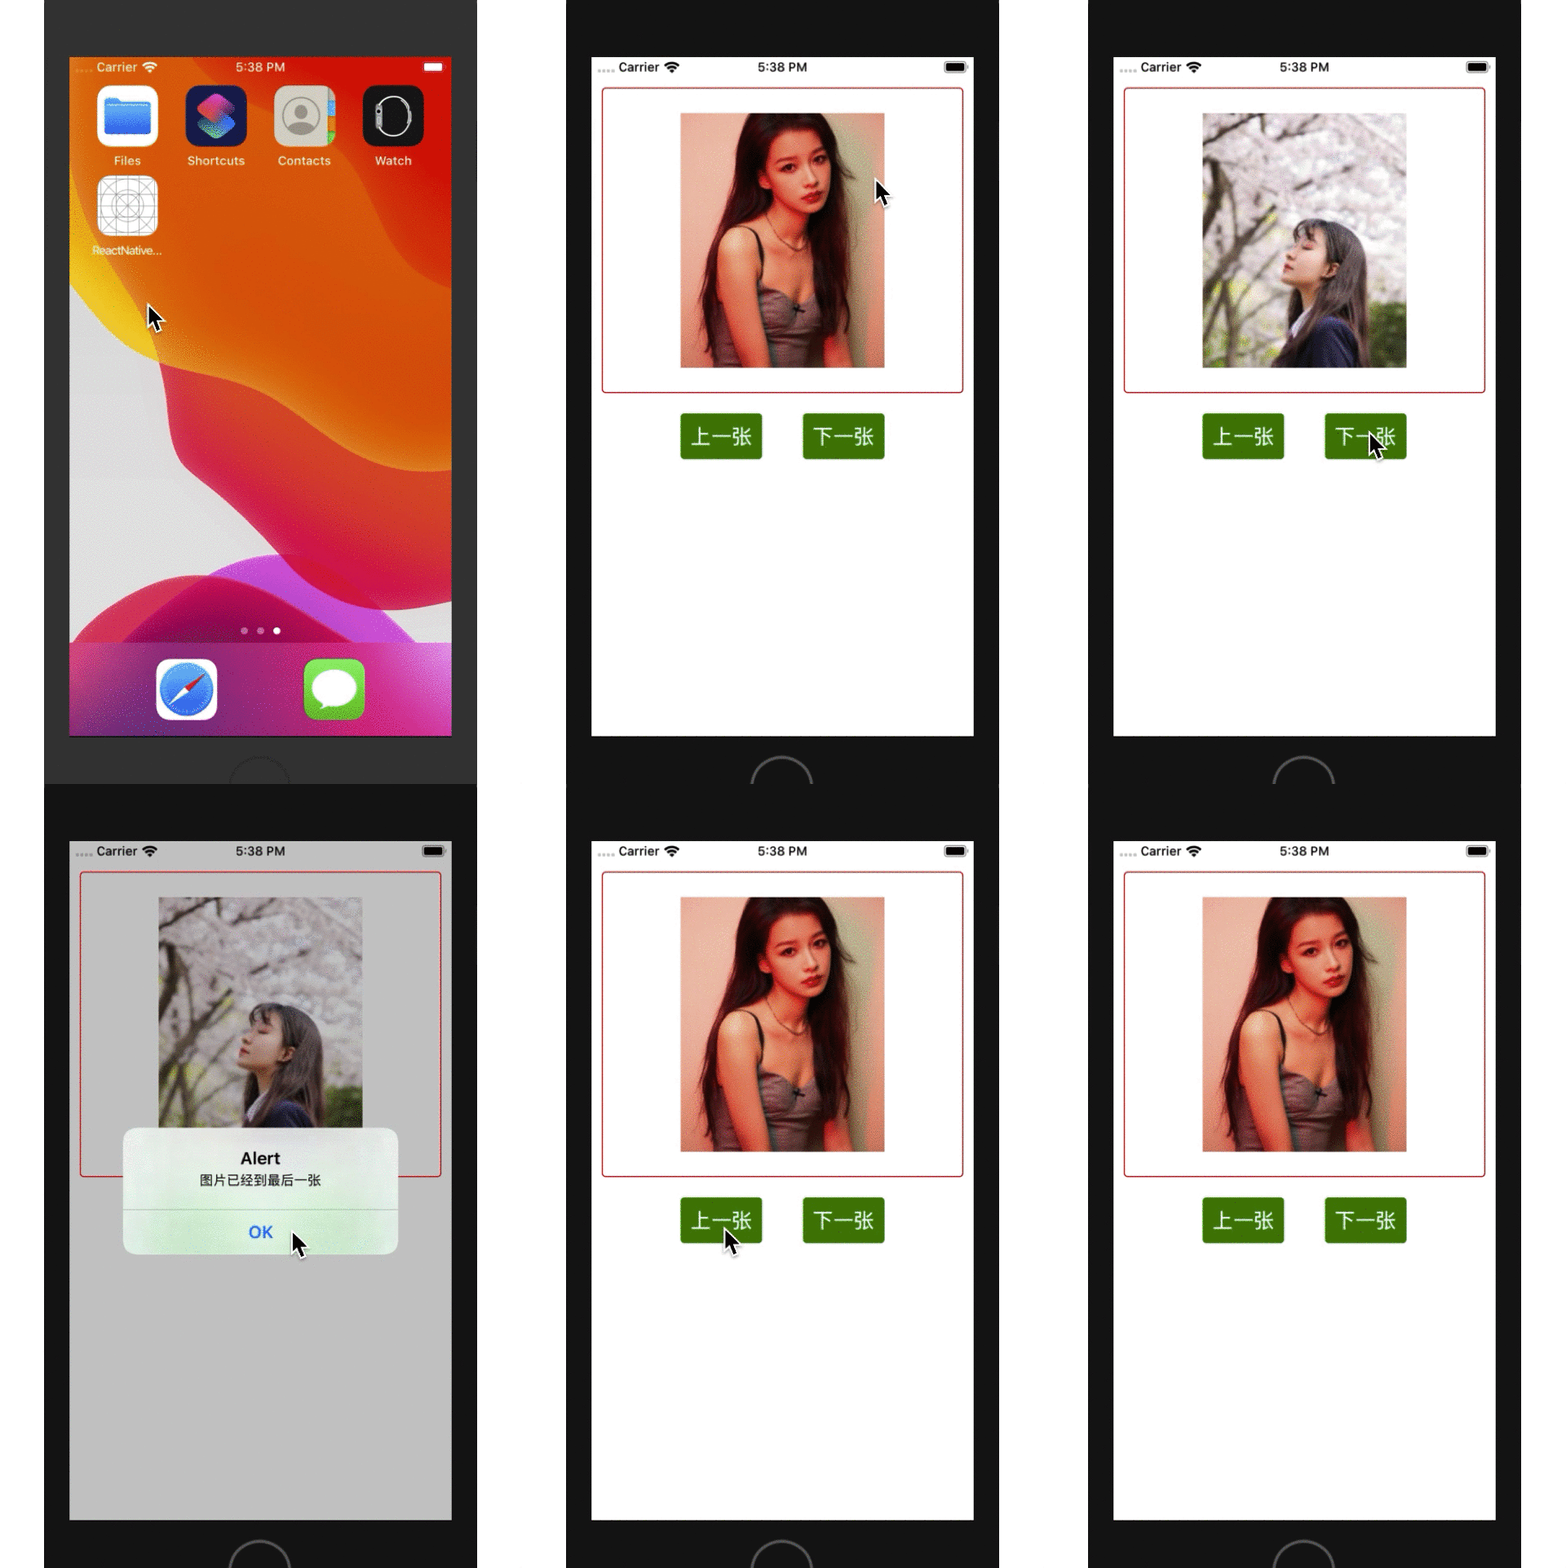
2、本地图片
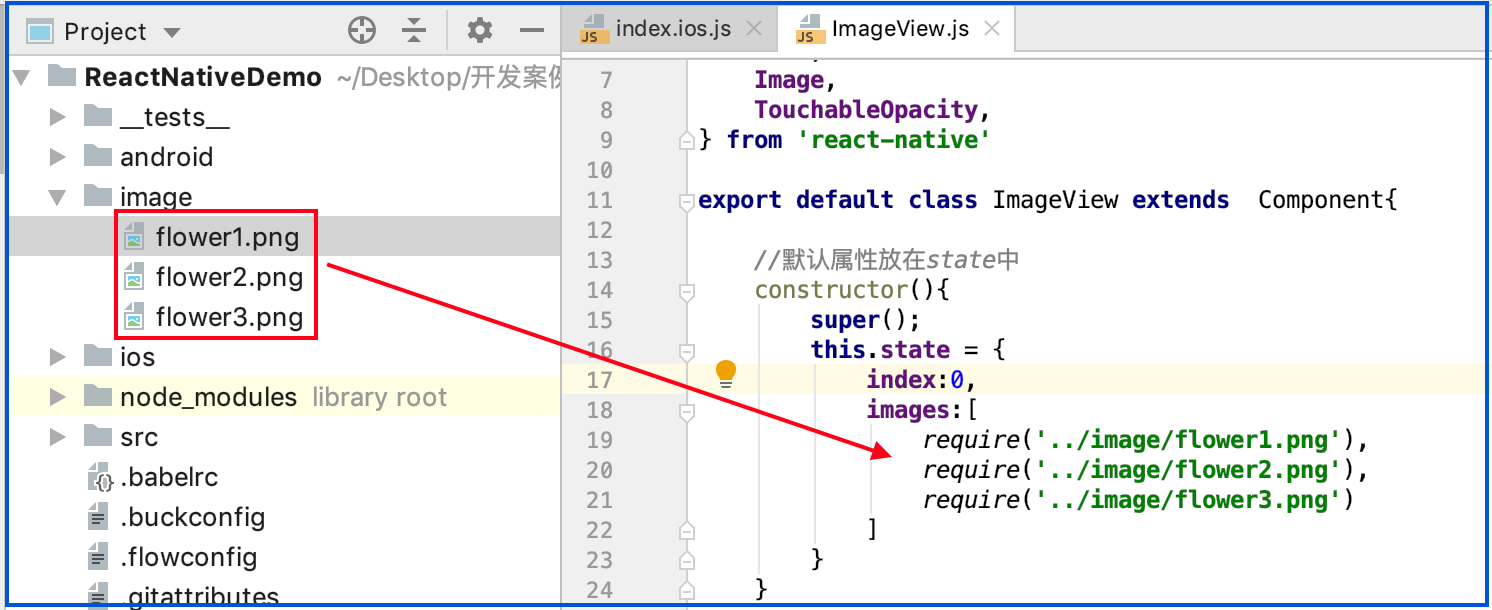
2-1 在项目中添加图片并加载
ImageView.js
import React, { Component } from 'react';

import {

    StyleSheet,

    View,

    Text,

    Image,

    TouchableOpacity,

} from 'react-native'

export default class ImageView extends  Component{

    //默认属性放在state中, 这里加载本地项目图片

    constructor(){

        super();

        this.state = {

            index:0,

            images:[

                require('../image/flower1.png'),

                require('../image/flower2.png'),

                require('../image/flower3.png')

            ]

        }

    }

    //下一张

    next = () => {

        const {index,images} = this.state;

        const count = images.length-1;

        if (index+1 > count) {

            alert("图片已经到最后一张");

            return;

        }

        const current = index+1;

        this.setState({index:current})

    };

    //上一张

    previous = () => {

        const {index} = this.state;

        if (index-1 <){

            alert("图片已经到第一张");

            return;

        }

        const current = index-1;

        this.setState({index:current})

    };

    render(){

        let {images,index} = this.state;

        return (

            <View style={styles.flex}>

                <View style={styles.container}>

                    <Image

                        style = {styles.image}

                        source = {images[index]}

                    />

                </View>

                <View style={styles.flexDirection}>

                    <View style={[styles.previous,styles.center]}>

                        <TouchableOpacity onPress={this.previous.bind(this)}>

                            <View>

                                <Text style={styles.font}>上一张</Text>

                            </View>

                        </TouchableOpacity>

                    </View>

                    <View style={[styles.next,styles.center]}>

                        <TouchableOpacity activeOpacity={0.2} onPress={this.next.bind(this)}>

                            <View>

                                <Text style={styles.font}>下一张</Text>

                            </View>

                        </TouchableOpacity>

                    </View>

                </View>

            </View>

        )

    }

}

const styles = StyleSheet.create({

    flex: {

        flex: 1

    },

    container: {

        marginTop: 30,

        height: 300,

        marginLeft: 10,

        marginRight: 10,

        borderColor: 'red',

        borderWidth: 1,

        borderRadius: 4,

        justifyContent: 'center',

        alignItems: 'center'

    },

    image: {

        width: 200,

        height: 250

    },

    flexDirection: {

        flexDirection: 'row',

        justifyContent: 'center',

        alignItems: 'center'

    },

    next: {

        height: 45,

        width: 80,

        backgroundColor: 'green',

        marginLeft: 20,

        marginTop: 20,

        borderWidth: 1,

        borderRadius: 4,

        borderColor: 'green'

    },

    previous: {

        height: 45,

        width: 80,

        backgroundColor: 'green',

        marginRight: 20,

        marginTop: 20,

        borderWidth: 1,

        borderRadius: 4,

        borderColor: 'green'

    },

    center: {

        justifyContent: 'center',

        alignItems: 'center'

    },

    font: {

        fontWeight: 'bold',

        fontSize: 20,

        textAlign: 'center',

        color: 'white'

    }

});
index.ios.js
/**

 * Sample React Native App

 * https://github.com/facebook/react-native

 * @flow

 */

import React, { Component } from 'react';

import ImageView from './src/ImageView'

import {

    AppRegistry,

} from 'react-native';

export default class ReactNativeDemo extends Component {

    render() {

        return (

            <ImageView/>

        );

    }

}

AppRegistry.registerComponent('ReactNativeDemo', () => ReactNativeDemo);
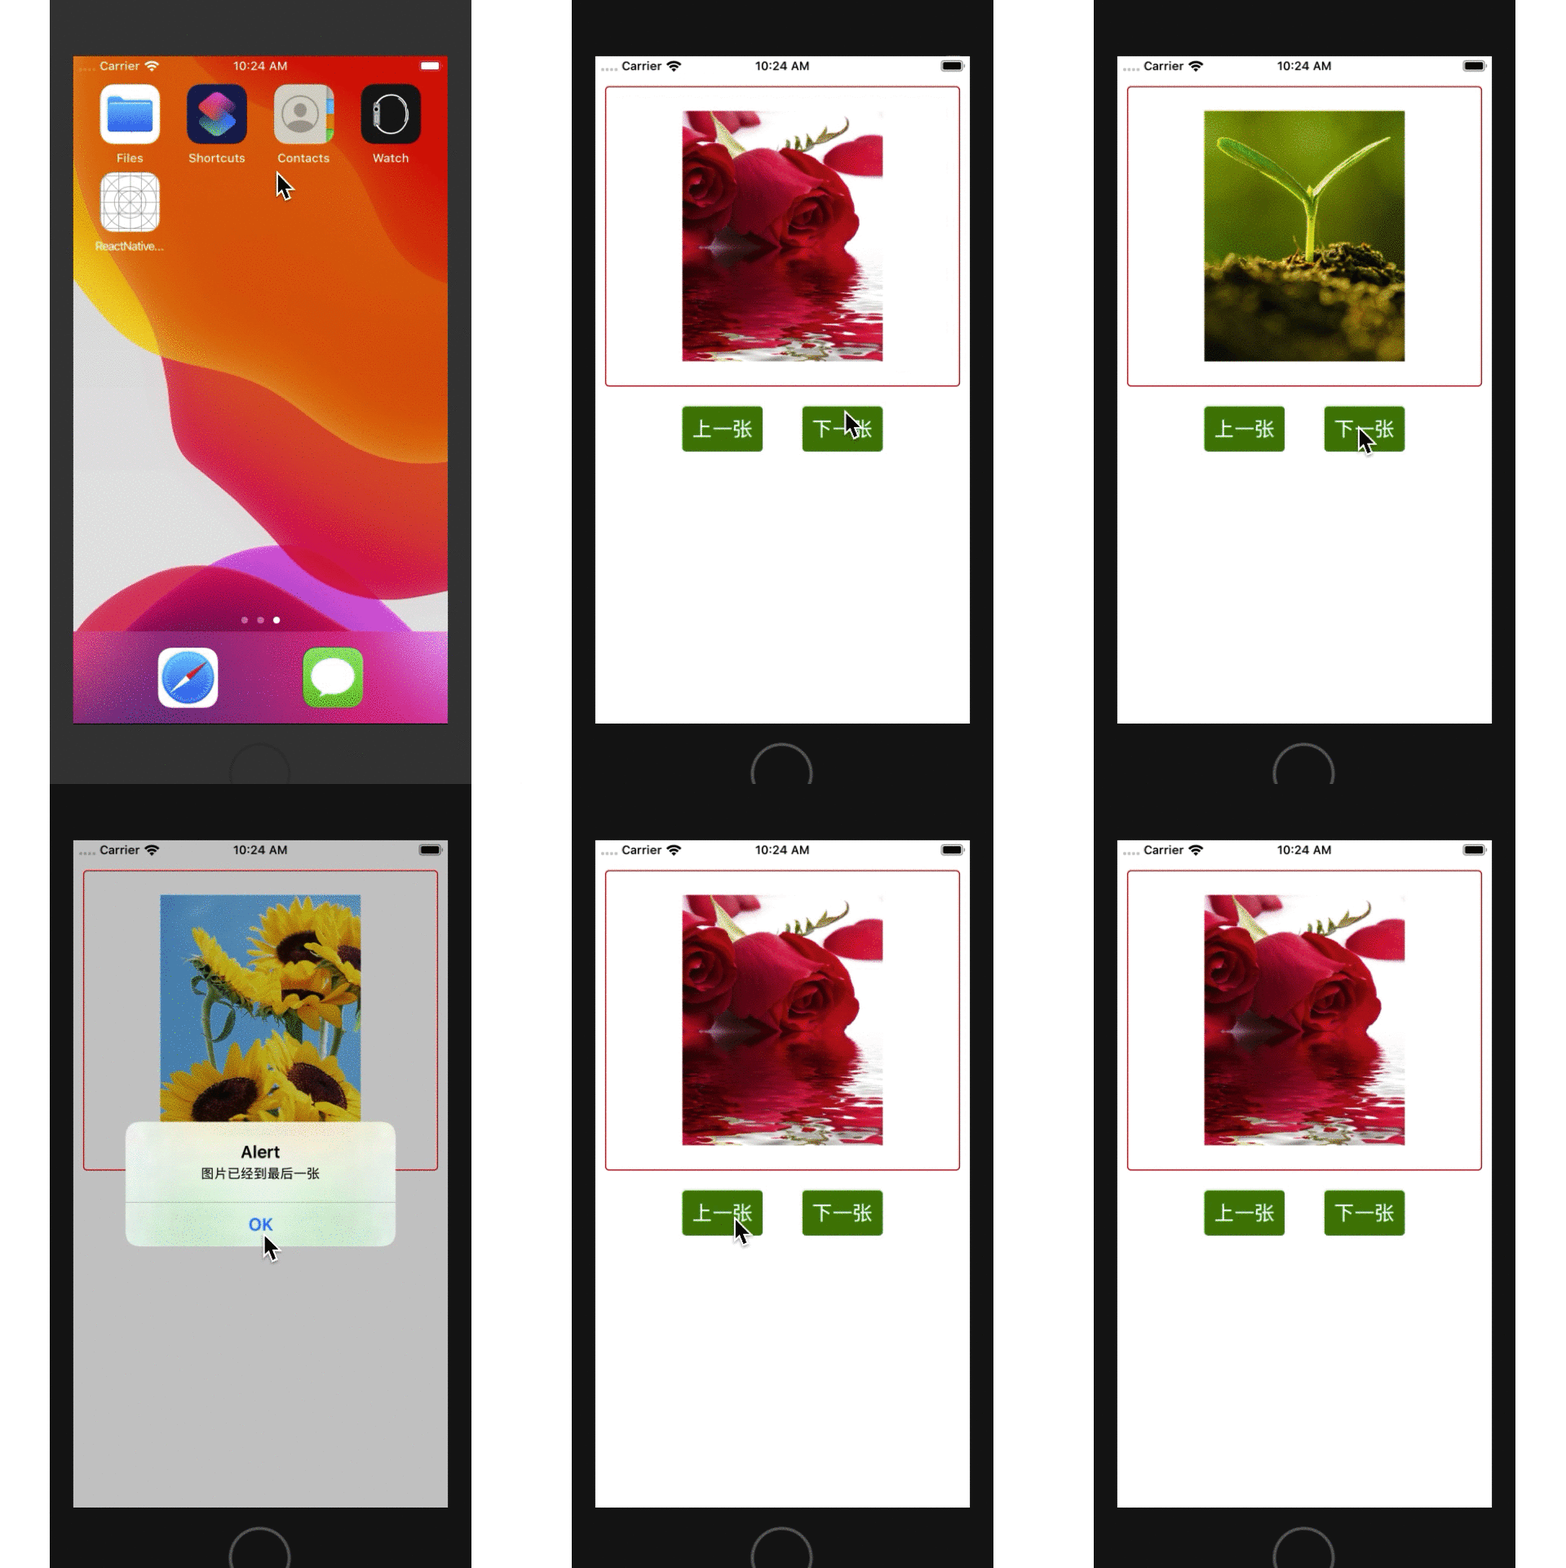
2-2 在Xcode中添加图片并加载
ImageView.js
import React, { Component } from 'react';

import {

    StyleSheet,

    View,

    Text,

    Image,

    TouchableOpacity,

} from 'react-native'

export default class ImageView extends  Component{

    //默认属性放在state中

    constructor(){

        super();

        this.state = {

            index:0,

            images:[

                'car1.png',

                'car2.png'

            ]

        }

    }

    //下一张

    next = () => {

        const {index,images} = this.state;

        const count = images.length-1;

        if (index+1 > count) {

            alert("图片已经到最后一张");

            return;

        }

        const current = index+1;

        this.setState({index:current})

    };

    //上一张

    previous = () => {

        const {index} = this.state;

        if (index-1 <){

            alert("图片已经到第一张");

            return;

        }

        const current = index-1;

        this.setState({index:current})

    };

    render(){

        let {images,index} = this.state;

        return (

            <View style={styles.flex}>

                <View style={styles.container}>

                    <Image

                        style = {styles.image}

                        source = {{uri:`${images[index]}`}}

                    />

                </View>

                <View style={styles.flexDirection}>

                    <View style={[styles.previous,styles.center]}>

                        <TouchableOpacity onPress={this.previous.bind(this)}>

                            <View>

                                <Text style={styles.font}>上一张</Text>

                            </View>

                        </TouchableOpacity>

                    </View>

                    <View style={[styles.next,styles.center]}>

                        <TouchableOpacity activeOpacity={0.2} onPress={this.next.bind(this)}>

                            <View>

                                <Text style={styles.font}>下一张</Text>

                            </View>

                        </TouchableOpacity>

                    </View>

                </View>

            </View>

        )

    }

}

const styles = StyleSheet.create({

    flex: {

        flex: 1

    },

    container: {

        marginTop: 30,

        height: 300,

        marginLeft: 10,

        marginRight: 10,

        borderColor: 'red',

        borderWidth: 1,

        borderRadius: 4,

        justifyContent: 'center',

        alignItems: 'center'

    },

    image: {

        width: 200,

        height: 250

    },

    flexDirection: {

        flexDirection: 'row',

        justifyContent: 'center',

        alignItems: 'center'

    },

    next: {

        height: 45,

        width: 80,

        backgroundColor: 'green',

        marginLeft: 20,

        marginTop: 20,

        borderWidth: 1,

        borderRadius: 4,

        borderColor: 'green'

    },

    previous: {

        height: 45,

        width: 80,

        backgroundColor: 'green',

        marginRight: 20,

        marginTop: 20,

        borderWidth: 1,

        borderRadius: 4,

        borderColor: 'green'

    },

    center: {

        justifyContent: 'center',

        alignItems: 'center'

    },

    font: {

        fontWeight: 'bold',

        fontSize: 20,

        textAlign: 'center',

        color: 'white'

    }

});
index.ios.js
/**

 * Sample React Native App

 * https://github.com/facebook/react-native

 * @flow

 */

import React, { Component } from 'react';

import ImageView from './src/ImageView'

import {

    AppRegistry,

} from 'react-native';

export default class ReactNativeDemo extends Component {

    render() {

        return (

            <ImageView/>

        );

    }

}

AppRegistry.registerComponent('ReactNativeDemo', () => ReactNativeDemo);

四、打包
ReactNative打包bundle后使用Xcode内的图片,可以参考其他博主链接试试:https://www.jianshu.com/p/516db3de199b。
ReactNative: 使用Image图片组件的更多相关文章
- React-Native之轮播组件looped-carousel的介绍与使用
React-Native之轮播组件looped-carousel的介绍与使用 一,关于react-native轮播组件的介绍与对比 1,react-native-swiper在动态使用网页图片,多张图 ...
- 图片组件——axure线框图部件库介绍
我们在后面的组件使用中,都统一使用"从部件区域拖拽图片组件到页面区域中" 1. 图片载入 1.1 将图片组件拖拽到页面区域 1.2 双击图片组件 1.3 选择合适图片,点击打开 1 ...
- react-native中的图片
静态图片资源 React Native 提供了一个统一的方式来管理 iOS 和 Android 应用中的图片.要往 App 中添加一个静态图片, 只需把图片文件放在代码文件夹中某处,然后像下面这样去引 ...
- Flutter学习笔记(10)--容器组件、图片组件
如需转载,请注明出处:Flutter学习笔记(10)--容器组件.图片组件 上一篇Flutter学习笔记(9)--组件Widget我们说到了在Flutter中一个非常重要的理念"一切皆为组件 ...
- flutter图片组件
在flutter中,image组件有很多构造函数,常用的包括Image.asset(本地图片)和Image.network(远程图片). 常用属性 不管是显示本地图片还是远程图片,image组件都包含 ...
- 【Flutter学习】基本组件之图片组件Image
一,概述 Image(图片组件)是显示图像的组件,一个显示图片的widget,支持图像格式:JPEG,PNG,GIF,动画GIF,WebP,动画WebP,BMP和WBMP. Image组件有多种构造函 ...
- 【Flutter实战】图片组件及四大案例
老孟导读:大家好,这是[Flutter实战]系列文章的第三篇,这一篇讲解图片组件,Image有很多高级用法,希望对您有所帮助. 图片组件是Flutter基础组件之一,和文本组件一样必不可少.图片组件包 ...
- React-Native基础_4.View组件
View组件 对应ios 的UIView android 中的view 使用要先导入View import { View } from 'react-native'; 使用就是View标签,可以添加S ...
- react-native DatePicker日期选择组件的实现
本教程的实现效果如下: 为了实现其淡入/淡出的覆盖效果, 还有取消按钮, 在此用了一个三方的组件, 大家可以先安装一下: 三方组件的地址:https://github.com/eyaleizenber ...
随机推荐
- hdu 1028 Ignatius and the Princess III (n的划分)
Ignatius and the Princess III Time Limit: 2000/1000 MS (Java/Others) Memory Limit: 65536/32768 K ...
- spf13-vim 显示neocomplete requires ...th Lua support
安装spf13-vim的时候下载了许多插件,neocomplete应该是比较重要的一个,毕竟自动补全.但是在使用时却一直有:neocomplete requires ...th Lua support ...
- 2016/11/10 kettle概述
ETL(Extract-Transform-Load,即抽取,转换,加载),数据仓库技术,是用来处理将数据从来源(以前做的项目)经过抽取,转换,加载到达目的端(正在做的项目)的过程.也就是新的项目需要 ...
- 判断机器CPU的大小端模式并将数据转换成小端形式
首先看一下概念 Little-Endian 就是低位字节排放在内存的低地址端,高位字节排放在内存的高地址端 Big-Endian 就是高位字节排放在内存的低地址端,低位字节排放在内存的高地址端. 第一 ...
- JS---封装getScroll函数 & 案例:固定导航栏
封装getScroll函数 1. 获取页面向上或者向左卷曲出去的距离的值 2. 浏览器的滚动事件 function getScroll() { return { left: window.pageXO ...
- windows + flutter +android+ vscode 安装配置运行流程(详细版本)
flutter 是由谷歌发布的一个全新的响应式.跨平台.高性能的移动开发框架,可以快速在iOS和Android上构建高质量的原生用户界面. 框架特点 快速开发:Flutter的热重载可以快速地进行测试 ...
- STM32基本GPIO操作:按键输入(扫描+外部中断)
(涉及专有名词较多,难免解释不到位,若有错误还请指出,谢谢!) 硬件连接图如下: 一.扫描 思路是在main函数中通过死循环来扫描端口电平状态检测,以此判断按键是否按下.实现较为简单. 1.初始化(注 ...
- JS中遍历对象属性的四种方法
Object.keys().Object.values().Object.entries().for...in.Map (1)Object.keys(): let ex1 = {c1: 'white' ...
- NLP入门(十一)从文本中提取时间
在我们的日常生活和工作中,从文本中提取时间是一项非常基础却重要的工作,因此,本文将介绍如何从文本中有效地提取时间. 举个简单的例子,我们需要从下面的文本中提取时间: 6月28日,杭州市统计局权 ...
- C#线程学习笔记一:线程基础
本笔记摘抄自:https://www.cnblogs.com/zhili/archive/2012/07/18/Thread.html,记录一下学习过程以备后续查用. 一.线程的介绍 进程(Proce ...