React-Native之轮播组件looped-carousel的介绍与使用
React-Native之轮播组件looped-carousel的介绍与使用
一,关于react-native轮播组件的介绍与对比
1,react-native-swiper在动态使用网页图片,多张图片时iOS上总是只显示第一张,Android正常显示,支持加载json数组数据。
2,react-native-viewpager,因为轮播时,下面的圆点有时显示会有误,加载上百页数据并且表现性能良好。在Android平台上面除此特性以外,ViewPager还支持自动循环无限轮播功能,类似与listview,需构建DataSource对象。
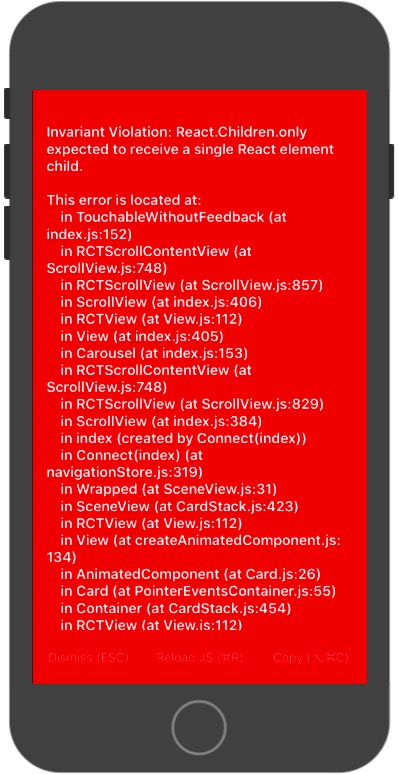
3,新的组件 react-native-looped-carousel ,整体看起来还不错(支持iOS Android),但是不支持加载json数组数据,只支持限制数组数据,而且在动态从数据库获取的数据时,如果数据还没获取完就渲染react-native-looped-carousel组件会报错:
二,react-native-looped-carousel的介绍
1,安装:
npm install react-native-looped-carousel --save
2,属性
| Name | propType | default value | description |
|---|---|---|---|
| autoplay | boolean | true | 是否自动轮播 |
| delay | number | 4000 | 多少毫秒切换一次 |
| currentPage | number | 0 | 设置初始页 |
| pageStyle | style | null | 页面的样式 |
| contentContainerStyle | style | null | contentContainerStyle for the scrollView |
| onAnimateNextPage | func | null | 切换轮播图时的回调方法 |
| swipe | bool | true | 是否允许手势滑动也换页面 |
| 分页 | --- | --- | --- |
| pageInfo | boolean | false | 是否在底部显示当前页面下标 / 页面个数 |
| pageInfoBackgroundColor | string | 'rgba(0, 0, 0, 0.25)' | 分页的背景色 |
| pageInfoBottomContainerStyle | style | null | pageInfo容器的样式 |
| pageInfoTextStyle | style | null | pageInfo中的文本样式 |
| pageInfoTextSeparator | string | ' / ' | 在 当前页面下标 和 页面个数之间的分隔符 |
| 小圆点 | --- | --- | --- |
| bullets | bool | false | 是否在轮播的底部显示小圆点 |
| bulletStyle | style | null | bullet(小圆点)的样式 |
| bulletsContainerStyle | style | null | style for the bullets container |
| chosenBulletStyle | stlye | null | bullet的容器的样式 |
| 导航箭头 | --- | --- | --- |
| arrows | bool | false | 是否显示轮播的导航箭头 |
| arrowsStyle | style | null | 导航箭头的样式 |
| arrowsContainerStyle | style | null | 导航箭头的容器样式 |
| leftArrowText | string / element | 'Left' | 左箭头的文字或图片 |
| rightArrowText | string / element | 'Right' | label / icon for right navigation arrow |
三,react-native-looped-carousel的使用实例
1,官网使用实例:
 import React, { Component } from 'react';

 import {

   Text,

   View,

   Dimensions,

 } from 'react-native';

 import Carousel from 'react-native-looped-carousel';

 const { width, height } = Dimensions.get('window');

 export default class CarouselExample extends Component {

   constructor(props) {

     super(props);

     this.state = {

       size: { width, height },

     };

   }

   _onLayoutDidChange = (e) => {

     const layout = e.nativeEvent.layout;

     this.setState({ size: { width: layout.width, height: layout.height } });

   }

   render() {

     return (

       <View style={{ flex: 1 }} onLayout={this._onLayoutDidChange}>

         <Carousel

           delay={2000}

           style={this.state.size}

           autoplay

           pageInfo

           onAnimateNextPage={(p) => console.log(p)}

         >

           <View style={[{ backgroundColor: '#BADA55' }, this.state.size]}><Text>1</Text></View>

           <View style={[{ backgroundColor: 'red' }, this.state.size]}><Text>2</Text></View>

           <View style={[{ backgroundColor: 'blue' }, this.state.size]}><Text>3</Text></View>

         </Carousel>

       </View>

     );

   }

 }
2,我的使用实例:
  <Carousel

                 delay={4000}   //自动切换的延迟 (毫秒)

                 style={{ height: Boxheight, width: AppSetting.ScreenWidth, backgroundColor: AppSetting.BLACK }}          //样式

                 autoplay    //自动轮播

                 pageInfo={false}    //在底部显示当前页面下标 / 页面个数

                 swiper      //允许手势滑动

                 bullets={true}  //显示小圆点

                 bulletStyle={{           //未选中的圆点样式

                     backgroundColor: 'rgba(255,255,255,0.4)',

                     width: 12,

                     height: 12,

                     borderRadius: 50,

                     borderColor:'rgba(255,255,255,0.4)',

                     // marginLeft: 10,

                     // marginRight: 9,

                     // marginTop: 6,

                     // marginBottom: 9,

                     margin:6

                 }} //未选中时小圆点的样式

                 chosenBulletStyle={{    //选中的圆点样式

                     backgroundColor: AppSetting.MAIN_COLOR,

                     width: 16,

                     height: 16,

                     borderRadius: 50,

                     // marginLeft: 10,

                     // marginRight: 9,

                     // marginTop: 9,

                     // marginBottom: 9,

                     margin:6

                 }}//选中时小圆点的样式

             >

                 {React.Children.map(self.state.dataImageSource, (child, index) => {

                     return (

                         <View>

                             <TouchableOpacity

                                 // key={index}

                                 style={styles.img}

                                 activeOpacity={1}

                                 //onPress={() => { Actions.AnnouncementDetails({ model: child }) }}

                                  onPress={() => { this.openAnnouncementData(child) }}

                             >

                                 <Image

                                     source={{ uri: child }}

                                     style={styles.img}

                                     resizeMode='stretch' />

                             </TouchableOpacity>

                         </View>

                     )

                 })}

             </Carousel>
 self.setState({

             announcementData: [

                 {

                     id: 1,

                     title: 'React Native之TextInput的介绍与使用(富文本封装与使用实例,常用输入框封装与使用实例)',

                     imageurl: 'http://www.baidu.com/images/banner1.png',

                     url: 'https://www.cnblogs.com/jackson-zhangjiang/p/9524842.html'

                 },

                 {

                     id: 3,

                     title: 'React Native之FlatList的介绍与使用实例',

                     imageurl: 'http://www.baidu.com/images/banner2.png',

                     url: 'https://www.cnblogs.com/jackson-zhangjiang/p/9523927.html'

                 },

                 {

                     id: 4,

                     title: '将数字转换成千分位表示',

                     imageurl: 'http://pic.58pic.com/58pic/10/97/02/30a58PICH7N.jpg',

                     url: 'https://www.cnblogs.com/jackson-zhangjiang/p/9454362.html'

                 },

             ],

  dataImageSource: [

                 'http://www.baidu.com/images/banner1.png',

                 'http://www.baidu.com/baidufiles/banner/images/2018/08/07/QQ%E5%9B%BE%E7%89%8720180807164315.jpg',

                 'http://www.baidu.com/images/banner2.png',

                 'http://pic.58pic.com/58pic/10/97/02/30a58PICH7N.jpg',

             ],

             isStartRendering:true

    })
当数据加载完成后,再渲染界面:
{this.state.isStartRendering?this.SowingMap():null}
React-Native之轮播组件looped-carousel的介绍与使用的更多相关文章
- React Native 之轮播图swiper组件
注释:swiper组件是第三方组件 所以在使用之前应该先在命令行安装,然后将第三方的模块引入(第三方模块地址:https://github.com/leecade/react-native-swipe ...
- 基于移动端Reactive Native轮播组件的应用与开发详解
总结下这段时间学习reactive native的一些东西,我们来认识一下,被炒得这么火的rn,究竟是个什么东西,以及如何去搭建自己的demo. reactive native是什么 由facebo ...
- 移动端Reactive Native轮播组件
移动端Reactive Native轮播组件 总结下这段时间学习reactive native的一些东西,我们来认识一下,被炒得这么火的rn,究竟是个什么东西,以及如何去搭建自己的demo. reac ...
- 一分钟搞定AlloyTouch图片轮播组件
轮播图也涉及到触摸和触摸反馈,同时,AlloyTouch可以把惯性运动打开或者关闭,并且设置min和max为运动区域,超出会自动回弹. 除了一般的竖向滚动,AlloyTouch也可以支持横向滚动,甚至 ...
- bootstrap轮播组件之“如何关闭自动轮播”
在一个页面里使用多个bootstrap轮播组件的时候,如果还让所有轮播图都自动轮播的话,整个画面都在动,会给用户一种很不好的体验感受.所以,需要关闭轮播图的自动轮播. 关闭方法:去除如下属性即可: d ...
- Omi-touch实战 移动端图片轮播组件的封装
pc端的轮播,移动端的轮播都很常见.一年前,我还为手机端没有左滑,右滑事件从而封装了一个swipe库,可以自定义超过多少滑动时间就不触发,也可以设置滑动多少距离才触发,这一个功能的代码就达到400多行 ...
- bootstrap轮播组件,大屏幕图片居中效果
在慕课网学习bootstrap轮播组件的时候,了解到轮播的图片都放在了类名为item下的img中 视频中老师对图片自适应采用给图片img设置width=100%完成,然而这样自适应处理图片在不同屏幕中 ...
- 轮播组件iceSlider
~~~~作为编写组件的一个参考吧,在js输出组件样式的问题上 探讨一下 尽量简化组件的调用 function iceSlider(element,options) { /* 功能:广告翻转切换控制 参 ...
- C-Swipe Mobile 一个适用于Vue2.x的移动端轮播组件
近期在做的一个Vue2项目里需要一个可以滑动的轮播组件,但是又因为现有的传统轮播库功能过于繁琐和笨重.因此自己写了一个针对于Vue2.x的轻型轮播组件. 项目GitHub链接:C-Swipe Mobi ...
随机推荐
- 在模态框(Modal)中使用UEditor全屏显示的一个坑
根据这个问题很简单就能查到一些文章明确说明了解决问题的方法,就是如下一段代码: var isModal = false; //判断该dom是否为modal var classes = $(contai ...
- C#事件の事件解析
事件(event)是基于windows消息处理机制的类,封装的更好,让开发者无须知道底层的消息处理机制,就可以开发出强大的基于事件的应用程序来.委托(delegate)委托可以理解成为函数指针,不同的 ...
- 经典Python进阶文档 真的很棒
https://docs.pythontab.com/interpy/args_kwargs/README/
- python笔记31-使用ddt报告出现dict() -> new empty dictionary dict(mapping) 问题解决
使用ddt框架生成html报告的时候,出现:dict() -> new empty dictionary dict(mapping) -> new dictionary initializ ...
- move或rebuild lob分区对象
当使用如下语法移动或重建一个lob分区对象,将报错: SQL> alter table SHOW_LOB_STORAGE move lob(DDD) store as (tablespace P ...
- SpringBoot之加密
最近利用闲暇时间写了一个博客系统,主要参考wordpress,主要目的是为了提高自己的技术能力.写代码写了两年多,联系到之前在学校的时候写过的一个博客系统,发现工作中开发的系统,技术上基本一致,业务逻 ...
- 通过随机数获得学生成绩,并把每个元素赋值为学生的分数成绩,通过增强for循环遍历结果。
package com.Summer_0419.cn; /** * @author Summer * 通过随机数获得学生成绩,并把每个元素赋值为学生的分数成绩 */ public class Test ...
- 计算机网络#关于HDLC#
HDLC(High-Level Data Link Control,高级数据链路控制):面向比特型的协议 主站(发送命令).从站(响应命令).复合站(既可发送命令,也可响应命令) HDLC链路配置方式 ...
- web 项目:解决插入 MySQL 数据库时中文乱码问题
背景:在做 javaweb 项目的时,前台传递的中文最后插入数据库的时候总是出现乱码现象. 解决方案 A.不管是使用 Idea.eclipse,确定自己的项目所使用的字符集是 UTF-8. B ...
- 4-STM32物联网开发WIFI(ESP8266)+GPRS(Air202)系统方案数据篇(云端电脑(Windows)安装配置数据库,使用本地Navicat for MySQL和手机APP 远程连接测试)
3-STM32物联网开发WIFI(ESP8266)+GPRS(Air202)系统方案数据篇(安装配置数据库,使用Navicat for MySQL和手机APP 连接测试) 根据前面的教程把软件复制到云 ...