vue下canvas绘制矩形
起因:根据项目需求本人写了一个绘制矩形的组件。
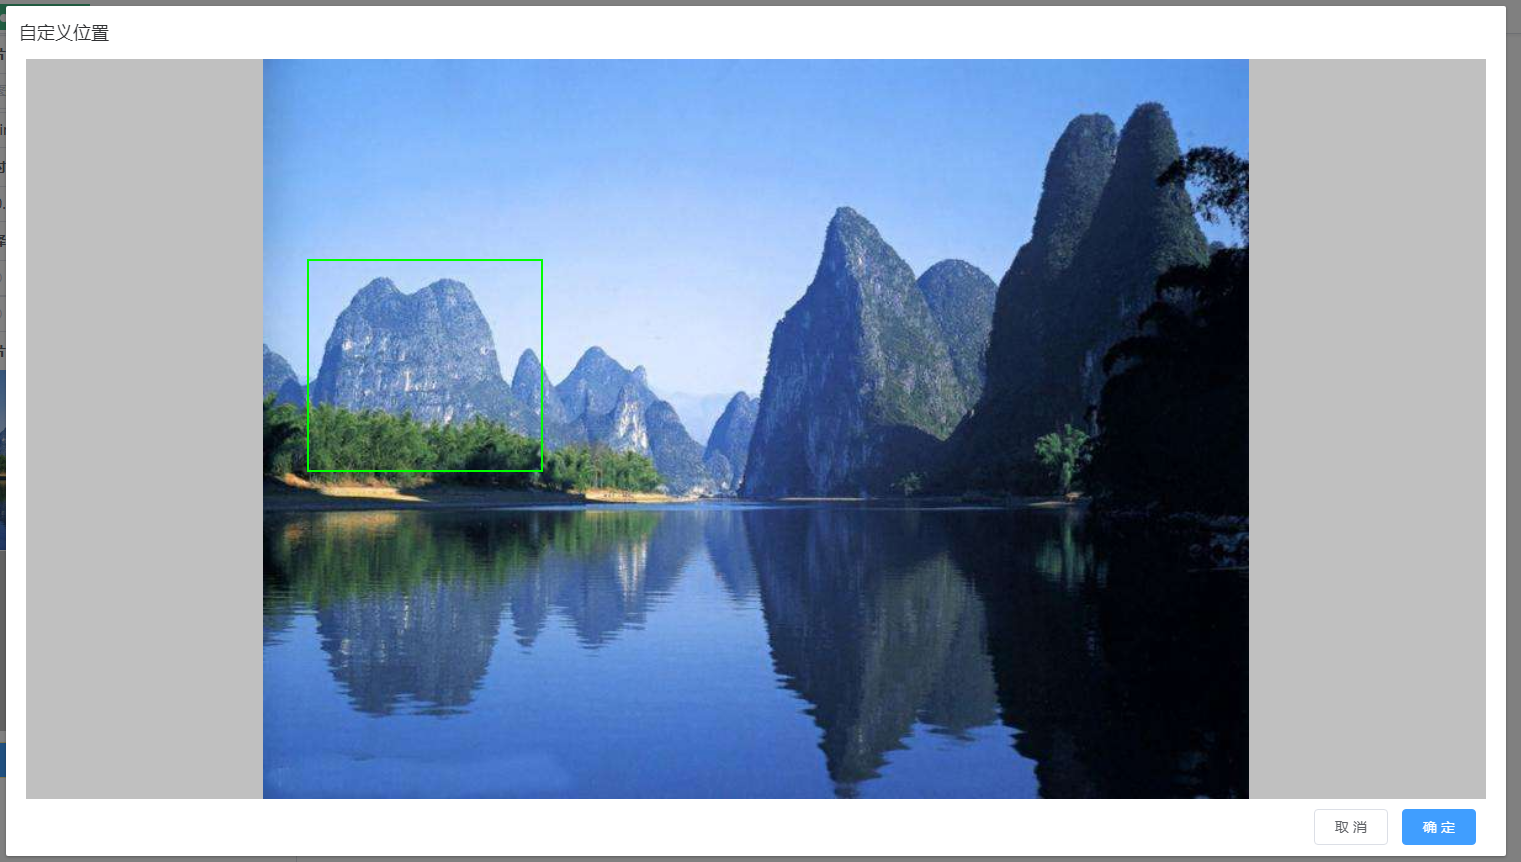
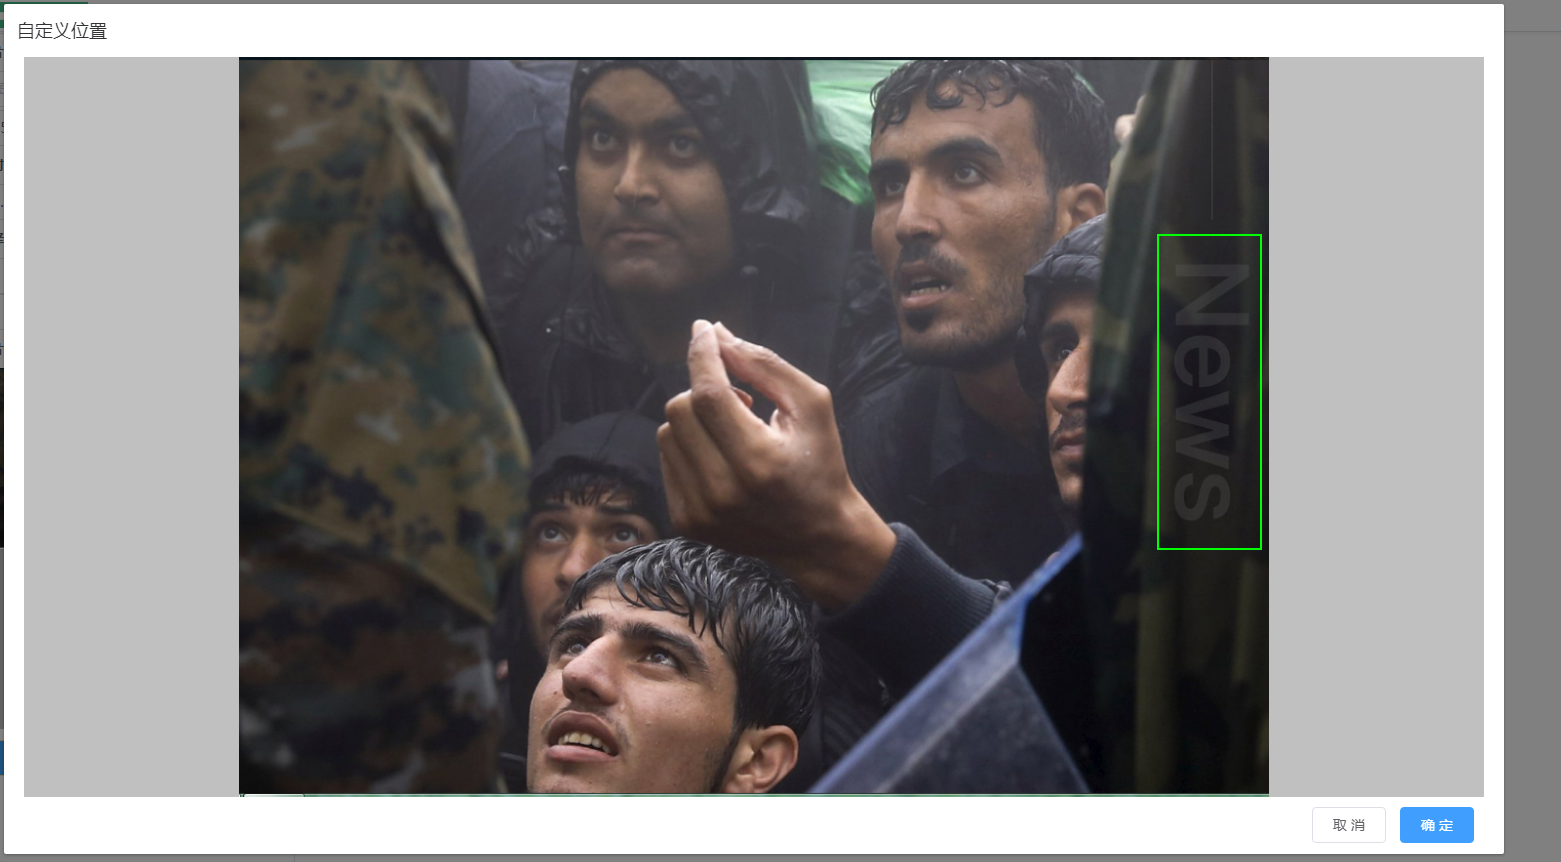
功能:在图片中绘制矩形,根据图片大小进行自适应展示,获取图片矩形坐标。
思路:首先定义一个固定大小的DIV,DIV标签中有监测鼠标变化的四个事件mousedown,mousemove,mouseup,mouseleave。
第二在DIV标签内有img,canvas两个标签,一个负责图片展示,一个负责绘制矩形。
其中img与DIV标签的大小相当,canvas是根据DIV标签position定位的以保证鼠标事件在图片上绘制矩形不会有偏差。
以下就是组件的全部代码和实现效果展示
<template>

    <div id="customPositionDiv">

        <div style="width: 1460px; height:740px;  background-color: #c0c0c0;

                    margin:0 auto ; display:-webkit-box;

                    -webkit-box-align:center; -webkit-box-pack:center; ">

            <div @mousedown="mousedown" @mousemove="mousemove"

                 @mouseup="mouseup" @Mouseleave="Mouseleave" :style="imgstyle">

                <img :src="imgSrc" :style="imgstyle">

                <canvas ref="table" :width="canvasWidth" :height="canvasHeight" :style="canvasstyle"></canvas>

            </div>

        </div>

        <div style="width: 1450px;z-index: inherit;text-align: right ;margin:10px 0 0 0">

            <span slot="footer" class="dialog-footer">

                <el-button @click="customClose">取 消</el-button>

                <el-button type="primary" @click="customQuery">确 定</el-button>

            </span>

        </div>

    </div>

</template>

<style lang="scss">

</style>

<script>

    import vue from 'vue';

    export default {

        name: 'canvasDraw',

        props: ['imgSrc'],

        data() {

            return {

                //  customPositionShow:false, //自定义位置

                //   showclose:false,

                startX: '',  //画画开始的X坐标

                startY: '',  //画画开始的Y坐标

                endX: '',    //画画结束的X坐标

                endY: '',    //画画结束的Y坐标

                isMouseDownInCanvas: '', //鼠标是否按下

                customcxt: '',      // cxt

                customRwidth: '',    //原图与展示图片的宽度比

                customRheight: '',   //原图与展示图片的高度比

                imgstyle: '',        //根据图片大小自适应样式

                canvasstyle: '',     //根据图片大小canvas自适应样式 居中显示

                canvasWidth: '',     //根据图片大小自适应canvas宽

                canvasHeight: '',    //根据图片大小自适应canvas高

                DivWidth: 1460,      //最大宽度

                DivHeight: 740,      //最大高度

            };

        },

        watch: {

            'imgSrc': function () {

                this.show();

            },

        },

        mounted() {

            this.show();

        },

        methods: {

            //取消时返回组件调用处所需的数据

            customClose() {

                this.customcxt.clearRect(0, 0, this.DivWidth, this.DivHeight);

                this.$emit('custom', { 'type': 1, 'data': '' });

            },

            //确定时返回组件调用处所需的数据

            customQuery() {

                this.customcxt.clearRect(0, 0, this.DivWidth, this.DivHeight);

                //根据绘制进行图片裁剪

                //获取矩形框Left,Width'

                let cLeft = 0;

                let cWidth = 0;

                if (this.startX > this.endX) {

                    cLeft = this.endX;

                    cWidth = this.startX - this.endX;

                } else {

                    cLeft = this.startX;

                    cWidth = this.endX - this.startX;

                }

                //获取矩形框Top,Height

                let cTop = 0;

                let cHeight = 0;

                if (this.startY > this.endY) {

                    cTop = this.endY;

                    cHeight = this.startY - this.endY;

                } else {

                    cTop = this.startY;

                    cHeight = this.endY - this.startY;

                }

                var oMark = [];

                oMark['offsetLeft'] = parseInt(cLeft / this.customRwidth);

                oMark['offsetTop'] = parseInt(cTop / this.customRheight);

                oMark['offsetWidth'] = parseInt(cWidth / this.customRwidth);

                oMark['offsetHeight'] = parseInt(cHeight / this.customRheight);

                this.$emit('custom', { 'type': 2, 'data': oMark });

            },

            // dialog展示自定义矩形框画板,

            // 计算img与canvas标签自适应图片的大小

            show() {

                vue.nextTick(_ => {

                    let customCanvas = this.$refs.table;// canvas显示层

                    this.customcxt = customCanvas.getContext("2d");

                    let img = new Image();

                    img.src = this.imgSrc;

                    let that = this;

                    img.onload = function () {

                        let canvasleft = 0;

                        let canvastop = 0;

                        let WrH = img.width / img.height;             //图片宽高比

                        let RWrH = that.DivWidth / that.DivHeight;    //放置图片DIV的宽高比

                        let aa = 0;

                        // 根据宽高比大小判断确定自适应的宽和高

                        if (RWrH > WrH) {

                            aa = that.DivHeight / img.height;

                            that.canvasHeight = that.DivHeight;

                            that.canvasWidth = img.width * aa;

                            canvasleft = (that.DivWidth - that.canvasWidth) / 2

                        } else {

                            aa = that.DivWidth / img.width;

                            that.canvasHeight = img.height * aa;

                            that.canvasWidth = that.DivWidth;

                            canvastop = (that.DivHeight - that.canvasHeight) / 2

                        }

                        that.imgstyle = ' position: relative;  width:' + that.canvasWidth

                                      + ' px; height:' + that.canvasHeight + 'px'; //img浮动定位居中显示

                        that.customRwidth = that.canvasWidth / img.width; //原图与展示图片的宽高比

                        that.customRheight = that.canvasHeight / img.height;

                        that.canvasstyle = 'position: absolute;left: ' + canvasleft

                                        + '; top: ' + canvastop + ';' //canvas浮动定位

                    };

                })

            },

            //鼠标按下时执行

            mousedown(e) {

                this.isMouseDownInCanvas = true;

                // 鼠标按下时开始位置与结束位置相同

                // 防止鼠标在画完矩形后 点击图画形成第二个图形

                this.endX = e.offsetX;

                this.endY = e.offsetY;

                this.startX = e.offsetX;

                this.startY = e.offsetY;

                this.mousemove(e)

            },

            //鼠标移动式时执行

            mousemove(e) {

                if (this.isMouseDownInCanvas) { // 当鼠标有按下操作时执行

                    this.endX = e.offsetX;

                    this.endY = e.offsetY;

                    let wwidth = this.endX - this.startX;

                    let wheigth = this.endY - this.startY;

                    // 清除指定区域的所有像素

                    this.customcxt.clearRect(0, 0, this.DivWidth, this.DivHeight);

                    this.customcxt.strokeStyle = " #00ff00"; //矩形框颜色

                    this.customcxt.lineWidth = "2";  //矩形框宽度

                    this.customcxt.strokeRect(this.startX, this.startY, wwidth, wheigth);  //绘制矩形

                }

            },

            //鼠标松开时执行

            mouseup(e) {

                this.isMouseDownInCanvas = false;

            },

            Mouseleave(e) {

                this.isMouseDownInCanvas = false

            },

        },

    }

</script>
vue下canvas绘制矩形的更多相关文章
- canvas绘制矩形
canvas绘制矩形 方法 fillRect(x, y, width, height) 画一个实心的矩形 clearRect(x, y, width, height) 清除一块儿矩形区域 stroke ...
- h5学习-canvas绘制矩形、圆形、文字、动画
绘制矩形<!DOCTYPE html> <html lang="en"> <head> <meta charset="UTF-8 ...
- canvas 绘制 矩形 圆形
<!DOCTYPE html><html xmlns="http://www.w3.org/1999/xhtml"><head> <tit ...
- canvas 绘制矩形和圆形
canvas绘制有两神方法:1).填充(fill)填充是将图形内部填满. 2).绘制边框 (stroke)绘制边框是不把图形内部填满,只是绘制图形的外框. 当我们在绘制图形的时候,首先要设定好绘制的样 ...
- canvas 绘制矩形
XXX(x,y,width,height) x矩形左上角x坐标 y矩形左上角y坐标 ...
- Canvas 绘制矩形,圆形,不规则图形(线条),渐变等图像效果
绘制矩形: getContext("2d") 对象是内建的 HTML5 对象,拥有多种绘制路径.矩形.圆形.字符以及添加图像的方法. fillStyle 方法将其染成红色,fill ...
- html5 canvas绘制矩形和圆形
<!DOCTYPE html> <html> <head> <meta charset="UTF-8"> <title> ...
- canvas绘制线和矩形
###canvas绘制矩形 HTML中的元素canvas只支持一种原生的图形绘制:矩形.所有其他的图形的绘制都至少需要生成一条路径 1.绘制矩形 canvas提供了三种方法绘制矩形: ----> ...
- Canvas学习:封装Canvas绘制基本图形API
Canvas学习:封装Canvas绘制基本图形API Canvas Canvas学习 从前面的文章中我们了解到,通过Canvas中的CanvasRenderingContext2D对象中的属性和方 ...
随机推荐
- STA 开篇
时序分析=动态时序分析+静态时序分析 动态时序分析简单讲就是gate-level simulation,仿真对象是netlist+sdf,通过SDF反标,得到gate跟net的delay,通过输入大量 ...
- node.js 和 yarn 安装
电脑环境 windows10 专业版 64 位 node.js 安装 Node.js 官方网站下载:https://nodejs.org/en/ 之后一步步得傻瓜式安装 配置环境变量和查看node.j ...
- codeforces 711 D.Directed Roads(tarjan 强连通分量 )
题目链接:http://codeforces.com/contest/711/problem/D 题目大意:Udayland有一些小镇,小镇和小镇之间连接着路,在某些区域内,如果从小镇Ai开始,找到一 ...
- 上传图片时使用crop进行裁剪
上传图片时,往往需要对图片进行裁剪. 实现方法为: 1.引入crop.css body{background:#}.upload-container{position:absolute;left:%; ...
- Spring Boot 2.x基础教程:找回启动日志中的请求路径列表
如果您看过之前的Spring Boot 1.x教程,或者自己原本就对Spring Boot有一些经验,或者对Spring MVC很熟悉.那么对于Spring构建的Web应用在启动的时候,都会输出当前应 ...
- 爬虫(十一):selenium爬虫
1. selenium基础 selenium部分可以去看我写的selenium基础部分,由于链接太多了这里就不发出来了. 代理ip: 有时候频繁爬取一些网页.服务器发现你是爬虫后会封掉你的ip地址.这 ...
- 第二十一篇 Linux中的环境变量简单介绍
环境变量之 PATH 定义解释器搜索用户执行命令的路径 获取PATH变量的值: echo $PATH /usr/local/bin:/usr/local/sbin:/usr/bin:/us ...
- Linux netstat命令详解(检验本机各端口的网络连接情况)
netstat命令用于显示与IP.TCP.UDP和ICMP协议相关的统计数据,一般用于检验本机各端口的网络连接情况.netstat是在内核中访问网络及相关信息的程序,它能提供TCP连接,TCP和UDP ...
- SpringMvc中文件的上传
本文转自:http://www.cnblogs.com/fjsnail/p/3491033.html 三个方法没有都测试,先get再说 第一个方法慢不知道是不是因为写的代码是按字节读取的,没有用Buf ...
- js 时间格式化工具类
/** * 返回示例:0 天 4 小时 7 分钟 57 秒 * @param second 毫秒数 * @returns {String} 时间html */ function secondToDay ...