swagger2接口发布demo
近来发现knife4j比swagger2整合起来方便,功能也更强大,推荐使用, 具体可参考 springboot2整合knife4j
1.目的:使用Swagger2发布接口,ui可操作
2.项目结构

3. 代码
3.1 接口类qinfeng.zheng.api.controller.DemoController
import io.swagger.annotations.Api;

import io.swagger.annotations.ApiImplicitParam;

import io.swagger.annotations.ApiImplicitParams;

import io.swagger.annotations.ApiOperation;

import org.springframework.web.bind.annotation.*;

import qinfeng.zheng.api.entity.UserEntity;

@Api(value = "会员接口")

@RestController

public class DemoController {

    @ApiOperation(value = "swagger接口测试demo", nickname = "swagger接口测试demo昵称")

    @GetMapping("/getDemo")

    public String getDemo() {

        return "getDemo方法调用成功...";

    }

    @ApiOperation(value = "获取会员信息接口", nickname = "根据userName获取用户相关信息")

    @ApiImplicitParam(name = "userName", value = "用户名称", required = true, dataType = "String")

    @PostMapping("/postMember")

    public String postMember(@RequestParam String userName) {

        return userName;

    }

    @ApiOperation(value = "添加用户信息", nickname = "nickname是什么", notes = "notes是什么", produces = "application/json")

    @PostMapping("/postUser")

    @ResponseBody

    @ApiImplicitParam(paramType = "query", name = "userId", value = "用户id", required = true, dataType = "int")

    public UserEntity postUser(@RequestBody UserEntity user, @RequestParam("userId") int userId) { // 这里用包装类竟然报错

        if (user.getId() == userId) {

            return user;

        }

        return new UserEntity();

    }

    @ApiOperation(value = "添加用户信息", nickname = "哈哈测试", notes = "哈哈测试添加用户", produces = "application/json")

    @PostMapping("/addUser")

    @ResponseBody

    @ApiImplicitParams({

            @ApiImplicitParam(paramType = "query", name = "userName", value = "用户姓名", required = true, dataType = "String"),

            @ApiImplicitParam(paramType = "query", name = "id", value = "用户id", required = true, dataType = "int") })

    public UserEntity addUser(String userName, int id) {

        UserEntity userEntity = new UserEntity();

        userEntity.setName(userName);

        userEntity.setId(id);

        return userEntity;

    }

}
3.2 实体类qinfeng.zheng.api.entity.UserEntity
package qinfeng.zheng.api.entity;

import io.swagger.annotations.ApiModel;

import io.swagger.annotations.ApiModelProperty;

/**

 * 创建时间: 23:09 2018/9/19

 * 修改时间:

 * 编码人员: ZhengQf

 * 版   本: 0.0.1

 * 功能描述:

 */

@ApiModel(value = "用户模型")

public class UserEntity {

    @ApiModelProperty(value="id" ,required= true,example = "123")

    private Integer id;

    @ApiModelProperty(value="用户姓名" ,required=true,example = "郑钦锋")

    private String name;

    public Integer getId() {

        return id;

    }

    public void setId(Integer id) {

        this.id = id;

    }

    public String getName() {

        return name;

    }

    public void setName(String name) {

        this.name = name;

    }

    @Override

    public String toString() {

        return "DemoDoctor [id=" + id + ", name=" + name + "]";

    }

}
3.3 配置类qinfeng.zheng.config.SwaggerConfig
package qinfeng.zheng.config;

import org.springframework.context.annotation.Bean;

import org.springframework.context.annotation.Configuration;

import springfox.documentation.builders.ApiInfoBuilder;

import springfox.documentation.builders.PathSelectors;

import springfox.documentation.builders.RequestHandlerSelectors;

import springfox.documentation.service.ApiInfo;

import springfox.documentation.spi.DocumentationType;

import springfox.documentation.spring.web.plugins.Docket;

import springfox.documentation.swagger2.annotations.EnableSwagger2;

/**

 * swagger2的配置类

 */

@Configuration

@EnableSwagger2

public class SwaggerConfig {

   @Bean

   public Docket createRestApi() {

      return new Docket(DocumentationType.SWAGGER_2).apiInfo(apiInfo()).select()

            // api扫包范围

            .apis(RequestHandlerSelectors.basePackage("qinfeng.zheng.api")).paths(PathSelectors.any()).build();

   }

    /**

     * 创建该API的基本信息(这些基本信息会展现在文档页面中)

     * 访问地址:http://项目实际地址/swagger-ui.html

     * @return

     */

   private ApiInfo apiInfo() {

      return new ApiInfoBuilder().title("Swagger接口发布测试").description("测试|Swagger接口功能")

            .termsOfServiceUrl("http://www.baidu.com")

            .version("1.0").build();

   }

}
3.4 启动类qinfeng.zheng.AppSwagger
package qinfeng.zheng;

import org.springframework.boot.SpringApplication;

import org.springframework.boot.autoconfigure.SpringBootApplication;

@SpringBootApplication

public class AppSwagger {

   public static void main(String[] args) {

      SpringApplication.run(AppSwagger.class, args);

   }

}
3.5 application.yml
server:

  port: 8080

spring:

  application:

    name: swagger
3.6 maven依赖
<?xml version="1.0" encoding="UTF-8"?>

<project xmlns="http://maven.apache.org/POM/4.0.0" xmlns:xsi="http://www.w3.org/2001/XMLSchema-instance"

   xsi:schemaLocation="http://maven.apache.org/POM/4.0.0 http://maven.apache.org/xsd/maven-4.0.0.xsd">

   <modelVersion>4.0.0</modelVersion>

   <groupId>qinfeng.zheng</groupId>

   <artifactId>springboot-swagger-demo</artifactId>

   <version>0.0.1-SNAPSHOT</version>

   <packaging>jar</packaging>

   <name>springboot-swagger-demo</name>

   <description>Demo project for Spring Boot</description>

   <parent>

      <groupId>org.springframework.boot</groupId>

      <artifactId>spring-boot-starter-parent</artifactId>

      <version>2.0.4.RELEASE</version>

      <relativePath/> <!-- lookup parent from repository -->

   </parent>

    <dependencies>

        <!-- SpringBoot整合Web组件 -->

        <dependency>

            <groupId>org.springframework.boot</groupId>

            <artifactId>spring-boot-starter-web</artifactId>

        </dependency>

        <!-- https://mvnrepository.com/artifact/io.springfox/springfox-swagger2 -->

        <dependency>

            <groupId>io.springfox</groupId>

            <artifactId>springfox-swagger2</artifactId>

            <version>2.9.2</version>

        </dependency>

        <dependency>

            <groupId>io.springfox</groupId>

            <artifactId>springfox-swagger-ui</artifactId>

            <version>2.9.2</version>

        </dependency>

    </dependencies>

</project>
4. 启动项目
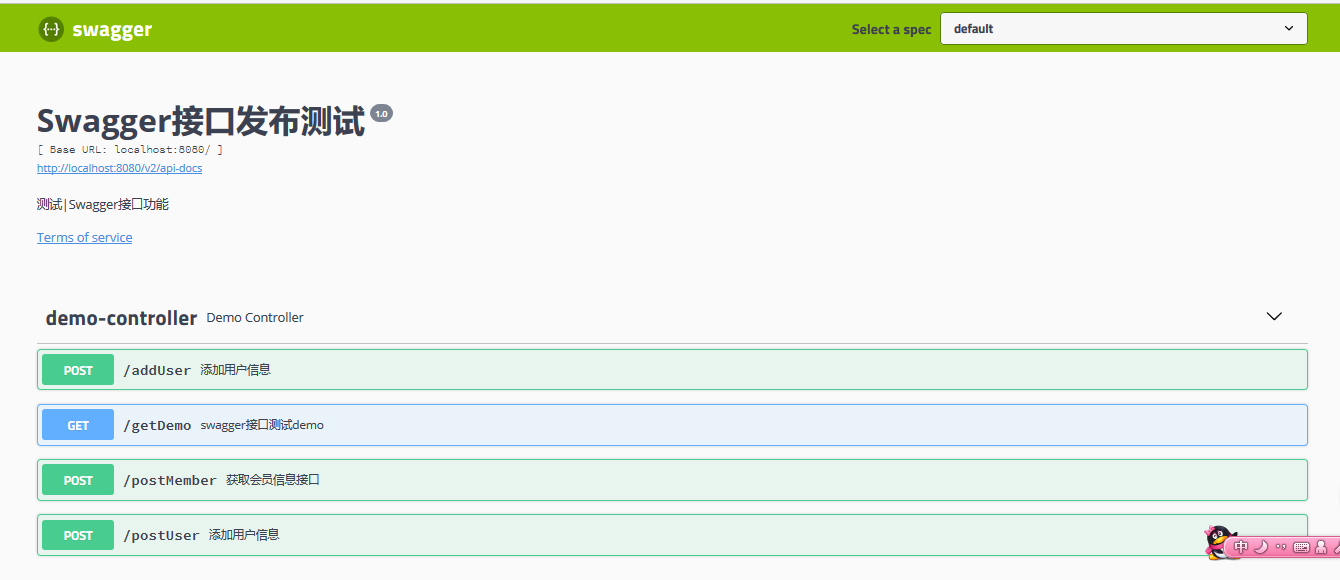
4.1 项目启动成功之后,浏览器访问http://localhost:8080/swagger-ui.html
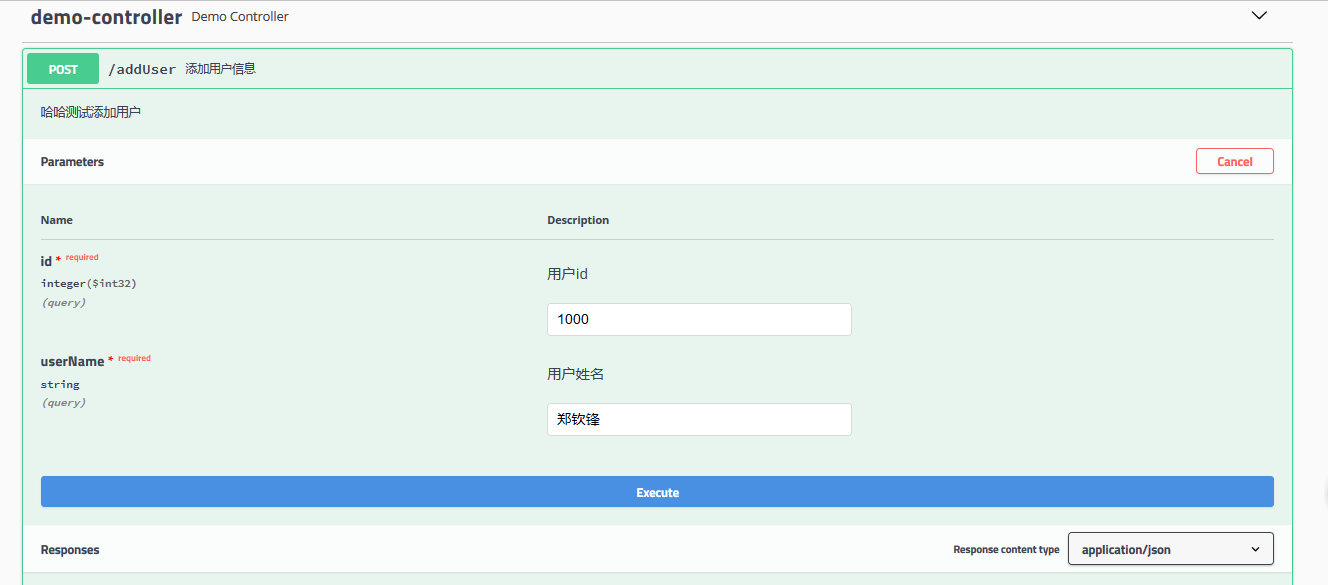
4.2 测试addUser接口
点击Execute提交请求,
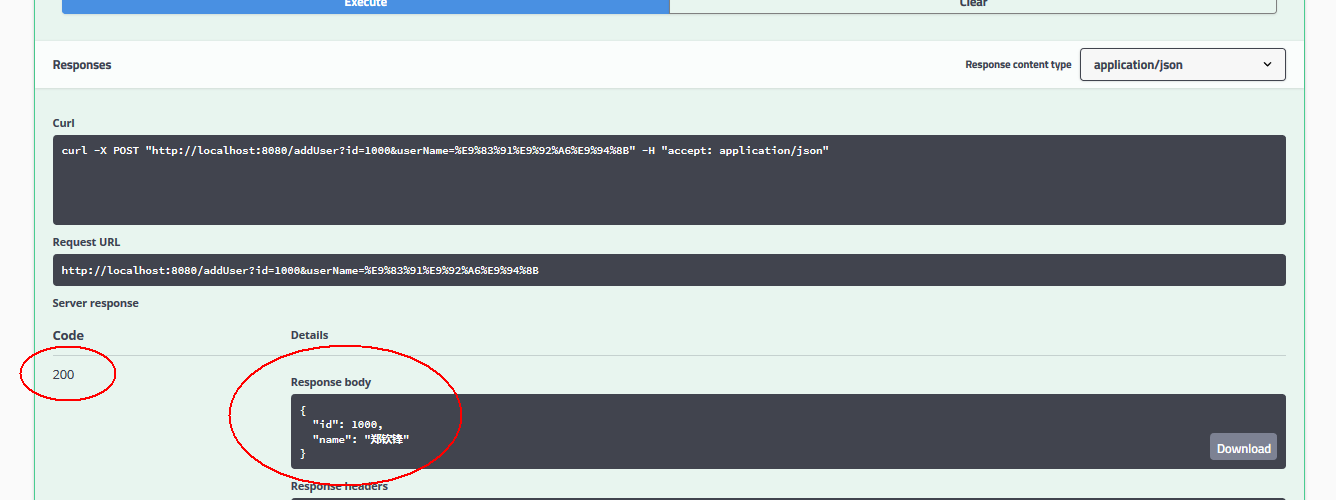
请求成功,其它接口可自行测试,皆正常!!!
swagger2接口发布demo的更多相关文章
- WebService—CXF—实现接口发布和客户端调用
(一)接口发布的几种方式 定义接口: @WebService(targetNamespace="http://www.itfad.net/queryUser") public in ...
- Asp.Net Core基于JWT认证的数据接口网关Demo
近日,应一位朋友的邀请写了个Asp.Net Core基于JWT认证的数据接口网关Demo.朋友自己开了个公司,接到的一个升级项目,客户要求用Aps.Net Core做数据网关服务且基于JWT认证实现对 ...
- 支付宝即时到账接口开发 - DEMO讲解
支付宝即时到帐接口 环境要求 PHP5.0以上,且需要开启curl.openssl. 文档地址: https://doc.open.alipay.com/doc2/detail?treeId=62&a ...
- WebService—CXF整合Spring实现接口发布和调用过程
一.CXF整合Spring实现接口发布 发布过程如下: 1.引入jar包(基于maven管理) <!-- cxf --> <dependency> <groupId> ...
- 新手入门贴之基于 python 语言的接口自动化 demo 小实战
大家好,我是正在学习接口测试的菜鸟.近期通过自己的学习,完成了一个关于测试接口的接口自动化demo.下面想跟大家分享一下,主要的思路是根据接口文档确定测试用例,并将测试用例写在excel中.因为只是小 ...
- (五)RabbitMQ消息队列-安装amqp扩展并订阅/发布Demo(PHP版)
原文:(五)RabbitMQ消息队列-安装amqp扩展并订阅/发布Demo(PHP版) 本文将介绍在PHP中如何使用RabbitMQ来实现消息的订阅和发布.我使用的系统依然是Centos7,为了方便, ...
- 使用JDK自带功能,实现一个简单的Web Service接口发布
万事开头难,本篇文章的目的就是使用JDK自带的功能,实现一个最简单的Web Service接口的发布. 下图是项目的组成,主要有三个部分,一个接口(WS),一个接口的实现类(WSImp),还有一个接口 ...
- 易飞ERP API接口调用DEMO
一.使用场景: 1.需要开放ERP数据给第三方系统对接,如APP手机端开发,MES,OA等: 2.接口按现在主流开发,restful风格,传JSON数据,跨平台,不限开发工具: 3.不限易飞ERP,支 ...
- swagger2 接口文档
1,maven: <project xmlns="http://maven.apache.org/POM/4.0.0" xmlns:xsi="http://www. ...
随机推荐
- 三十二、python操作XML文件
'''XML:模块 xml总结 1.解析 str 文件 tree,ElementTree,type root,Element,type2.操作 Element: tag,text,find,iter, ...
- oracle查询语句,根据中文的拼音排序
SELECT * FROM USER t ORDER BY nlssort(FIRSTNAME, 'NLS_SORT=SCHINESE_PINYIN_M')
- python-笔记(三)文件操作
文件的操作一般分三步: 1.打开文件,获取文件的指针(句柄) 2.通过指针(句柄)操作文件 3.关闭文件 现在有以下文件: 我们为爱还在学 学沟通的语言 学着谅解 学着不流泪 等到我们学会飞 飞越黑夜 ...
- 阶段1 语言基础+高级_1-3-Java语言高级_06-File类与IO流_07 缓冲流_3_BufferedInputStream_字节缓冲
内容改成abc 来个数组缓冲
- fillna()函数
method: pad/ffill:用前一个非缺失值去填充该缺失值,用左边的非缺失值去填充该缺失值 backfill/bfill:用下一个非缺失值填充该缺失值,用右边的非缺失值去填 ...
- 【MM系列】SAP MM模块-库存盘点BAPI的使用及注意点
公众号:SAP Technical 本文作者:matinal 原文出处:http://www.cnblogs.com/SAPmatinal/ 原文链接:[MM系列]SAP MM模块-库存盘点BAPI的 ...
- 【ABAP系列】SAP ABAP 生成随机数的函数
公众号:SAP Technical 本文作者:matinal 原文出处:http://www.cnblogs.com/SAPmatinal/ 原文链接:[MM系列]SAP ABAP 生成随机数的函数 ...
- csrf原理及flask的处理方法
csrf原理及flask的处理方法 为什么需要CSRF? Flask-WTF 表单保护你免受 CSRF 威胁,你不需要有任何担心.尽管如此,如果你有不包含表单的视图,那么它们仍需要保护. 例如,由 A ...
- 入门级,关于下载设置wamp的安装
将wamp下载下来,分清楚自己电脑是32还是64位,在安装之前,首先确定你电脑里安装了vc++ 的运行库,不然安装wamp后会出现提醒缺少XXX文件,但是注意,在安装vc运行库的时候,请搜索集合包类的 ...
- c#用log4Net将日志写入到Oracle数据库,并写入到文件中
原文:c#用log4Net将日志写入到Oracle数据库,并写入到文件中 版权声明:本文为博主原创文章,遵循CC 4.0 BY-SA版权协议,转载请附上原文出处链接和本声明. 本文链接:https:/ ...