
Linux环境下MySQL5.7安装记录
参考文档
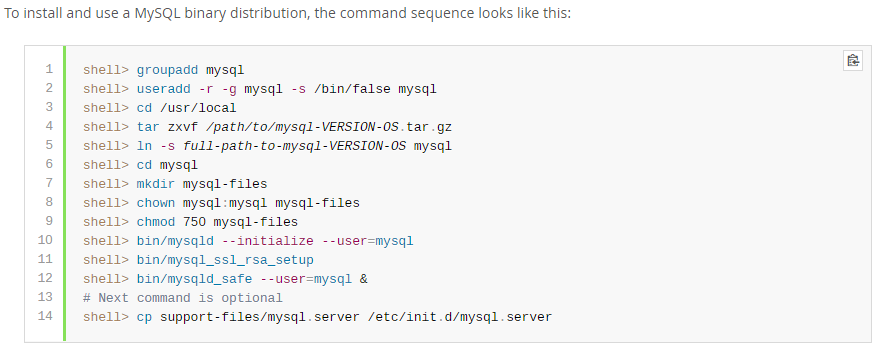
《Installing MySQL on Unix/Linux Using Generic Binaries》
https://dev.mysql.com/doc/refman/5.7/en/binary-installation.html
卸载旧版本MySQL
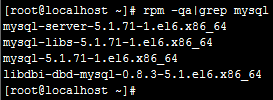
查看当前Linux环境中是否已经安装了MySQL。
执行命令:rpm -qa|grep mysql
查看状态:service mysqld status

停止服务:service mysqld stop
卸载MySQL:
[root@localhost ~]# rpm -e mysql-server-5.1.71-1.el6.x86_64 --nodeps
[root@localhost ~]# rpm -e mysql-libs-5.1.71-1.el6.x86_64 --nodeps
[root@localhost ~]# rpm -e mysql-5.1.71-1.el6.x86_64 --nodeps
[root@localhost ~]# rpm -e libdbi-dbd-mysql-0.8.3-5.1.el6.x86_64 --nodeps
创建MySQL组和用户
查看是否已经具有mysql用户。
[root@iZ88rvassw1Z opt]# cat /etc/group | grep mysql
[root@iZ88rvassw1Z opt]# cat /etc/passwd | grep mysql
添加组和用户
[root@iZ88rvassw1Z opt]# groupadd mysql
[root@iZ88rvassw1Z opt]# useradd -r -g mysql mysql
[root@iZ88rvassw1Z opt]# cat /etc/group | grep mysql
mysql:x:500:
[root@iZ88rvassw1Z opt]# cat /etc/passwd | grep mysql
mysql:x:498:500::/home/mysql:/bin/bash
[root@iZ88rvassw1Z opt]#
下载MySQL安装介质
下载地址:
https://dev.mysql.com/downloads/mysql/
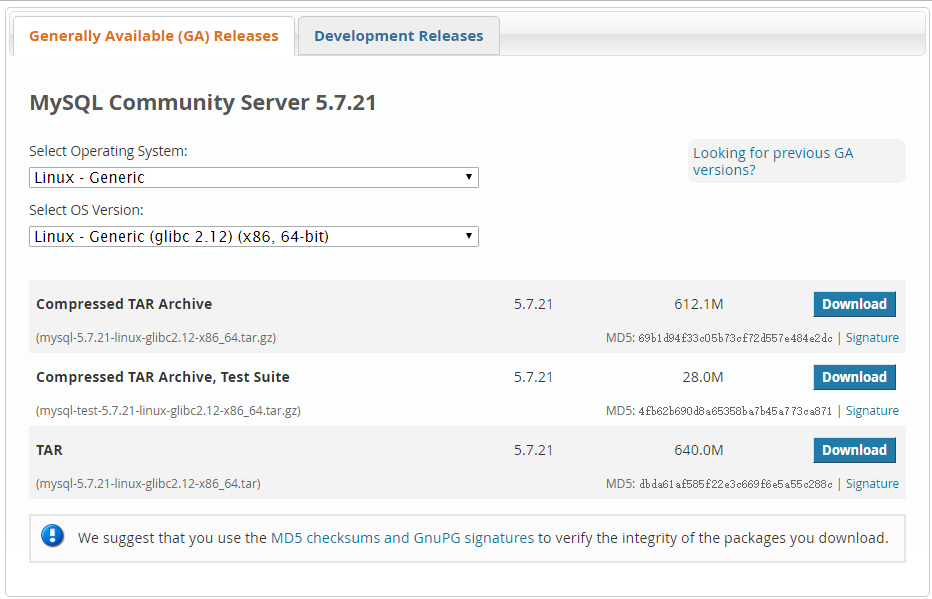
选择Linux-Generic,X86,64-bit;下载TAR。
上传MySQL安装介质
使用XFTP或者其他工具将安装介质上传至服务器。
本示例上传至“/opt/”目录。
[root@iZ88rvassw1Z opt]# ll
total 1310816
-rw-r--r-- 1 root root 671129600 Feb 5 16:48 mysql-5.7.21-linux-glibc2.12-x86_64.tar
MySQL安装过程
解压tar包:
[root@iZ88rvassw1Z opt]# tar xvf mysql-5.7.21-linux-glibc2.12-x86_64.tar

[root@iZ88rvassw1Z opt]# ll

total 1310816

-rw-r--r-- 1 root root 671129600 Feb 5 16:48 mysql-5.7.21-linux-glibc2.12-x86_64.tar

-rw-r--r-- 1 7161 31415 641798603 Dec 28 12:20 mysql-5.7.21-linux-glibc2.12-x86_64.tar.gz

-rw-r--r-- 1 7161 31415 29328152 Dec 28 12:18 mysql-test-5.7.21-linux-glibc2.12-x86_64.tar.gz
解压tar.gz包:
[root@iZ88rvassw1Z opt]# tar zxvf mysql-5.7.21-linux-glibc2.12-x86_64.tar.gz

[root@iZ88rvassw1Z opt]# ll

total 1310820

drwxr-xr-x 9 root root 4096 Feb 5 20:03 mysql-5.7.21-linux-glibc2.12-x86_64

-rw-r--r-- 1 root root 671129600 Feb 5 16:48 mysql-5.7.21-linux-glibc2.12-x86_64.tar

-rw-r--r-- 1 7161 31415 641798603 Dec 28 12:20 mysql-5.7.21-linux-glibc2.12-x86_64.tar.gz

-rw-r--r-- 1 7161 31415 29328152 Dec 28 12:18 mysql-test-5.7.21-linux-glibc2.12-x86_64.tar.gz

drwxr-xr-x. 2 root root 4096 Nov 22 2013 rh
修改文件夹名称:
[root@iZ88rvassw1Z opt]# mv mysql-5.7.21-linux-glibc2.12-x86_64 mysql
移动文件夹目录:
[root@iZ88rvassw1Z opt]# mv mysql /usr/local/
查看文件夹目录:
[root@iZ88rvassw1Z local]# ll

total 60

drwxr-xr-x  7 root root 4096 Nov  1 17:24 aegis

drwxr-xr-x. 2 root root 4096 Sep 23  2011 bin

drwxr-xr-x. 2 root root 4096 Sep 23  2011 etc

drwxr-xr-x. 2 root root 4096 Sep 23  2011 games

drwxr-xr-x. 2 root root 4096 Sep 23  2011 include

drwxr-xr-x  8 uucp  143 4096 Sep 27  2014 jdk1.7.0_71

drwxr-xr-x. 2 root root 4096 Sep 23  2011 lib

drwxr-xr-x. 2 root root 4096 Sep 23  2011 lib64

drwxr-xr-x. 2 root root 4096 Sep 23  2011 libexec

drwxr-xr-x  9 root root 4096 Feb  5 20:03 mysql

drwxr-xr-x. 2 root root 4096 Sep 23  2011 sbin

drwxr-xr-x. 5 root root 4096 Aug 14  2014 share

drwxr-xr-x. 2 root root 4096 Sep 23  2011 src

drwxr-xr-x  9 root root 4096 Jan 28 15:53 tomcat_gxwp

drwxr-xr-x  2 root root 4096 Jan 28 15:52 tools

[root@iZ88rvassw1Z local]#
修改文件所属权:
[root@iZ88rvassw1Z local]# chown -R mysql:mysql mysql/

[root@iZ88rvassw1Z local]# ll

total 60

drwxr-xr-x  7 root  root  4096 Nov  1 17:24 aegis

drwxr-xr-x. 2 root  root  4096 Sep 23  2011 bin

drwxr-xr-x. 2 root  root  4096 Sep 23  2011 etc

drwxr-xr-x. 2 root  root  4096 Sep 23  2011 games

drwxr-xr-x. 2 root  root  4096 Sep 23  2011 include

drwxr-xr-x  8 uucp    143 4096 Sep 27  2014 jdk1.7.0_71

drwxr-xr-x. 2 root  root  4096 Sep 23  2011 lib

drwxr-xr-x. 2 root  root  4096 Sep 23  2011 lib64

drwxr-xr-x. 2 root  root  4096 Sep 23  2011 libexec

drwxr-xr-x  9 mysql mysql 4096 Feb  5 20:03 mysql

drwxr-xr-x. 2 root  root  4096 Sep 23  2011 sbin

drwxr-xr-x. 5 root  root  4096 Aug 14  2014 share

drwxr-xr-x. 2 root  root  4096 Sep 23  2011 src

drwxr-xr-x  9 root  root  4096 Jan 28 15:53 tomcat_gxwp

drwxr-xr-x  2 root  root  4096 Jan 28 15:52 tools

[root@iZ88rvassw1Z local]#
开始执行安装:
安装命令:
mysqld --initialize --user=mysql --basedir=/usr/local/mysql --datadir=/usr/local/mysql/data
[root@iZ88rvassw1Z bin]# ./mysqld --initialize --user=mysql --basedir=/usr/local/mysql --datadir=/usr/local/mysql/data

2018-02-05T12:06:22.319404Z 0 [Warning] TIMESTAMP with implicit DEFAULT value is deprecated. Please use --explicit_defaults_for_timestamp server option (see documentation for more details).

2018-02-05T12:06:23.991371Z 0 [Warning] InnoDB: New log files created, LSN=45790

2018-02-05T12:06:24.235099Z 0 [Warning] InnoDB: Creating foreign key constraint system tables.

2018-02-05T12:06:24.333502Z 0 [Warning] No existing UUID has been found, so we assume that this is the first time that this server has been started. Generating a new UUID: fc7902f7-0a6c-11e8-9528-00163e00016c.

2018-02-05T12:06:24.336727Z 0 [Warning] Gtid table is not ready to be used. Table 'mysql.gtid_executed' cannot be opened.

2018-02-05T12:06:24.337416Z 1 [Note] A temporary password is generated for root@localhost: UdW3pJf4c+ko

[root@iZ88rvassw1Z bin]#

[Note] A temporary password is generated for root@localhost: UdW3pJf4c+ko
默认生成一个临时密码,通过该密码登录MySQL。
配置MySQL
登录MySQL控制台:
mysql -u root -p
输入刚才的临时密码后登录MySQL控制台。
修改root用户密码:
登录控制台后执行SQL发现报如下错误。
ERROR 1820 (HY000): You must reset your password using ALTER USER statement before executing this statement.
SET PASSWORD = PASSWORD('passw0rd');

mysql> flush privileges;
Query OK, 0 rows affected (0.00 sec)
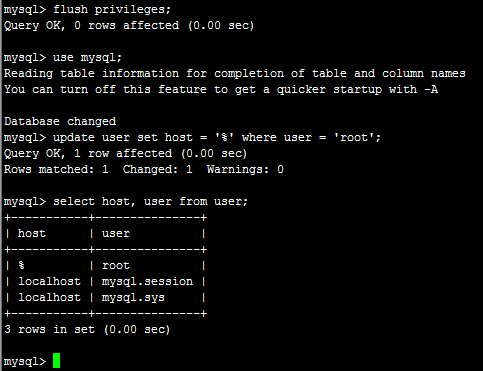
允许root用户远程访问:
mysql> use mysql;
Reading table information for completion of table and column names
You can turn off this feature to get a quicker startup with -A
Database changed
mysql> update user set host = '%' where user = 'root';
Query OK, 1 row affected (0.00 sec)
Rows matched: 1 Changed: 1 Warnings: 0
mysql> select host, user from user;
+-----------+---------------+
| host | user |
+-----------+---------------+
| % | root |
| localhost | mysql.session |
| localhost | mysql.sys |
+-----------+---------------+
3 rows in set (0.00 sec)
配置MySQL为服务
在/usr/local/mysql/目录下执行:
cp support-files/mysql.server /etc/init.d/mysqld
经过以上操作即可实现通过服务方式启动、停止MySQL。
启动:service mysqld start
停止:service mysqld stop
状态:service mysqld status
使用MySQL
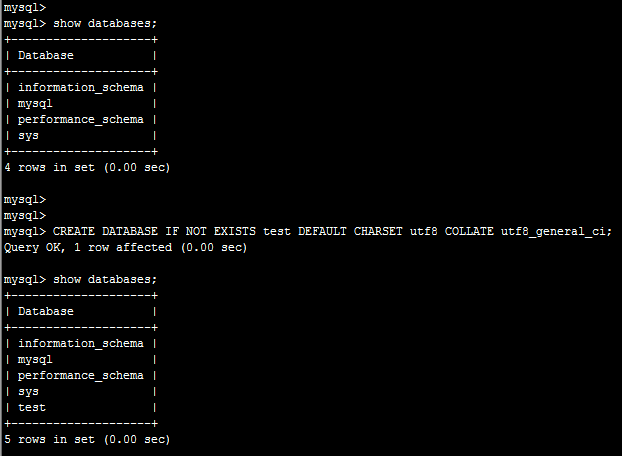
创建数据库:
CREATE DATABASE IF NOT EXISTS test DEFAULT CHARSET utf8 COLLATE utf8_general_ci;
导入数据:
source /opt/t_analy_act_act.sql
完成。
Linux环境下MySQL5.7安装记录的更多相关文章
- Linux环境下Python的安装过程
Linux环境下Python的安装过程 前言 一般情况下,Linux都会预装 Python了,但是这个预装的Python版本一般都非常低,很多 Python的新特性都没有,必须重新安装新一点的版本,从 ...
- Linux环境下NodeJS的安装配置(HelloWorld)
Linux环境下NodeJS的安装配置(HelloWorld) 最简单的环境安装,测试helloworld.给初学者!! 安装脚本,请仔细阅读逐行执行: #!/bin/bash #检查是否已经安装 r ...
- Linux环境下使用yum安装zip和unzip
Linux环境下使用yum安装zip和unzip. yum install zip yum install unzip
- PCL库在Linux环境下的编译安装
PCL库在Linux环境下的编译安装 PCL库的源码库:https://github.com/PointCloudLibrary/pcl 下载完了之后解压下来 编译库的几个步骤 mkdir build ...
- Linux环境下卸载、安装及配置MySQL5.1
Linux环境下卸载原有MySQL5.1数据库,并重新安装MySQL数据库的示例记录. 一.卸载MySQL 查看主机中是否安装了MySQL数据库: [root@RD-viPORTAL- ~]# rpm ...
- mosquitto在Linux环境下的部署/安装/使用/测试
mosquitto在Linux环境下的部署 看了有三四天的的源码,(当然没怎么好好看了),突然发现对mosquitto的源码有了一点点感觉,于是在第五天决定在Linux环境下部署mosquitto. ...
- Linux环境下:vmware安装Windows报错误-缺少所需的CD/DVD驱动器设备驱动程序
解决方法:将硬盘格式从SCSI改为IDE. 方法如下: 右键点击你新建的虚拟机名,点击最下面的setting,看到左侧第二行是hard disk 了么,你那里肯定是SCSI的,选中它,点最下面的rem ...
- Redis学习——Linux环境下Redis的安装(一)
一.关于Redis Redis最为一款开源的key-value存储系统,自推出到现在一直受到编程人员的喜爱.它支持存储多种value类型,String .List .Set .Zset .Hash.这 ...
- Linux 环境下为VirtualBox安装增强功能
VirtualBox安装CentOS后,再安装增强功能就可以共享文件夹.粘贴板以及鼠标无缝移动,主要步骤如下: 1.yum -y update 2.yum -y install g++ gcc gcc ...
随机推荐
- 【algorithm】尾递归
尾递归和一般的递归不同在对内存的占用,普通递归创建stack累积而后计算收缩,尾递归只会占用恒量的内存(和迭代一样).SICP中描述了一个内存占用曲线,用以上答案中的Python代码为例(普通递归): ...
- CentOS 7下安装Logstash ELK Stack 日志管理系统(上)
介绍 The Elastic Stack - 它不是一个软件,而是Elasticsearch,Logstash,Kibana 开源软件的集合,对外是作为一个日志管理系统的开源方案.它可以从任何来源,任 ...
- MySQL5.6 怎样优化慢查询的SQL语句 -- 慢日志介绍
近期有个开发团队抱怨我们平台包括的mysql cluster不行,总是报mysql的"heartbeat Error".分析了他们收集的日志.没有发现mysql cluster节点 ...
- hdoj 1203 I NEED A OFFER! 【另类01背包】【概率背包】
题意:... 策略:动态规划. 由于是求至少能得到一个offer的概率,那我们能够反着求.求得不到一个offer的概率.最后用1减去就好了. 代码: #include<string.h> ...
- Lync 2013 与Exchange 2013 UM&UC 集成!
设置好对应的拨号计划.我们设置分机号码为4位: 配置好接入号码为5000: 配置自己主动助理号码为6000: 改动UM拨号模式为双模式: Set-UMService -identity Exch ...
- HDU 2795 Billboard(宣传栏贴公告,线段树应用)
HDU 2795 Billboard(宣传栏贴公告,线段树应用) ACM 题目地址:HDU 2795 Billboard 题意: 要在h*w宣传栏上贴公告,每条公告的高度都是为1的,并且每条公告都要 ...
- XxPay支付系统-boot版本 使用
https://segmentfault.com/a/1190000016987391?utm_source=tag-newest 有三个版本: spring boot 版本: spring clou ...
- 游戏server设计的一些感悟
Author:Echo Chen(陈斌) Email:chenb19870707@gmail.com Blog:Blog.csdn.net/chen19870707 Date:September 30 ...
- 嵌入式驱动开发之---dm8127 中sensor 驱动的改变
#IPNC_DEVICE := DM385IPNC_DEVICE := DM812x # Values are "LOW_POWER" and "FULL_FEATURE ...
- web 界面设计---大道至简
http://www.cnblogs.com/coder2012/p/4023442.html 一个非常精简的webpy页面博客 qing.weibo.com 新浪的轻微博也不错精简