
Centos 7.x 源码编译搭建Nginx
环境:
centos 7
防火墙关闭
Selinx关闭
Nginx Web安装
安装依赖库
yum install pcre-devel pcre gcc gcc-c++ zlib zlib-devel openssl openssl-devel -y (pcre库主要用于nginx正则表达)
下载Nginx源码包
cd /softwares
wget -c http://nginx.org/download/nginx-1.4.2.tar.gz
tar -xvzf nginx-1.4.2.tar.gz
预编译、编译Nginx
cd nginx-1.4.2
./configure --prefix=/usr/local/nginx --with-http_stub_status_module --with-http_ssl_module
make && make install
检查nginx是否安装正确
/usr/local/nginx/sbin/nginx -t # 返回OK即为安装成功
nginx.conf配置文件详解 (cd /usr/local/nginx/conf)
#user  nobody;      # Nginx用户及组

worker_processes  1;        # 工作进程:数目。根据硬件调整,通常等于CPU数量或者2倍于CPU

#error_log  logs/error.log;         # 错误日志:存放路径

#error_log  logs/error.log  notice;

#error_log  logs/error.log  info;

#pid        logs/nginx.pid;         # pid(进程标识符):存放路径

events {

    worker_connections  1024;

        # 每个工作进程的最大连接数量。根据硬件调整,和前面工作进程配合起来用,尽量大,但是别把cpu跑到100%就行。

        # 每个进程允许的最多连接数,nginx最大连接数=worker连接数*worker进程数

}

#设定http服务器

http {

    include       mime.types;       # 文件扩展名与文件类型映射表

    default_type  application/octet-stream;     # 默认文件类型

    #log_format  main  '$remote_addr - $remote_user [$time_local] "$request" '

    #                  '$status $body_bytes_sent "$http_referer" '

    #                  '"$http_user_agent" "$http_x_forwarded_for"';

    #access_log  logs/access.log  main;

    sendfile        on;

        # 开启高效文件传输模式,sendfile指令指定nginx是否调用sendfile函数来输出文件,对于普通应用设为 on,

        # 如果用来进行下载等应用磁盘IO重负载应用,可设置为off,以平衡磁盘与网络I/O处理速度,降低系统的负载。

        # 注意:如果图片显示不正常把这个改成off

    #tcp_nopush     on;     # 激活参数可把httpresponse header和文件的开始放在一个文件里发布,减少网络报文段数量,防止网络阻塞

    #keepalive_timeout  0;

        # 连接超时时间,单位是秒。

        # 客户端到服务器端的连接持续有效时间,当出现对服务器的后继请求时,keepalive-timeout功能可避免建立或重新建立连接

    keepalive_timeout  65;

    #gzip  on;          # 开启gzip压缩功能

    server {

        listen       80;        # 监听端口

        server_name  localhost;         # 域名可以有多个,用空格隔开

        #charset koi8-r;

        #access_log  logs/host.access.log  main;

        location / {

            root   html;        # 站点根目录,即网站程序放的目录

            index  index.html index.htm;        # 首页引导页排序

        }

        #error_page  404              /404.html;

        # redirect server error pages to the static page /50x.html

        #

        error_page   500 502 503 504  /50x.html;

        location = /50x.html {

            root   html;

        }

        # proxy the PHP scripts to Apache listening on 127.0.0.1:80

        #

        #location ~ \.php$ {

        #    proxy_pass   http://127.0.0.1;

        #}

        # pass the PHP scripts to FastCGI server listening on 127.0.0.1:9000

        #

        #location ~ \.php$ {

        #    root           html;

        #    fastcgi_pass   127.0.0.1:9000;

        #    fastcgi_index  index.php;

        #    fastcgi_param  SCRIPT_FILENAME  /scripts$fastcgi_script_name;

        #    include        fastcgi_params;

        #}

        # deny access to .htaccess files, if Apache's document root

        # concurs with nginx's one

        #

        #location ~ /\.ht {

        #    deny  all;

        #}

    }

    # another virtual host using mix of IP-, name-, and port-based configuration

    #

    #server {

    #    listen       8000;

    #    listen       somename:8080;

    #    server_name  somename  alias  another.alias;

    #    location / {

    #        root   html;

    #        index  index.html index.htm;

    #    }

    #}

    # HTTPS server

    #

    #server {

    #    listen       443;

    #    server_name  localhost;

    #    ssl                  on;

    #    ssl_certificate      cert.pem;

    #    ssl_certificate_key  cert.key;

    #    ssl_session_timeout  5m;

    #    ssl_protocols  SSLv2 SSLv3 TLSv1;

    #    ssl_ciphers  HIGH:!aNULL:!MD5;

    #    ssl_prefer_server_ciphers   on;

    #    location / {

    #        root   html;

    #        index  index.html index.htm;

    #    }

    #}

}
编辑nginx.conf配置文件
cd /usr/local/nginx/
vim nginx.conf
#user  nobody;

worker_processes  1;

#error_log  logs/error.log;

#error_log  logs/error.log  notice;

#error_log  logs/error.log  info;

#pid        logs/nginx.pid;

events {

    worker_connections  1024;

}

http {

    include       mime.types;

    default_type  application/octet-stream;

    #log_format  main  '$remote_addr - $remote_user [$time_local] "$request" '

    #                  '$status $body_bytes_sent "$http_referer" '

    #                  '"$http_user_agent" "$http_x_forwarded_for"';

    #access_log  logs/access.log  main;

    sendfile        on;

    #tcp_nopush     on;

    #keepalive_timeout  0;

    keepalive_timeout  65;

    #gzip  on;

    server {

        listen       80;

        server_name  www.myb.com  localhost;

        location / {

            root   html;

            index  index.html index.htm;

        }

    }

}
启动nginx
检查是否有80端口被占用(如若有80端口被启用,首先关掉80端口的相应服务,一般是apach服务)
netstat -tnl
netstat -tnl | grep 80 # 没有结果显示,便为正常
/usr/local/nginx/sbin/nginx # 启动nginx,此处直接回车即可,没有start
ps -ef | grep nginx
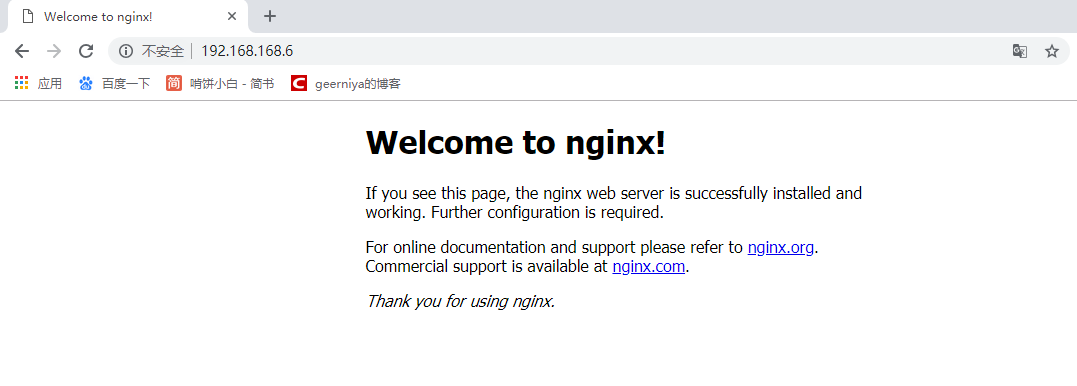
浏览器输入nginx服务器地址:192.168.168.6
Nginx 虚拟主机配置
修改nginx.conf配置文件的server段内容如下:
#virtual hosts config 2014/5/18

server {

        listen       80;

        server_name  www.a.com;

        #access_log  logs/host.access.log  main;

        location / {

            root   html/a;

            index  index.html index.htm;

        }

server {

        listen       80;

        server_name  www.b.com;

        #access_log  logs/host.access.log  main;

        location / {

            root   html/b;

            index  index.html index.htm;

        }

     }
mkdir –p /usr/local/nginx/html/{a,b}
cd /usr/local/nginx/html/a
vim index.html # 在目录a和b中分别写入不同的index.html
/usr/local/nginx/sbin/nginx -t
/usr/local/nginx/sbin/nginx -s reload # 平滑重启
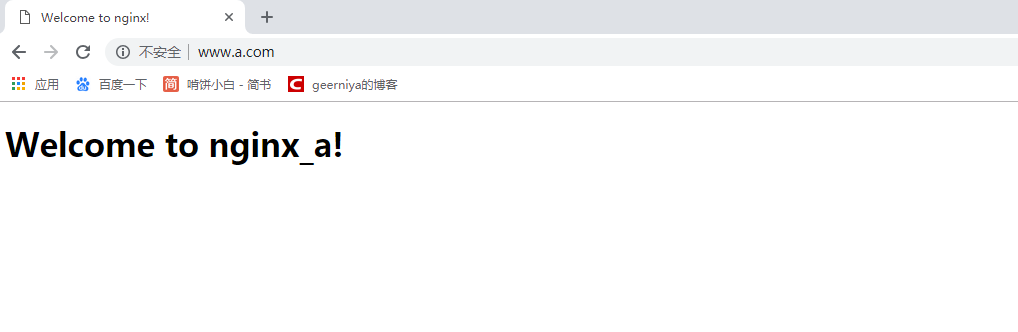
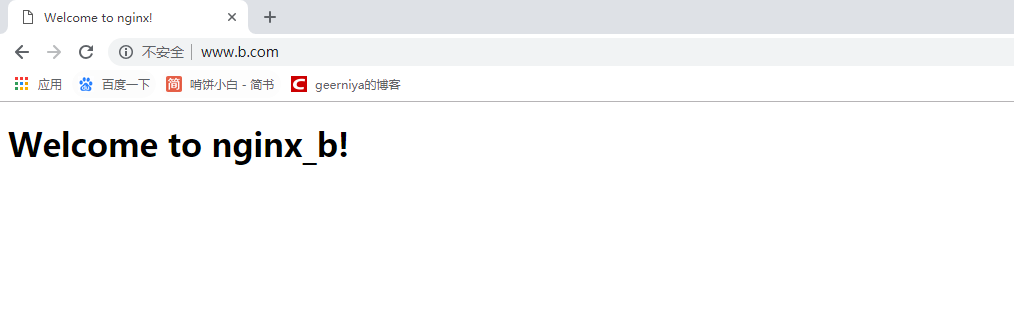
在windows的hosts文件中添加虚拟主机域名
在浏览器中访问虚拟主机
升级Nginx版本
cd /softwares
wget http://www.nginx.org/download/nginx-1.6.1.tar.gz
/usr/local/nginx/sbin/nginx -V # 查看升级之前旧版本的configure选项
编译新版本的Nginx
tar zxvf nginx-1.6.1.tar.gz
cd nginx-1.6.1
./configure --prefix=/usr/local/nginx --with-http_stub_status_module --with-http_ssl_module
make
mv /usr/local/nginx/sbin/nginx /usr/local/nginx/sbin/nginx.old # 备份旧版本的nginx的执行程序
cp /usr/src/nginx-1.6.1/objs/nginx /usr/local/nginx/sbin/ # 替换旧的Nginx的执行程序
kill -USR2 `cat /usr/local/nginx/logs/nginx.pid`
# 使nginx的旧版本停止接收请求,由Nginx新版本接替,且老进程处理完所有请求,关闭所有连接后停止服务
ls /usr/local/nginx/logs/ # 查看nginx日志目录会生成一个nginx.pid.oldbin文件,存放旧版本nginx 的pid号
/usr/local/nginx/sbin/nginx -t # 检查新版本Nginx是否正常
/usr/local/nginx/sbin/nginx -s reload # 平滑重启
/usr/local/nginx/sbin/nginx -v # 查看升级升级后的版本
netstat -aupt | grep nginx # 查看服务运行状态

reboot操作系统后,重启nginx服务报错:

报错处理:/usr/local/nginx/sbin/nginx -c /usr/local/nginx/conf/nginx.conf
Centos 7.x 源码编译搭建Nginx的更多相关文章
- CentOS 6.5 源码编译搭建LNMP(三台独立主机实现)
搭建前准备: 1.三台独立主机 nginx:192.168.1.102 php-fpm:192.168.1.105 mysql:192.168.1.103 2.相关软件的源码包 nginx:nginx ...
- CentOS 6.5 源码编译搭建LAMP(两台独立主机实现)
搭建前准备: 1.两台独立主机 httpd:192.168.1.105 php-fpm:192.168.1.105 mariadb:192.168.1.103 2.相关软件的源码包 httpd:htt ...
- Centos 7源码编译搭建Nginx
一.Nginx入门介绍 1. Nginx(engine x):[ˈendʒɪnks] 2. Nginx 是 Igor Sysoev 为俄罗斯访问量第二的 Rambler.ru 站点开发的,第一个公开版 ...
- CentOS 7上源码编译安装和配置LNMP Web+phpMyAdmin服务器环境
CentOS 7上源码编译安装和配置LNMP Web+phpMyAdmin服务器环境 什么是LNMP? LNMP(别名LEMP)是指由Linux, Nginx, MySQL/MariaDB, PHP/ ...
- CentOS 7.4 源码编译安装 Redis
一.CentOS 7.4 源码编译安装 Redis 1.下载源码并解压 wget http://download.redis.io/releases/redis-4.0.10.tar.gz tar ...
- CentOS7 源码编译安装Nginx
源码编译安装nginx 1.下载nginx源码包(这里以nginx-1.18.0为例) wget http://nginx.org/download/nginx-1.18.0.tar.gz 2 ...
- 源码编译安装nginx及设置开机启动项
1.上传nginx文档:解压到/data目录下,并安装依赖包tar xf nginx-1.20.1.tar.gz -C /data/cd /data/nginx-1.20.1/ && ...
- Centos7通过yum跟源码编译安装Nginx
源码编译安装 http://nginx.org/en/download.html 到官网下载,然后用XFTP上传到root目录 把文件解压出来 tar -zxvf nginx-1.16.0.tar.g ...
- centos 6.5源码编译安装subversion 1.8.10
一.简介 CentOS 6.5的yum源可以安装的SVN客户端版本太低了,1.6.11,所以需要升级到1.8.10,而官网有没有找到1.8.10的安装包,只能选择源码编译安装. 二.安装步骤 参考官网 ...
随机推荐
- LinkedHashMap源代码阅读
LinkedHashMap LinkedHashMap内部採用了散列表和链表实现Map接口,并能够保证迭代的顺序,和HashMap不同,其内部维护一个指向全部元素的双向链表,其决定了遍历的顺序,一般是 ...
- UISearchBar作为inputAccessoryView时的响应链
UISearchBar对象做为一个普通的视图对象加入到视图控制器的self.view中,定义.初始化.设置delegate.然后becomeFirstResponder,最后resignFirstRe ...
- luogu2763 试题库问题 二分匹配
关键词:二分匹配 本题用有上下界的网络流可以解决,但编程复杂度有些高. 每个类需要多少题,就设置多少个类节点.每个题节点向其所属的每一个类节点连一条边.这样就转化成了二分匹配问题. #include ...
- python chunk 方式读取大文件——本质上还是file read自身支持
参考:https://stackoverflow.com/questions/519633/lazy-method-for-reading-big-file-in-python 最优雅方式: file ...
- DCloud-MUI:utils
ylbtech-DCloud-MUI:utils 1.返回顶部 1.init mui框架将很多功能配置都集中在mui.init方法中,要使用某项功能,只需要在mui.init方法中完成对应参数配置即可 ...
- 第11课 Git GUI程序的基本功能
11-1 Git GUI程序的基本操作
- Beauty Contest(凸包求最远点)
http://poj.org/problem?id=2187 题意:求凸包上最远点距离的平方 思路:开始用旋转卡壳求的最远点,WA,改了好久..后来又改成枚举凸包上的点..AC了.. #include ...
- jquery的ajax同步异步执行
大家先看一段简单的jquery ajax 返回值的js 代码 function getReturnAjax{ $.ajax({ type:"POST", http:/ ...
- JavaScript中变速运动的数学模型构建
AB两地直线距离相距为S,机器人β从A点向B点行进.已知机器人β的每间隔固定时间行进一段路程,其下次行进的距离为当前距离B点路程的1/q(q为正整数),求机器人第n次行进距离的表达式an以及前n项和公 ...
- HDU1043 Eight
题目: 简单介绍一下八数码问题: 在一个3×3的九宫格上,填有1~8八个数字,空余一个位置,例如下图: 1 2 3 4 5 6 7 8 在上图中,由于右下角位置是空的 ...