
解决WIN7与虚拟机CentOS的文件夹共享问题
一、系统与软件
WIN7 64bit、VirtualBox 5.0.14、CentOS 6.5、SecureCRT 7.2.3
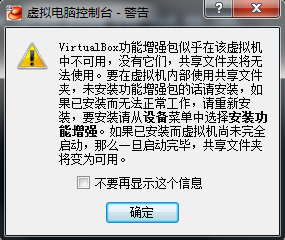
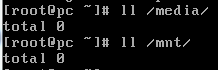
二、使用文件夹共享需要安装增强功能,但是安装时无法读取光盘iso文件

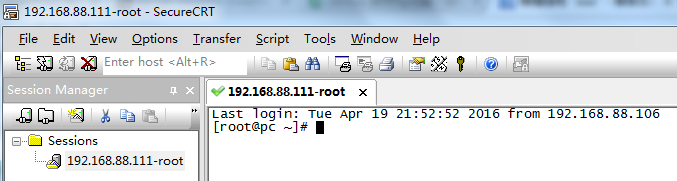
三、为了方便操作,配置静态IP,并使用CRT连接上去(参考http://my.oschina.net/allman90/blog/294847?fromerr=CotpElUe)
[root@pc ~]# vi /etc/sysconfig/network-scripts/ifcfg-eth0

DEVICE=eth0                               //指出设备名称

HWADDR=:::::4A                  //硬件Mac地址

TYPE=Ethernet                             //网络类型

UUID=c1d0e14c-cd39--af44-37daca90c1f9 //设备UUID编号

ONBOOT=yes                                //是否启动应用

NM_CONTROLLED=yes                         //设备是否被NetworkManager管理

BOOTPROT=static                           //启动类型 dhcp|static

BROADCAST=192.168.88.203                  //广播地址

IPADDR=192.168.88.111                     //IP地址

NETMASK=255.255.255.0                     //子网掩码

NETWORK=192.168.88.0                      //网络地址

GATEWAY=192.168.88.254                    //网关地址

DNS1=8.8.8.8                              //DNS

[root@pc ~]# service network restart

Shutting down interface eth0:                              [  OK  ]

Shutting down loopback interface:                          [  OK  ]

Bringing up loopback interface:                            [  OK  ]

Bringing up interface eth0:                                [  OK  ]

[root@pc ~]# ifconfig

eth0      Link encap:Ethernet  HWaddr :::::2C

          inet addr:192.168.88.111  Bcast:192.168.88.255  Mask:255.255.255.0

          inet6 addr: fe80::a00:27ff:fe57:732c/ Scope:Link

          UP BROADCAST RUNNING MULTICAST  MTU:  Metric:

          RX packets: errors: dropped: overruns: frame:

          TX packets: errors: dropped: overruns: carrier:

          collisions: txqueuelen:

          RX bytes: (11.9 MiB)  TX bytes: (341.4 KiB)

lo        Link encap:Local Loopback

          inet addr:127.0.0.1  Mask:255.0.0.0

          inet6 addr: ::/ Scope:Host

          UP LOOPBACK RUNNING  MTU:  Metric:

          RX packets: errors: dropped: overruns: frame:

          TX packets: errors: dropped: overruns: carrier:

          collisions: txqueuelen:

          RX bytes: (0.0 b)  TX bytes: (0.0 b)

[root@pc ~]# ping www.baidu.com

PING www.baidu.com (111.13.100.92) () bytes of data.

 bytes from 111.13.100.92: icmp_seq= ttl= time=59.1 ms

 bytes from 111.13.100.92: icmp_seq= ttl= time=65.4 ms
四、既然无法读取光盘,便采用FTP上传,配置FTP(参考http://os.51cto.com/art/201408/448630.htm)
[root@pc ~]# yum -y install vsftpd                                        // 安装FTP

...

Complete!

[root@pc ~]# service vsftpd start                                         // 启动FTP

Starting vsftpd for vsftpd:                                [  OK  ]

[root@pc ~]# vi /etc/sysconfig/iptables                                   // 防火墙开启21端口

-A INPUT -m state --state NEW -m tcp -p tcp --dport  -j ACCEPT

-A INPUT -m state --state NEW -m tcp -p tcp --dport  -j ACCEPT

[root@pc ~]# service iptables restart                                     // 重启防火墙

iptables: Flushing firewall rules:                         [  OK  ]

iptables: Setting chains to policy ACCEPT: filter          [  OK  ]

iptables: Unloading modules:                               [  OK  ]

iptables: Applying firewall rules:                         [  OK  ]

[root@pc ~]# cat /etc/passwd | grep ftp                                   // 新增一个账户ftpuser,并设置密码

ftp:x:::FTP User:/var/ftp:/sbin/nologin

[root@pc ftp]# useradd -g ftp ftpuser

[root@pc ftp]# passwd ftpuser

Changing password for user ftpuser.
无法读取目录 
[root@pc ~]# getsebool -a | grep ftp                        // 开启外网访问

allow_ftpd_full_access --> off

ftp_home_dir --> off

[root@pc ~]# setsebool -P allow_ftpd_full_access

[root@pc ~]# setsebool -P ftp_home_dir

[root@pc ~]# vi /etc/vsftpd/vsftpd.conf                     // 设定passive模式端口范围

pasv_min_port=

pasv_max_port=

[root@pc ~]# service vsftpd restart                         // 重启FTP

[root@pc ~]# vi /etc/sysconfig/iptables                     // 开启防火墙对应范围端口

-A INPUT -m state --state NEW -m tcp -p tcp --dport : -j ACCEPT

[root@pc ~]# service iptables restart                       // 重启防火墙
正常连接上虚拟机 
把VirtualBox安装目录下的 VBoxGuestAdditions.iso 解压,并通过FTP客户端filezilla上传到虚拟机
[root@pc ~]# cd /home/ftpuser/

[root@pc ftpuser]# ll

total

drwxr-xr-x.  ftpuser ftp  Apr  : VBoxGuestAdditions
五、开始安装增强功能
[root@pc ~]# cd /home/ftpuser/VBoxGuestAdditions/

[root@pc VBoxGuestAdditions]# ll

total

drwxr-xr-x.  ftpuser ftp      Apr  : 32Bit

drwxr-xr-x.  ftpuser ftp      Apr  : 64Bit

-rw-r--r--.  ftpuser ftp       Apr  : AUTORUN.INF

-rw-r--r--.  ftpuser ftp      Apr  : autorun.sh

drwxr-xr-x.  ftpuser ftp      Apr  : cert

drwxr-xr-x.  ftpuser ftp      Apr  : OS2

-rw-r--r--.  ftpuser ftp      Apr  : runasroot.sh

-rw-r--r--.  ftpuser ftp   Apr  : VBoxLinuxAdditions.run

-rw-r--r--.  ftpuser ftp  Apr  : VBoxSolarisAdditions.pkg

-rw-r--r--.  ftpuser ftp  Apr  : VBoxWindowsAdditions-amd64.exe

-rw-r--r--.  ftpuser ftp    Apr  : VBoxWindowsAdditions.exe

-rw-r--r--.  ftpuser ftp  Apr  : VBoxWindowsAdditions-x86.exe

[root@pc VBoxGuestAdditions]# chmod +x runasroot.sh

[root@pc VBoxGuestAdditions]# ./runasroot.sh

Usage: runasroot.sh DESCRIPTION COMMAND [ADVICE]

Attempt to execute COMMAND with root privileges, displaying DESCRIPTION if

possible and displaying ADVICE if possible if no su()-like tool is available.

[root@pc VBoxGuestAdditions]# chmod +x VBoxLinuxAdditions.run

[root@pc VBoxGuestAdditions]# ./VBoxLinuxAdditions.run

Verifying archive integrity... All good.

Uncompressing VirtualBox 5.0. Guest Additions for Linux............

VirtualBox Guest Additions installer

Copying additional installer modules ...

Installing additional modules ...

Removing existing VirtualBox non-DKMS kernel modules       [  OK  ]

Building the VirtualBox Guest Additions kernel modules

The gcc utility was not found. If the following module compilation fails then

this could be the reason and you should try installing it.

The headers for the current running kernel were not found. If the following

module compilation fails then this could be the reason.

The missing package can be probably installed with

yum install kernel-devel-2.6.-.el6.x86_64

Building the main Guest Additions module                   [FAILED]

(Look at /var/log/vboxadd-install.log to find out what went wrong)

Doing non-kernel setup of the Guest Additions              [  OK  ]

Installing the Window System drivers

Could not find the X.Org or XFree86 Window System, skipping.

[root@pc VBoxGuestAdditions]# cat /var/log/vboxadd-install.log

/tmp/vbox./Makefile.include.header:: *** Error: unable to find the sources of your current Linux kernel. Specify KERN_DIR=<directory> and run Make again.  Stop.

Creating user for the Guest Additions.

Creating udev rule for the Guest Additions kernel module.
查找报错 Building the main Guest Additions module [FAILED](参考 http://www.xuebuyuan.com/2039380.html)
[root@pc VBoxGuestAdditions]# yum -y install gcc make gcc-c++

[root@pc VBoxGuestAdditions]# yum -y install kernel

[root@pc VBoxGuestAdditions]# yum -y install kernel-devel

[root@pc VBoxGuestAdditions]# yum -y install kernel-headers
重启CentOS并再次执行VBoxLinuxAdditions.run,依旧报错(参考 http://askubuntu.com/questions/22743/how-do-i-install-guest-additions-in-a-virtualbox-vm)
[root@pc VBoxGuestAdditions]# yum update

[root@pc ~]# /opt/VBoxGuestAdditions-5.0./uninstall.sh

[root@pc ~]# /home/ftpuser/VBoxGuestAdditions/VBoxLinuxAdditions.run

[root@pc ~]# cat /var/log/vboxadd-install.log

/bin/sh: perl: command not found
这次变成报没有 perl,于是 yum -y install perl 补齐
再次进行安装
[root@pc ~]# /opt/VBoxGuestAdditions-5.0./uninstall.sh

[root@pc ~]# /home/ftpuser/VBoxGuestAdditions/VBoxLinuxAdditions.run

Verifying archive integrity... All good.

Uncompressing VirtualBox 5.0. Guest Additions for Linux............

VirtualBox Guest Additions installer

You appear to have a version of the VBoxGuestAdditions software

on your system which was installed from a different source or using a

different type of installer.  If you installed it from a package from your

Linux distribution or if it is a default part of the system then we strongly

recommend that you cancel this installation and remove it properly before

installing this version.  If this is simply an older or a damaged

installation you may safely proceed.

Do you wish to continue anyway? [yes or no]

yes

Removing existing VirtualBox non-DKMS kernel modules       [  OK  ]

grep: /opt/VBoxGuestAdditions-*/init/*: No such file or directory

Copying additional installer modules ...

Installing additional modules ...

Removing existing VirtualBox non-DKMS kernel modules       [  OK  ]

Building the VirtualBox Guest Additions kernel modules

Building the main Guest Additions module                   [  OK  ]

Building the shared folder support module                  [  OK  ]

Building the OpenGL support module                         [FAILED]

(Look at /var/log/vboxadd-install.log to find out what went wrong. The module is not built but the others are.)

Doing non-kernel setup of the Guest Additions              [  OK  ]

Starting the VirtualBox Guest Additions                    [  OK  ]

Installing the Window System drivers

Could not find the X.Org or XFree86 Window System, skipping.
终于成功了,其中 OpenGL 失败是因为我的CentOS是精简版没有界面的!
六、设置共享

[root@pc ~]# ll /media/

total

drwxrwx---.  root vboxsf  Mar  : sf_win_www
----------------------------------2019-01-10----------------------------------
 [root@localhost ~]# df

 Filesystem           1K-blocks     Used Available Use% Mounted on

 /dev/mapper/VolGroup-lv_root

                             % /

 tmpfs                                  % /dev/shm

 /dev/sda1                         % /boot

 .host://www          165686344 81123004  84563340  49% /datas/htdocs

 .host://log          165686344 81123004  84563340  49% /datas/log

 .host://vmware       157300384 89902340  67398044  58% /datas/vmware

 [root@localhost ~]# vmware-hgfsclient #查看共享目录

 www

 vmware

 log

 python

 [root@localhost ~]# mount -t vmhgfs .host:/python /datas/python #挂载

 Error: cannot canonicalize mount point: No such file or directory

 [root@localhost ~]# mkdir /datas/python

 [root@localhost ~]# mount -t vmhgfs .host:/python /datas/python

 [root@localhost ~]# df

 Filesystem           1K-blocks     Used Available Use% Mounted on

 /dev/mapper/VolGroup-lv_root

                             % /

 tmpfs                                  % /dev/shm

 /dev/sda1                         % /boot

 .host:/www          165686344 81123004  84563340  49% /datas/htdocs

 .host:/log          165686344 81123004  84563340  49% /datas/log

 .host:/vmware       157300384 89902340  67398044  58% /datas/vmware

 .host:/python       165686344 81123004  84563340  49% /datas/python

 [root@localhost ~]# ll /datas/python/

 total

 -rwxrwxrwx  root root     May     .log

 [root@localhost ~]# vim /etc/fstab #自动挂载

 .host:/python          /datas/python           vmhgfs  iocharset=utf8,rw,uid=www,gid=www 0 1

 [root@localhost ~]# init

 [root@localhost ~]# df

 Filesystem           1K-blocks     Used Available Use% Mounted on

 /dev/mapper/VolGroup-lv_root

                             % /

 tmpfs                                  % /dev/shm

 /dev/sda1                         % /boot

 .host:/www          165686344 81123004  84563340  49% /datas/htdocs

 .host:/log          165686344 81123004  84563340  49% /datas/log

 .host:/vmware       157300384 89902340  67398044  58% /datas/vmware

 .host:/python       165686344 81123004  84563340  49% /datas/python
https://blog.csdn.net/qq_30309813/article/details/79830356
https://www.cnblogs.com/qiyebao/p/4484047.html
解决WIN7与虚拟机CentOS的文件夹共享问题的更多相关文章
- centos 下文件夹共享
[root@localhost share]# yum install samba -y[root@localhost share]# cp /etc/samba/smb.conf /etc/samb ...
- 解决win7无法打开chm格式文件的问题
解决win7无法打开chm格式文件的问题. (一).简单方法(本人用的这个) 1.打开chm2.win7提示安全问题3.chm无法显示内容4.关闭chm5.右键点击chm,点击“解除锁定”,ok 没 ...
- [转]Virtualbox主机和虚拟机之间文件夹共享及双向拷贝(Windows<->Windows, Windows<->Linux)
本文转自:https://www.jb51.net/article/97271.htm 最近学习Virtualbox的一些知识,记录下,Virtualbox下如何实现主机和虚拟机之间文件夹共享及双向拷 ...
- VMWare12虚拟机实现主客机间的文件拖拽(复制粘贴)和文件夹共享
版本: 主机:Windows 7 64位旗舰版 虚拟机: VMWare 12 + Windows 7 64位旗舰版 VMWare pro 12 + Ubuntu16.04LTS 64位 注:由于VMW ...
- 2017-7-19-每日博客-关于Linux下的CentOS中文件夹基本操作命令.doc
CentOS中文件夹基本操作命令 文件(夹)查看类命令 ls--显示指定目录下内容 说明:ls 显示结果以不同的颜色来区分文件类别.蓝色代表目录,灰色代表普通文件,绿色代表可执行文件,红色代表压缩文件 ...
- win7文件夹共享(不新建账户、不带密码直接访问)
1.右键需要共享的文件夹>共享>特定用户>选择Everyone>“添加”>“共享” 2.打开控制面板>按类别的查看方式>网络和Internet下的选择家庭组和 ...
- 负载均衡下的资源文件配置/多站点下的资源文件夹共享(Windows IIS)
前言: 负载均衡用的是NLB,微软的方案不太靠谱,举个例子吧,AB两台服务器负载出C,如果用户访问访问C之后分配的是A,那么如果A挂了,是不会自动切换到B的.据说后来还有一种NLB的方案可以实现,也不 ...
- 工程师技术(四):配置SMB文件夹共享、多用户Samba挂载、普通NFS共享的实现、安全NFS共享的实现
一.配置SMB文件夹共享 目标: 本例要求在虚拟机 server0 上发布两个共享文件夹,具体要求如下: 1> 此服务器必须是 STAFF 工作组的一个成员 2> 发布目录 /comm ...
- Powershell学习之道-文件夹共享及磁盘映射
导读 在Linux环境下,我们很轻易就能得心应手地通过命令操作一切事物,在Windows下,Powershell也算是后起之秀,提供大量的cmdlet以及c#的横向拓展.下面将由小编带领大家通过Pow ...
随机推荐
- 当MyEclipse突然异常关闭
今天的博文主要记录一个问题,就是当MyEclipse异常关闭后,再次开启环境,导致Tomcat无法启动的问题解决方案 问题描述:在MyEclipse启动或者是tomcat启动的时候出现:Address ...
- 在JS中获取文件点之后的后缀字符
var upFileName = $("#fileToUpload").val();var index1=upFileName.lastIndexOf(".") ...
- Objective-C 装饰模式--简单介绍和使用
装饰模式是在不必改变原类文件和使用继承的情况下,动态地扩展一个对象的功能.它是通过创建一个包装对象,也就是装饰来包裹真实的对象. 比如游戏机有一个GamePad类, 现在要增加一个作弊功能(例如100 ...
- CentOS On VirtualBox
背景 后台开发需要随时与服务器交互,本人使用Mac开发.但是不愿意在Mac上直接安装redis以及mysql等等工具.所以选择在VirtualenvBox下安装一个服务器系统,并且使用ssh与其连接. ...
- session和cookie的区别
cookie机制和session机制的区别 具体来说cookie机制采用的是在客户端保持状态的方案,而session机制采用的是在服务器端保持状态的方案. 同时我们也看到,由于才服务器 ...
- 【Win10 应用开发】语音命令与App Service集成
昨天,老周演示了语音命令集成这一高大上功能,今天咱们来点更高级的语音命令. 在昨天的例子中,响应语音命令是需要启动应用程序的,那么如果可以不启动应用程序,就直接在小娜面板上进行交互,是不是会更高大小呢 ...
- 记一次ASP.NET MVC性能优化(实际项目中)
前言 在开发中为了紧赶项目进度而未去关注性能的问题,在项目逐渐稳定下来后发现性能令人感到有点忧伤,于是开始去关注这方面,本篇为记录在开发中遇到的问题并解决,不喜勿喷.注意:以下问题都是在移动端上出现, ...
- Android重写菜单增加系统自带返回键
条件:当前项目导入了ActionBarSherlock这个jar包,这个jar包的作用为了程序的兼容性,考虑低版本的问题. 学习ActionBarSherlock参考博客链接:http://blog. ...
- 本地maven仓库使用及配置
本地仓库的创建 下载 nexus-2.11.4-01-bundle.zip 解压并运行C:\nexus-2.11.4-01-bundle\nexus-2.11.4-01\bin\jsw\windows ...
- PHP中AJAX的使用(完整实例【大牛可飘过】)
有一段时间不写关于AJAX的东西了,最近和同学参加个比赛,要做一个类似博客的东西,用到了AJAX的东西,在写东西之前为了再熟悉一下AJAX,自己做了个关于AJAX的小事例与大家分享一下. AJAX在j ...