03.redis与ssm整合(mybatis二级缓存)
SSM+redis整合
ssm框架之前已经搭建过了,这里不再做代码复制工作。
这里主要是利用redis去做mybatis的二级缓存,mybaits映射文件中所有的select都会刷新已有缓存,如果不存在就会新建缓存,所有的insert,update操作都会更新缓存。
redis的好处也显而易见,可以使系统的数据访问性能更高。本节只是展示了整合方法和效果,后面会补齐redis集群、负载均衡和session共享的文章。
下面就开始整合工作:

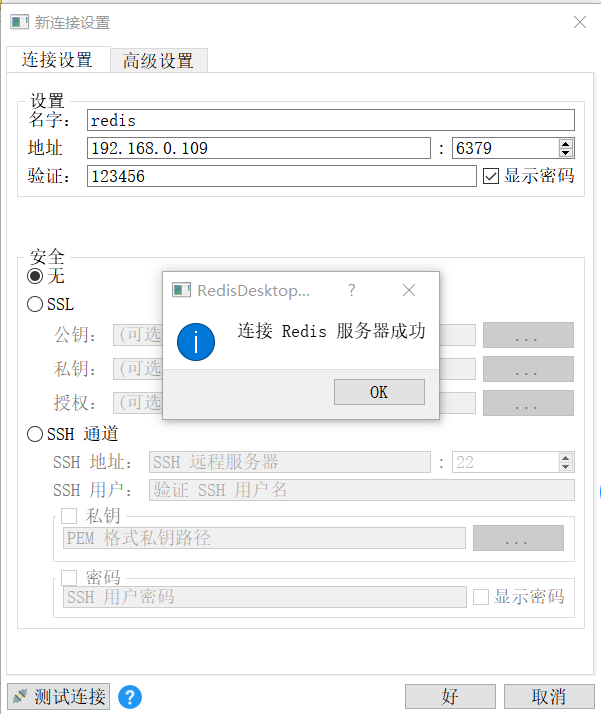
后台首先启动redis-server(后台启动与远程连接linux服务的方法都需要改redis.conf文件),启动命令“./src/redis-server ./redis.conf”
我这里是windows系统下开发的,推荐一个可视化工具“Redis Desktop manager”,需要远程连接linux下的redis,需要linux下开启端口对外开放(具体方法是修改/etc/sysconfig/iptables文件,增加对外端口开发命令)。
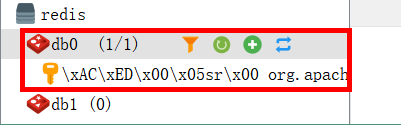
以上操作都完成后,即可远程连接成功了,如图:
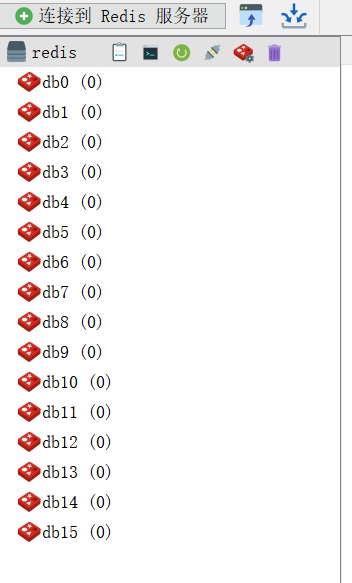
现在还没有缓存记录,下面进入代码阶段,首先在pom.xml中增加需要的redis jar包
 <dependency>

             <groupId>redis.clients</groupId>

             <artifactId>jedis</artifactId>

             <version>2.9.0</version>

         </dependency>

         <dependency>

             <groupId>org.springframework.data</groupId>

             <artifactId>spring-data-redis</artifactId>

             <version>1.6.2.RELEASE</version>

         </dependency>

         <dependency>

             <groupId>org.mybatis</groupId>

             <artifactId>mybatis-ehcache</artifactId>

             <version>1.0.0</version>

         </dependency>

           <!-- 添加druid连接池包 -->

         <dependency>

             <groupId>com.alibaba</groupId>

             <artifactId>druid</artifactId>

             <version>1.0.24</version>

         </dependency>
pom.xml写好后,还需要新增两个配置文件:redis.properties
redis.host=192.168.0.109

redis.port=6379

redis.pass=123456

redis.maxIdle=200

redis.maxActive=1024

redis.maxWait=10000

redis.testOnBorrow=true
其中字段也都很好理解,再加入配置文件:spring-redis.xml
 <beans xmlns="http://www.springframework.org/schema/beans"

   xmlns:xsi="http://www.w3.org/2001/XMLSchema-instance"

   xmlns:p="http://www.springframework.org/schema/p"

   xmlns:mvc="http://www.springframework.org/schema/mvc"

   xmlns:util="http://www.springframework.org/schema/util"

   xmlns:aop="http://www.springframework.org/schema/aop"

   xmlns:context="http://www.springframework.org/schema/context"

   xmlns:task="http://www.springframework.org/schema/task"

   xsi:schemaLocation="http://www.springframework.org/schema/beans

       http://www.springframework.org/schema/beans/spring-beans-4.3.xsd

       http://www.springframework.org/schema/util

       http://www.springframework.org/schema/util/spring-util-4.3.xsd

       http://www.springframework.org/schema/mvc

       http://www.springframework.org/schema/mvc/spring-mvc-4.3.xsd

       http://www.springframework.org/schema/aop

       http://www.springframework.org/schema/aop/spring-aop-4.3.xsd

       http://www.springframework.org/schema/context

       http://www.springframework.org/schema/context/spring-context-4.3.xsd">

     <!-- 连接池基本参数配置,类似数据库连接池 -->

      <context:property-placeholder location="classpath*:redis.properties" />

     <bean id="poolConfig" class="redis.clients.jedis.JedisPoolConfig">

         <property name="maxTotal" value="${redis.maxActive}"/>

         <property name="maxIdle" value="${redis.maxIdle}" />

         <property name="testOnBorrow" value="${redis.testOnBorrow}"/>

     </bean>

     <!-- 连接池配置,类似数据库连接池 -->

     <bean id="jedisConnectionFactory" class="org.springframework.data.redis.connection.jedis.JedisConnectionFactory" >

         <property name="hostName" value="${redis.host}"></property>

         <property name="port" value="${redis.port}"></property>

         <property name="password" value="${redis.pass}"></property>

         <property name="poolConfig"  ref="poolConfig"></property>

     </bean>

     <!-- 调用连接池工厂配置 -->

     <!-- <bean id="redisTemplate" class=" org.springframework.data.redis.core.RedisTemplate">

         <property name="jedisConnectionFactory" ref="jedisConnectionFactory"></property>

         如果不配置Serializer,那么存储的时候智能使用String,如果用User类型存储,那么会提示错误User can't cast  to String!!!

          <property name="keySerializer">

             <bean

             class="org.springframework.data.redis.serializer.StringRedisSerializer" />

         </property>

         <property name="valueSerializer">

             <bean

                 class="org.springframework.data.redis.serializer.JdkSerializationRedisSerializer" />

         </property>

     </bean> -->

     <bean id="redisCacheTransfer" class="com.cjl.util.RedisCacheTransfer">

         <property name="jedisConnectionFactory" ref="jedisConnectionFactory" />

     </bean>

 </beans>
配置文件写好后,就开始java代码的编写:
JedisClusterFactory.java
 package com.cjl.util;

 import java.util.HashSet;

 import java.util.Properties;

 import java.util.Set;

 import java.util.regex.Pattern;

 import org.apache.commons.pool2.impl.GenericObjectPoolConfig;

 import org.springframework.beans.factory.FactoryBean;

 import org.springframework.beans.factory.InitializingBean;

 import org.springframework.core.io.Resource;

 import redis.clients.jedis.HostAndPort;

 import redis.clients.jedis.JedisCluster;

 public class JedisClusterFactory implements FactoryBean<JedisCluster>, InitializingBean {

     private Resource addressConfig;

     private String addressKeyPrefix;

     private JedisCluster jedisCluster;

     private Integer timeout;

     private Integer maxRedirections;

     private GenericObjectPoolConfig genericObjectPoolConfig;

     private Pattern p = Pattern.compile("^.+[:]\\d{1,5}\\s*$");

     public JedisCluster getObject() throws Exception {

         return jedisCluster;

     }

     public Class<? extends JedisCluster> getObjectType() {

         return (this.jedisCluster != null ? this.jedisCluster.getClass() : JedisCluster.class);

     }

     public boolean isSingleton() {

         return true;

     }

     private Set<HostAndPort> parseHostAndPort() throws Exception {

         try {

             Properties prop = new Properties();

             prop.load(this.addressConfig.getInputStream());

             Set<HostAndPort> haps = new HashSet<HostAndPort>();

             for (Object key : prop.keySet()) {

                 if (!((String) key).startsWith(addressKeyPrefix)) {

                     continue;

                 }

                 String val = (String) prop.get(key);

                 boolean isIpPort = p.matcher(val).matches();

                 if (!isIpPort) {

                     throw new IllegalArgumentException("ip 或 port 不合法");

                 }

                 String[] ipAndPort = val.split(":");

                 HostAndPort hap = new HostAndPort(ipAndPort[0], Integer.parseInt(ipAndPort[1]));

                 haps.add(hap);

             }

             return haps;

         } catch (IllegalArgumentException ex) {

             throw ex;

         } catch (Exception ex) {

             throw new Exception("解析 jedis 配置文件失败", ex);

         }

     }

     public void afterPropertiesSet() throws Exception {

         Set<HostAndPort> haps = this.parseHostAndPort();

         jedisCluster = new JedisCluster(haps, timeout, maxRedirections, genericObjectPoolConfig);

     }

     public void setAddressConfig(Resource addressConfig) {

         this.addressConfig = addressConfig;

     }

     public void setTimeout(int timeout) {

         this.timeout = timeout;

     }

     public void setMaxRedirections(int maxRedirections) {

         this.maxRedirections = maxRedirections;

     }

     public void setAddressKeyPrefix(String addressKeyPrefix) {

         this.addressKeyPrefix = addressKeyPrefix;

     }

     public void setGenericObjectPoolConfig(GenericObjectPoolConfig genericObjectPoolConfig) {

         this.genericObjectPoolConfig = genericObjectPoolConfig;

     }

 }
RedisCache.java
 package com.cjl.util;

 import java.util.concurrent.locks.ReadWriteLock;

 import java.util.concurrent.locks.ReentrantReadWriteLock;

 import org.apache.ibatis.cache.Cache;

 import org.slf4j.Logger;

 import org.slf4j.LoggerFactory;

 import org.springframework.data.redis.connection.jedis.JedisConnection;

 import org.springframework.data.redis.connection.jedis.JedisConnectionFactory;

 import org.springframework.data.redis.serializer.JdkSerializationRedisSerializer;

 import org.springframework.data.redis.serializer.RedisSerializer;

 import redis.clients.jedis.exceptions.JedisConnectionException;

 public class RedisCache implements Cache {

     private static final Logger logger = LoggerFactory.getLogger(RedisCache.class);

     private static JedisConnectionFactory jedisConnectionFactory;

     private final String id;

     private final ReadWriteLock rwl = new ReentrantReadWriteLock();

     public RedisCache(final String id) {

         if (id == null) {

             throw new IllegalArgumentException("Cache instances require an ID");

         }

         logger.debug("MybatisRedisCache:id=" + id);

         this.id = id;

     }

     /**

      * 清空所有缓存

      */

     public void clear() {

         rwl.readLock().lock();

         JedisConnection connection = null;

         try {

             connection = jedisConnectionFactory.getConnection();

             connection.flushDb();

             connection.flushAll();

         } catch (JedisConnectionException e) {

             e.printStackTrace();

         } finally {

             if (connection != null) {

                 connection.close();

             }

             rwl.readLock().unlock();

         }

     }

     public String getId() {

         return this.id;

     }

     /**

      * 获取缓存总数量

      */

     public int getSize() {

         int result = 0;

         JedisConnection connection = null;

         try {

             connection = jedisConnectionFactory.getConnection();

             result = Integer.valueOf(connection.dbSize().toString());

             logger.info("添加mybaits二级缓存数量:" + result);

         } catch (JedisConnectionException e) {

             e.printStackTrace();

         } finally {

             if (connection != null) {

                 connection.close();

             }

         }

         return result;

     }

     public void putObject(Object key, Object value) {

         rwl.writeLock().lock();

         JedisConnection connection = null;

         try {

             connection = jedisConnectionFactory.getConnection();

             RedisSerializer<Object> serializer = new JdkSerializationRedisSerializer();

             connection.set(SerializeUtil.serialize(key), SerializeUtil.serialize(value));

             logger.info("添加mybaits二级缓存key=" + key + ",value=" + value);

         } catch (JedisConnectionException e) {

             e.printStackTrace();

         } finally {

             if (connection != null) {

                 connection.close();

             }

             rwl.writeLock().unlock();

         }

     }

     public Object getObject(Object key) {

         // 先从缓存中去取数据,先加上读锁

         rwl.readLock().lock();

         Object result = null;

         JedisConnection connection = null;

         try {

             connection = jedisConnectionFactory.getConnection();

             RedisSerializer<Object> serializer = new JdkSerializationRedisSerializer();

             result = serializer.deserialize(connection.get(serializer.serialize(key)));

             logger.info("命中mybaits二级缓存,value=" + result);

         } catch (JedisConnectionException e) {

             e.printStackTrace();

         } finally {

             if (connection != null) {

                 connection.close();

             }

             rwl.readLock().unlock();

         }

         return result;

     }

     public Object removeObject(Object key) {

         rwl.writeLock().lock();

         JedisConnection connection = null;

         Object result = null;

         try {

             connection = jedisConnectionFactory.getConnection();

             RedisSerializer<Object> serializer = new JdkSerializationRedisSerializer();

             result = connection.expire(serializer.serialize(key), 0);

         } catch (JedisConnectionException e) {

             e.printStackTrace();

         } finally {

             if (connection != null) {

                 connection.close();

             }

             rwl.writeLock().unlock();

         }

         return result;

     }

     public static void setJedisConnectionFactory(JedisConnectionFactory jedisConnectionFactory) {

         RedisCache.jedisConnectionFactory = jedisConnectionFactory;

     }

     public ReadWriteLock getReadWriteLock() {

         // TODO Auto-generated method stub

         return rwl;

     }

 }
RedisCacheTransfer.java
 package com.cjl.util;

 import org.springframework.beans.factory.annotation.Autowired;

 import org.springframework.data.redis.connection.jedis.JedisConnectionFactory;

 /**

  * 静态注入中间类

  */

 public class RedisCacheTransfer {

      @Autowired

         public void setJedisConnectionFactory(JedisConnectionFactory jedisConnectionFactory) {

             RedisCache.setJedisConnectionFactory(jedisConnectionFactory);

         }

 }
SerializeUtil.java
 package com.cjl.util;

 import java.io.ByteArrayInputStream;

 import java.io.ByteArrayOutputStream;

 import java.io.ObjectInputStream;

 import java.io.ObjectOutputStream;

 /**

  *

  * @author cjl

  *

  */

 public class SerializeUtil {

     /**

      * 序列化

      */

     public static byte[] serialize(Object object) {

         ObjectOutputStream oos = null;

         ByteArrayOutputStream baos = null;

         try {

             // 序列化

             baos = new ByteArrayOutputStream();

             oos = new ObjectOutputStream(baos);

             oos.writeObject(object);

             byte[] bytes = baos.toByteArray();

             return bytes;

         } catch (Exception e) {

             e.printStackTrace();

         }

         return null;

     }

     /**

      *反序列化

      */

     public static Object unserialize(byte[] bytes) {

         if (bytes !=null) {

             ByteArrayInputStream bais = null;

             try {

                 // 反序列化

                 bais = new ByteArrayInputStream(bytes);

                 ObjectInputStream ois = new ObjectInputStream(bais);

                 return ois.readObject();

             } catch (Exception e) {

             }

         }

         return null;

     }

 }
所有东西准备齐全后还需要修改映射文件
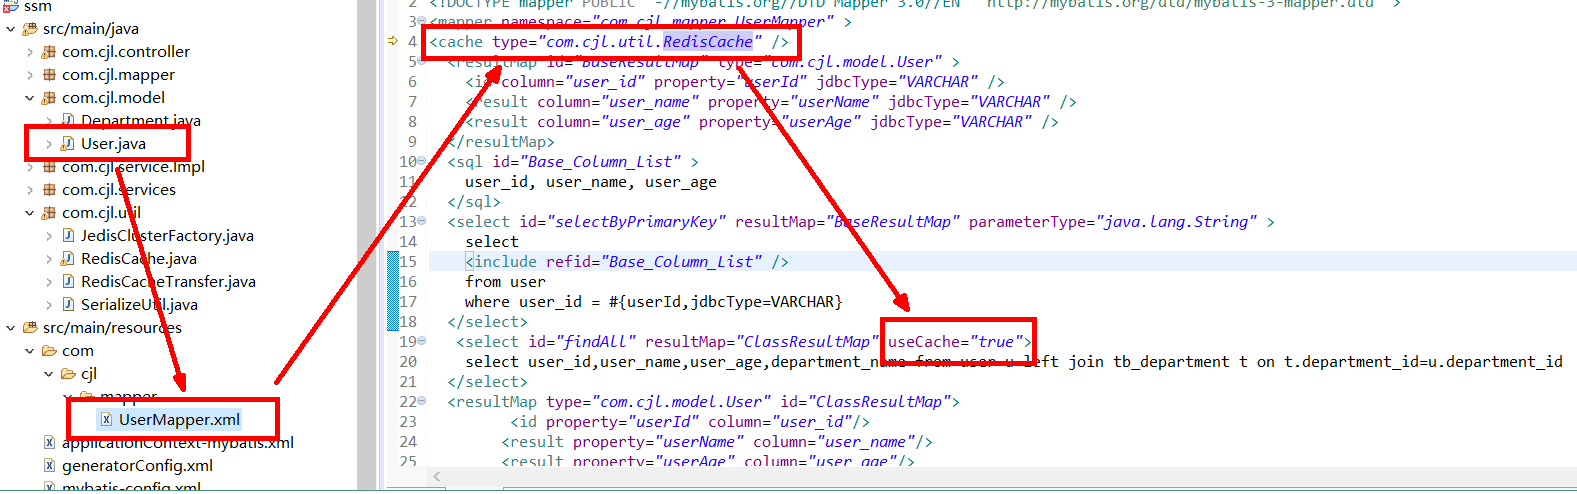
要使mybaits缓存生效,还需如上图这样开启二级缓存。配置文件还需要在web.xml中加载生效
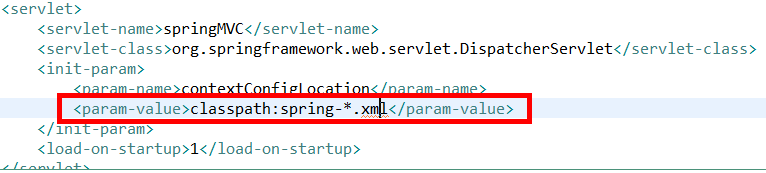
一切准备就绪后,启动服务
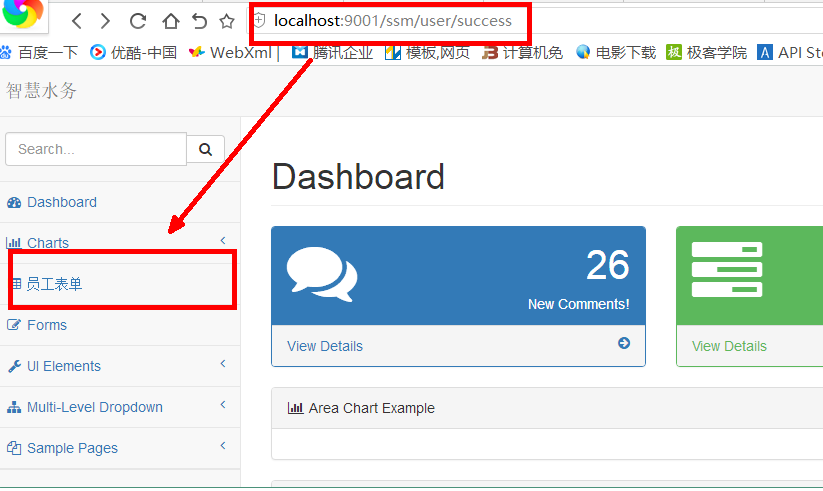
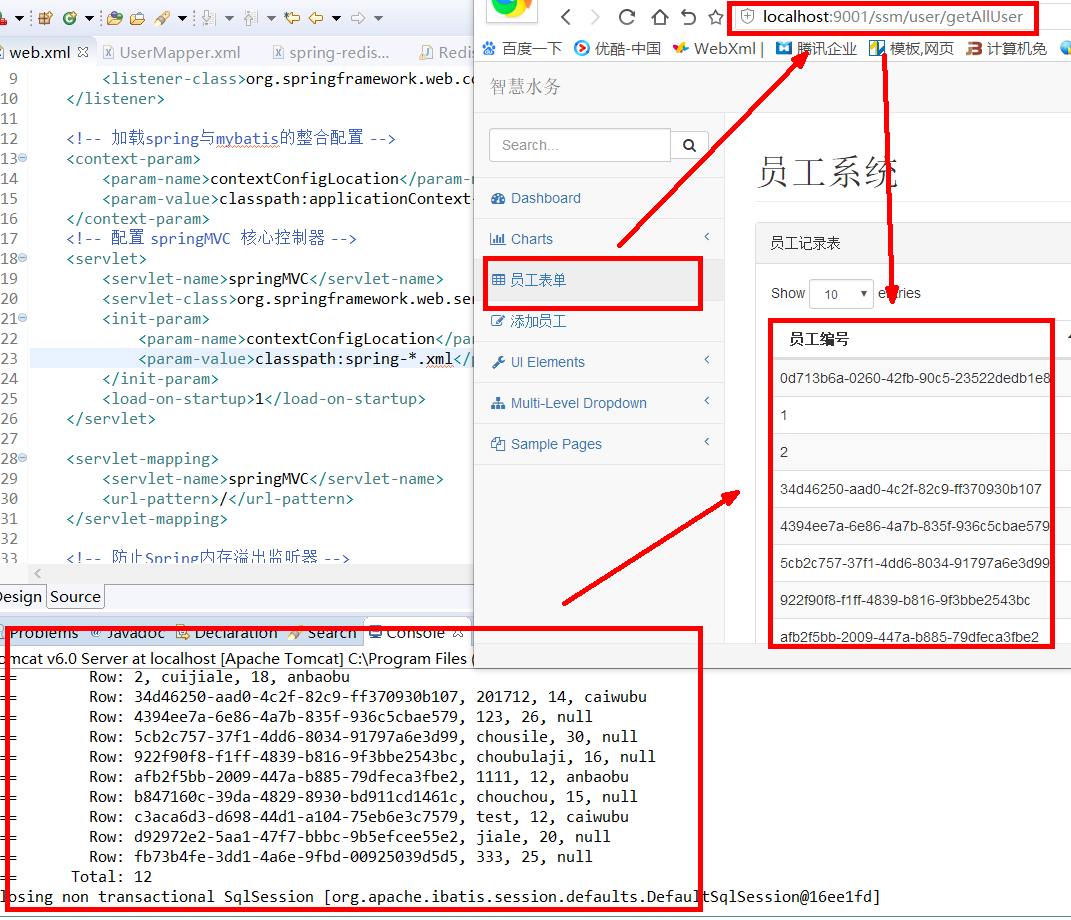
启动成功后,点击员工表单可以触发查询所有员工的方法,第一次进行查询语句可以看到mybatis打印了查询语句,并在redis服务器中更新了一条缓存
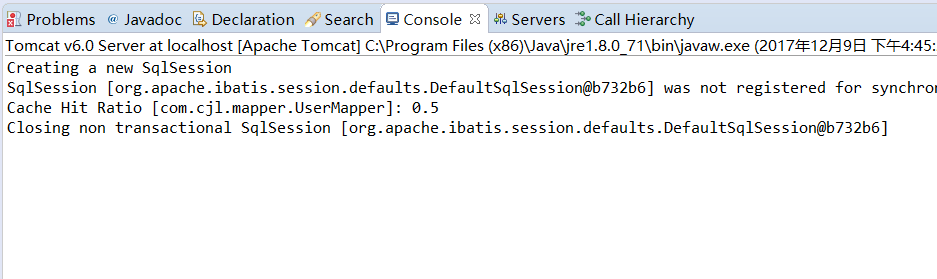
我们清空控制台再次点击查询员工按钮执行查询方法,可以看到没有执行查询语句,证明第二次查询直接从缓存中取值,没有连接mysql进行查询。
以上整合基本已经完成,如有不对的地方希望大家能够指出,后面会补上负载均衡和session共享。
03.redis与ssm整合(mybatis二级缓存)的更多相关文章
- Spring Boot 入门(十):集成Redis哨兵模式,实现Mybatis二级缓存
本片文章续<Spring Boot 入门(九):集成Quartz定时任务>.本文主要基于redis实现了mybatis二级缓存.较redis缓存,mybaits自带缓存存在缺点(自行谷歌) ...
- mybatis二级缓存应用及与ehcache整合
mybaits的二级缓存是mapper范围级别,除了在SqlMapConfig.xml设置二级缓存的总开关,还要在具体的mapper.xml中开启二级缓存. 1.开启mybatis的二级缓存 在核心配 ...
- Springboot整合Ehcache 解决Mybatis二级缓存数据脏读 -详细
前面有写了一篇关于这个,但是这几天又改进了一点,就单独一篇在详细说明一下 配置 application.properties ,启用Ehcache # Ehcache缓存 spring.cache.t ...
- mybatis二级缓存
二级缓存区域是根据mapper的namespace划分的,相同namespace的mapper查询数据放在同一个区域,如果使用mapper代理方法每个mapper的namespace都不同,此时可以理 ...
- Mybatis 二级缓存应用 (21)
[MyBatis 二级缓存] 概述:一级缓存作用域为同一个SqlSession对象,而二级缓存用来解决一级缓存不能夸会话共享,作用范围是namespace级,可以被多个SqlSession共享(只要是 ...
- 深入了解MyBatis二级缓存
深入了解MyBatis二级缓存 标签: mybatis二级缓存 2015-03-30 08:57 41446人阅读 评论(13) 收藏 举报 分类: Mybatis(51) 版权声明:版权归博主所 ...
- MyBatis二级缓存配置
正如大多数持久层框架一样,MyBatis 同样提供了一级缓存和二级缓存的支持 Mybatis二级缓存是SessionFactory,如果两次查询基于同一个SessionFactory,那么就从二级缓存 ...
- 如何细粒度地控制你的MyBatis二级缓存(mybatis-enhanced-cache插件实现)
前几天网友chanfish 给我抛出了一个问题,笼统地讲就是如何能细粒度地控制MyBatis的二级缓存问题,酝酿了几天,觉得可以写个插件来实现这个这一功能.本文就是从问题入手,一步步分析现存的MyBa ...
- MyBatis 二级缓存全详解
目录 MyBatis 二级缓存介绍 二级缓存开启条件 探究二级缓存 二级缓存失效的条件 第一次SqlSession 未提交 更新对二级缓存影响 探究多表操作对二级缓存的影响 二级缓存源码解析 二级缓存 ...
随机推荐
- MySQL事务与锁
MySQL事务与锁 锁的基本概念 锁是计算机协调多个进程或线程并发访问某一资源的机制. 相对其他数据库而言,MySQL的锁机制比较简单,其最显著的特点是不同的存储引擎支持不同的锁机制.比如,MyISA ...
- iOS动画学习 -隐式动画
事务 Core Animation基于一个假设,说屏幕上的任何东西都可以(或者可能)做动画.你并不需要在Core Animation中手动打开动画,但是你需要明确地关闭它,否则它会一直存在. 当你改变 ...
- 2016-2017 ACM-ICPC, Asia Tsukuba Regional Contest D Hidden Anagrams
题目链接:http://codeforces.com/gym/101158/attachments /* * @Author: lyucheng * @Date: 2017-10-21 12:20:0 ...
- Linux中常见问题(磁盘 定时任务)
第1章 linux无法上网 1) 第一步,先ping域名. ping www.baidu.com 2)再ping一个公网ip , ping 223.5.5.5/223.6.6.6/114.11 ...
- 正常启动HBase顺序
先启动hadoop集群start-all.sh 在master节点会启动SecondaryNameNode,NameNode,ResourceManager 在slave节点会启动NodeManage ...
- mysql5.7.16安装 初始密码获取及密码重置
在window7下面安装mysql5.7.16,出现一个问题,在初始化时,默认生成了一个密码,导致连接不了数据库.而在5.7以前,默认密码是空的,可以不用密码即可进入数据库.5.7之后的就遇到坑了,下 ...
- ⑨bootstrap组件 按钮式下拉菜单 输入框 使用基础案例
<!DOCTYPE html> <html lang="en"> <head> <meta charset="UTF-8&q ...
- 介绍一款好用 mongodb 可视化工具
最近想自己搭建一个个人博客,所以学了下mongodb,mongodb是用命令行输入的,有些人可能不太习惯,我自己找了下mongodb的一些可视化工具,一开始安装的是mongoVUE,mongoVUE页 ...
- 微信小程序语音识别服务搭建全过程解析(https api开放,支持新接口mp3录音、老接口silk录音)
silk v3(或新录音接口mp3)录音转olami语音识别和语义处理的api服务(ubuntu16.04服务器上实现) 重要的写在前面 重要事项一: 所有相关更新,我优先更新到我个人博客中,其它地方 ...
- centos6.7系统安装流程
虚拟机创建centos的过程,如下: 1.首先创建一个空白文件 2.打开虚拟机,打开文件,或者页面的<创建虚拟机>,如下: 3.打开之后如下所示,选择自定义,Linux崇尚自由 4.第四步 ...