用Spring Boot零配置快速创建web项目(1)
一、Spring Boot简介
Spring Boot是由Pivotal团队提供的全新框架,其设计目的是用来简化新Spring应用的初始搭建以及开发过程。该框架使用了特定的方式来进行配置,从而使开发人员不再需要定义样板化的配置。通过这种方式,Boot致力于在蓬勃发展的快速应用开发领域(rapid application development)成为领导者。
本文是一个springboot入门级的helloworld程序。
二、maven安装与配置
下载地址:http://maven.apache.org/download.cgi
下载这个页面上Files下的apache-maven-3.3.9-bin.zip包
下载好后解压缩到本地,然后在环境变量中新建
M2_HOME=(目录)\apache-maven-3.3.9
在path中加入:%M2_HOME%/bin;
完了之后,把maven根目录下的conf目录下的settings.xml复制到C:\Users\(用户名)\.m2这个目录下,(这个目录是运行过mvn 相关命令后才有的,如果是第一次安装maven,可能这个目录没有,直接新建一个就好了)因为这个目录是eclipse和intellij等开发软件默认maven配置文件的地方
复制好了之后,修改settings.xml,主要修改两个地方:
<localRepository>D:/Program Files/maven/repository</localRepository>
这儿是本地maven仓库的位置
<mirrors>
    <!-- mirror
     | Specifies a repository mirror site to use instead of a given repository. The repository that
     | this mirror serves has an ID that matches the mirrorOf element of this mirror. IDs are used
     | for inheritance and direct lookup purposes, and must be unique across the set of mirrors.
     |
    <mirror>
      <id>mirrorId</id>
      <mirrorOf>repositoryId</mirrorOf>
      <name>Human Readable Name for this Mirror.</name>
      <url>http://my.repository.com/repo/path</url>
    </mirror>
     -->

     <mirror>
      <id>alimaven</id>
      <name>aliyun maven</name>
      <url>http://maven.aliyun.com/nexus/content/groups/public/</url>
      <mirrorOf>central</mirrorOf>
    </mirror>
  </mirrors>
这个是国内的阿里云maven仓库的镜像,速度超级快,比国外默认的仓库快
强烈推荐哈!
三、用Spring Boot新建web项目
新建一个maven工程(注意,不要勾选create from archytype,虽然它会帮你创建骨架,但是会从外网下载一些东西,很慢,导致会卡在那,下载东西的时间,还不如手工创建一下目录,分分钟搞定)
然后输入相应的groupId,artifactId
项目建好后,目录结构是这样的:
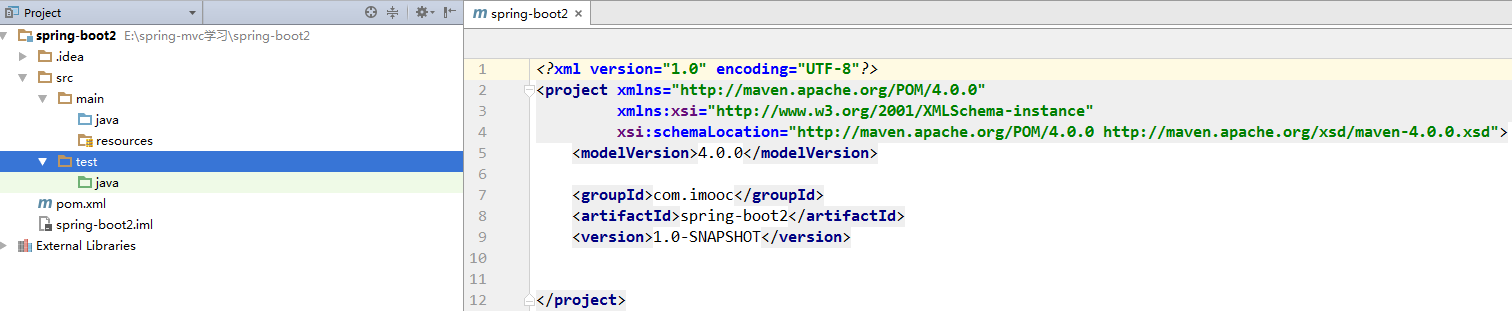
右边是pom.xml文件
在resources目录下创建WEB-INF目录,这个是web项目都该有的目录
在resources目录下创建templates目录,这个是velocity的vm模板放置的地方
好,接下来修改pom.xml,我直接贴一个最小配置
<?xml version="1.0" encoding="UTF-8"?>
<project xmlns="http://maven.apache.org/POM/4.0.0"
         xmlns:xsi="http://www.w3.org/2001/XMLSchema-instance"
         xsi:schemaLocation="http://maven.apache.org/POM/4.0.0 http://maven.apache.org/xsd/maven-4.0.0.xsd">
    <modelVersion>4.0.0</modelVersion>

    <groupId>com.imooc</groupId>
    <artifactId>spring-boot2</artifactId>
    <version>1.0-SNAPSHOT</version>

    <name>springboot</name>
    <url>http://maven.apache.org</url>

    <properties>
        <project.build.sourceEncoding>UTF-8</project.build.sourceEncoding>
    </properties>

    <parent>
        <groupId>org.springframework.boot</groupId>
        <artifactId>spring-boot-starter-parent</artifactId>
        <version>1.4.2.RELEASE</version>
    </parent>

    <dependencies>
        <dependency>
            <groupId>org.springframework.boot</groupId>
            <artifactId>spring-boot-starter-web</artifactId>
        </dependency>

        <dependency>
            <groupId>junit</groupId>
            <artifactId>junit</artifactId>
            <version>4.12</version>
        </dependency>

        <dependency>
            <groupId>org.springframework.boot</groupId>
            <artifactId>spring-boot-starter-velocity</artifactId>
        </dependency>
    </dependencies>
</project>
可以看到,继承了spring-boot-starter-parent,依赖了junit,spring-boot-starter-web,spring-boot-starter-velocity
以前我们在spring的配置,spring-boot都会按照默认配置,帮我们弄好
四、写代码
先写一个controller
package com.imooc.controller;

import org.springframework.stereotype.Controller;
import org.springframework.ui.ModelMap;
import org.springframework.web.bind.annotation.RequestMapping;

/**
 * HELLO 控制器
 */
@Controller
public class HelloController {

    @RequestMapping(value = "/test.htm")
    public String hello(ModelMap modelMap) {
        modelMap.addAttribute("message", "hello,world!");
        return "test";
    }
}
注意包名:com.imooc.controller
再写一个启动程序
package com.imooc;

import org.springframework.boot.SpringApplication;
import org.springframework.boot.autoconfigure.EnableAutoConfiguration;
import org.springframework.boot.autoconfigure.SpringBootApplication;

/**
 * 主程序开始
 */
@SpringBootApplication
public class Starter {

    public static void main(String[] args) {
        SpringApplication.run(Starter.class, args);
    }
}
注意启动程序的包名:com.imooc
注意上面配置的注解:SpringBootApplication
建议:带有main方法的类写在最外层的目录中,这样,spring-boot才能从最外层目录中,找到所有目录的配置
五、配置velocity
在resources下新建application.properties
spring.velocity.charset=UTF-8
spring.velocity.properties.input.encoding=UTF-8
spring.velocity.properties.output.encoding=UTF-8
spring.velocity.resourceLoaderPath=classpath:/templates/
spring.velocity.prefix=/
spring.velocity.suffix=.vm
spring.velocity.toolbox-config-location=/WEB-INF/toolbox.xm
在WEB-INF下新建toolbox.xml
<toolbox>
</toolbox>
空的就行了,只有一个根标签
好,下面新建一个vm,在templates下,新建一个test.vm
<h1>${message}</h1>
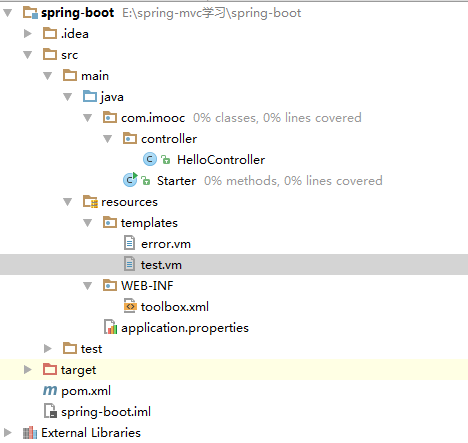
好,最终的目录结构是:
六、启动
run main函数
浏览器中输入:localhost:8080/test.htm
就可以看到hello,world了,是不是so easy,免去了很多麻烦的配置呢
用Spring Boot零配置快速创建web项目(1)的更多相关文章
- Spring boot 零配置开发微服务
2018年12月29日星期六 体验Spring boot 零配置开发微服务 1.为什么要用Spring boot? 1.1 简单方便.配置少.整合了大多数框架 1.2 适用于微服务搭建,搭建的微服务 ...
- Spring Boot 学习(一) 快速搭建SpringBoot 项目
快速搭建一个 Spring Boot 项目 部分参考于<深入实践Spring Boot>.<Spring实战 第四版>与程序猿DD的有关博客. 参考(嘟嘟独立博客):http: ...
- Spring Boot -- Idea搭建下搭建web项目
最近公司准备使用Spring Boot框架,让小瑾先来学习一下,为了表示小瑾的办事效率,小瑾直接先学习用Idea搭建一个Spring Boot项目,哈哈哈,坐等领导夸. 废话不多说了,先来总结一下用I ...
- Spring Boot 知识笔记(创建maven项目、HTTP接口)
一.使用Maven手工创建SpringBoot应用(IDEA) 1. 点击File——New——Project——Maven——Next,填写相关信息,创建项目. 2. 在pom.xml中添加相关 ...
- Spring-Boot快速搭建web项目详细总结
最近在学习Spring Boot 相关的技术,刚接触就有种相见恨晚的感觉,因为用spring boot进行项目的搭建是在太方便了,我们往往只需要很简单的几步,便可完成一个spring MVC项目的搭建 ...
- Spring Boot入门-快速搭建web项目
Spring Boot 概述: Spring Boot makes it easy to create stand-alone, production-grade Spring based Appli ...
- 【spring boot】5.spring boot 创建web项目并使用jsp作前台页面
贼烦的是,使用spring boot 创建web项目,然后我再idea下创建的,but 仅仅启动spring boot的启动类,就算整个项目都是好着的,就算是能够进入controller中,也不能成功 ...
- 在Spring Boot中配置web app
文章目录 添加依赖 配置端口 配置Context Path 配置错误页面 在程序中停止Spring Boot 配置日志级别 注册Servlet 切换嵌套服务器 在Spring Boot中配置web a ...
- spring boot / cloud (十七) 快速搭建注册中心和配置中心
spring boot / cloud (十七) 快速搭建注册中心和配置中心 本文将使用spring cloud的eureka和config server来搭建. 然后搭建的模式,有很多种,本文主要聊 ...
随机推荐
- CSS中.和#区别
一.问题来源 制作导航栏,参考别人的代码,发现的. 二.解析 2.1 概述 id:用来定义页面中大的样式,如栏目划分,顶部,正文,底部等:用#top的形式来定义: class:用来定义一些比较细节的样 ...
- mysql通过SOURCE导入SQL时报错处理
ERROR: unknown command '\n' Can't connect to the server 网上查询了,多少是编码问题引起,一边是UTF8一边是GBK,反复调整MY.CNF配置文件 ...
- fragment的实现与互相通信
Android3.0后出来的新控件,主要是为了在平板和手机屏幕的兼容 实现效果: 点击Sd卡,出现SD目录下的所有文件和文件夹,点击外置Sd卡,出现外置Sd卡目录下的文件和文件夹.点击U盘,出现U盘目 ...
- COALESCE函数
--SQL学习笔记一 --函数coalesce --功能返回参数中第一个非NULL值 --语法 COALESCE ( expression [ ,n ] ) --创建测试表 IF OBJECT_ID( ...
- Xamarin Crack
Inspired by http://www.cnblogs.com/portal/p/4666252.html#undefined To 'crack' VS Xamarin, take VS201 ...
- typedef 用法及 指针函数 和 函数指针
typedef 本质上是定义了一种新的类型, 该新类型可以原有类型的别名或是原有类型的组合. 而#define 只是字符串的替换. 如定义: typedef char* CHARP; 则 CHARP ...
- HDOJ(HDU) 1720 A+B Coming(进制)
Problem Description Many classmates said to me that A+B is must needs. If you can't AC this problem, ...
- Java学习日记 I/O
File类1.String[] list() 返回一个目录下文件和文件夹路径的字符串数组2.File[] listFiles() 以File类对象数组,返回目录下的所有文件和文件夹3.isDirect ...
- Going Home - poj 2195(最小费用流 | 二分匹配)
题目大意:在一个网格里面有n个小男人和n个房子,现在想让每个小男人都有一个房子住,不过每个人移动一下都需要花费¥1,现在求出来最小的总花费.ps:可以认为网格的每个点都是很大的广场并且容纳所有的人,人 ...
- 我与Ubuntu的5年共成长
初次接触Ubuntu那还是2010年的初夏,那年大学二年级即将结束,为了增加计算机学院学生的技术能力和就业竞争力,学校组织了很多培训机构.公司企业来学校做技术宣讲.分享等 记得有一个企业是做Mp3 M ...