微信小程序-上传多张图片加进度条(支持预览、删除)
2018-12-24
详情示例见:https://www.cnblogs.com/cisum/p/9564898.html
2018-12-29
组件下载见:https://www.cnblogs.com/cisum/p/10199507.html
2019-3-14(推荐)
组件demo:https://www.cnblogs.com/cisum/p/10533559.html
index.js
data: {
list: '',
upload_picture_list: []
},
//选择图片方法
uploadpic: function (e) {
var that = this //获取上下文
var upload_picture_list = that.data.upload_picture_list
//选择图片
wx.chooseImage({
count: 8,
sizeType: ['compressed'],
sourceType: ['album', 'camera'],
success: function (res) {
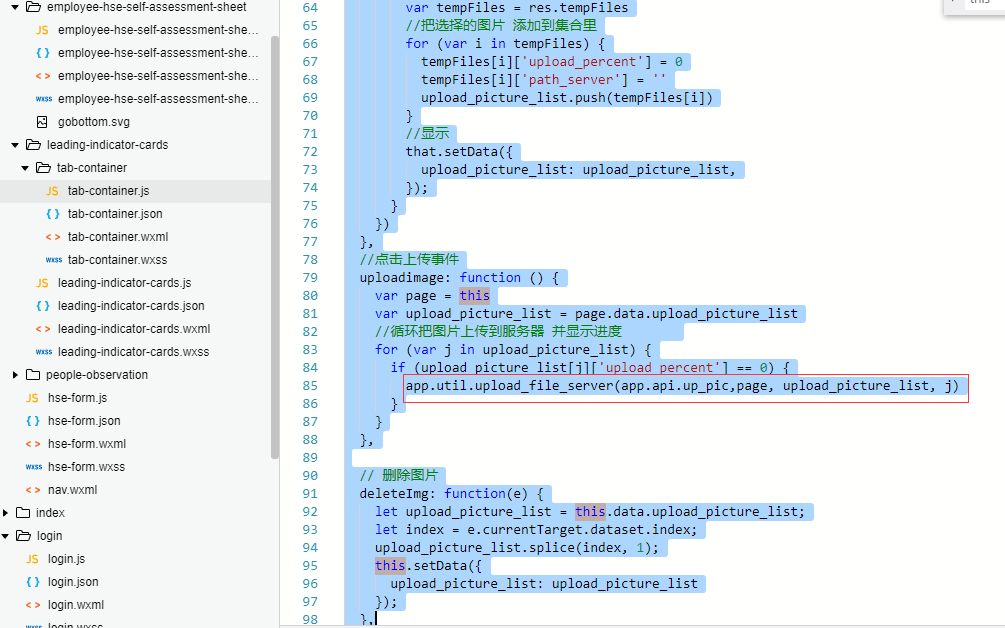
var tempFiles = res.tempFiles
//把选择的图片 添加到集合里
for (var i in tempFiles) {
tempFiles[i]['upload_percent'] = 0
tempFiles[i]['path_server'] = ''
upload_picture_list.push(tempFiles[i])
}
//显示
that.setData({
upload_picture_list: upload_picture_list,
});
}
})
},
//点击上传事件
uploadimage: function () {
var page = this
var upload_picture_list = page.data.upload_picture_list
//循环把图片上传到服务器 并显示进度
for (var j in upload_picture_list) {
if (upload_picture_list[j]['upload_percent'] == 0) {
//调用函数
app.util.upload_file_server(app.api.up_pic,page, upload_picture_list, j)
}
}
},
// 删除图片
deleteImg: function(e) {
let upload_picture_list = this.data.upload_picture_list;
let index = e.currentTarget.dataset.index;
upload_picture_list.splice(index, 1);
this.setData({
upload_picture_list: upload_picture_list
});
},
   //上传方法

   function upload_file_server(url, that, upload_picture_list, j) {

     //上传返回值

     const upload_task = wx.uploadFile({

       // 模拟https

       url: url, //需要用HTTPS,同时在微信公众平台后台添加服务器地址

       filePath: upload_picture_list[j]['path'], //上传的文件本地地址

       name: 'file',

       formData: {

         'num': j

       },

       //附近数据,这里为路径

       success: function (res) {

         var data = JSON.parse(res.data);

         // //字符串转化为JSON

         if (data.Success == true) {

           var filename = data.file //存储地址 显示

           upload_picture_list[j]['path_server'] = filename

         } else {

           upload_picture_list[j]['path_server'] = filename

         }

         that.setData({

           upload_picture_list: upload_picture_list

         });

         wx.setStorageSync('imgs', upload_picture_list);

       }

     })

     //上传 进度方法

     upload_task.onProgressUpdate((res) => {

       upload_picture_list[j]['upload_percent'] = res.progress

       that.setData({

         upload_picture_list: upload_picture_list

       });

     });

   }
index.wxml
 <view class="picture_list">

     <view wx:for="{{upload_picture_list}}" class="picture_item" wx:key="{{index}}">

       <image wx:if="{{item.upload_percent < 100}}" src="{{item.path}}" mode="aspectFill"></image>

       <image wx:if="{{item.upload_percent == 100}}" src="{{item.path_server}}" mode="aspectFill"></image>

       <view class="upload_progress" wx:if="{{item.upload_percent < 100}}" data-index="{{index}}" bindtap="previewImg">{{item.upload_percent}}%</view>

       <text class='del' bindtap='deleteImg' data-src='{{image}}' style='display:{{isDel}}' data-index="{{index}}">×</text>

     </view>

     <view class='picture_item'>

       <view class="add-image" bindtap='uploadpic'>

         <text>+</text>

       </view>

     </view>

   </view>

   <button bindtap='uploadimage' class='yes-upload'>确定上传</button>
index.wxss
 .add-image, .up-pic image {

   margin-top: 2%;

   margin-left: 2%;

   width: 150rpx;

   height: 150rpx;

   color: #ddd;

   font-size: 144rpx;

   line-height: 95%;

   text-align: center;

   background-color: #fff;

   cursor: pointer;

   border-radius: 10rpx;

 }

 .picture_list {

   padding: 20rpx;

   margin-left: 12%;

   display: flex;

   flex-direction: row;

   flex-wrap: wrap;

   justify-content: flex-start;

   align-items: flex-start;

   align-content: flex-start;

 }

 .picture_item {

   margin: 10px;

   margin-left:;

   position: relative;

   width: 160rpx;

   height: 160rpx;

 }

 .picture_item .del {

   position: absolute;

   top: -11rpx;

   right: -11rpx;

   color: #fff;

   border-radius: 50%;

   width: 40rpx;

   height: 40rpx;

   z-index:;

   line-height: 35rpx;

   text-align: center;

   background-color: #f00;

 }

 .upload_progress {

   position: absolute;

   top:;

   left:;

   opacity: 0.7;

   border-radius: 8rpx;

   background-color: #000;

   color: #fff;

   width: 160rpx;

   height: 160rpx;

   text-align: center;

   line-height: 160rpx;

   font-size: 12px;

 }

 .picture_item image {

   width: 160rpx;

   height: 160rpx;

 }
app.api.x :是封装的各类请求url地址
app.util.x :是封装的函数,关于使用
1. 先util添加方法
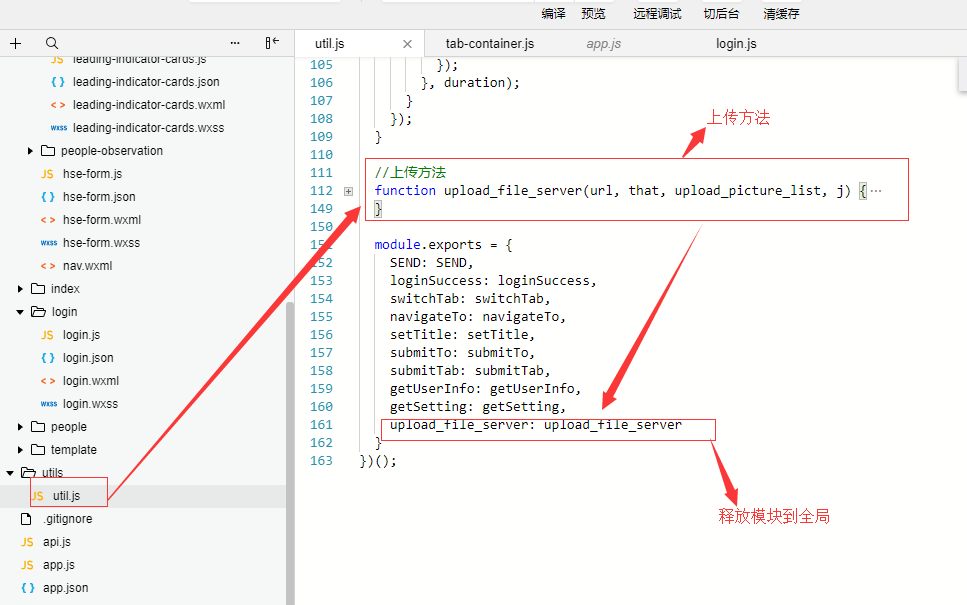
2. app.js

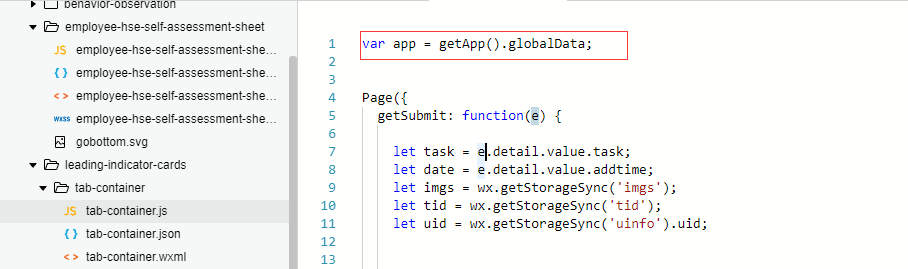
3. 页面上调用,需要声明
后端php代码
<?php

    class Imageadmin

    {

        public function imageupload()

        {

            //名字获取

            $wxid=$_POST["num"];

            //时间获取

            $diaryTime=$_POST["datetime"];

            //获取日期

            $date = $_POST["date"];

            $a = substr($_FILES['file']['type'],6);//获取图片后缀

            //$a =  strstr( $_FILES['file']['type'], '/');

            $file_name=$date.'\\'.$diaryTime.'_'.$wxid.'.'.$a;//拼装存储地址path

            $file_name1=$date.'/'.$diaryTime.'_'.$wxid.'.'.$a;//拼装图片浏览path

            $path = "D:\www\File\\".$file_name;//存储path

            $dir = iconv("UTF-8", "GBK","D:\www\File\\".$date);//判断文件夹是否存在

            if (!file_exists($dir)){

                mkdir ($dir,0777,true);//不存在 创建新文件夹

                $panduan = move_uploaded_file($_FILES['file']['tmp_name'], $path);//存入图片

            } else {

                $panduan = move_uploaded_file($_FILES['file']['tmp_name'], $path);//存入已有文件夹内

            }

            //保存到指定路径  指定名字

            if ($panduan){//存储成功

                $res = ['errCode'=>0,'errMsg'=>'图片上传成功','file'=>$file_name1,'Success'=>true];

                return json($res);

            }else{//失败

                $res = ['errCode'=>0,'errMsg'=>'图片上传失败','file'=>'https://127.0.0.1:80/xxxx.png','Success'=>!true];

                return json($res);

            }

        }

    }

?>
微信小程序-上传多张图片加进度条(支持预览、删除)的更多相关文章
- 微信小程序上传多张图片,及php后台处理
微信小程序上传多张图片,级小程序页面布局直接来代码index.wxml <view class='body' style='width:{{windowWidth}}px;height:{{wi ...
- 微信小程序上传Excel文本文件功能
问题: 在开发过程中会发现微信小程序有很多功能都还不能满足我们的需求,谁叫客户就是上帝呢,前几天小编遇到了这么个问题,就是用微信小程序上传文件,但是还以为微信带有这个模块,可是查了许久还是没有找到,只 ...
- 微信小程序之上传多张图片
之前写过一篇小程序商品发布的博客,里面有上传多张图片的功能,这里单独拿出来实现以下,小程序的upLoadFile一次只能上传一张图片,需要循环调这个接口来实现 for (var i = 0; i &l ...
- 微信小程序上传与下载文件
需要准备的工作: ①.建立微信小程序工程,编写以下代码. ②.通过IDE建立springboot+web工程,编写接收文件以及提供下载文件的方式,并将上传的文件相关信息记录在mysql数据库中.具体请 ...
- 微信小程序上传后发布或者体验版测试无数据解决办法
在做微信小程序开发的过程中,发现小程序在本地调用接口的数据都显示,但是上传之后,发现手机体验没有数据.以下为解决办法: 1.先清除缓存试试. 2.打开微信小程序工具右上角的详情——项目设置,将“不校验 ...
- Taro 微信小程序 上传文件到minio
小程序前端上传文件不建议直接引用minio的js npm包,一来是这个包本身较大,会影响小程序的体积,二来是ak sk需要放到前端存储,不够安全,因此建议通过请求后端拿到签名数据后上传. 由于小程序的 ...
- 微信小程序-上传照片-多张显示
图片就是一个简单的效果 实现 先看wxml和wxss代码 <view class='in-demand'> <view class='dema-title'> <text ...
- 微信小程序之wx.request:fail错误,真机预览请求无效问题解决,安卓,ios网络预览异常
新版开发者工具增加了https检查功能:可使用此功能直接检查排查ssl协议版本问题: 可能原因:0:后台域名没有配置0.1:域名不支持https1:没有重启工具:2:域名没有备案,或是备案后不足24小 ...
- 微信小程序上传一或多张图片
一.要点 1.选取图片 wx.chooseImage({ sizeType: [], // original 原图,compressed 压缩图,默认二者都有 sourceType: [], // a ...
随机推荐
- ALPHA(四)
目录 组员情况 组员1(组长):胡绪佩 组员2:胡青元 组员3:庄卉 组员4:家灿 组员5:凯琳 组员6:丹丹 组员7:何家伟 组员8:政演 组员9:鸿杰 组员10:刘一好 组员:何宇恒 展示组内最新 ...
- easyui在datagrid只想选择一条
<table class="" id="jgrid" data-options="fitColumns:true,rownumbers: tru ...
- [luoguP3332] [ZJOI2013]K大数查询(树套树)
传送门 一开始想的是区间线段树套权值线段树,结果好像不能实现. 然后题解是权值线段树套区间线段树. 区间线段树上标记永久化就省去了pushdown的操作减少常数. 标记永久化的话..yy不出来就看代码 ...
- 洛谷P2947 [USACO09MAR]仰望Look Up
P2947 [USACO09MAR]仰望Look Up 74通过 122提交 题目提供者洛谷OnlineJudge 标签USACO2009云端 难度普及/提高- 时空限制1s / 128MB 提交 ...
- MFC 对话框阴影效果
在 OnInitDialog(Cdialog)里面添加 SetClassLong(this->m_hWnd, GCL_STYLE, GetClassLong(this->m_hWnd, G ...
- JavaScript 笔记(2) -- 类型转换 & 正则表达 & 变量提升 & 表单验证
目录: typeof, null, undefined, valueOf() 类型转换 正则表达式 错误: try, catch, throw 调试工具 变量提升 strict 严格模式 使用误区 ...
- 幸运数字(bzoj 1853)
Description 在中国,很多人都把6和8视为是幸运数字!lxhgww也这样认为,于是他定义自己的“幸运号码”是十进制表示中只包含数字6和8的那些号码,比如68,666,888都是“幸运号码”! ...
- 洛谷 P1174 打砖块
题目描述 小红很喜欢玩一个叫打砖块的游戏,这个游戏的规则如下: 在刚开始的时候,有n行*m列的砖块,小红有k发子弹.小红每次可以用一发子弹,打碎某一列当前处于这一列最下面的那块砖,并且得到相应的得分. ...
- android程序入口
android程序的真正入口是Application类的onCreate方法
- Day 20 Object_oriented_programing(摘)
面向对象变成介绍 面向过程编程 核心是过程(流水线式思维),过程即解决问题的步骤,面向过程的设计就好比精心设计好一条流水线,考虑周全什么时候处理什么东西.主要应用在一旦完成很少修改的地方,如linux ...