Vue cli之路由router
一、安装路由
Vue-router用于提供给vue项目在开发中用于绑定url和组件页面的关系的核心插件。
默认情况下,vue没有提供路由的功能,所以我们使用vue-router,并需要在项目根目录。
npm install vue-router
安装了vue-router插件以后,我们必须要对路由进行初始化并且还要绑定组件与url地址之间的路由映射关系。
首页,我们需要在一个单独的目录router下创建路由文件index.js,实例化路由对象并绑定组件和url地址的关系。
二、基本使用
在src路径下创建router/index.js,代码:
import VueRouter from "vue-router";

import Vue from "vue";

Vue.use(VueRouter);

import Home from "../views/Home";

import HelloWorld from "../components/HelloWorld";

import Forecast from "../components/Forecast";

export default new VueRouter({

  mode: "history", // hash 表示以地址栏的哈希值作为路径,history以历史对象的url作为路径

  routes:[  // 路由列表,里面的每一个成员都是一个url地址和组件的映射关系

    {

      path: "/",

      component: Home,

    },

    {

      path: "/hi",

      component: HelloWorld,

    },

    {

      path: "/index",

      component: Forecast,

    }

  ]

});
main.js,代码:
// The Vue build version to load with the `import` command

// (runtime-only or standalone) has been set in webpack.base.conf with an alias.

import Vue from 'vue'    // 没有声明路径,则默认从node_module中导包过来

import App from './App'  // 如果由声明了路径,则表示从当前文件出发根据路径关系进行导报

import axios from "axios";

import router from "./router/index";  // 导入路由对象

// 初始化axios对象

Vue.prototype.$http = axios.create();

Vue.config.productionTip = false

/* eslint-disable no-new */

new Vue({

  el: '#app',

  router,

  components: { App },

  template: '<App/>'

})
App.vue,代码:
<template>

  <div id="app">

    <!--    <HelloWorld msg="Welcome to Your Vue.js App"/>-->

    <!--    <Home></Home>-->

    <router-view></router-view>

  </div>

</template>

<script>

// import HelloWorld from './components/HelloWorld.vue'

// import Home from './views/Home'

export default {

  name: 'App',

  components: {

    // HelloWorld

    // Home

  }

}

</script>

<style>

#app {

  font-family: Avenir, Helvetica, Arial, sans-serif;

  -webkit-font-smoothing: antialiased;

  -moz-osx-font-smoothing: grayscale;

  text-align: center;

  color: #2c3e50;

  margin-top: 60px;

}

</style>
三、页面跳转
vue-router提供了2种写法让我们实现页面跳转。
1、通过router-link来跳转
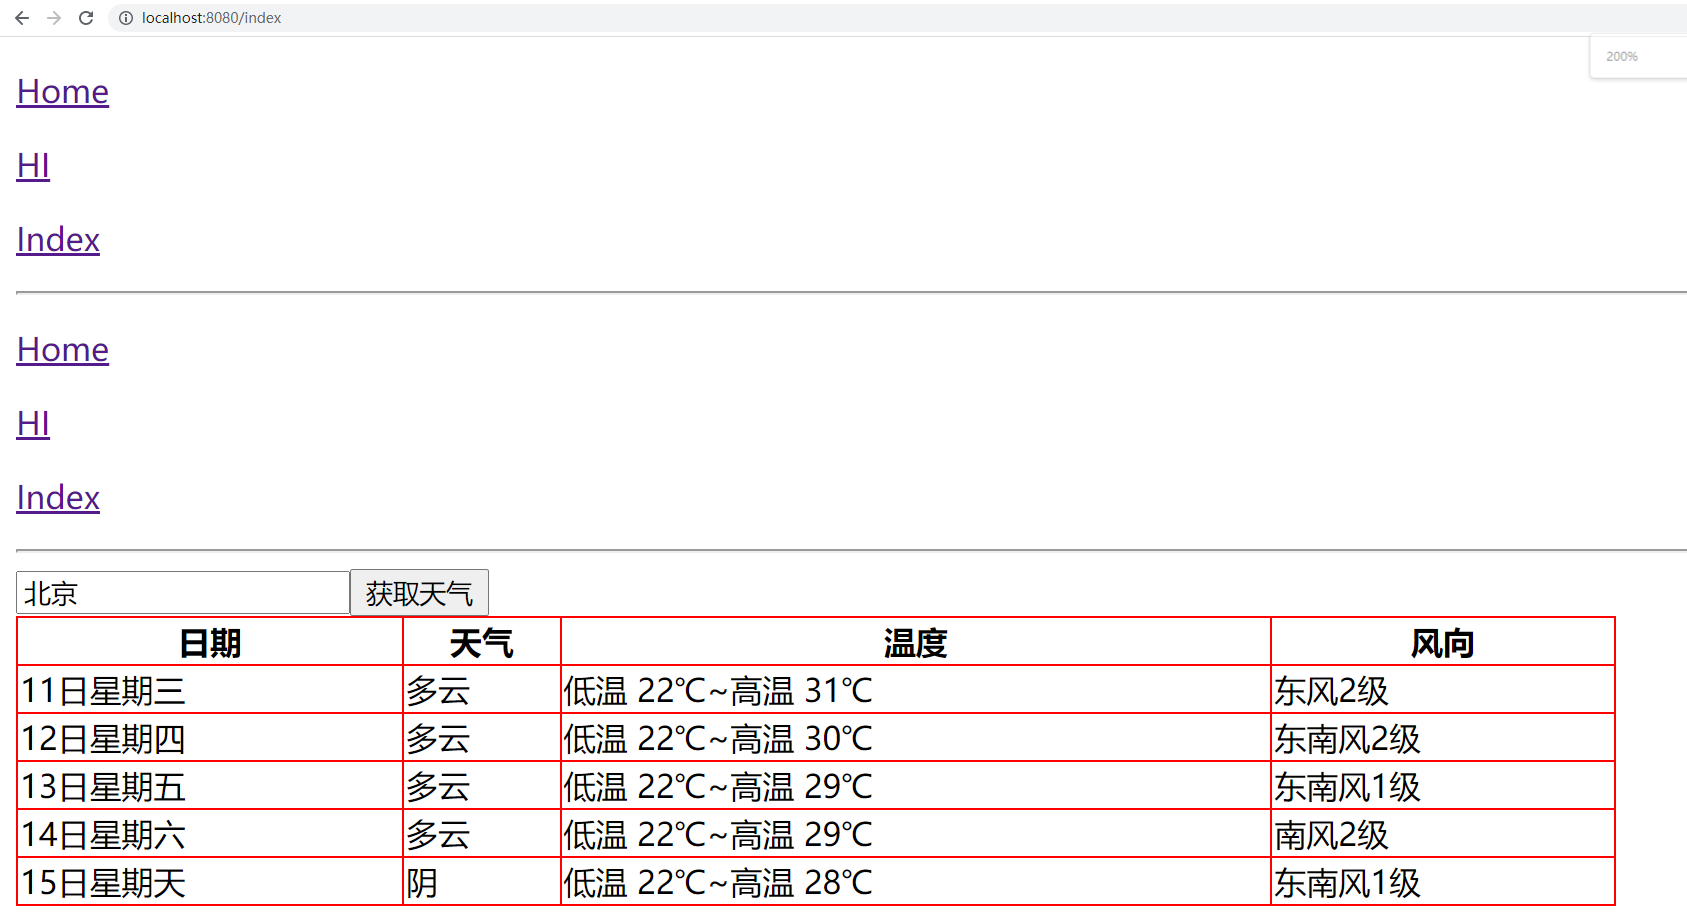
App.vue,代码:
<template>

  <div id="app">

    <p><a href="/">Home</a></p>

    <p><a href="/hi">HI</a></p>

    <p><a href="/index">Index</a></p>

    <hr>

    <p>

      <router-link to="/">Home</router-link>

    </p>

    <p>

      <router-link to="/hi">HI</router-link>

    </p>

    <p>

      <router-link :to="url">Index</router-link>

    </p>

    <hr>

    <router-view></router-view>

  </div>

</template>

<script>

export default {

  name: 'App',  // 组件名

  data() {

    return {

      url: "/index",

    }

  },

  components: { // 子组件

  }

}

</script>

<style>

</style>
注意:一般在开发中不会在App.vue编写具体的代码,我们这里仅仅是为了方便学习演示。
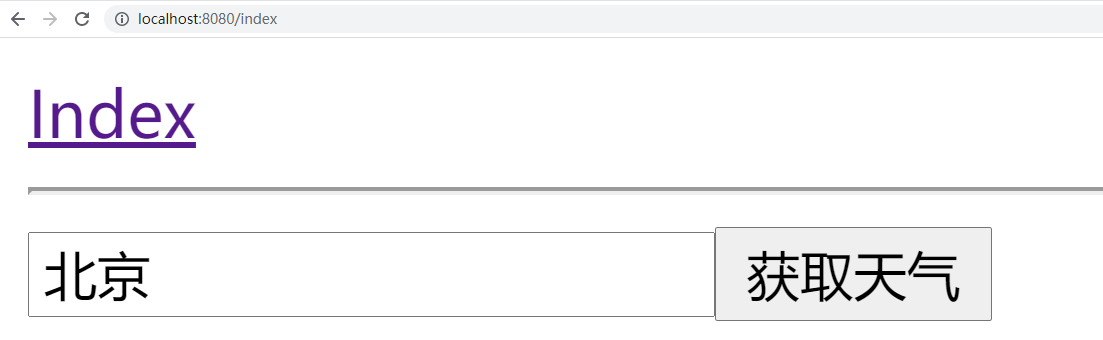
2、通过this.$router来跳转
App.vue,代码:
<template>

  <div id="app">

    <a href="" @click.prevent="goto">Index</a>

    <hr>

   <router-view></router-view>

  </div>

</template>

<script>

export default {

  name: 'App',  // 组件名

  data(){

    return {

       url: "/index",

       user: "root",

    }

  },

  methods:{

    goto(){

      // 页面跳转

      if(this.user === "root"){

        this.$router.push("/index"); // ajax页面跳转到指定的路由地址

        // this.$router.back(); // 跳转返回上一页

        // this.$router.go(-1); // -1相当于back,后退一页

        // this.$router.go(1); // 1表示forward,前进一页

      }

    }

  },

  components: { // 子组件

  }

}

</script>

<style>

</style>
四、传递参数
vue-router提供了2种用于开发中传递参数的方式给我们使用。
1、路径参数
url地址的路径作为变量,传递参数到下一个页面组件中进行获取使用。
router/index.js,代码:
import VueRouter from "vue-router";

import Vue from "vue";

Vue.use(VueRouter);

import Home from "../views/Home";

import HelloWorld from "../components/HelloWorld";

import Forecast from "../components/Forecast";

import Article from "../components/Article";

export default new VueRouter({

  mode: "history", // hash 表示以地址栏的哈希值作为路径,history以历史对象的url作为路径

  routes:[  // 路由列表,里面的每一个成员都是一个url地址和组件的映射关系

    {

      path: "/",

      component: Home,

    },

    {

      path: "/hi",

      component: HelloWorld,

    },

    {

      path: "/index",

      component: Forecast,

    },

     {

      path: "/article/:year/:month",

      component: Article,

    },

  ]

});
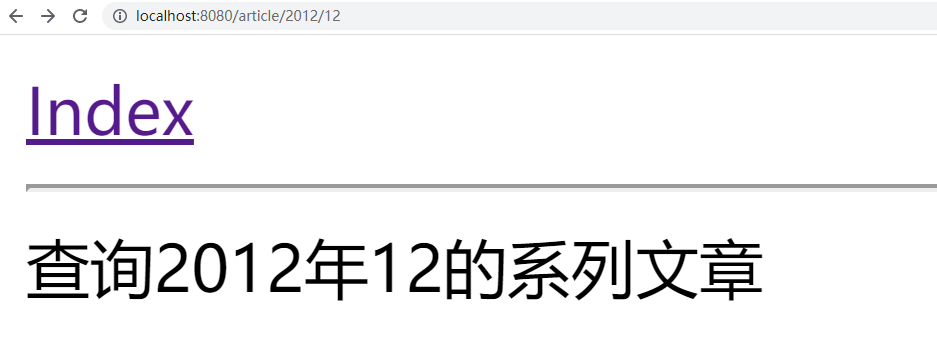
Article.vue,代码:
<template>

  <div>

    查询{{year}}年{{month}}的系列文章

  </div>

</template>

<script>

export default {

  name: "Article",

  data(){

    return {

      year: 0,

      month: 0,

    }

  },

  created() {

    this.year = this.$route.params.year;

    this.month = this.$route.params.month;

  }

}

</script>

<style scoped>

</style>
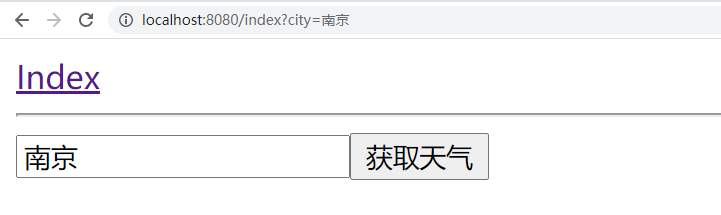
2、查询参数
url地址的查询字符串作为参数,在下一个页面组件中进行获取使用。
App.vue:
<template>

  <div id="app">

    <a href="" @click.prevent="goto">Index</a>

    <hr>

   <router-view></router-view>

  </div>

</template>

<script>

export default {

  name: 'App',  // 组件名

  data(){

    return {

       url: "/index",

       user: "root",

    }

  },

  methods:{

    goto(){

      // 页面跳转

      if(this.user === "root"){

        this.$router.push("/index?city=南京"); // ajax页面跳转到指定的路由地址

      }

    }

  },

  components: { // 子组件

  }

}

</script>

<style>

</style>
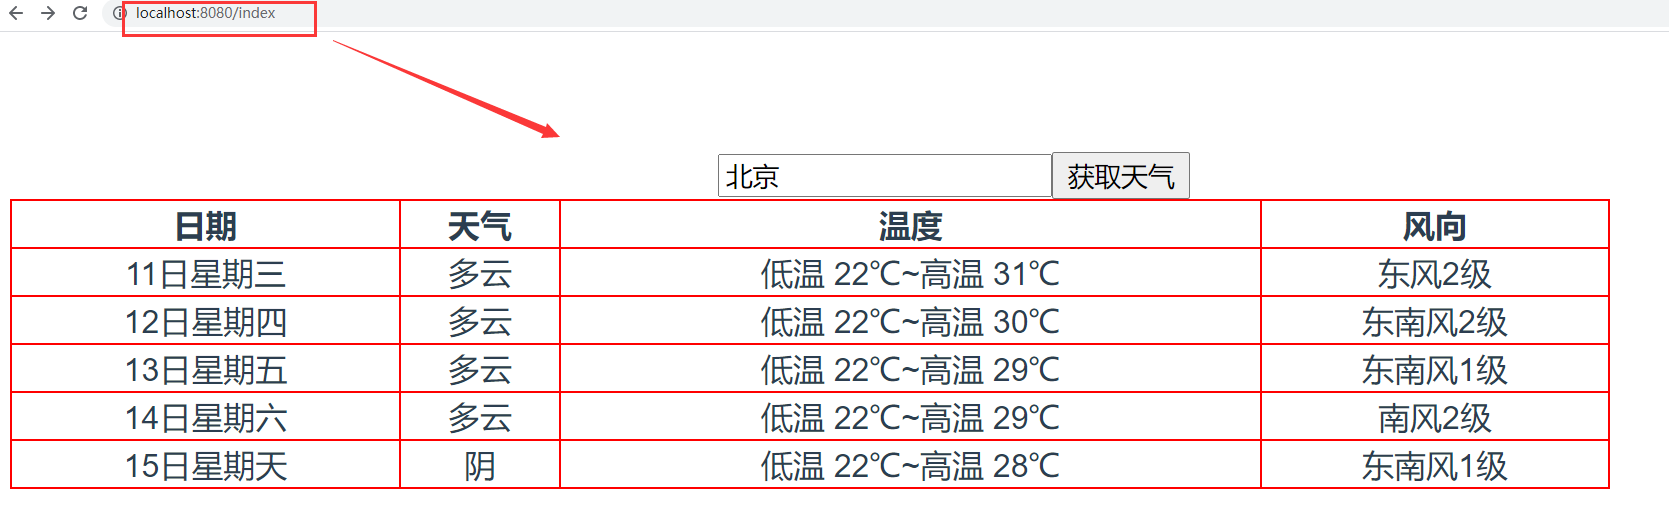
Forecast.vue,代码:
<template>

  <div>

    <input type="text" v-model="city">

    <button @click="get_weather">获取天气</button>

    <table v-if="weather_list.length>1">

      <tr>

        <th>日期</th>

        <th>天气</th>

        <th>温度</th>

        <th>风向</th>

      </tr>

      <tr v-for="weather in weather_list">

        <td>{{weather.date}}</td>

        <td>{{weather.type}}</td>

        <td>{{weather.low}}~{{weather.high}}</td>

        <td>{{weather.fengxiang}}{{weather.fengli|format}}</td>

      </tr>

    </table>

  </div>

</template>

<script>

export default {

  name: "Index",

  data(){

    return {

      city: "北京",

      weather_list:[],

    }

  },

  filters:{

    format(content){

      return content.replaceAll("<![CDATA[","").replaceAll("]]>","");

    }

  },

  created(){

      // 任意一个组件中都可以获取查询参数

      console.log(this.$route.query); // 获取所有的查询参数

      if(this.$route.query.city){

         this.city = this.$route.query.city

      }

  },

  methods:{

    get_weather(){

      // 发送http请求获取天气

      this.$http.get("http://wthrcdn.etouch.cn/weather_mini",{

        params:{

          city: this.city,

        }

      }).then(response=>{

        console.log(response.data.data.forecast);

        this.weather_list = response.data.data.forecast;

      }).catch(error=>{

        console.log(error);

      })

    }

  }

}

</script>

<style scoped>

table{

  width: 800px;

  border-collapse: collapse;

}

td,th{

  border: 1px solid red;

}

</style>
Vue cli之路由router的更多相关文章
- vue工程化与路由router
一.介绍 vue.js 是 目前 最火的前端框架,vue.js 兼具 angular.js 和 react.js 的优点,并剔除它们的缺点.并且提供了很多的周边配套工具 如vue-router ...
- vue教程(五)--路由router介绍
一.html页面中如何使用 1.引入 vue-router.js 2.安装插件 Vue.use(VueRouter) 3.创建路由对象 var router = new VueRouter({ // ...
- vue初级学习--路由router的编写(resolve的使用)
一.导语 最近在用vue仿写淘宝的商品详情页面以及加入购物车页面,若是成功了,分享给大家~~~~~~~~~~~~~~~~~~~~~~~~~~~~~~ 二.正文 我先用控制台创建了vue项目demo(如 ...
- [转]Vue CLI 3搭建vue+vuex 最全分析
原文地址:https://my.oschina.net/wangnian/blog/2051369 一.介绍 Vue CLI 是一个基于 Vue.js 进行快速开发的完整系统.有三个组件: CLI:@ ...
- Vue CLI 3搭建vue+vuex 最全分析
一.介绍 Vue CLI 是一个基于 Vue.js 进行快速开发的完整系统.有三个组件: CLI:@vue/cli 全局安装的 npm 包,提供了终端里的vue命令(如:vue create .vue ...
- vue项目创建步骤 和 路由router知识点
菜单快捷导航: vue项目创建 vue路由router知识点(路径参数.查询参数.命名路由.嵌套路由.命名视图.hash/history模式) 1.创建一个vue项目步骤 (windows环境下).创 ...
- react router @4 和 vue路由 详解(六)vue怎么通过路由传参?
完整版:https://www.cnblogs.com/yangyangxxb/p/10066650.html 8.vue怎么通过路由传参? a.通配符传参数 //在定义路由的时候 { path: ' ...
- react router @4 和 vue路由 详解(四)vue如何在路由里面定义一个子路由
完整版:https://www.cnblogs.com/yangyangxxb/p/10066650.html 6.vue如何在路由里面定义一个子路由? 给父路由加一个 children:[] 参考我 ...
- Vue学习笔记-Vue.js-2.X 学习(七)===>脚手架Vue-CLI(路由Router)
脚手架Vue-CLI(路由Router) 一 按装(通过新创建脚手架按装),如果在原来的脚手架上按装直接进图型化界面vue ui的插件按装. 二 使用(上面按装下面步骤自动会生成) 第一步:导入路由对 ...
- vue cli 3
介绍 Vue CLI 是一个基于 Vue.js 进行快速开发的完整系统 通过 @vue/cli 搭建交互式的项目脚手架. 通过 @vue/cli + @vue/cli-service-global 快 ...
随机推荐
- openGauss/MOGDB时间消耗相关视图
openGauss/MOGDB 时间消耗相关视图 本文出处:https://www.modb.pro/db/388212 数据库版本 openGauss/MOGDB-2.1.1 一.显示当前用户在各个 ...
- 动态规划(六)——树形dp
树形dp,又称树状dp,即在树上进行的dp,在设计动态规划算法时,一般就以节点从深到浅(子树从小到大)的顺序作为dp的"阶段",dp的状态表示中,第一维通常是节点编号(代表以该节点 ...
- 升级Django项目过程中问题记录
升级内容: python版本:3.8.4升到3.10.7 Django版本:2.2.13升到4.2 所遇问题: 1. error in anyjson setup command: use_2to3 ...
- Elasticsearch与kibana的单机安装
前言 本文为纯实操记录,以供需要时查阅. 对应版本为7.3,jdk版本1.8 Elasticsearch安装 Elasticsearch官网:https://www.elastic.co/cn/pro ...
- 简述Linux磁盘IO
1.什么是磁盘 在讲解磁盘IO前,先简单说下什么是磁盘.磁盘是可以持久化存储的设备,根据存储介质的不同,常见磁盘可以分为两类:机械磁盘和固态磁盘. 1.1 机械磁盘 第一类,机械磁盘,也称为硬盘驱动器 ...
- HL7标准的版本
HL7V2 HL7v2是用于在系统之间交换临床和患者信息的最广泛使用的医疗保健消息传递标准.HL7v2的目标是使用代表临床事件信息的标准化消息(例如患者管理活动.人口统计.医疗订单.结果和财务信息)在 ...
- Serverless 架构落地实践及案例解析
简介: 技术演进的本质是更好服务业务,传统开发方式使企业花费更多的精力打磨底层技术细节,而 Serverless 架构就是让开发者专注业务实现从而创造更大的业务价值. 作者 | 丹坤 整理 | 徐 ...
- 企业版Spark Databricks + 企业版Kafka Confluent 联合高效挖掘数据价值
简介:本文介绍了如何使用阿里云的Confluent Cloud和Databricks构建数据流和LakeHouse,并介绍了如何使用Databricks提供的能力来挖掘数据价值,使用Spark ML ...
- Java异步非阻塞编程的几种方式
简介: Java异步非阻塞编程的几种方式 一. 从一个同步的Http调用说起 一个很简单的业务逻辑,其他后端服务提供了一个接口,我们需要通过接口调用,获取到响应的数据. 逆地理接口:通过经纬度获取这个 ...
- [FAQ] wechaty 与 wechaty-puppet-padplus 生态安全吗
答案是肯定有风险. 非技术角度讲,使用这种方式登录微信存在被微信官方风控的可能性,需要特别注意. 另外,以下是 wechaty 项目说明文件中截取的内容: 我们可以看到,除了微信官方方面的风险,我们的 ...