SpringBoot整合ActiveMq实现Queue和Topic两种模式(看不懂你来打我)
一、前言
最近小编在学习消息队列,然后选中了ActiveMq,来进行学习.于是探索了好久,来整理一下自己的学习心得!大家一起学习,希望对你有用.我把一些我自己的理解写在注释里了注意看!!
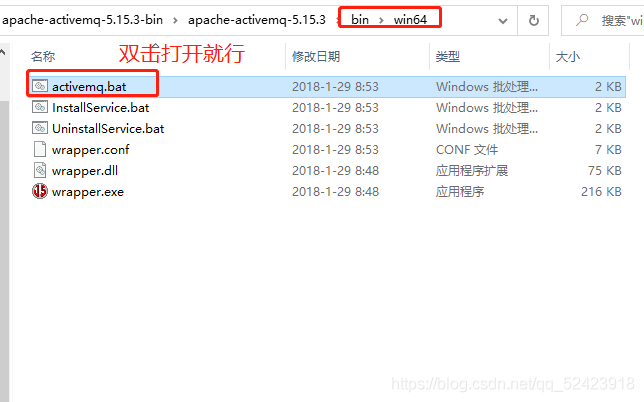
二、ActiveMq的下载和使用
- 下载
大家直接下载解压就可以使用了--->
链接:https://pan.baidu.com/s/1W0MZtQAya0mOEKMWqJK1iA
提取码:29mz
- 使用
三、依赖准备
	<!-- activemq -->

	<dependency>

	   <groupId>org.springframework.boot</groupId>

	   <artifactId>spring-boot-starter-activemq</artifactId>

	</dependency>
四、yml文件配置
spring:

 activemq:

  broker-url: tcp://127.0.0.1:61616

  user: admin

  password: admin

  jms:

   pub-sub-domain: true # 默认为false:queue   true:topic

queue: queue_mq # 点对点消费名字

topic: topic_mq # 订阅式消费名字
五、配置Bean
import org.apache.activemq.command.ActiveMQQueue;

import org.apache.activemq.command.ActiveMQTopic;

import org.springframework.beans.factory.annotation.Value;

import org.springframework.context.annotation.Bean;

import org.springframework.context.annotation.Configuration;

import org.springframework.jms.annotation.EnableJms;

import javax.jms.Queue;

import javax.jms.Topic;

@Configuration

@EnableJms

public class ActiveMqConfig {

    @Value("${queue}")//对应yml文件中定义的queue

    private String queue;

    @Value("${topic}")//对应yml文件中定义的topic

    private String topic;

    /**

     * 创建点对点的队列  一个消息只能被一个消费者消费  --- 一对一

     * @return

     */

    @Bean

    public Queue queue(){

        return new ActiveMQQueue(queue);

    }

    /**

     * 创建订阅式的队列  一个消息可以被多个消费者消费 --- 一对多

     * @return

     */

    @Bean

    public Topic topic(){

        return new ActiveMQTopic(topic);

    }

}
六、创建生产者(Queue+Topic)
import org.springframework.beans.factory.annotation.Autowired;

import org.springframework.jms.core.JmsMessagingTemplate;

import org.springframework.web.bind.annotation.GetMapping;

import org.springframework.web.bind.annotation.RequestParam;

import org.springframework.web.bind.annotation.RestController;

import javax.jms.Queue;

import javax.jms.Topic;

@RestController

public class ProducerController {

    @Autowired

    private Queue queue;

    @Autowired

    private Topic topic;

    @Autowired

    private JmsMessagingTemplate jmsMessagingTemplate;

    /**

     * 点对点的消息队列的生产者

     * @param string

     */

    @GetMapping("/queue")

    public void sendMsgQueue(@RequestParam String string){

        System.out.println("消息已经发送,准备被消费,消息为 ---> "+string);

        jmsMessagingTemplate.convertAndSend(queue,string);

    }

    /**

     * 一对多的消息队列的生产者

     * @param string

     */

    @GetMapping("/topic")

    public void sendMsgTopic(@RequestParam String string){

        System.out.println("消息已经发送,准备被消费,消息为 ---> "+string);

        jmsMessagingTemplate.convertAndSend(topic,string);

    }

}
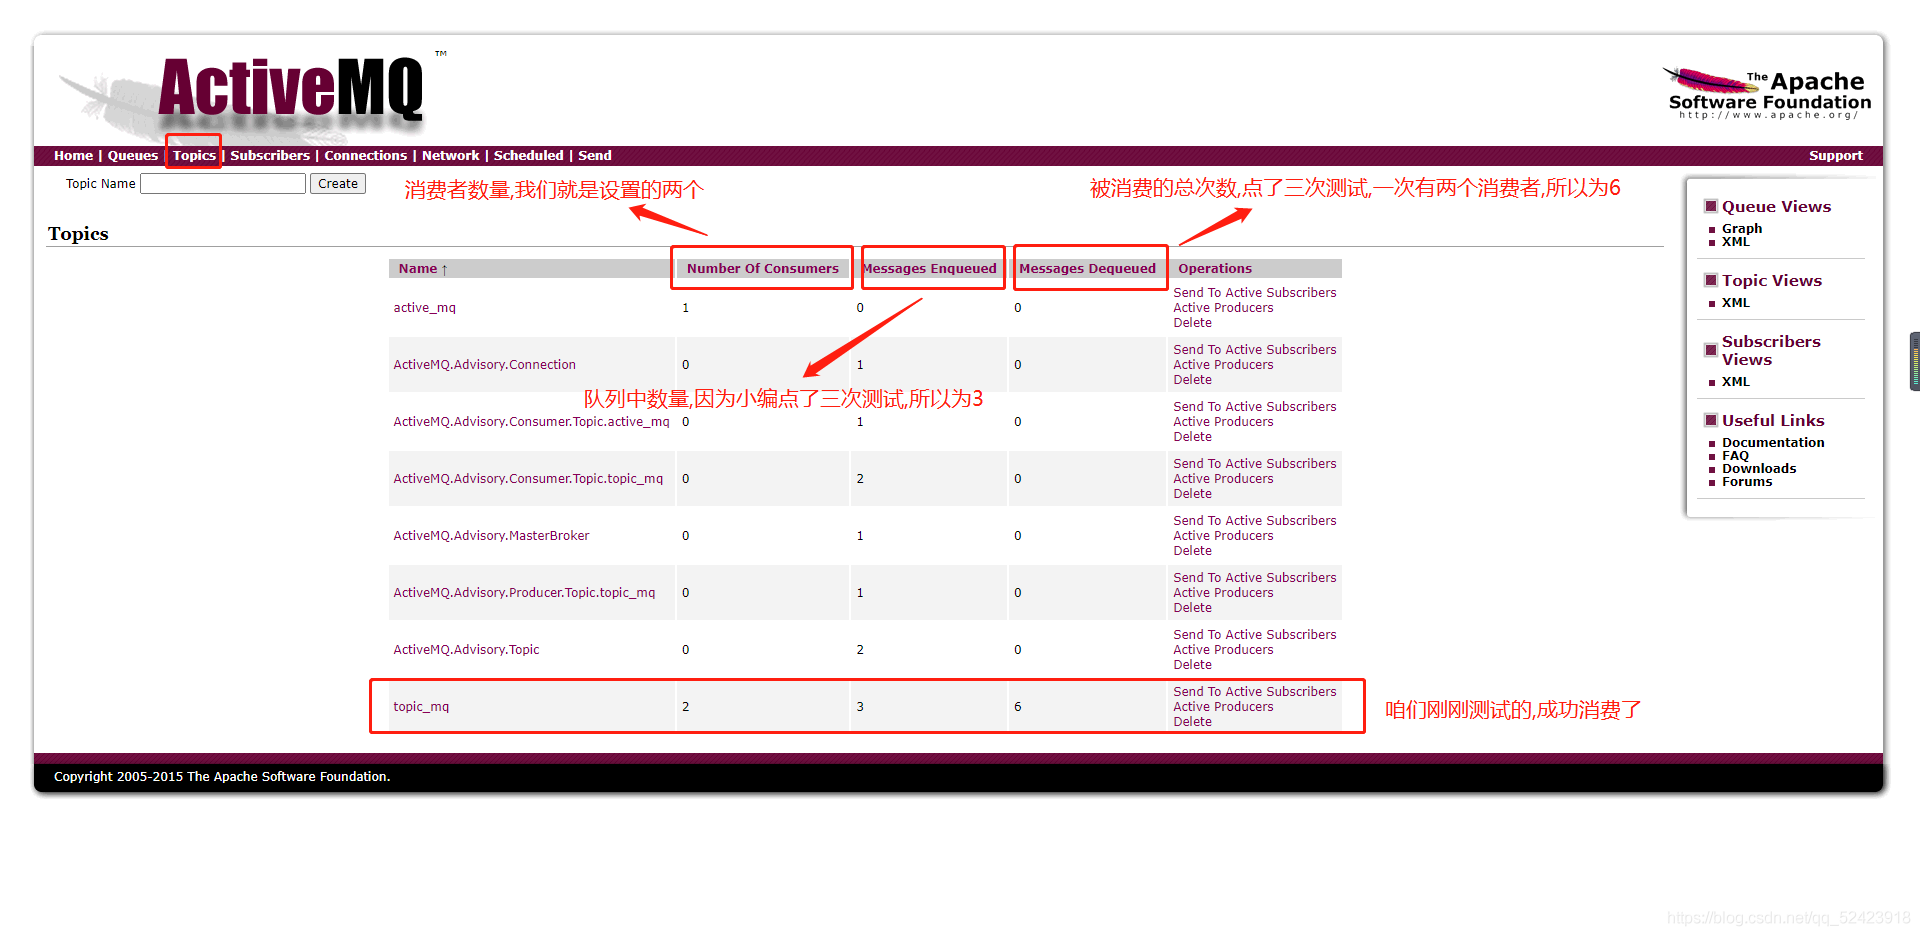
七、创建消费者(Topic模式下)
import org.springframework.jms.annotation.JmsListener;

import org.springframework.stereotype.Component;

@Component

public class TopicConsumer {

    /**

     * 监听消息,名字为生产者发送的名字,要一致,不然监听不到.

     * 因为是订阅者模式,可以有多个消费者,我们这里举两个来进行测试

     * @param string

     */

    @JmsListener(destination = "${topic}")

    public void consumerTopicOne(String string){

        System.out.println("我是消费者一号:消费消息成功,信息为---> "+string);

    }

    @JmsListener(destination = "${topic}")

    public void consumerTopicTwo(String string){

        System.out.println("我是消费者二号:消费消息成功,信息为---> "+string);

    }

}
八、测试结果(Topic模式下)

九、ActiveMq网页版查看是否成功(Topic模式下)
网站地址 http://127.0.0.1:8161/admin/ 账号密码都是admin

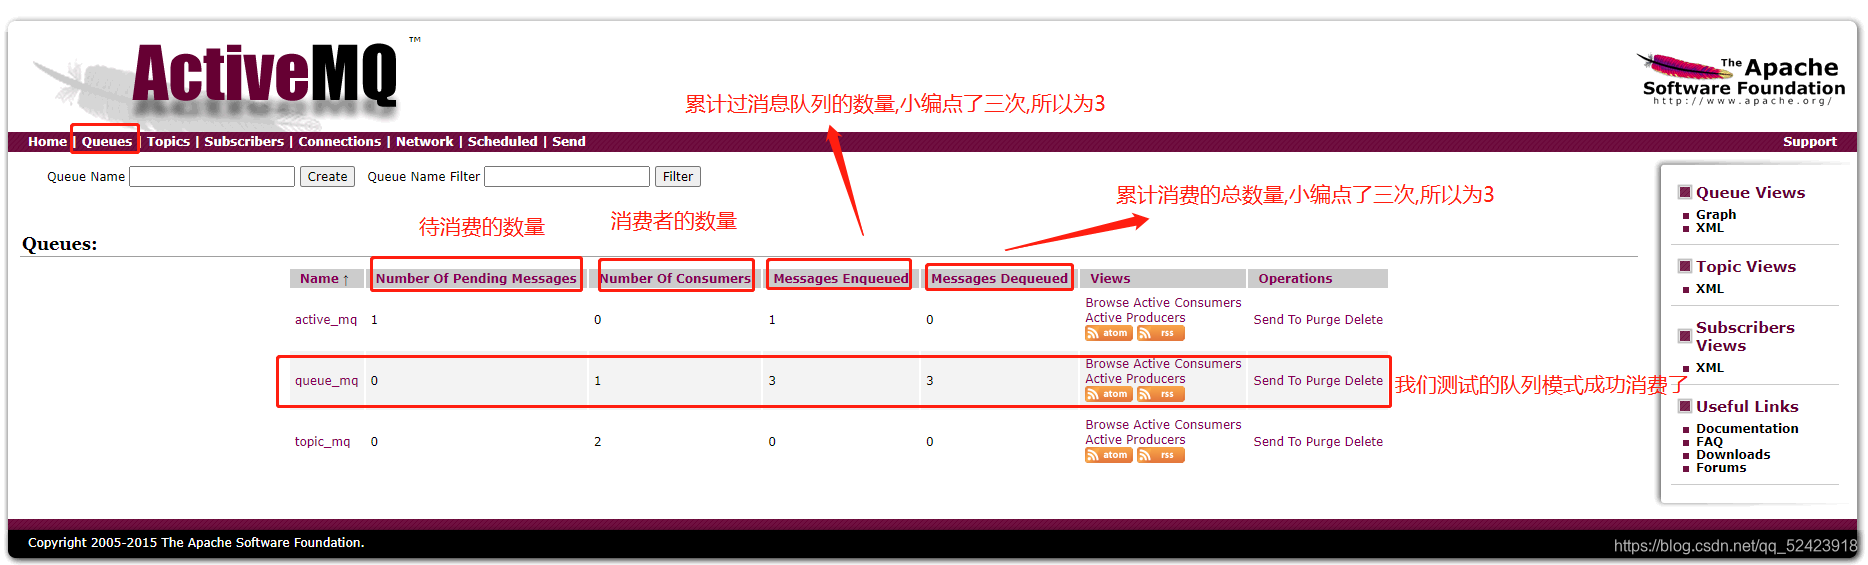
十、创建消费者(Queue模式下)
首先把yml文件中的配置修改为Queue:pub-sub-domain: false
import org.springframework.jms.annotation.JmsListener;

import org.springframework.stereotype.Component;

@Component

public class QueueConsumer {

    /**

     * 监听消息,名字为生产者发送的名字,要一致,不然监听不到.

     * 因为是队列模式,只能消费者

     * @param string

     */

    @JmsListener(destination = "${queue}")

    public void consumerQueue(String string){

        System.out.println("消费消息成功,信息为---> "+string);

    }

}
十一、测试结果(Queue模式下)

十二、ActiveMq网页版查看是否成功(Queue模式下)
十三、总结
这样我们就搭建好了,并且测试没有问题,有问题留言哦.比较合适刚刚学习的童鞋们,期待您的关注,一起学习,一起提高哦!!!
SpringBoot整合ActiveMq实现Queue和Topic两种模式(看不懂你来打我)的更多相关文章
- ActiveMQ的queue以及topic两种消息处理机制分析
1 queue与topic的技术特点对比 对比项 Topic Queue 概要 Publish Subscribe messaging 发布订阅消息 Point-to-Point 点对点 有无状 ...
- 解决Springboot整合ActiveMQ发送和接收topic消息的问题
环境搭建 1.创建maven项目(jar) 2.pom.xml添加依赖 <parent> <groupId>org.springframework.boot</group ...
- 实例讲解Springboot整合MongoDB进行CRUD操作的两种方式
1 简介 Springboot是最简单的使用Spring的方式,而MongoDB是最流行的NoSQL数据库.两者在分布式.微服务架构中使用率极高,本文将用实例介绍如何在Springboot中整合Mon ...
- 消息队列:快速上手ActiveMQ消息队列的JMS方式使用(两种模式:Topic和Queue的消息推送和订阅)
1.实现功能 希望使用一套API,实现两种模式下的消息发送和接收功能,方便业务程序调用 1.发送Topic 2.发送Queue 3.接收Topic 4.接收Queue 2.接口设计 根据功能设计公共调 ...
- SpringBoot系列八:SpringBoot整合消息服务(SpringBoot 整合 ActiveMQ、SpringBoot 整合 RabbitMQ、SpringBoot 整合 Kafka)
声明:本文来源于MLDN培训视频的课堂笔记,写在这里只是为了方便查阅. 1.概念:SpringBoot 整合消息服务 2.具体内容 对于异步消息组件在实际的应用之中会有两类: · JMS:代表作就是 ...
- SpringBoot整合ActiveMQ和开启持久化
一.点对点 1.提供者目录展示 2.导入依赖 <dependency> <groupId>org.springframework.boot</groupId> &l ...
- ActiveMQ 笔记(四)Spring\SpringBoot 整合 Activemq
个人博客网:https://wushaopei.github.io/ (你想要这里多有) 一.Spring 整合Activemq 1.所需jar包 <dependencies> &l ...
- Web项目容器集成ActiveMQ & SpringBoot整合ActiveMQ
集成tomcat就是随项目启动而启动tomcat,最简单的方法就是监听器监听容器创建之后以Broker的方式启动ActiveMQ. 1.web项目中Broker启动的方式进行集成 在这里采用Liste ...
- SpringBoot整合ActiveMQ快速入门
Spring Boot 具有如下特性: 为基于 Spring 的开发提供更快的入门体验 开箱即用,没有代码生成,也无需 XML 配置.同时也可以修改默认值来满足特定的需求. 提供了一些大型项目中常见的 ...
随机推荐
- 使用Azure Congnitive Services 技术制作AI故事机
引言 前一段时间有幸参加了微软MVP的AI方面的学习挑战赛,对于AI 这个新的领域的技术瞬间勾起了我的学习兴趣. 最近几年,不管是国内还是国外,AI都是一个异常火热的词.比如现在的自动驾驶技术,其实就 ...
- Python - bytes与字符串的相互转化
decode和encode的区别和介绍 by.decode(encoding='UTF-8',errors='strict') str.encode(encoding='UTF-8',errors=' ...
- BPDU、Hybrid、MSTP
BPDU.Hybrid.MSTP 一.BPDU 1)BPDU概述 2)BPDU类型 3)BPDU报文字段 二.Hybrid ...
- 使用BeautifulSoup自动爬取微信公众号图片
爬取微信分享的图片,根据不同的页面自行修改,使用BeautifulSoup爬取,自行格局HTML修改要爬取图片的位置 import re import time import requests imp ...
- 实验 1 Linux 系统的安装和常用命令
实验 1 Linux 系统的安装和常用命令 (题目) 一.实验目的 (1)掌握 Linux 虚拟机的安装方法.Spark 和 Hadoop 等大数据软件在 Linux 操作系统 上运行可以发挥最佳性能 ...
- [001] - JavaSE面试题(一):面向对象
第一期:Java面试 - 100题,梳理各大网站优秀面试题.大家可以跟着我一起来刷刷Java理论知识 [001] - JavaSE面试题(一):面向对象 第1问:面向对象和面向过程的区别? 面向过程 ...
- K8s基本概念资料
https://www.cnblogs.com/menkeyi/p/7134460.html
- browse下载插件DownThemAll!
DownThemAll!是一个不错的下载插件,它安装在各类browse上.
- C++第五十二篇 -- 多线程之消息传递
主线程向子线程发送消息 参考链接:https://www.cnblogs.com/ranjiewen/p/5729539.html 1. 创建线程语句 HANDLE hThread; DWORD dw ...
- (python函数03)zip()函数
(python函数03)zip()函数 zip是用来压缩的,它接受一系列可迭代的对象作为参数,将对象中对应的元素打包成一个个元组(tuple),然后返回有这些tuples组成的对象,可强制转化为列表和 ...