Modern Data Lake with Minio : Part 2
转自: https://blog.minio.io/modern-data-lake-with-minio-part-2-f24fb5f82424
In the first part of this series, we saw why object storage systems like Minio are the perfect approach to build modern data lakes that are agile, cost-effective, and massively scalable.
In this post we’ll learn more about object storage, specifically Minio and then see how to connect Minio with tools like Apache Spark and Presto for analytics workloads.
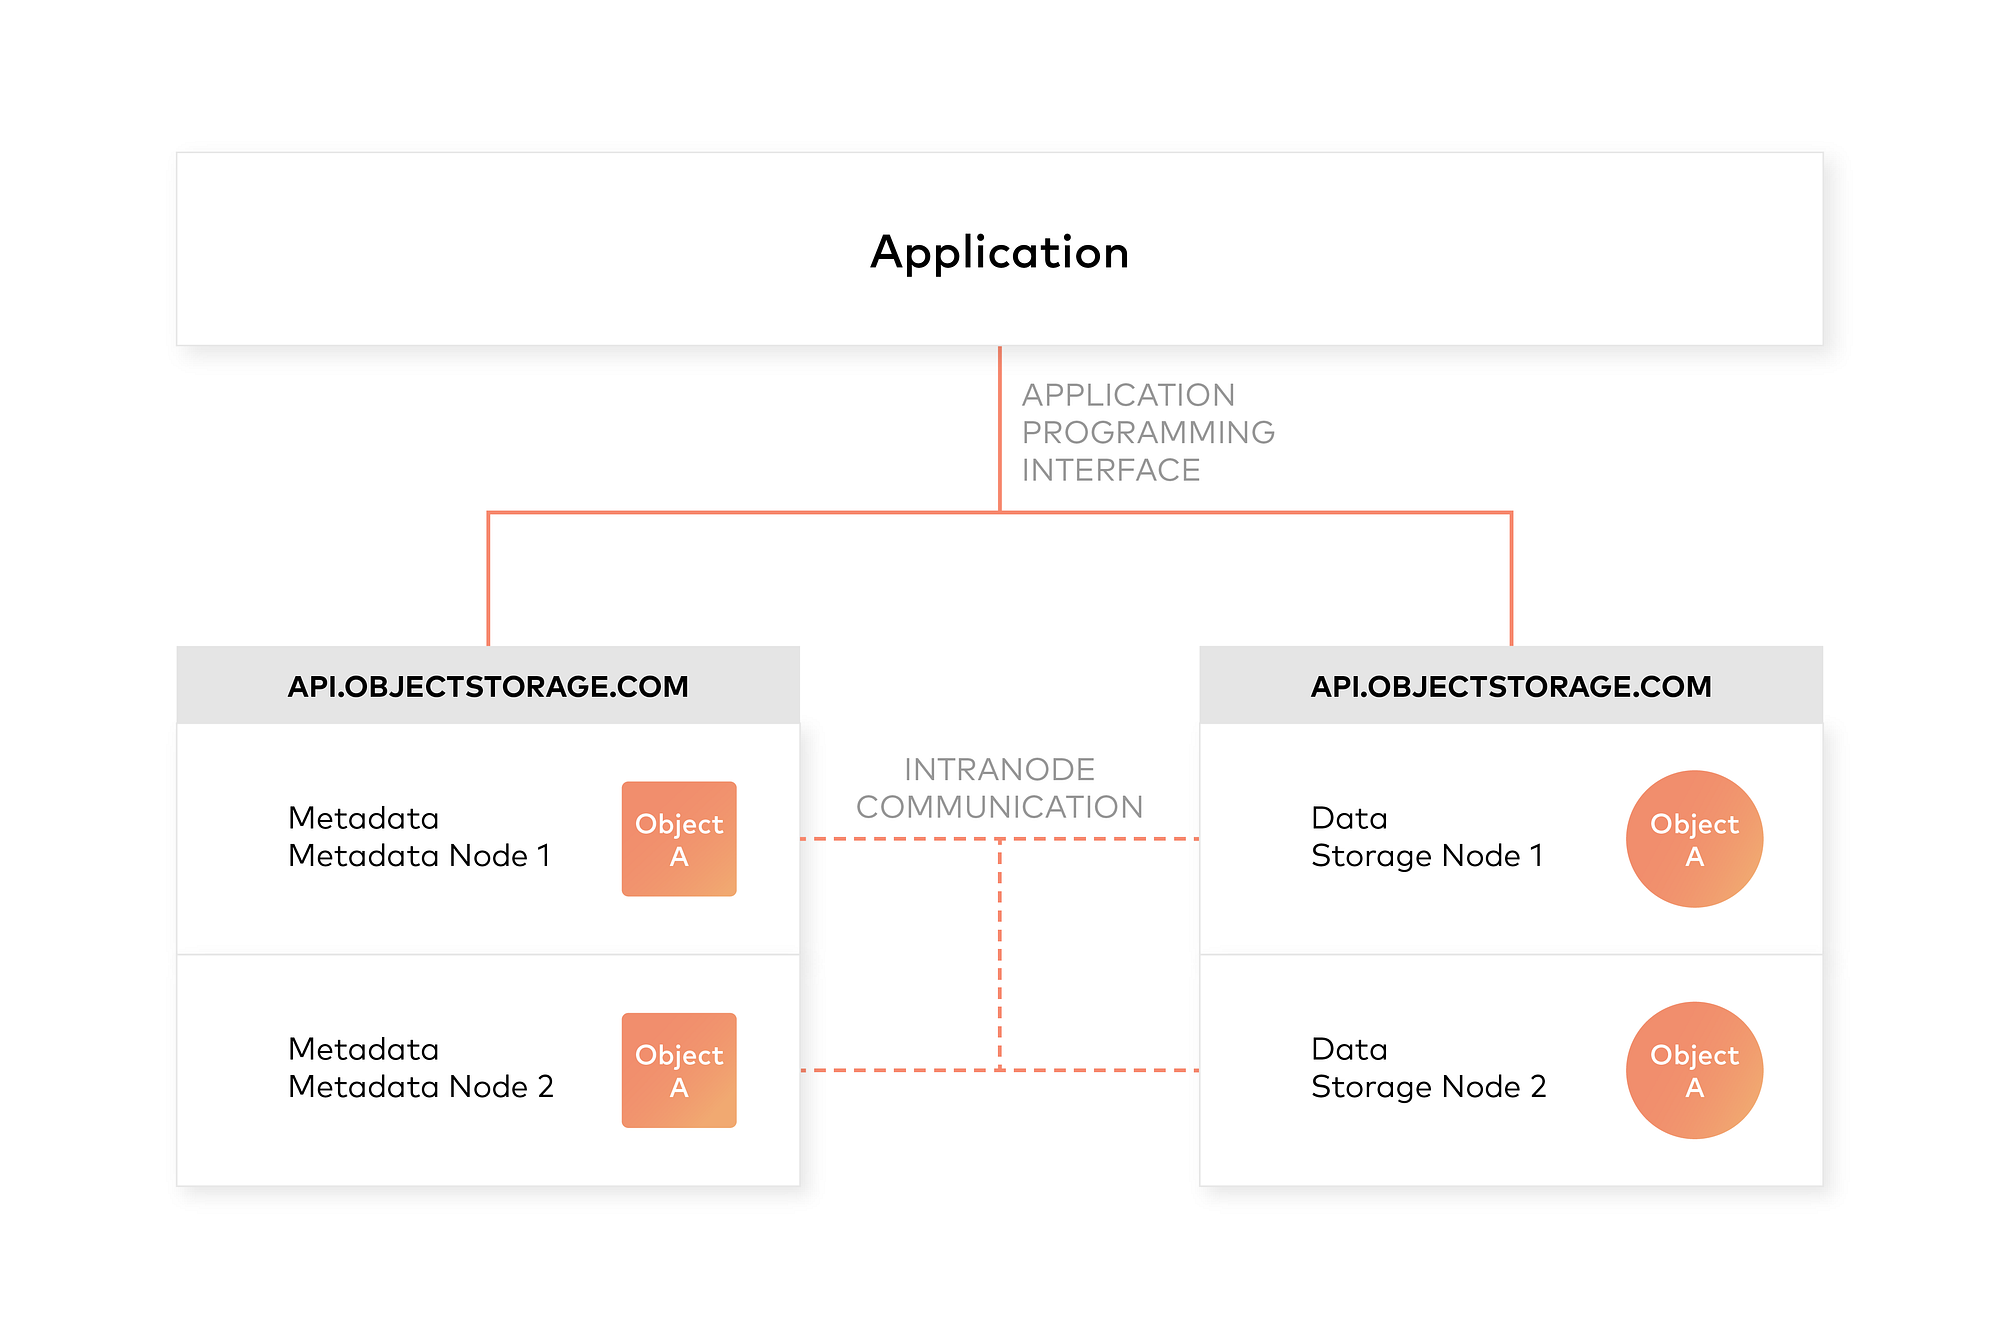
Architecture of an object storage system
One of the design principles of object storage is to abstract some of the lower layers of storage away from the administrators and applications. Thus, data is exposed and managed as objects instead of files or blocks. Objects contain additional descriptive properties which can be used for better indexing or management. Administrators do not have to perform lower-level storage functions like constructing and managing logical volumes to utilize disk capacity or setting RAID levels to deal with disk failure.
Object storage also allows the addressing and identification of individual objects by more than just file name and file path. Object storage adds a unique identifier within a bucket, or across the entire system, to support much larger namespaces and eliminate name collisions.
Inclusion of rich custom metadata within the object
Object storage explicitly separates file metadata from data to support additional capabilities. As opposed to fixed metadata in file systems (filename, creation date, type, etc.), object storage provides for full function, custom, object-level metadata in order to:
- Capture application-specific or user-specific information for better indexing purposes
- Support data-management policies (e.g. a policy to drive object movement from one storage tier to another)
- Centralized management of storage across many individual nodes and clusters
- Optimize metadata storage (e.g. encapsulated, database or key value storage) and caching/indexing (when authoritative metadata is encapsulated with the metadata inside the object) independently from the data storage (e.g. unstructured binary storage)
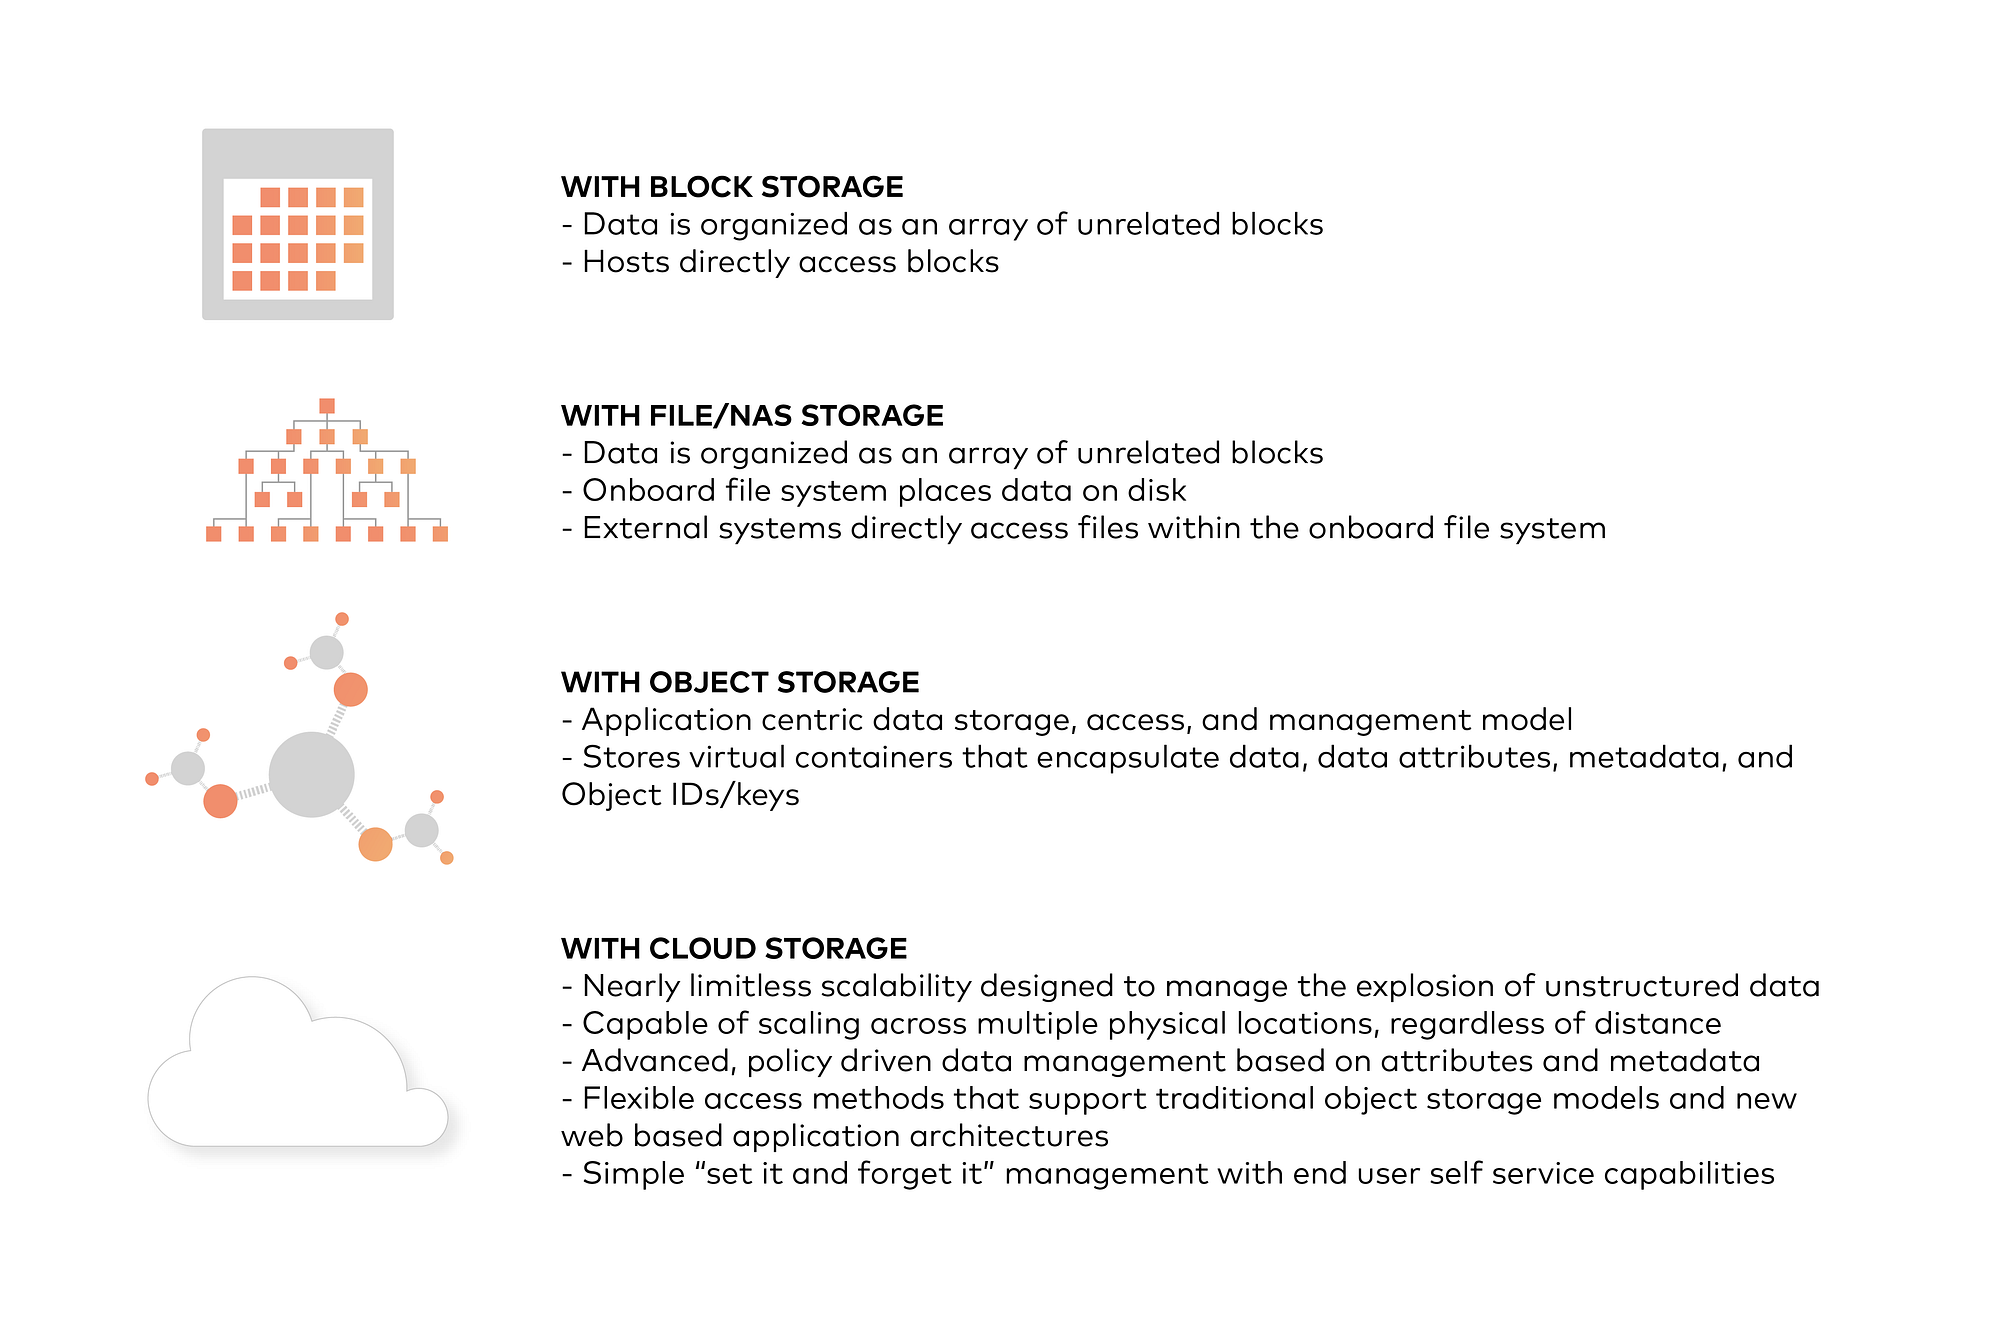
All the four types of storage in a nutshell
Integrating Minio Object Store with Hadoop 3
Use Minio documentation to deploy Minio on your preferred platform. Then, follow the steps to see how to integrate Minio with Hadoop.
- First, install Hadoop 3.1.0. Download the tar and extract to a folder. Create either .bashrc or .profile (In Windows, path and environment variables) as below
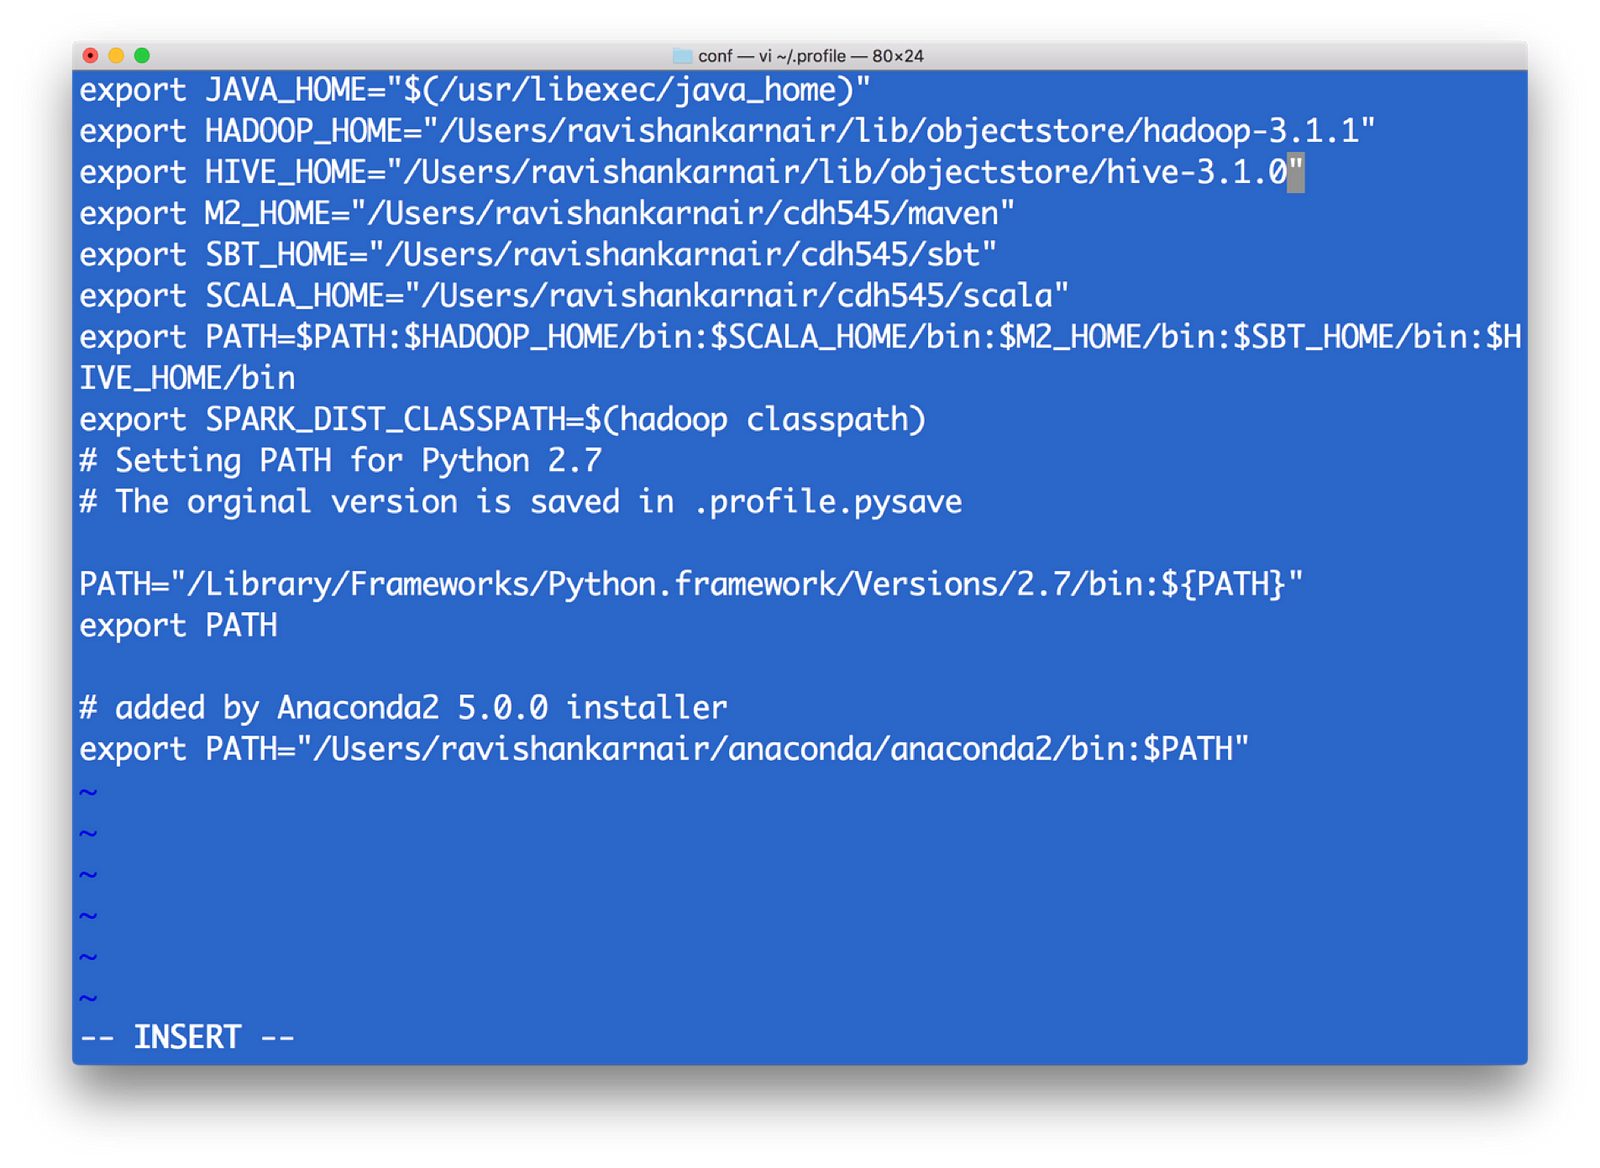
Your profile (I am using Mac)
2) All configurations for a Hadoop related with file system is kept in a directory etc/hadoop(this is relative from the root of your installation — I will call root installation directory as $HADOOP_HOME). We need to make changes in core-site.xml to point the new file system. Note that when we write hdfs:// for accessing the Hadoop file system, by default it connects to the underlying default FS configured in core-site.xml, which is managed as blocks of 128MB (Hadoop versions 1 was 64 MB), essentially indicating that hdfs is block storage. Now that we have Object Storage, the protocol to access cannot be hdfs://. Instead we need to use another protocol, and most commonly used one is s3a . S3 stands for Simple Storage Service, created by Amazon and is widely used as access protocol for object storage. Hence in core-site.xml, we need to write the info on what the underlying code should do when the command starts with s3a. Refer the below file for details and update it into core-site.xml of your Hadoop installation.
<property>
<name>fs.s3a.endpoint</name>
<description>AWS S3 endpoint to connect to.</description><value>http://localhost:9000</value>
<! — NOTE: Above value is obtained from the minio start window — -></property>
<property>
<name>fs.s3a.access.key</name>
<description>AWS access key ID.</description>
<value>UC8VCVUZMY185KVDBV32</value>
<! — NOTE: Above value is obtained from the minio start window — -></property>
<property>
<name>fs.s3a.secret.key</name>
<description>AWS secret key.</description>
<value>/ISE3ew43qUL5vX7XGQ/Br86ptYEiH/7HWShhATw</value>
<! — NOTE: Above value is obtained from the minio start window — ->
</property>
<property>
<name>fs.s3a.path.style.access</name>
<value>true</value>
<description>Enable S3 path style access.</description>
</property>
3) To enable s3a, we need some jar files to be copied to $HADOOP_HOME/share/lib/common/lib directory. Note that you also need to match your Hadoop version with the jar files you download. I used Hadoop version 3.1.1, hence I used hadoop-aws-3.1.1.jar. These are the jar files needed :
hadoop-aws-3.1.1.jar //should match your Hadoop version
aws-java-sdk-1.11.406.jar
aws-java-sdk-1.7.4.jar
aws-java-sdk-core-1.11.234.jar
aws-java-sdk-dynamodb-1.11.234.jar
aws-java-sdk-kms-1.11.234.jar
aws-java-sdk-s3–1.11.406.jar
httpclient-4.5.3.jar
joda-time-2.9.9.jar
4) Now start dfs as usual. Without namenode, we can’t connect to s3a. The script to start is in $HADOOP_HOME/sbin directory. Note that this is needed only if you want to use hdfs filesystem as well as s3a
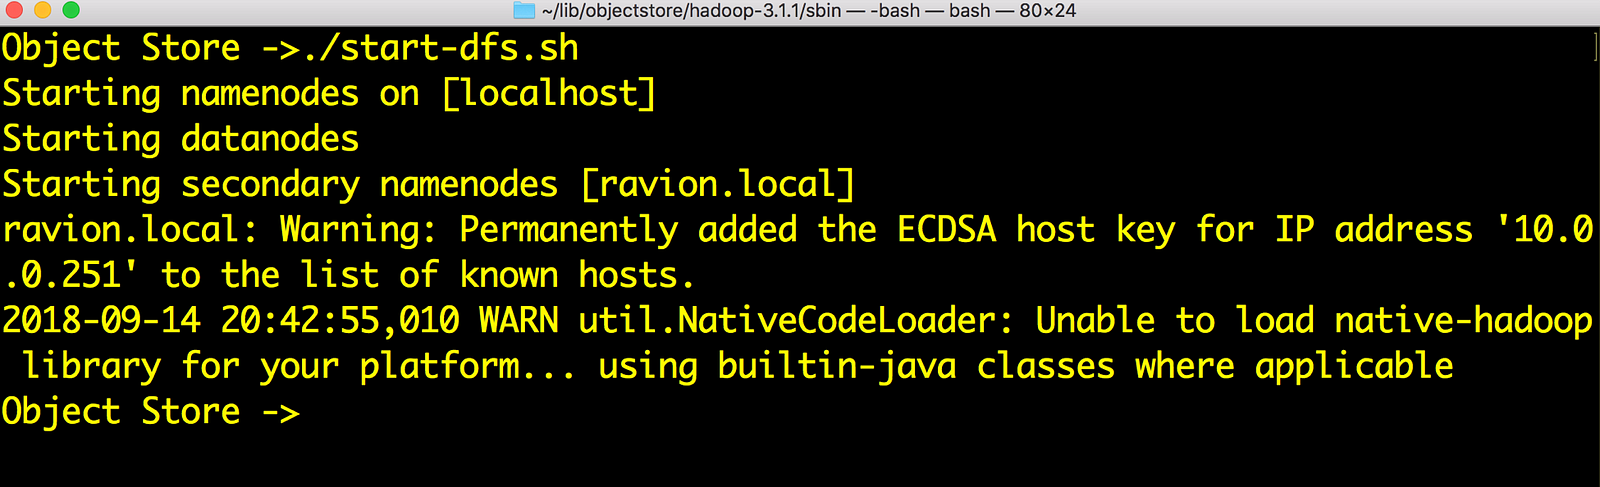
Start Hadoop
5) Let’s play with s3a://
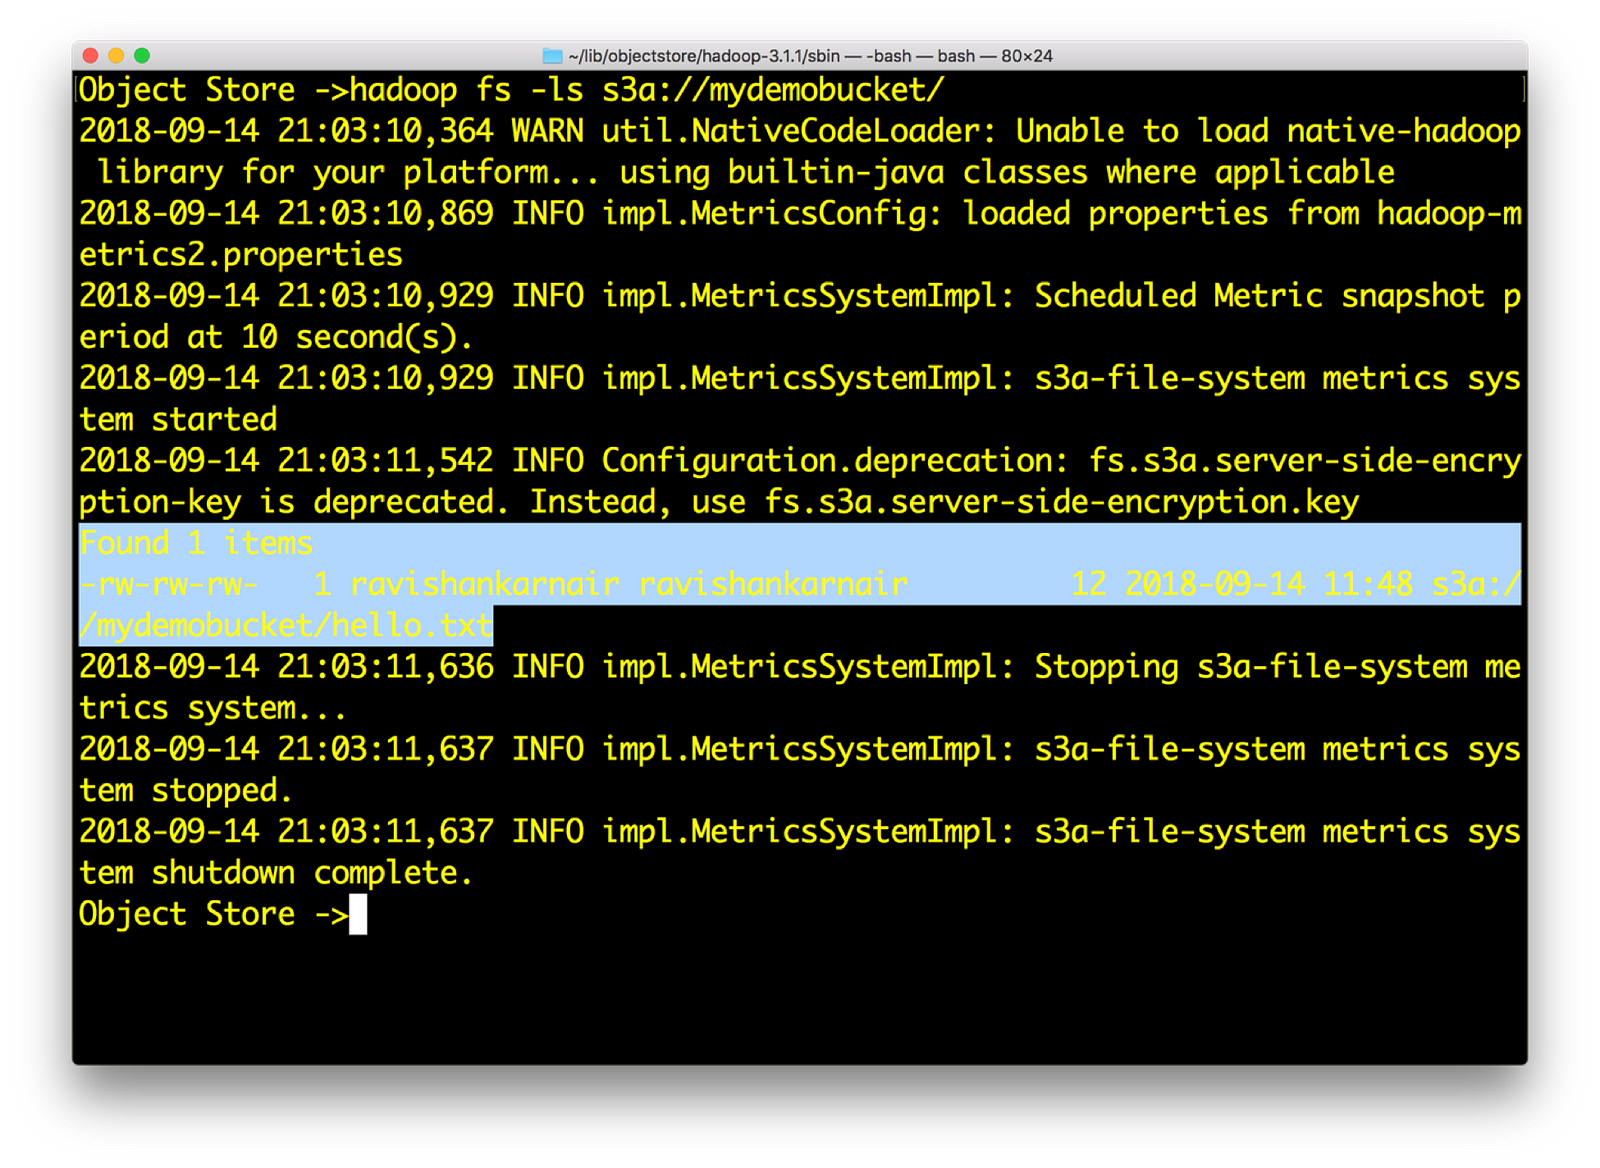
See that you can access an Object Store now with s3a://
6) Now create a sample file res.txt locally with random text. Then enter
hadoop fs –put res.txt s3a://mydemobucket/res.txt
Check the Minio browser now, you should see the file in bucket mydemobucket
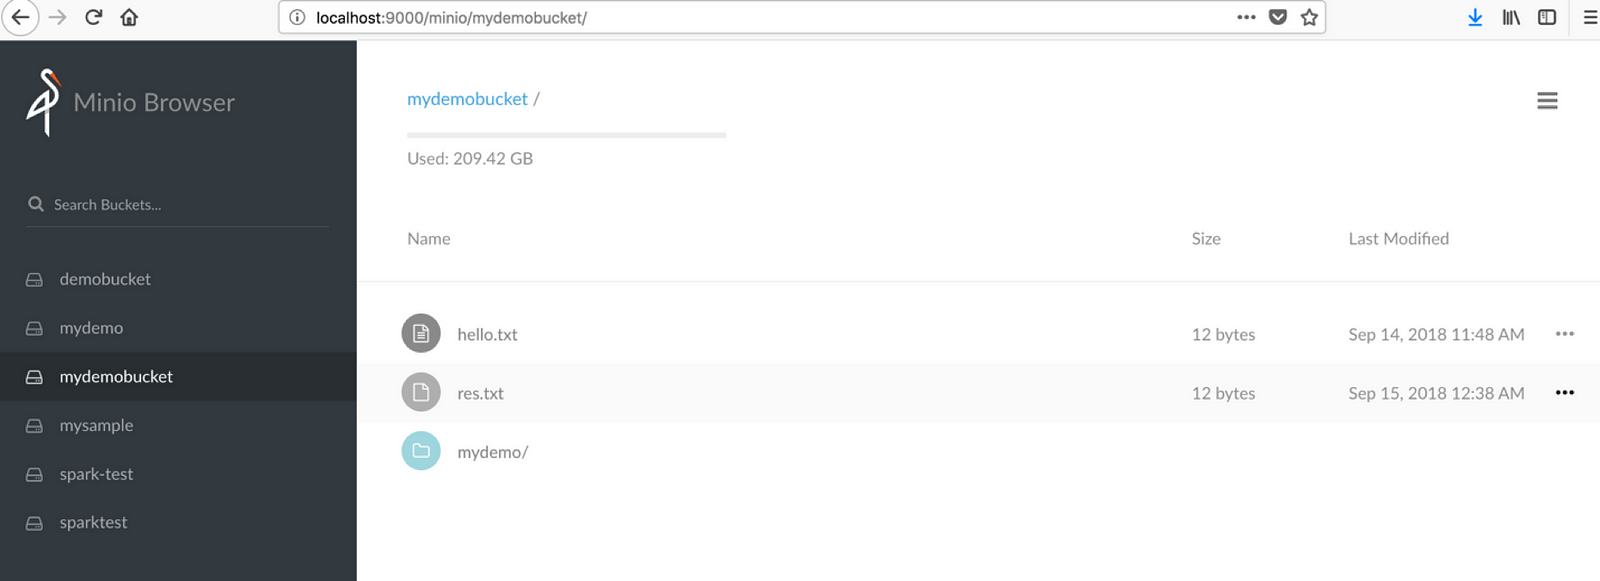
You can see the file in Minio browser
Also , try hadoop fs –cat command on any file that you may have:
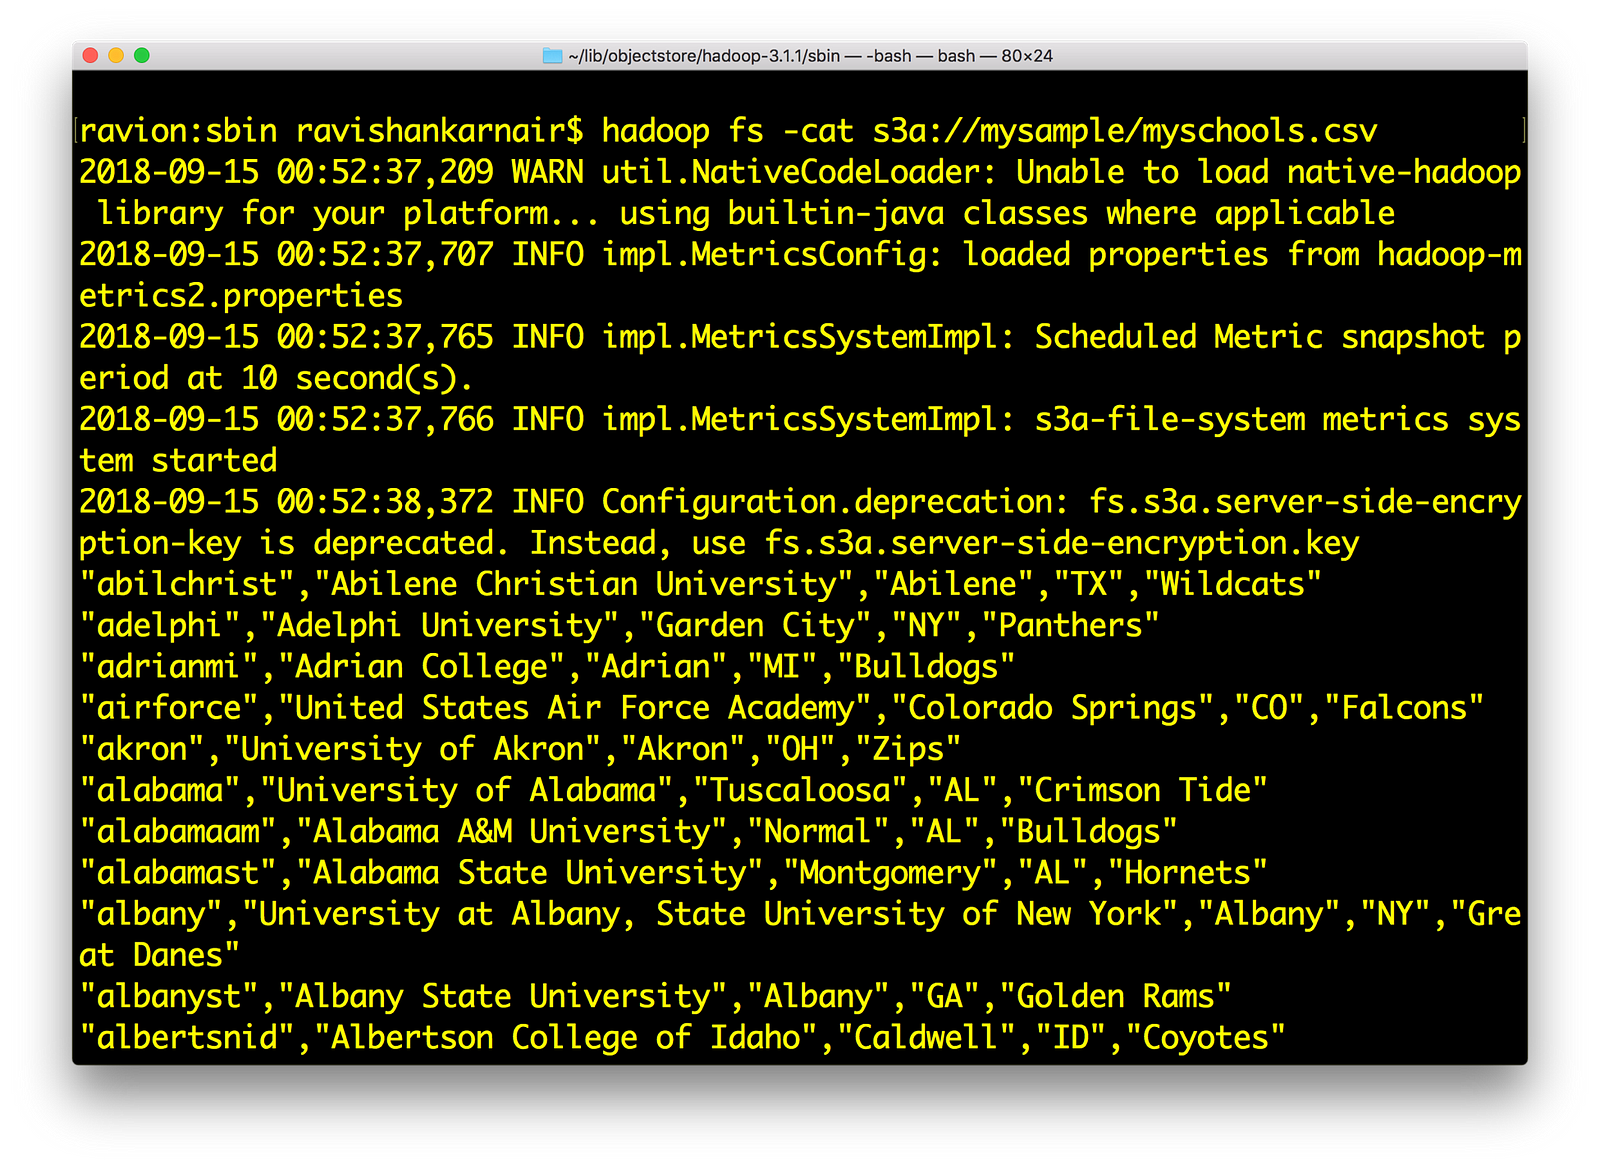
Lists the data from Hadoop shell using s3a://
If all this works for you, we have successfully integrated Minio with Hadoop using s3a:// .
Integrating Minio Object Store with HIVE 3.1.0
- Download latest version of HIVE compatible with Apache Hadoop 3.1.0. I have used apache-hive-3.1.0. Untar the downloaded bin file. Lets call untarred directory as hive-3.1.0
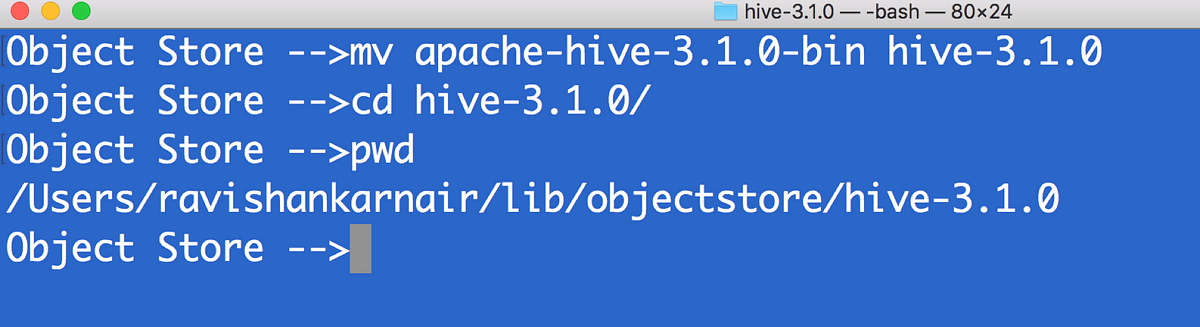
Hive installation
2) First copy all files that you used step 3 above (in the Hadoop integration section) to $HIVE_HOME/lib directory
3) Create hive-site.xml. Make sure you have MYSQL running to be used a metastore. Create a user (in this example ravi )
<configuration>
<property>
<name>javax.jdo.option.ConnectionURL</name><value>jdbc:mysql://localhost:3307/objectmetastore?createDatabaseIfNotExist=true</value>
<description>metadata is stored in a MySQL server</description>
</property>
<property>
<name>javax.jdo.option.ConnectionDriverName</name>
<value>com.mysql.jdbc.Driver</value>
<description>MySQL JDBC driver class</description>
</property>
<property>
<name>javax.jdo.option.ConnectionUserName</name>
<value>ravi</value>
<description>user name for connecting to mysql server</description>
</property>
<property>
<name>javax.jdo.option.ConnectionPassword</name>
<value>ravi</value>
<description>password for connecting to mysql server</description>
</property>
<property>
<name>fs.s3a.endpoint</name>
<description>AWS S3 endpoint to connect to.</description><value>http://localhost:9000</value>
</property>
<property>
<name>fs.s3a.access.key</name>
<description>AWS access key ID.</description>
<value>UC8VCVUZMY185KVDBV32</value>
</property>
<property>
<name>fs.s3a.secret.key</name>
<description>AWS secret key.</description>
<value>/ISE3ew43qUL5vX7XGQ/Br86ptYEiH/7HWShhATw</value>
</property>
<property>
<name>fs.s3a.path.style.access</name>
<value>true</value>
<description>Enable S3 path style access.</description>
</property>
<property>
<name>hive.metastore.warehouse.dir</name>
<value>s3a://hive/warehouse</value>
</property>
</configuration>
4) Since its initial time, we need to run metatool once. Add $HIVE_HOME and bin to environment variables. Refer to step 1 above.
5) In minio, create a bucket called hive and a directory warehouse. We must have s3a://hive/warehouse available.
6) Source your ~/.profile. Please copy the MYSQL driver (mysql-connector-java-x.y.z.jar)to $HIVE_HOME/lib. Then run metatool as
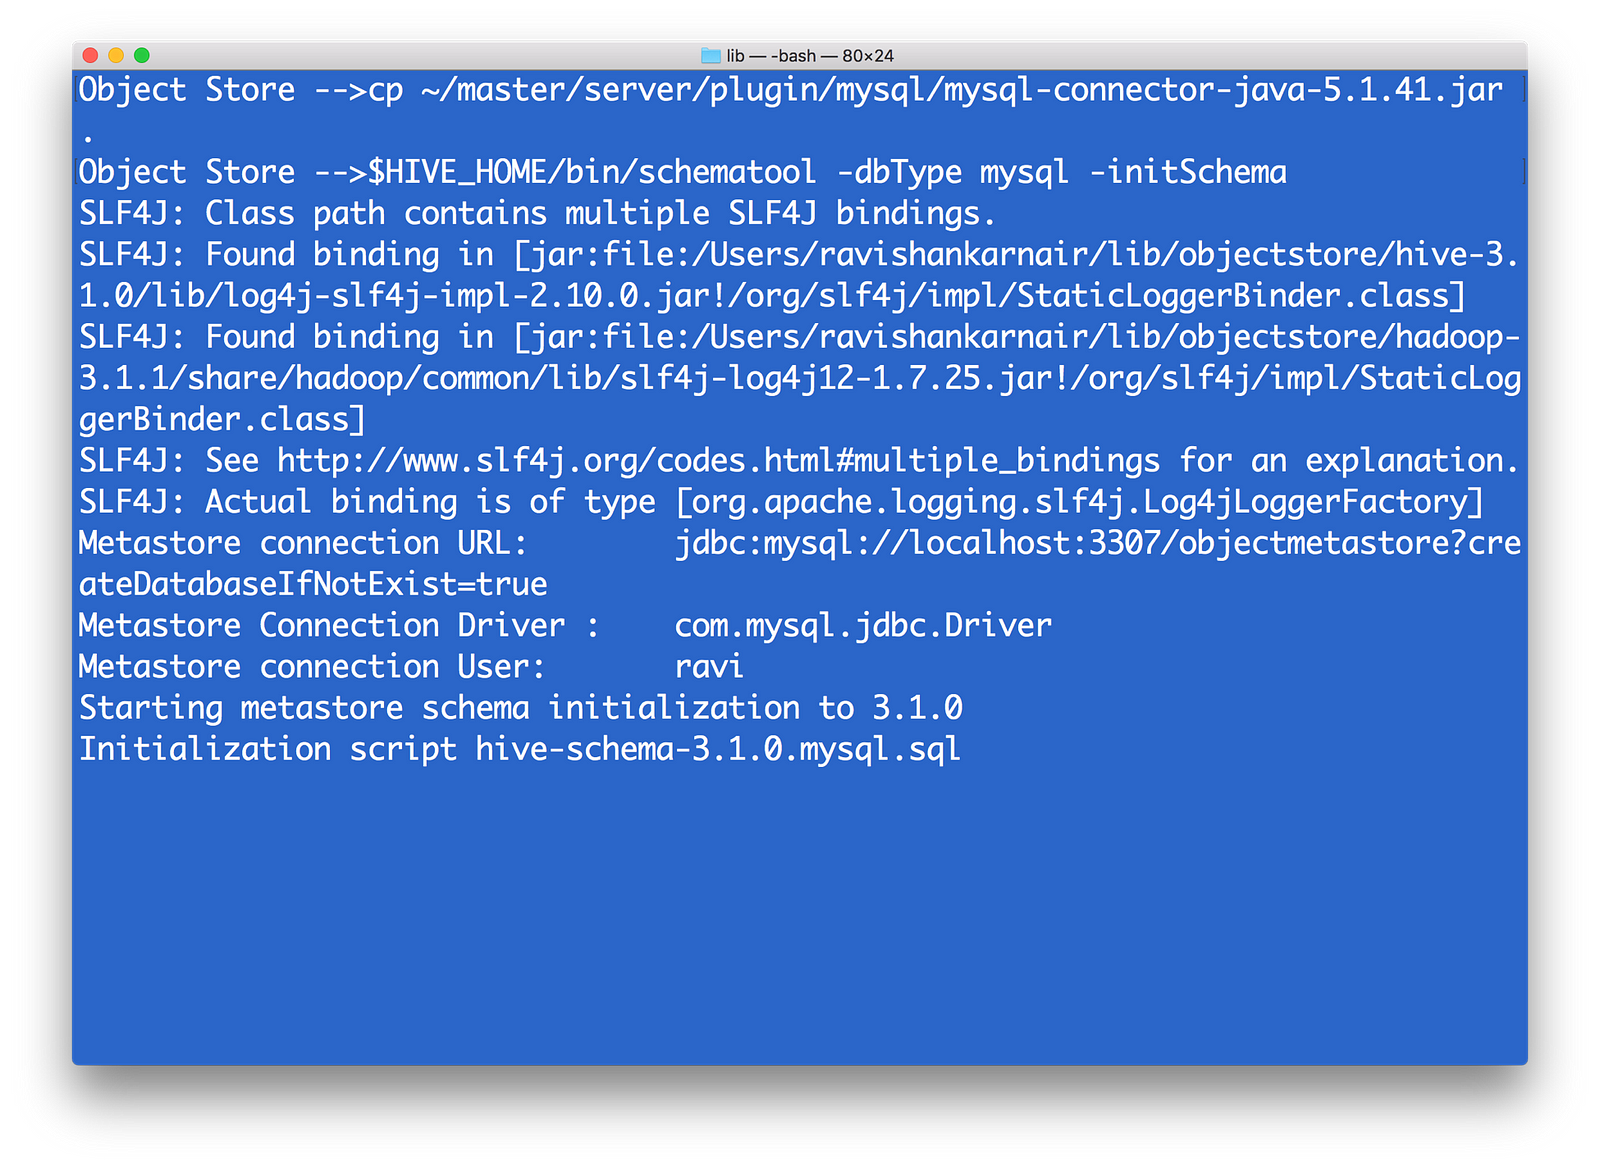
Run HIVE metatool to initialize the megastore
7) Start Hive server and Meta store by
$HIVE_HOME/bin/hiveserver2 start
$HIVE_HOME/bin/hiveserver2 --service metastore
8) Copy some data file to the mydemobucket that we created earlier. You may use minio client in step 6 above. I have myschools.csv, which contains schoolid, schoolname, schoolcity, schoolstate and schoolnick. The file is as follows:
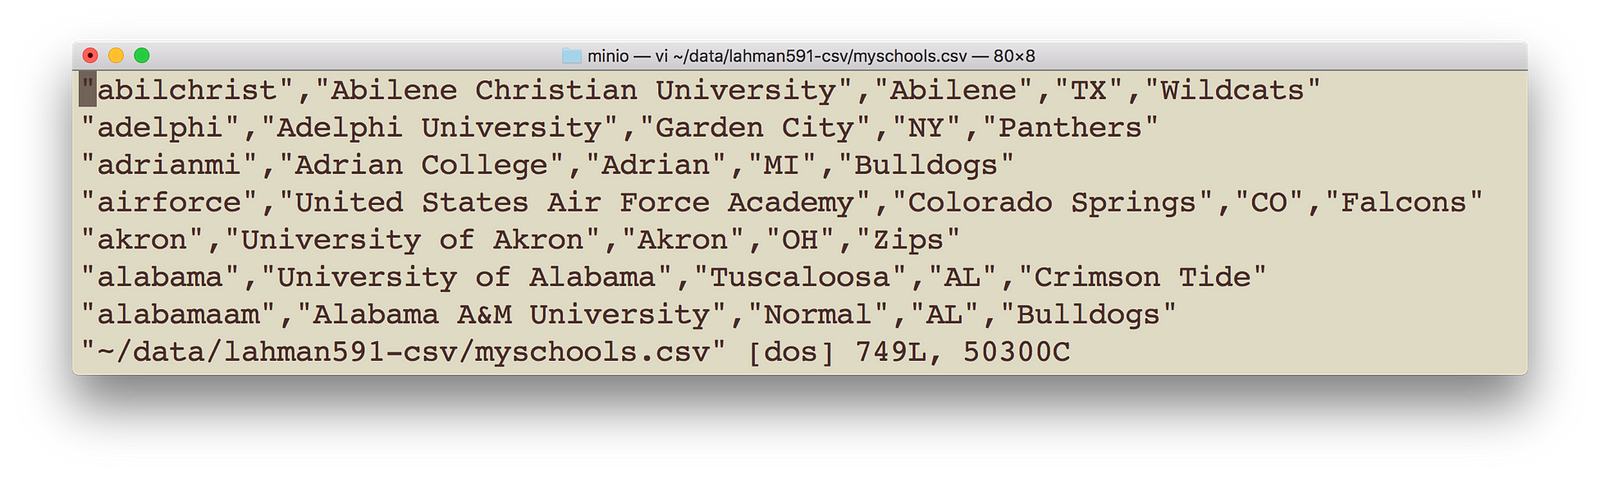
My sample data
Execute following command with appropriate change to your data file location and name. Make sure you bring the data to be copied to your local.
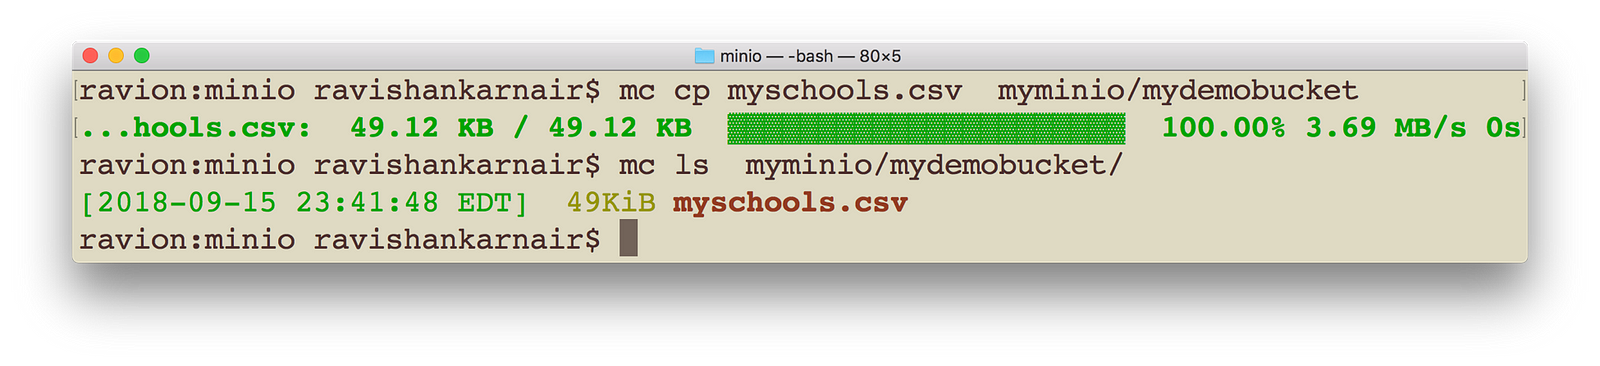
Create a bucket in Minio and copy the data (We are using Minio Client)
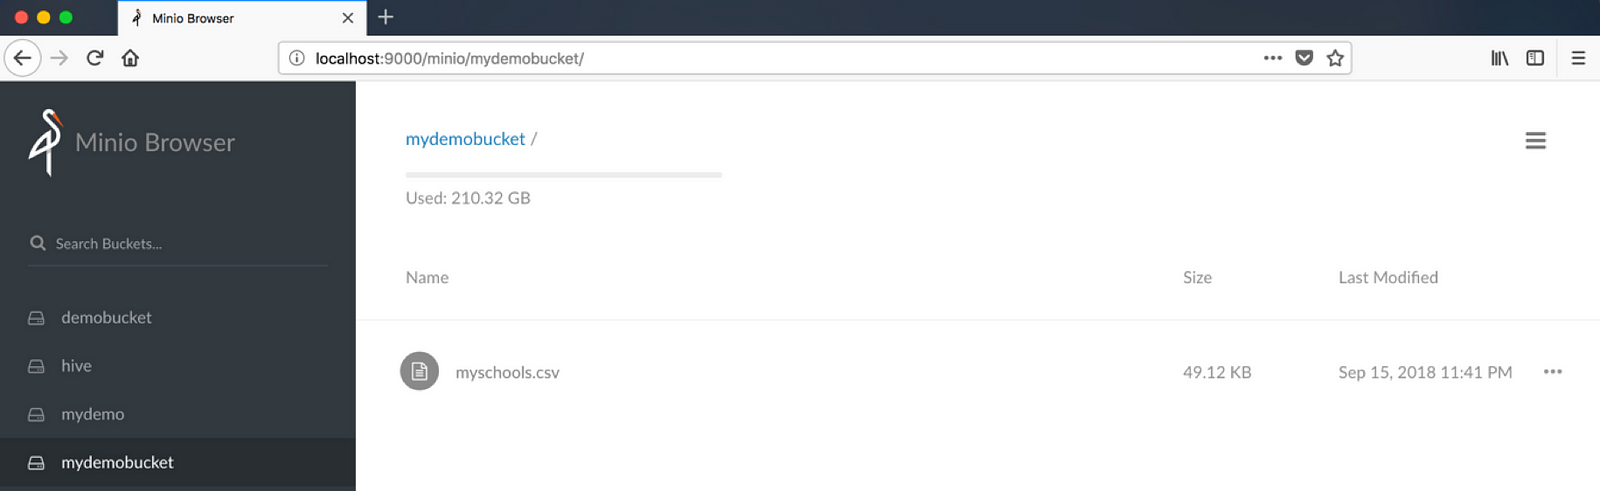
Make sure Minio browser displays the bucket and data
10) Create a HIVE table, with data pointing to s3 now. Please note that you must give upto parent directory, not the file name. I have highlighted the error message you may get when you give filename
create table schools (schoolId string, schoolName string, schoolCity string, schoolState string, schoolNick string) row format delimited fields terminated by ‘,’ lines terminated by “\n” location ‘s3a://mydemobucket/’;
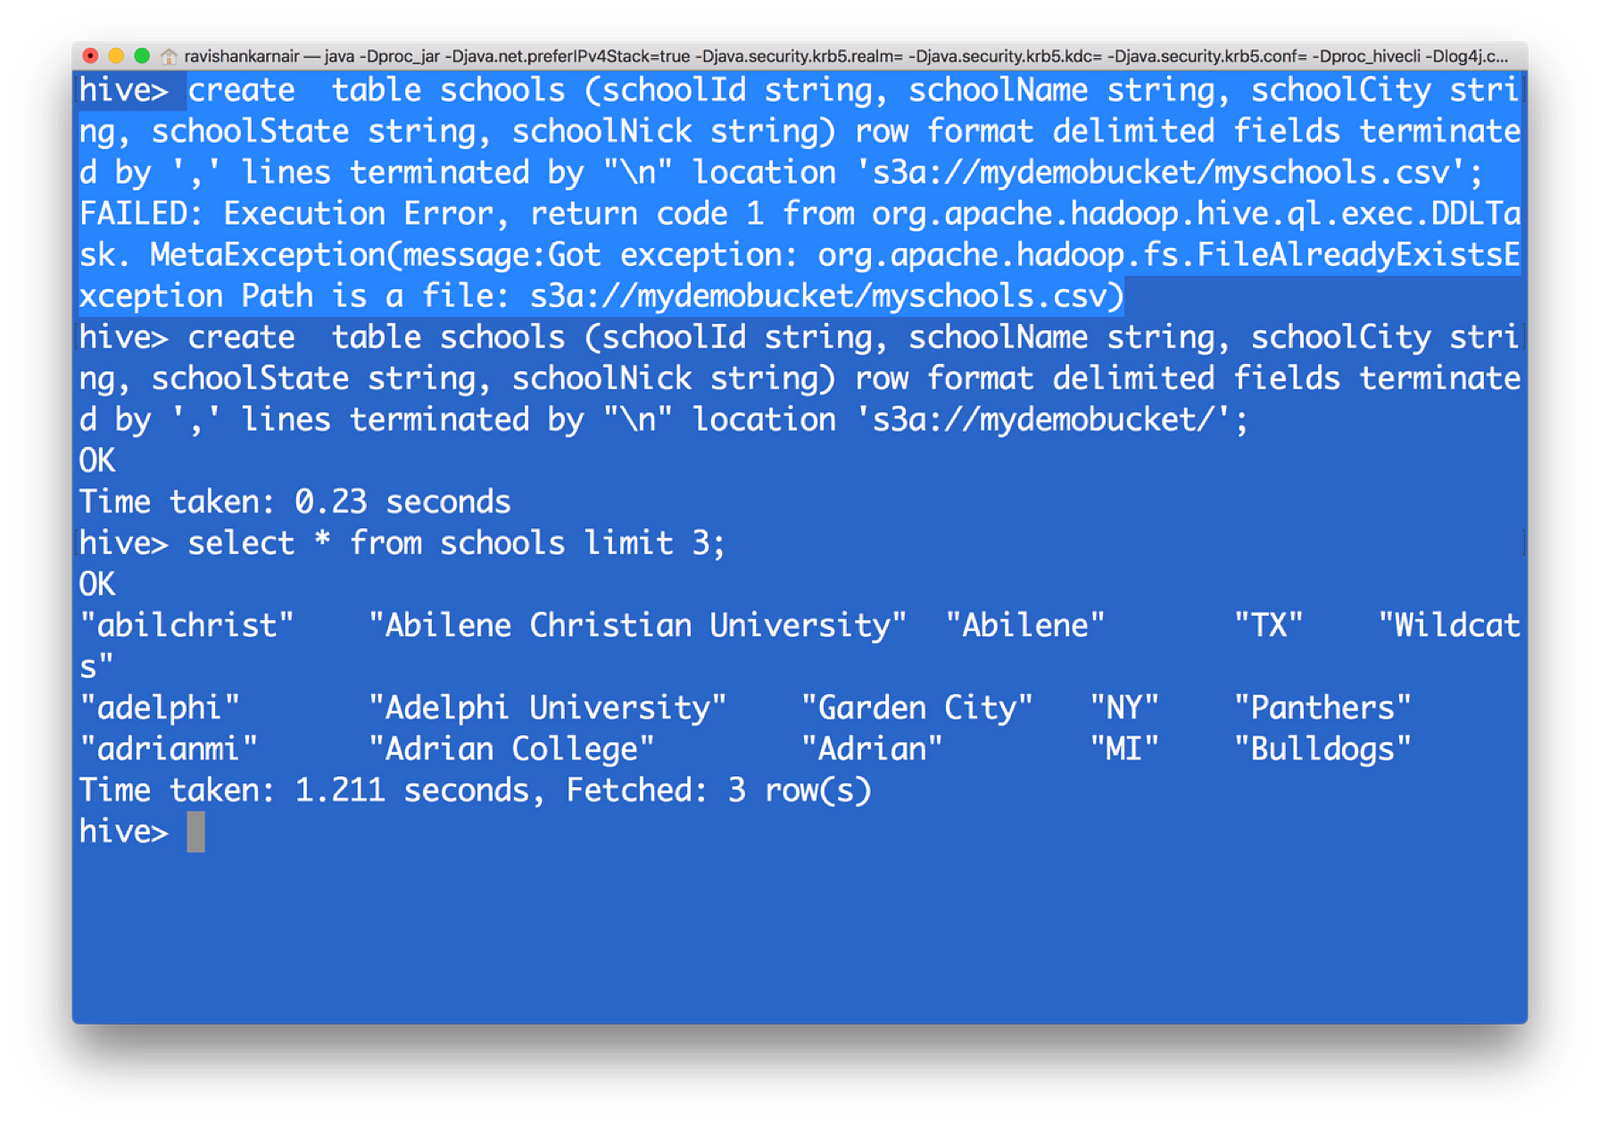
Create a table pointing to your file in Object Storage and retrieve using Hive QL
You have now created a HIVE table from s3 data. That means, with the underlying file system as S3, we can create a data warehouse without the dependency on HDFS.
Integrating Presto — unified data architecture platform with Minio object storage
You may now require another important component: How to combine data with an already existing system, when you move to Object Storage? You may want to compare with the data you have in a MYSQL database of your organization with the data in HIVE (on S3). Here comes one of the top notch and free (open source) unified data architecture systems in the world — Facebook’s presto.
Now let’s integrate presto with whole system. Download the latest version from https://github.com/prestodb/presto. Follow the deployment instructions. At the minimum, we need the presto server and presto client for accessing the server. Its distributed SQL query engine which allows you to write SQL for getting data from multiple systems with rich set of SQL functions.
- Install Presto. You will have following directory structure from root. Within catalog directory, you will mention the connectors that you need Presto to query. Connectors are the systems with which Presto can query. Presto comes up with many default connectors.
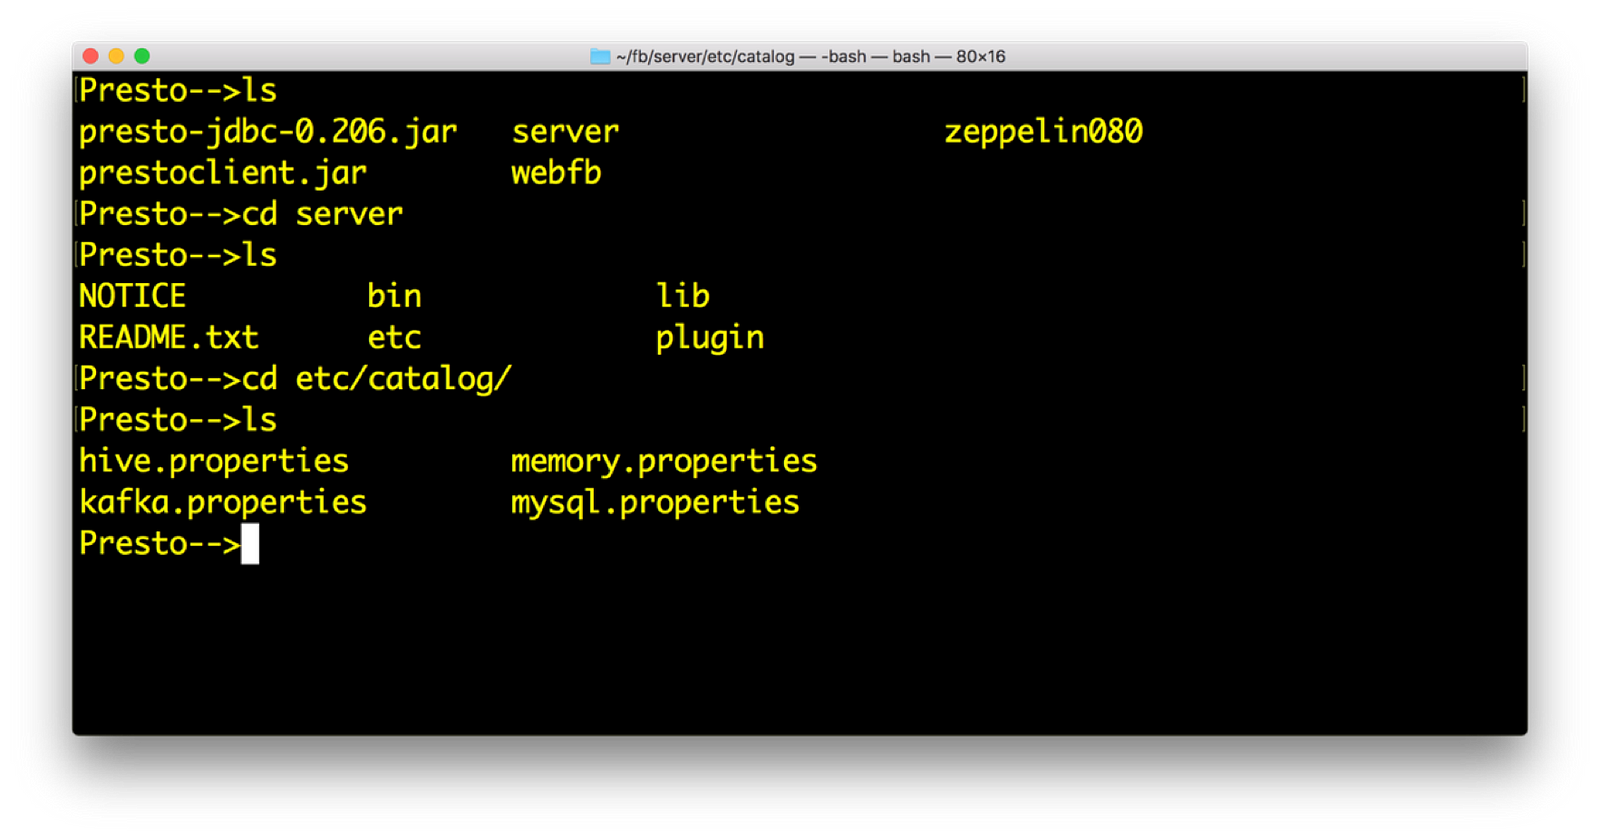
Presto installation and catalogs (Refer https://prestodb.io)
2) Open hive.properties. We should have the following data. Again access key and secret are available from minio launch screen
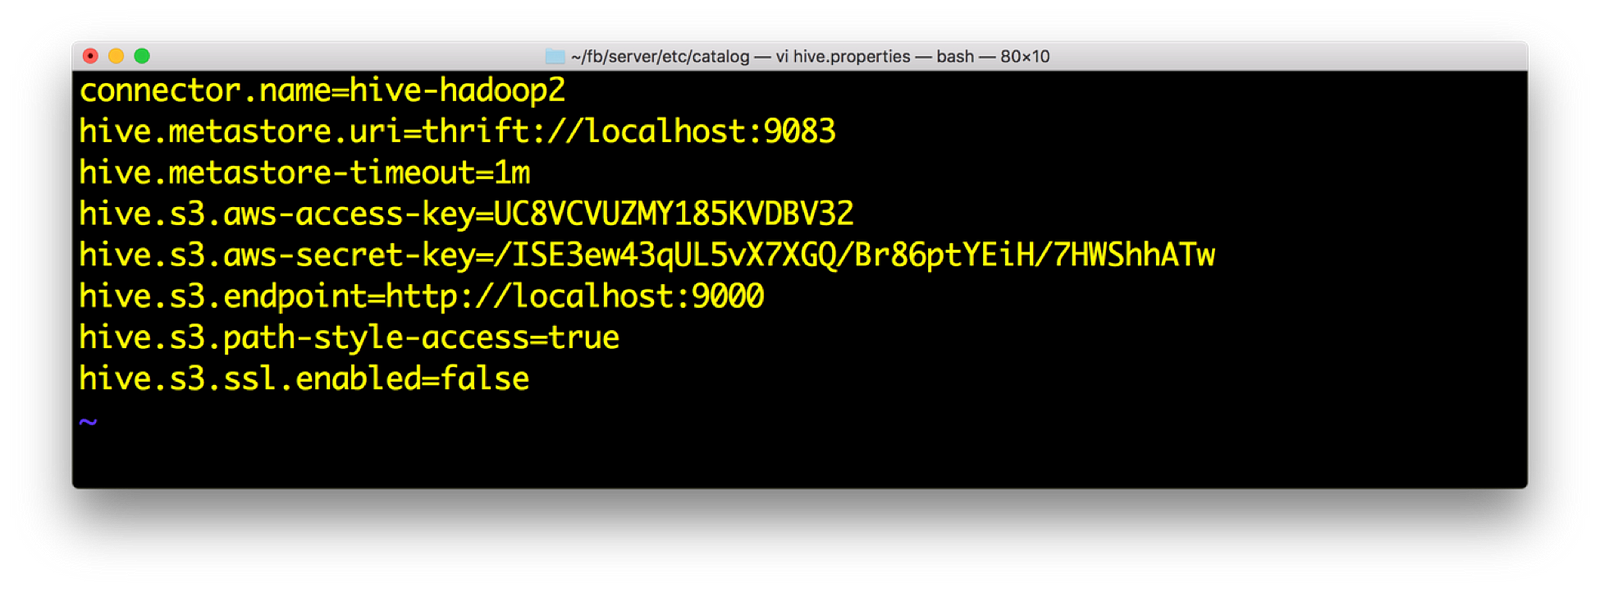
Hive catalog entries for connecting to s3a:// in Presto
3) Start Presto. You need to do to server directory and execute: bin/launcher run
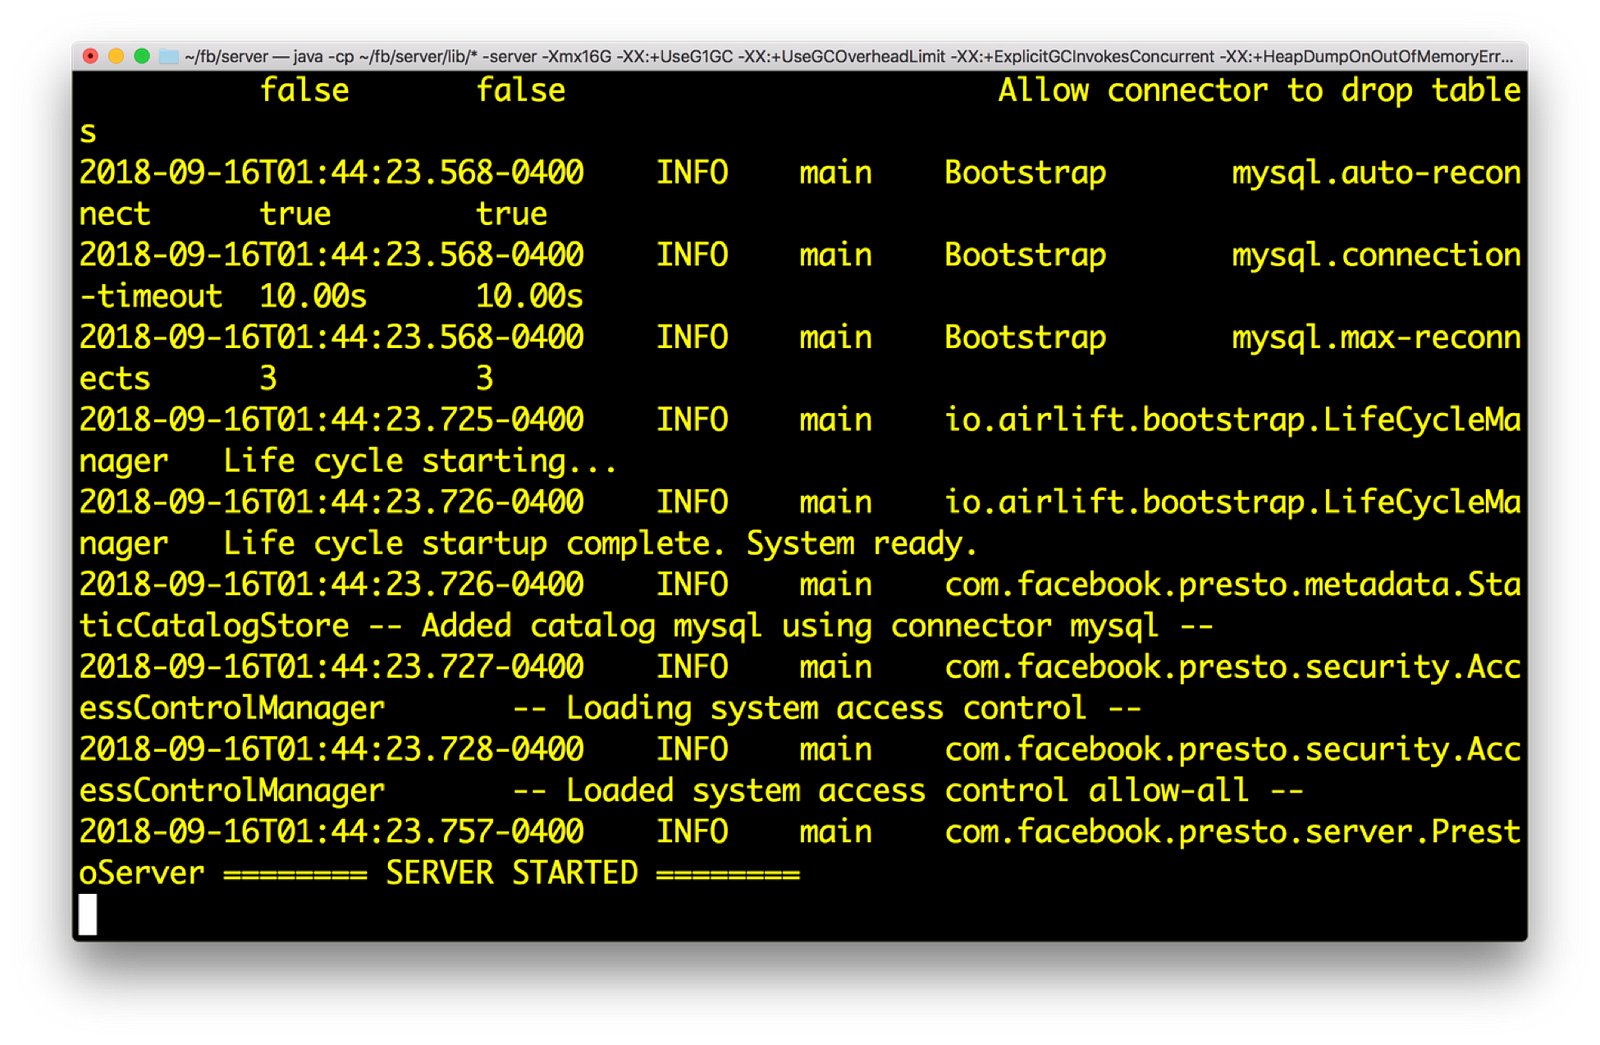
Presto start screen
4) Run the presto client. This is done by following command:
java –jar <prestoclient jar name>
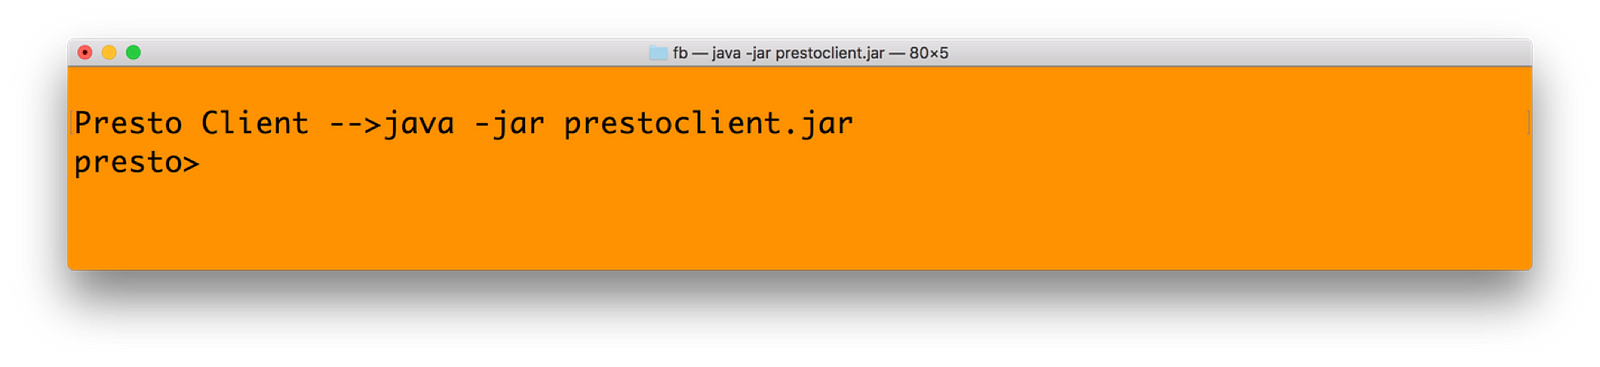
Run the Presto Client which will connect to previously started Presto server
5) In presto, you need mention the catalogname.databasename.tablenameformat for getting data. Our catalog name is HIVE, database is default and table name is schools. Hence
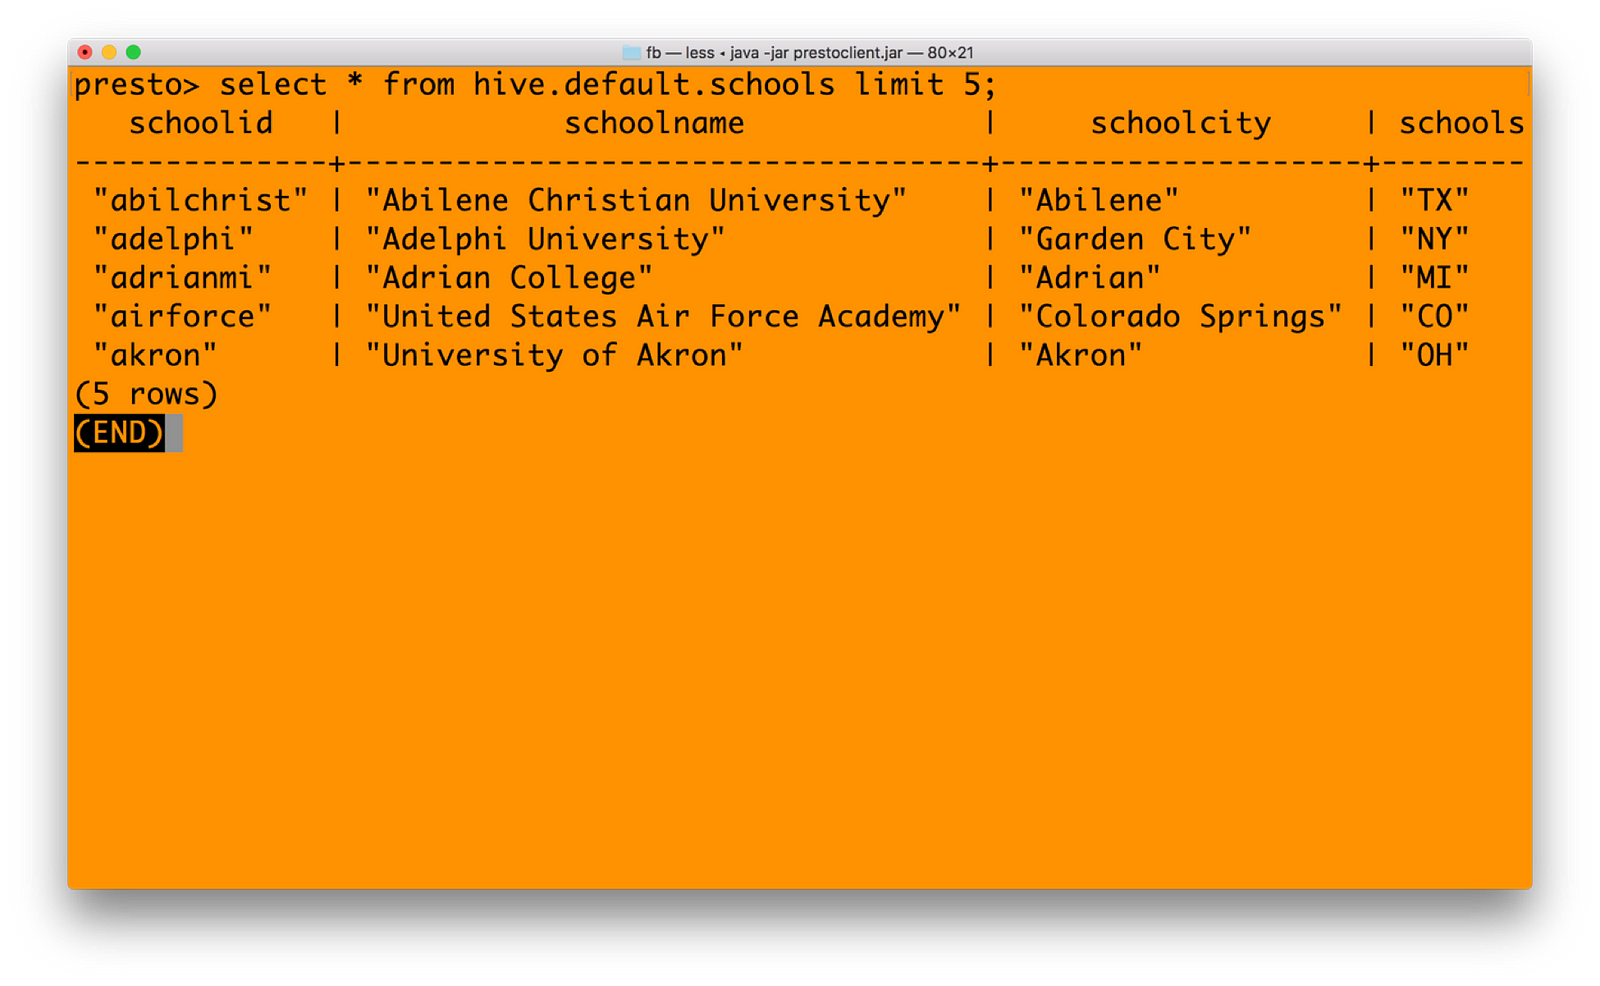
Querying the Hive table from Presto
6) You can join mysql catalog with hive catalog now — seamlessly unifying data from multiple systems. See the query below in Presto (just a cross join query for example)

Unified query to combine Hive table from Minio Object Storage and your existing RDBMS (MySQL in this case)
Integrating Spark — Unified Analytics with Minio Object Storage
We have done all pre-requisites for running Spark against Minio, during our previous steps. This include getting right jars and setting core-site.xml in Hadoop 3.1.1. Notable point is, you need to download the Spark version without Hadoop. The reason being, Spark has not yet certified against 3.1.1 Hadoop, and hence including Spark with Hadoop will have many conflicts with jar files. You can download Spark without Hadoop from https://archive.apache.org/dist/spark/spark-2.3.1/
1) Start Spark shell with all jars mentioned earlier in Step 3 in Integration with Hadoop section. You may create a bin directory with all jars copied. Or refer to the jars that you had earlier.
./bin/spark-shell — master local[4] — jars “../bin/hadoop-aws-3.1.1.jar,../bin/httpclient-4.5.3.jar,../bin/aws-java-sdk-core-1.11.234.jar,../bin/aws-java-sdk-kms-1.11.234.jar,../bin/aws-java-sdk-1.11.234.jar,../bin/aws-java-sdk-s3–1.11.234.jar,../bin/joda-time-2.9.9.jar”
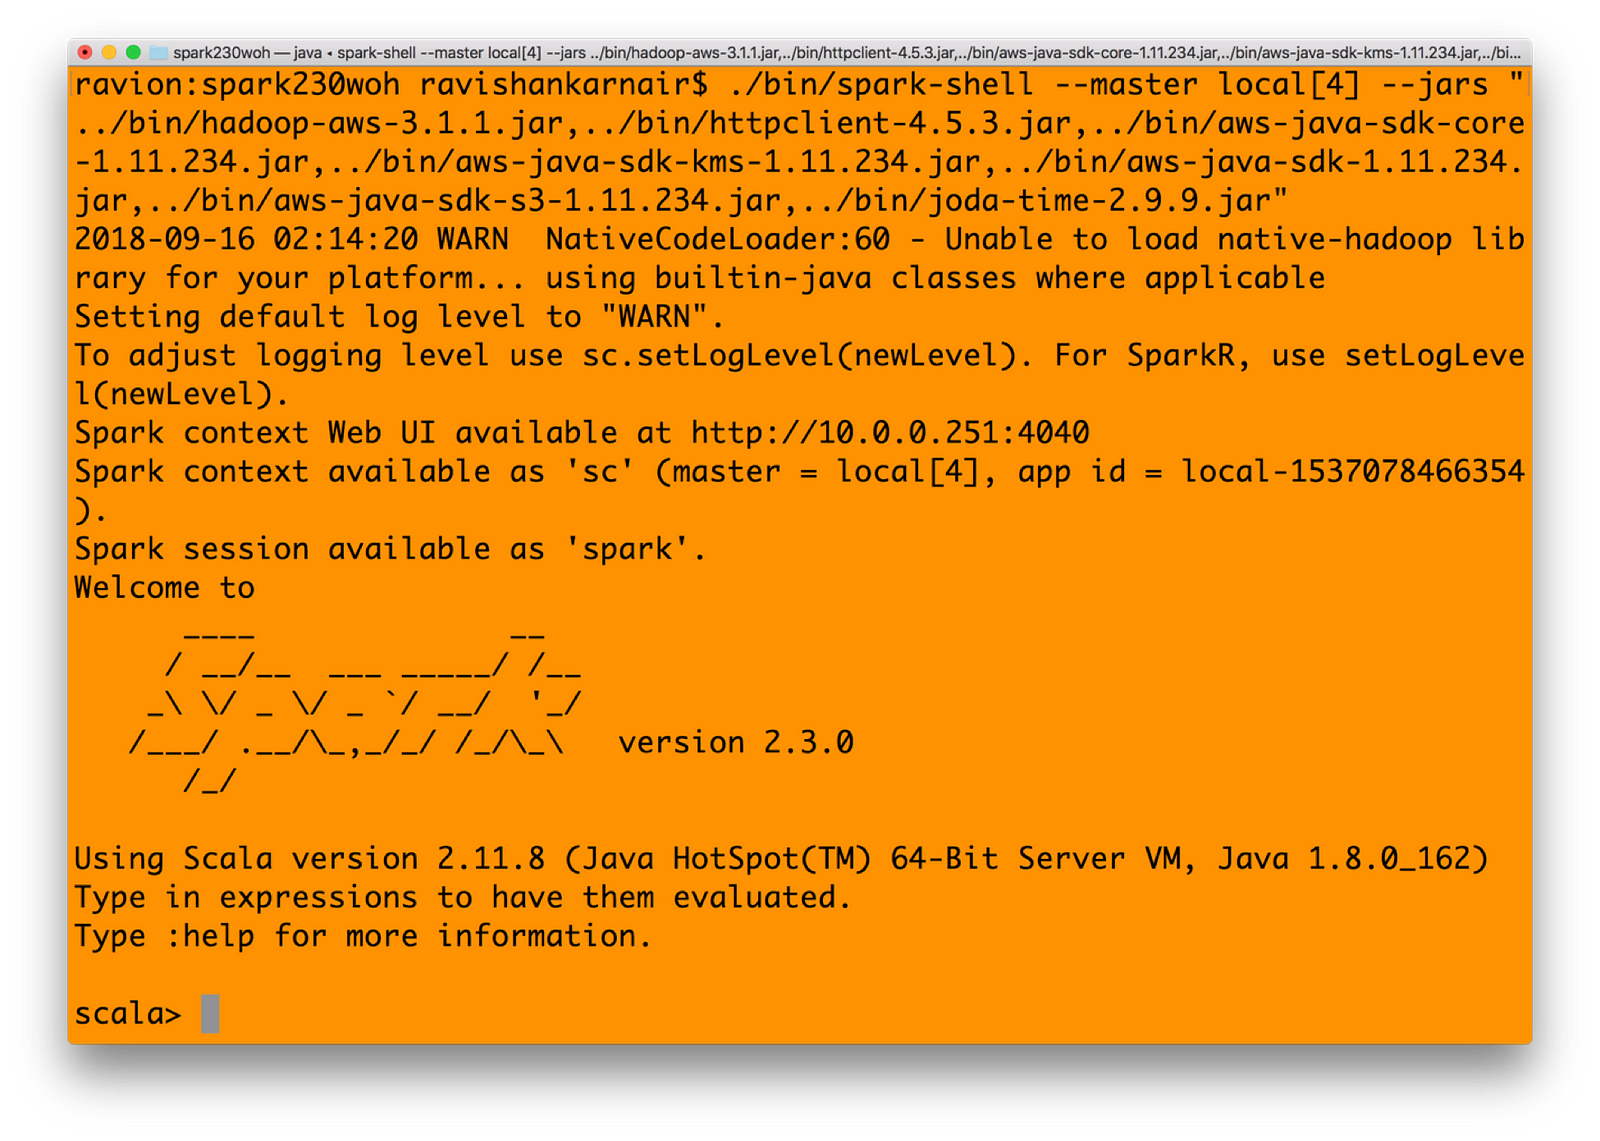
Start Apache Spark with all relevant jar files
2) Let’s create an RDD in Spark. Type in
spark.sparkContext.hadoopConfiguration.set(“fs.s3a.endpoint”, “http://localhost:9000");
spark.sparkContext.hadoopConfiguration.set(“fs.s3a.access.key”, “UC8VCVUZMY185KVDBV32”);
spark.sparkContext.hadoopConfiguration.set(“fs.s3a.secret.key”, “/ISE3ew43qUL5vX7XGQ/Br86ptYEiH/7HWShhATw”);
spark.sparkContext.hadoopConfiguration.set(“fs.s3a.path.style.access”, “true”);
spark.sparkContext.hadoopConfiguration.set(“fs.s3a.connection.ssl.enabled”, “false”);
spark.sparkContext.hadoopConfiguration.set(“fs.s3a.impl”, “org.apache.hadoop.fs.s3a.S3AFileSystem”);
val b1 = sc.textFile(“s3a://mydemobucket/myschools.csv”)
3) You may convert the RDD to a dataFrame and then get values
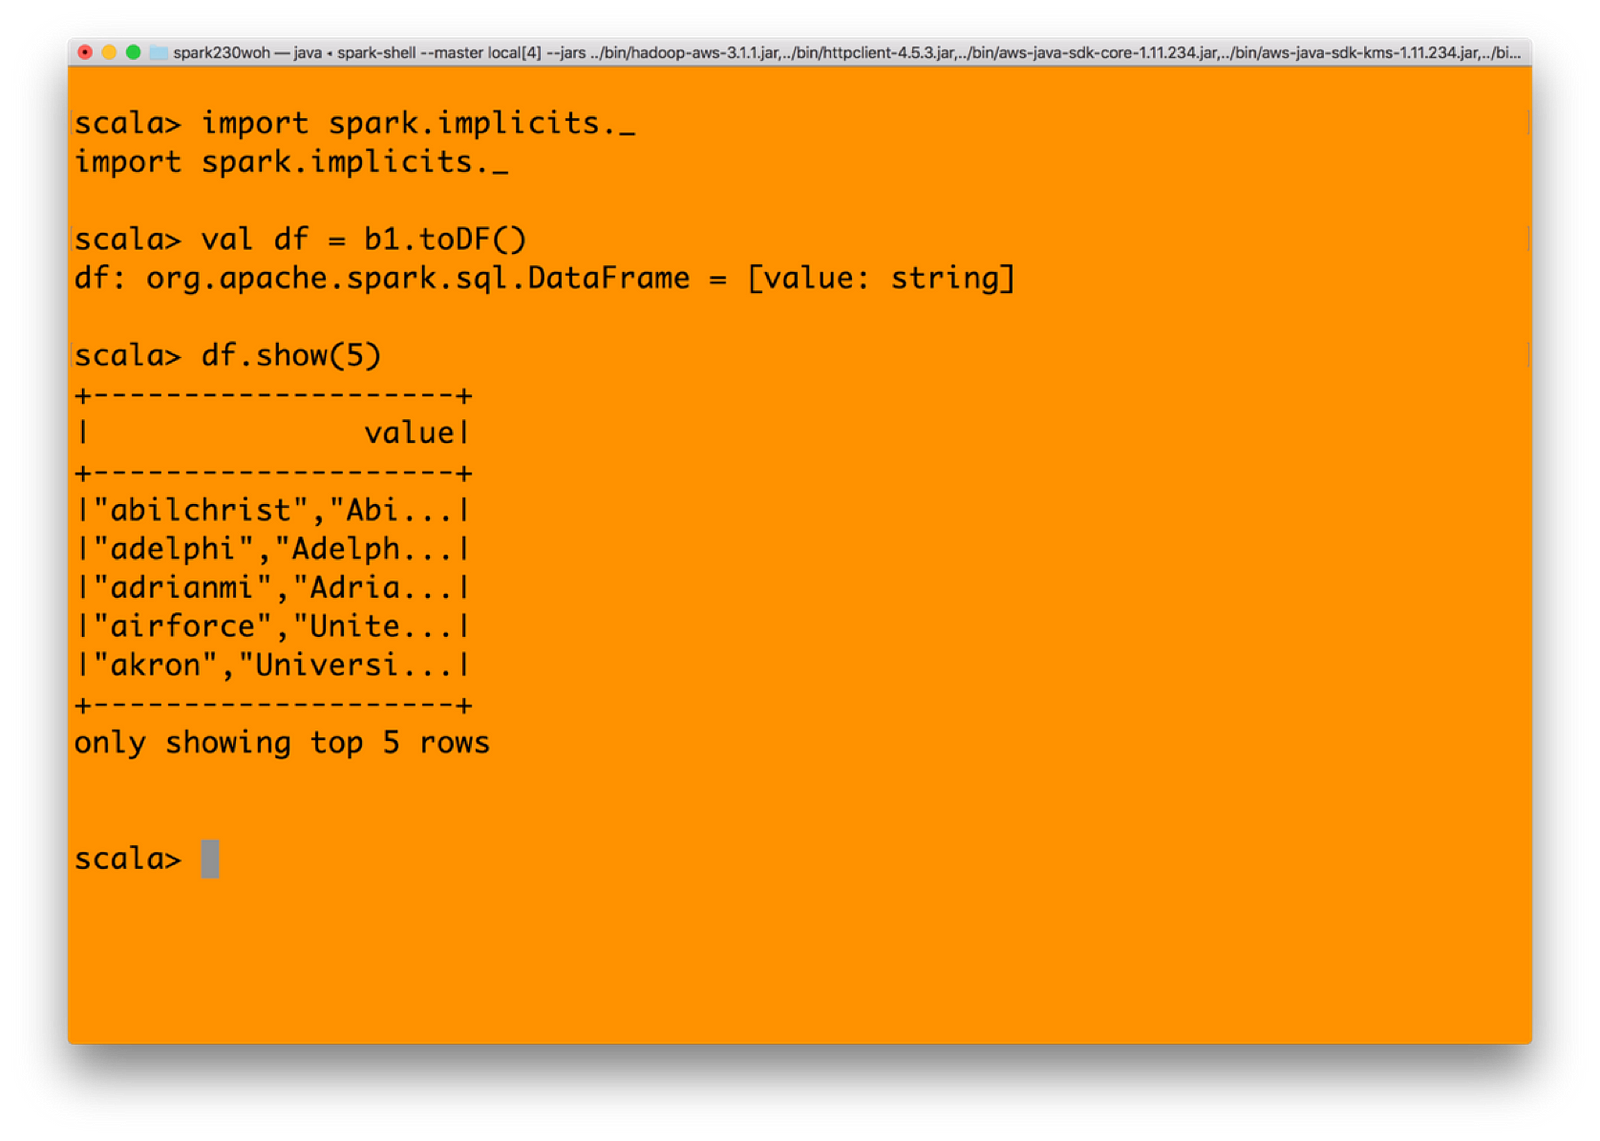
Getting a dataframe in Spark from the RDD which in turn was created from Minio
4) And finally, let’s write it back to minio object store with s3 protocol from Spark. Make sure that you have created a bucket named spark-test before executing below command.(Assuming resultdf is a bucket existing)
df.write.format(“csv”).save(“s3a://spark-test/resultdf”)
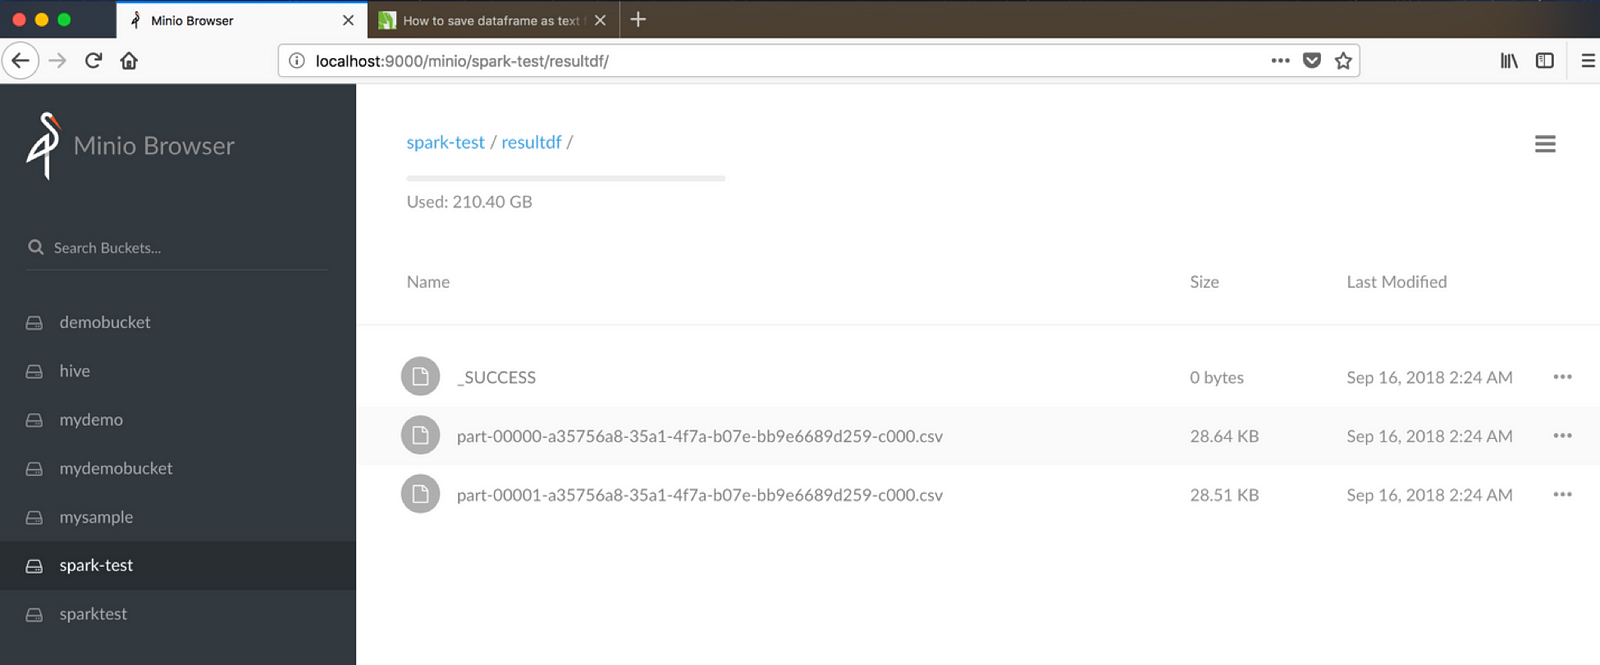
See the resultdf bucket to see the data written from Spark
Integrating Spark — Are We Writing Files or Objects?
Did you notice that when we write using Spark through S3, the files are written as normal files — which ideally should not be the case when we use an underlying object storage Minio. Can we write the data into Minio as objects? The following code shows how. The trick is to integrate minio client java SDK within your Java or Scala code. Use the foreachPartition function of Spark to write directly into Minio.
First, write a function which updates into Minio.
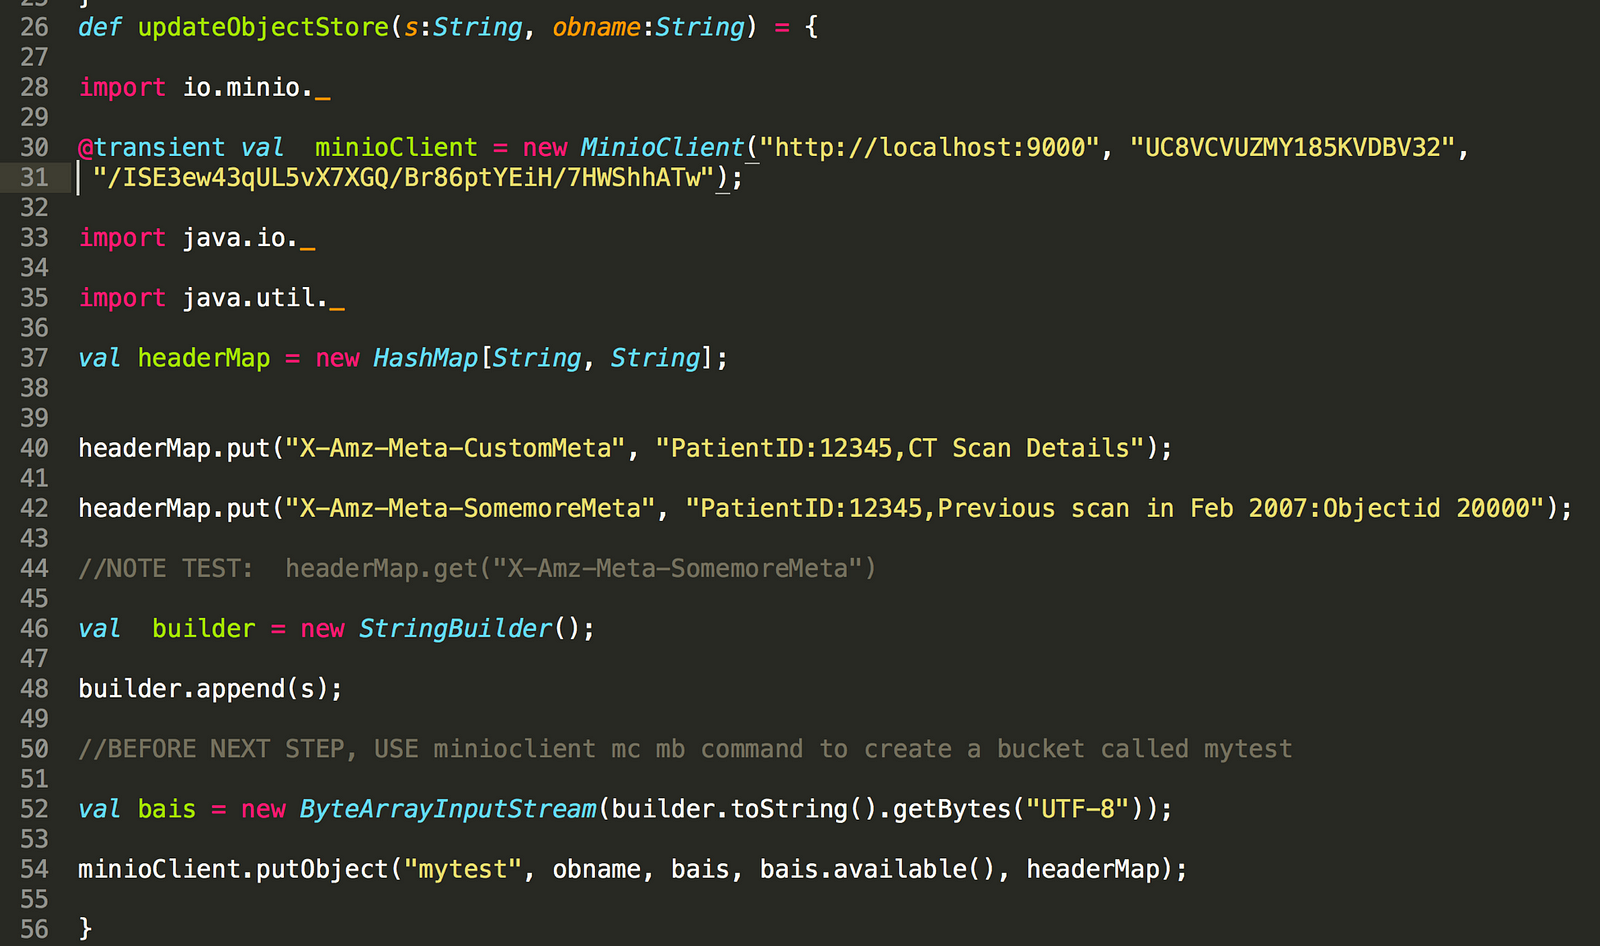
Integrating MinioClient within your Spark application
Now use the above function in your Spark code as below:
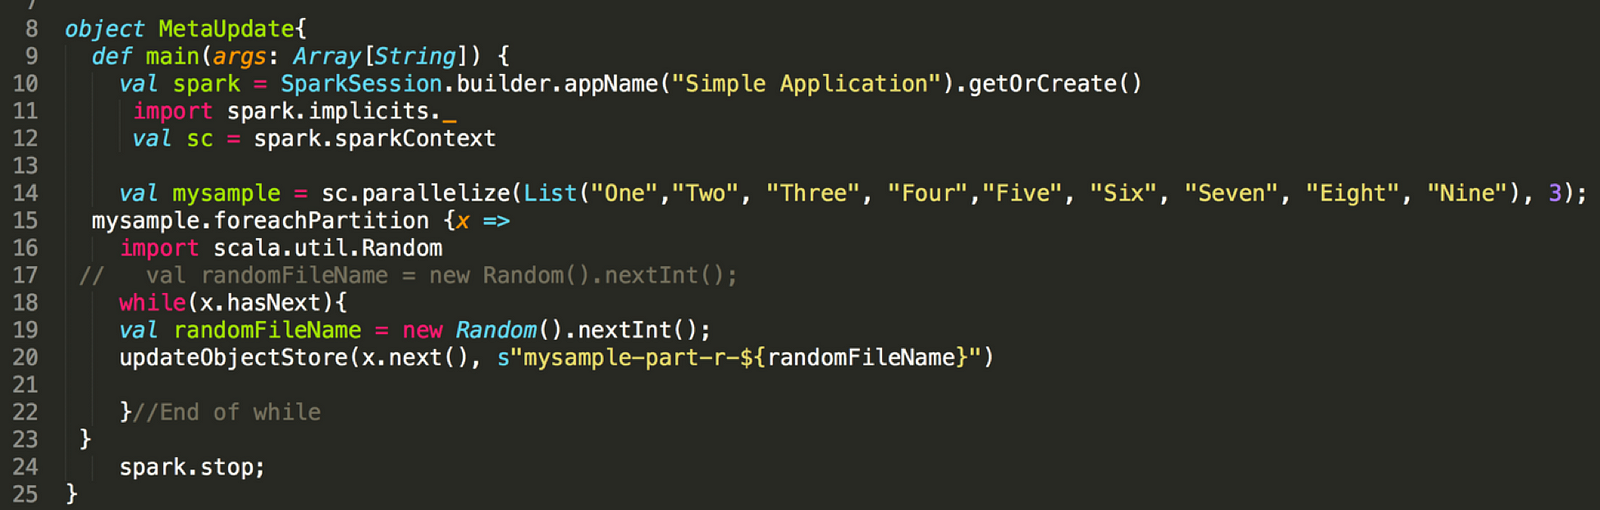
MetaUpdate object now writes object into Minio — not files
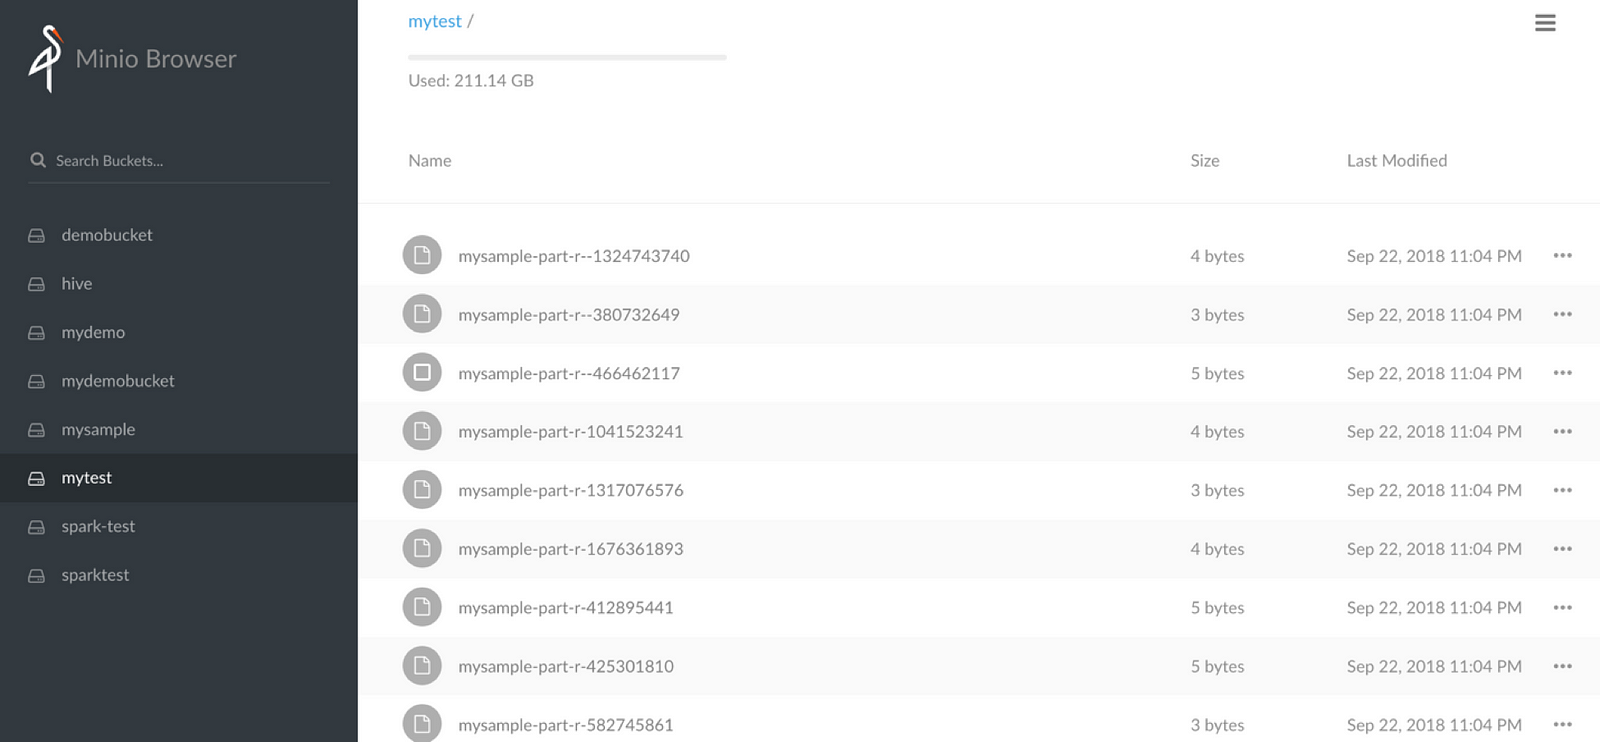
The data from Spark as objects in Minio
Summary
We have shown that Object Storage with Minio is a very effective way to create a data lake. All essential components that a data lake needs are seamlessly working with Minio through s3a protocol.
Overall architecture for your data lake can be:
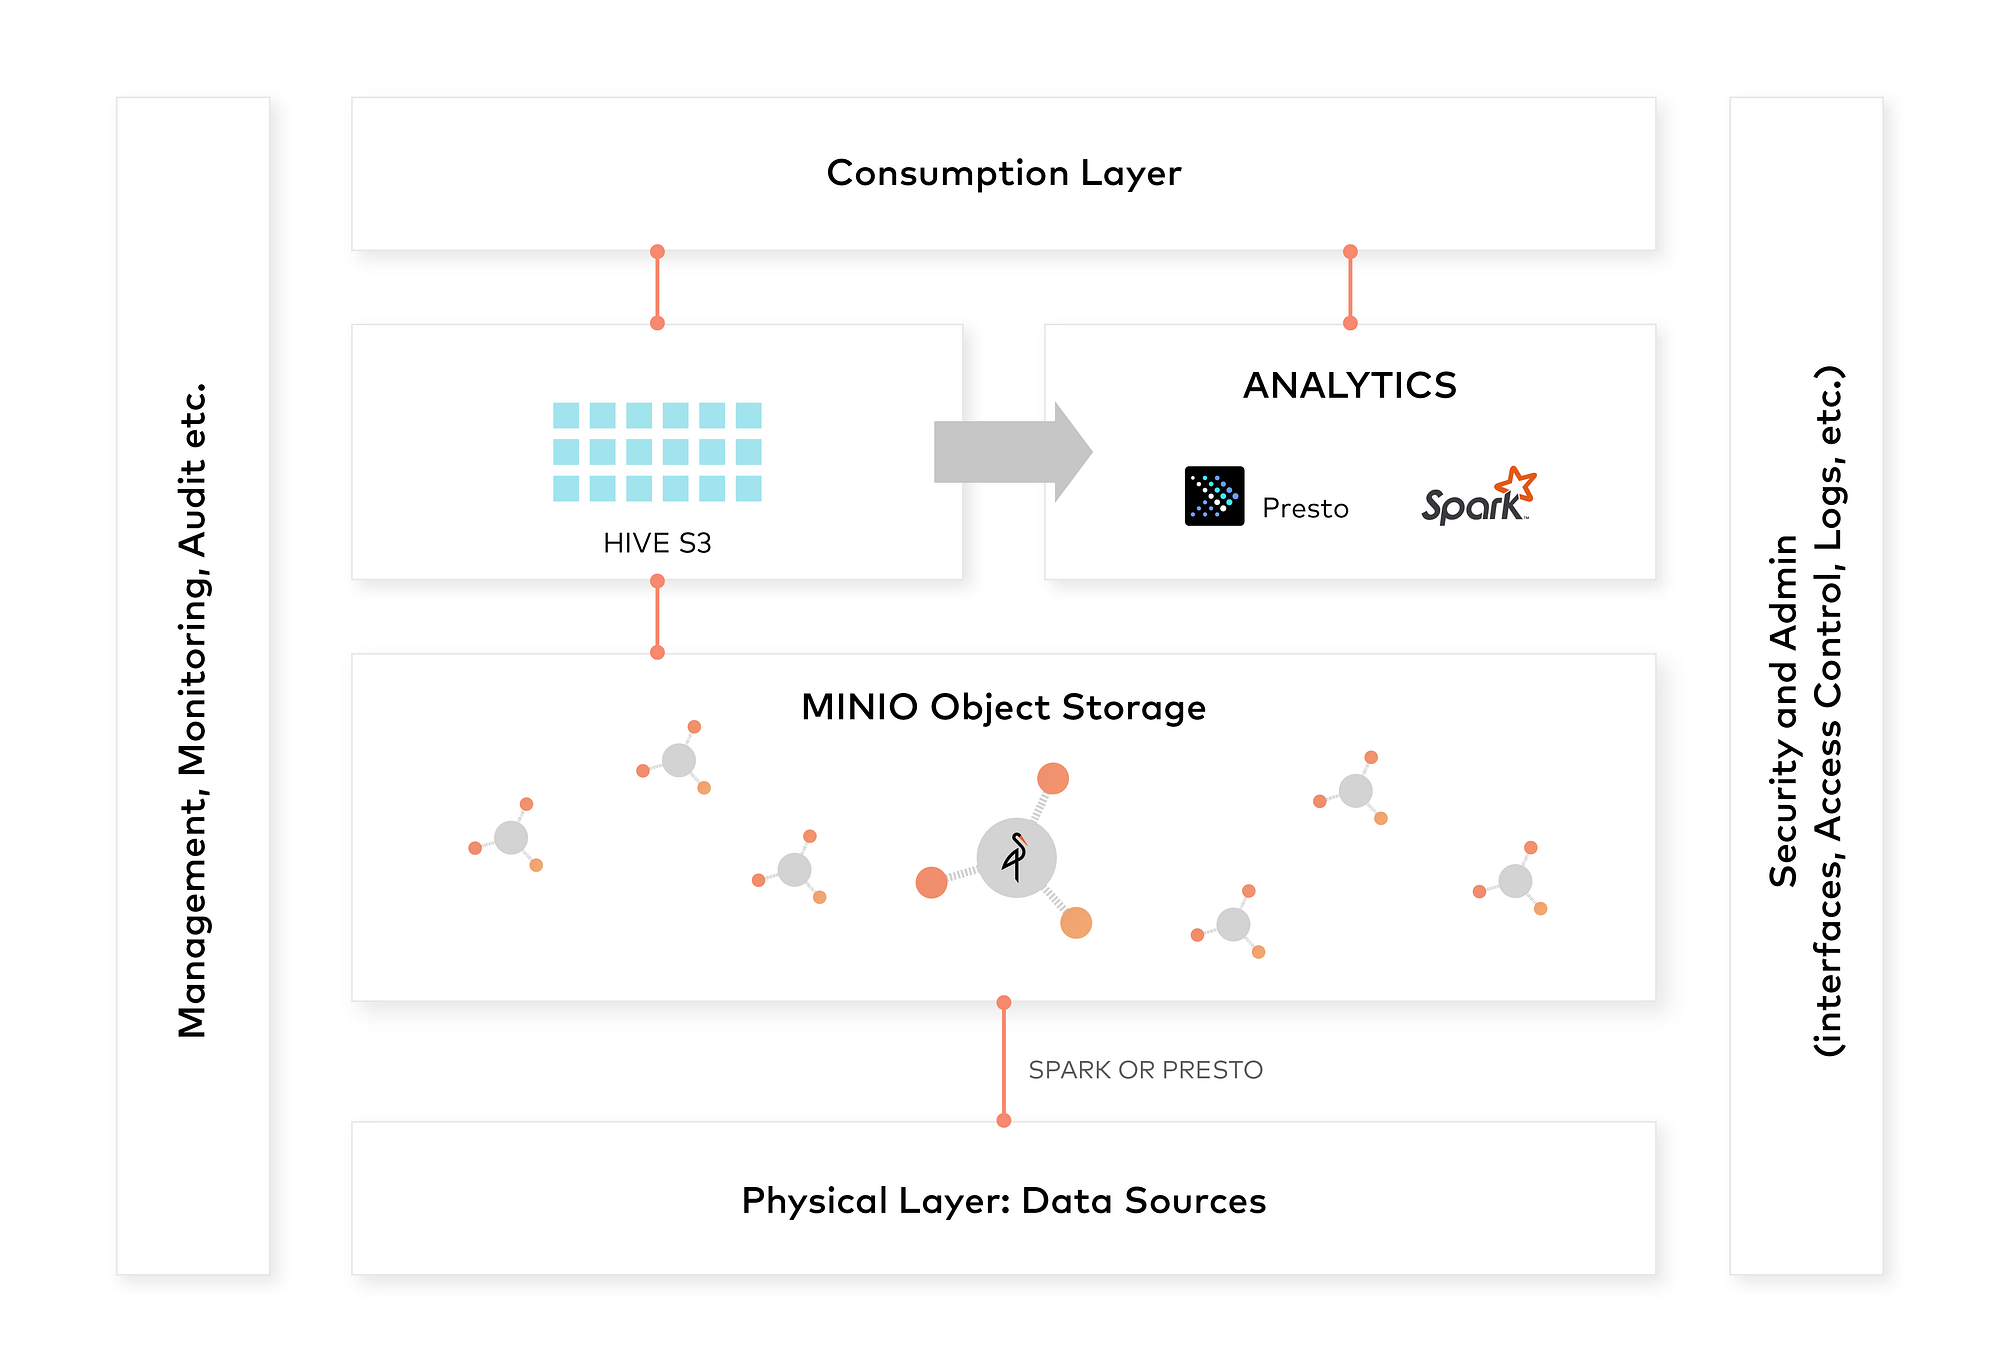
Hope you will be able to explore the concepts and use it across various use cases. Enjoy!
This is a guest post by our community member Ravishankar Nair.
Modern Data Lake with Minio : Part 2的更多相关文章
- Modern Data Lake with Minio : Part 1
转自:https://blog.minio.io/modern-data-lake-with-minio-part-1-716a49499533 Modern data lakes are now b ...
- Data Lake Analytics的Geospatial分析函数
0. 简介 为满足部分客户在云上做Geometry数据的分析需求,阿里云Data Lake Analytics(以下简称:DLA)支持多种格式的地理空间数据处理函数,符合Open Geospatial ...
- Data Lake Analytics + OSS数据文件格式处理大全
0. 前言 Data Lake Analytics是Serverless化的云上交互式查询分析服务.用户可以使用标准的SQL语句,对存储在OSS.TableStore上的数据无需移动,直接进行查询分析 ...
- data lake 新式数据仓库
Data lake - Wikipedia https://en.wikipedia.org/wiki/Data_lake 数据湖 Azure Data Lake Storage Gen2 预览版简介 ...
- 构建企业级数据湖?Azure Data Lake Storage Gen2不容错过(上)
背景 相较传统的重量级OLAP数据仓库,“数据湖”以其数据体量大.综合成本低.支持非结构化数据.查询灵活多变等特点,受到越来越多企业的青睐,逐渐成为了现代数据平台的核心和架构范式. 数据湖的核心功能, ...
- 构建企业级数据湖?Azure Data Lake Storage Gen2实战体验(中)
引言 相较传统的重量级OLAP数据仓库,“数据湖”以其数据体量大.综合成本低.支持非结构化数据.查询灵活多变等特点,受到越来越多企业的青睐,逐渐成为了现代数据平台的核心和架构范式. 因此数据湖相关服务 ...
- 构建企业级数据湖?Azure Data Lake Storage Gen2实战体验(下)
相较传统的重量级OLAP数据仓库,“数据湖”以其数据体量大.综合成本低.支持非结构化数据.查询灵活多变等特点,受到越来越多企业的青睐,逐渐成为了现代数据平台的核心和架构范式. 作为微软Azure上最新 ...
- Azure Data Lake Storage Gen2实战体验
相较传统的重量级OLAP数据仓库,“数据湖”以其数据体量大.综合成本低.支持非结构化数据.查询灵活多变等特点,受到越来越多企业的青睐,逐渐成为了现代数据平台的核心和架构范式. 作为微软Azure上最新 ...
- Data Lake Analytics: 读/写PolarDB的数据
Data Lake Analytics 作为云上数据处理的枢纽,最近加入了对于PolarDB的支持, PolarDB 是阿里云自研的下一代关系型分布式云原生数据库,100%兼容MySQL,存储容量最高 ...
随机推荐
- Linux如何从零开始搭建nfs服务器(centOS6)
Server端 1.打印系统版本 cat /etc/redhat-release uname -r uname -m 2.检查是否安装NFS服务 rpm -aq nfs-utils rpcbind L ...
- [SCOI2005]栅栏
这个题...只能说比较水... 排序后,算一个前缀和,二分dfs查找答案...加上两个剪枝就过了...QVQ 我只能刷这种水题...我太菜了...QVQ #include<iostream> ...
- 百杂讲堂之为什么32位系统只能操作4g内存
百杂讲堂之为什么32位系统只能操作4g内存 计算机内存中很多的单元,每一个单元就是一个字节,一个字节有8位.每一个单元有两种状态:0和1. 所以 两个单元就有4个组合: 3个单元就有8个组合: 依次类 ...
- swift简单处理调用高清大图导致内存暴涨的情况
开发中,通常需要用到使用选取多张图片的功能,但是高清大图很吃内存,我想到的处理方案就是拿到高清大图的时候,重新绘制一张小的图片使用.至于清晰度尚可,至少我是分辨不出多大区别. 基本思路就是先固定宽,然 ...
- Java小故事(一)
import java.util.Date; //导入包 public class Test11 { public static void main(String [] args){ CatFathe ...
- python代理可用检测、代理类型检测
#coding:utf-8 import urllib2 def url_user_agent(proxy,url): proxy_support = urllib2.ProxyHandler({'h ...
- 【linux基础】如何查看Linux系统是64位还是32位
如何查看Linux系统是64位还是32位 $getconf LONG_BIT or $file /bin/ls or #查看linux版本 $lsb_release -a or $uname -a 参 ...
- 搜索入门_简单搜索bfs dfs大杂烩
dfs题大杂烩 棋盘问题 POJ - 1321 和经典的八皇后问题一样. 给你一个棋盘,只有#区域可以放棋子,同时同一行和同一列只能有一个棋子. 问你放k个棋子有多少种方案. 很明显,这是搜索题. ...
- [LeetCode&Python] Problem 762. Prime Number of Set Bits in Binary Representation
Given two integers L and R, find the count of numbers in the range [L, R](inclusive) having a prime ...
- flask数据库的迁移
需要的插件:flask-migrate 在每次修改模型之后,将修改的东西映射到数据库中. 使用flask-migrate 必须借助flask_scripts,这个包的所有MigrateCommand ...