Qt中实现菜单和工具栏功能
Qt创建菜单和工具栏:
一、 temp.h文件的内容
1.定义类temp继承QMainWindow
2.添加Q_OBJECT , 构造函数 、 析构函数等内容
3.$重点内容
3.1定义QAction *newAction; (相当于菜单和工具条里面的基本功能如:新建、打开文件)
3.2定义QMenu *fileMenu;
3.3定义 QToolBar *fileToolBar;
4.定义QAction的响应函数即slot函数:
private slots:
void msg();
二、 temp.cpp 文件内容
1.添加头文件
#include <QtGui>
#include "temp.h"
#include<windows.h> //MessageBox()函数
2.填写构造函数(重点内容)
2.1 初始化和设置QAction
    newAction = new QAction(tr("&New"), this);

    newAction->setIcon(QIcon("D:/Documents/Visual Studio 2010/Projects/qt-book/chap03/temp/images/new.png"));

    newAction->setShortcut(QKeySequence::New);

    newAction->setStatusTip(tr("Create a new spreadsheet file"));

    connect(newAction, SIGNAL(triggered()), this, SLOT(msg()));
2.2 添加File菜单并返回指针给QMenu *fileMenu , 将QAction添加到菜单File中。
fileMenu = menuBar()->addMenu(tr("&File")); //menuBar()需要头文件#include <QtGui>
fileMenu->addAction(newAction);
2.3 添加File工具栏并返回指针给QToolBar * fileToolBar ,将QAction添加到File工具栏中
fileToolBar = addToolBar(tr("&File"));
fileToolBar->addAction(newAction);
3.实现void msg()函数(用于测验使用)
void temp::msg()
{ MessageBox(NULL,TEXT("这是对话框"),TEXT("你好"),MB_ICONINFORMATION|MB_YESNO); }
三、 main.cpp文件的内容
#include "temp.h"

#include <QtGui/QApplication>

int main(int argc, char *argv[])

{

    QApplication a(argc, argv);

    temp w;

    //w.setFixedSize(800,22);   //此函数可以实现ENVI菜单样式

    w.show();

    return a.exec();

}

main.cpp
main.cpp
四、补充temp.h和temp.cpp文件
#ifndef TEMP_H

#define TEMP_H

#include <QtGui/QMainWindow>

class temp : public QMainWindow

{

    Q_OBJECT

public:

    temp(QWidget *parent = );

    ~temp();

private:

    QAction *newAction;

    QMenu *fileMenu;

    QToolBar *fileToolBar;

private slots:

    void msg();

};

#endif // TEMP_H
temp.h
#include <QtGui>

#include "temp.h"

#include<windows.h>

temp::temp(QWidget *parent)

    : QMainWindow(parent)

{

    newAction = new QAction(tr("&New"), this);

    newAction->setIcon(QIcon("D:/Documents/Visual Studio 2010/Projects/qt-book/chap03/temp/images/new.png"));

    newAction->setShortcut(QKeySequence::New);

    newAction->setStatusTip(tr("Create a new spreadsheet file"));

    connect(newAction, SIGNAL(triggered()), this, SLOT(msg()));

     fileMenu = menuBar()->addMenu(tr("&File"));

     fileMenu->addAction(newAction);

      fileToolBar = addToolBar(tr("&File"));

      fileToolBar->addAction(newAction);

      //setCentralWidget(fileToolBar);  //此函数的作用是将QWidget控件放在中间位置

}

temp::~temp()

{

}

void temp::msg()

{

    MessageBox(NULL,TEXT("这是对话框"),TEXT("你好"),MB_ICONINFORMATION|MB_YESNO);

}
temp.cpp
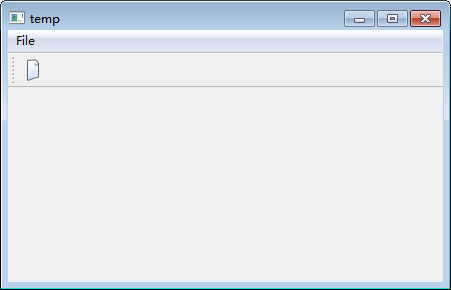
五、结果预览

六、工程文件下载地址
http://pan.baidu.com/s/1mgkOkrQ
Qt中实现菜单和工具栏功能的更多相关文章
- Qt5:Qt中屏幕或窗口截图功能的实现
要想在Qt中实现屏幕或窗口截图功能 ,通常有两种方法: 1 -- 使用 QPixmap 类 2 -- 使用 QScreen类 然而虽然俩两种方法用到的类不相同,但是调用到的类成员函数的函数名称和参 ...
- qt中的菜单QMenu QAction
Qt中要建立菜单,有三个类很重要: QMenuBar(QWidget * parent = 0) QMenu(QWidget * parent = 0) QMenu(const QString &am ...
- PyQt5教程——菜单和工具栏(3)
PyQt5中的菜单和工具栏 在这部分的PyQt5教程中,我们将创建菜单和工具栏.菜单式位于菜单栏的一组命令操作.工具栏是应用窗体中由按钮和一些常规命令操作组成的组件. 主窗口 QMainWindow类 ...
- 在PyQt中构建 Python 菜单栏、菜单和工具栏
摘要:菜单.工具栏和状态栏是大多数GUI 应用程序的常见且重要的图形组件.您可以使用它们为您的用户提供一种快速访问应用程序选项和功能的方法. 本文分享自华为云社区<Python 和 PyQt:创 ...
- Qt中截图功能的实现
提要 需求:载入一张图片并显示,能够放大缩小,能够截取图片的某个矩形并保存. 原以为蛮简单的一个功能,事实上还是有点小复杂. 最简单Qt图片浏览器能够參考Qt自带的Demo:Image Viewer ...
- 在 jupyter 中添加菜单和自动完成功能
在 jupyter 中添加菜单和自动完成功能 参考文档http://www.360doc.com/content/17/1103/14/1489589_700569828.shtmlhttp://to ...
- Qt中QMenu的菜单关闭处理方法
Qt中qmenu的实现三四千行... 当初有个特殊的需求, 要求菜单的周边带几个像素的阴影, 琢磨了半天, 用QMenu做不来, 就干脆自己用窗口写一个 然而怎么让菜单消失却非常麻烦 1. 点击菜单项 ...
- qt中qlineedit和qtextedit右键菜单翻译成中文
没有linguist和lupdate等命令需要安装Linguist: 在Terminal中输入: sudo apt-get install qt4-dev-tools qt4-doc qt4-qtco ...
- 第47课 Qt中的调色板
1. QPalette类 (1)QPalette类提供了绘制QWidget组件的不同状态所使用的颜色. (2)QPalette对象包含了3个状态的颜色描述 ①激活颜色组(Active):组件获得焦点使 ...
随机推荐
- WebApi 文件上传
1. 注意给form表单加上enctype = "multipart/form-data" 属性,否则会导致Action的参数HttpPostedFileBase 对象接收不到文件 ...
- C#操作AD的例子
一下连接中包含了使用c#对AD操作的各种列子 http://www.codeproject.com/Articles/18102/Howto-Almost-Everything-In-Active-D ...
- C#中Func<T,TResult>的用法和Lambda表达式
在C#3.0中引用了Limbda表达式,Limbda表达式实际上就是一个方法,只不过该方法是匿名方法(即没有名称的方法)代码片段: Func<int,string,string> t=(i ...
- VS2010中手动重命名项目
在visual studio 中重命名项目名称的方法: 1. 重命名项目名称 2. 修改Assembly name 3. 修改Default namespace 4. 在Assembly Inform ...
- Java中加载配置文件的集中方式,以及利用ClassLoader加载文件 .
我们往常进行文件的加载的时候 用到的都是 FileInputStream进行 文件的加载比如下面一个例子 : InputStream in=FileInputStream("1.prope ...
- android 图片合成
package com.ebensz.eink.demo; import java.io.File; import java.io.FileOutputStream; import android.a ...
- Memcache 在win7x64中安装配置
Memcached从0.2.0开始,要求PHP版本大于等于5.2.0. 环境:phpstudy集成环境 目标:实现php用memcache 下载:memcache for win 64 http:// ...
- 变态最大值--nyoj题目811
变态最大值 时间限制:1000 ms | 内存限制:65535 KB 难度:1 描述 Yougth讲课的时候考察了一下求三个数最大值这个问题,没想到大家掌握的这么烂,幸好在他的帮助下大家算是解 ...
- 编译安装mysql5.7.9
第一步:安装一些可能会用到的依赖 yum -y install gcc-c++ ncurses-devel cmake make perl gcc autoconf automake zlib lib ...
- JavaScript声音播放
方式一: /** * 播放音频(Chrome.opera)支持 * @param file:支持 rm,mid,wav */ function playAudio(file) { var embed= ...