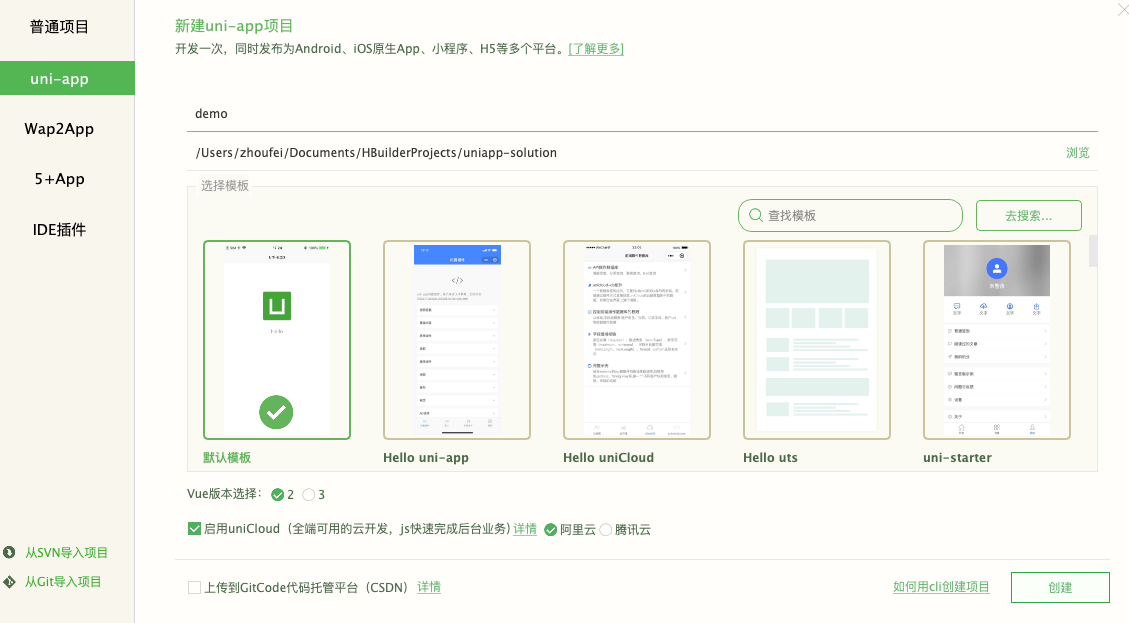
uni-app云开发入门
'use strict';

exports.main = async (event, context) => {

    //event为客户端上传的参数

    console.log('event : ', event)

    //返回数据给客户端

    return "Hello Cloud Func"

};
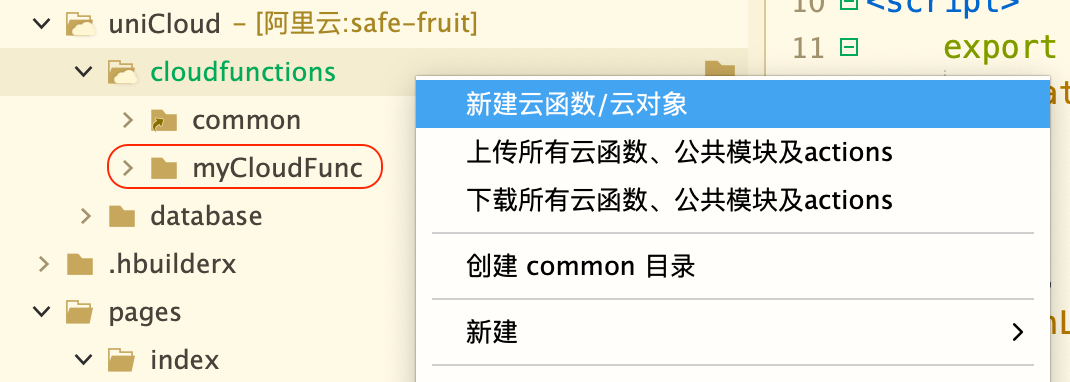
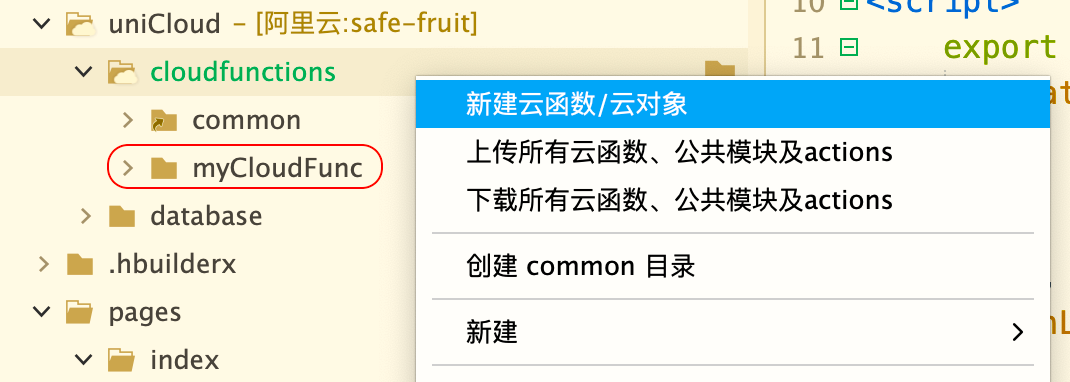
3.使用云函数
onLoad() {

    uniCloud.callFunction({

        name:'myCloudFunc'

        }).then((res)=>{

            console.log(res)

        })

},
打印结果

'use strict';

const db = uniCloud.database();

exports.main = async (event, context) => {

    //event为客户端上传的参数

    console.log('event : ', event)

    const collection = await db.collection('User').get()

    //返回数据给客户端

    return collection

};
函数使用
onLoad() {

    uniCloud.callFunction({

        name:'myCloudDB',

        success: (res) => {

            console.log(res);

        }

    })

},
<template>

    <view class="content">

        <form @submit="submitData">

            <input type="text" name="name">

            <input type="tel" name="phone">

            <button form-type="submit">提交表单</button>

        </form>

    </view>

</template>

<script>

    export default {

        methods: {

            async submitData(v) {

                console.log(v)

                let {name,phone} = v.detail.value

                 let res = await uniCloud.callFunction({

                    name:'myCloudDB',

                    data:{

                        name,

                        phone

                    }

                })

                console.log(res)

            }

        }

    }

</script>
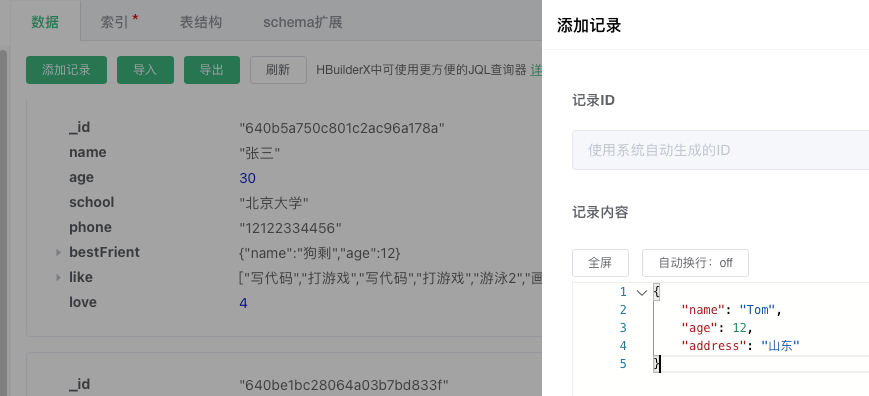
定义云函数

'use strict';

const db = uniCloud.database()

const dbCmd = db.command

exports.main = async (event, context) => {

    //event为客户端上传的参数

    console.log('event : ', event)

    // doc: 根据id查询

    // let res = await db.collection('User').doc('640b5a9228064a03b7aa1ac7').get()

    // 限制条数

    // let res = await db.collection('User').limit(5).get()

    // // skip:跳过的条数,分页的话数字是页数*每页条数

    // let res = await db.collection('User').limit(5).skip(5).get()

    // field:只返回声明的字段,_id默认返回

    // let res = await db.collection('User').field({name: true}).get()

    // orderBy: 排序字段+升序/降序类型

    // let res = await db.collection('User').orderBy('age','desc').get()

/*

1.简单的值等于查询,如name: 'Tom'

2.逻辑指令单条件查询,如age: dbCmd.gt(15)

3.逻辑指令多条件查询,如dbCmd.or(dbCmd.lt(15), dbCmd.gt(20))

4.正则匹配

使用//简单正则匹配,中间写要匹配的内容,如/^梅/ig(i忽略大小写,g全局)

使用RegExp对象匹配,如new RegExp('梅','ig')

    */

    let res = await db.collection('User').where({

        // age: dbCmd.gt(15)

        // age: dbCmd.or(dbCmd.lt(15), dbCmd.gt(20))

        // name: /梅/ig

         // name: new RegExp('梅','ig')

        }).get()

    //返回数据给客户端

    return res

};

vue组件调用

<script>

    export default {

        onReady() {

            uniCloud.callFunction({

                name:'myCloudGet',

                success: (res) => {

                    console.log(res)

                    this.list = res.result.data

                }

            })

        },

    }

</script>
'use strict';

const { link } = require("fs");

const db = uniCloud.database()

const dbCmd = db.command

exports.main = async (event, context) => {

    //event为客户端上传的参数

    console.log('event : ', event)

    // 单条记录更新

    // const res = await db.collection('User').doc('640bf773e766bb2975957423').update({

    //     phone: '88889999'

    // })

    // 多条记录更新

    // const res = await db.collection('User').where({

    //     _id: dbCmd.in(['640bf773e766bb2975957423','640be1bc28064a03b7bd833f'])

    // }).update({

    //     phone: '88889999000'

    // })

    // const res = await db.collection('User').where({

    //     name: /梅/ig

    // }).update({

    //     address: '冬梅大桥旁,33号'

    // })

    // 更新对象和数组

    // const res = await db.collection('User').where({

    //     name: "张三"

    // }).update({

    //     like:{

    //         0: "游泳2"

    //     },

    //     bestFrient:{

    //         name:"jack"

    //     }

    // })

    // set: 覆盖一个对象, update:更新局部字段

    const res = await db.collection('User').where({

        name: "张三"

    }).update({

        // dbCmd.inc(1):自增加一

        love: dbCmd.inc(1),

        // dbCmd.unshift(["写代码","打游戏"]): 数组头部添加数据

        like: dbCmd.unshift(["写代码","打游戏"]),

        // dbCmd.set({}) 更新一个对象,参数为传入的一个对象

        bestFrient: dbCmd.set({

            name: '狗剩',

            age: 12

        })

    })

    //返回数据给客户端

    return res

};
'use strict';

const db = uniCloud.database()

const dbCmd = db.command

exports.main = async (event, context) => {

    //event为客户端上传的参数

    console.log('event : ', event)

    // 全部删除

    const res = db.collection('User').where({

        _id: dbCmd.neq(-1)

    }).remove()

    //返回数据给客户端

    return res

};
<template>

    <view class="content">

        <uni-file-picker

            v-model="imageValue"

            fileMediatype="image"

                        limit="3"

            mode="grid"

            @select="select"

            @progress="progress"

            @success="success"

            @fail="fail"

        />

    </view>

</template>

<script>

    export default {

        data() {

            return {

                imageValue: []

            }

        }

    }

</script>
<template>

    <view class="content">

        <uni-file-picker

            v-model="imageValue"

            fileMediatype="image"

            mode="grid"

            :auto-upload="false"

            @select="select"

            @progress="progress"

            @success="success"

            @fail="fail"

            ref="files"

        />

        <button @click="upload">开始上传</button>

    </view>

</template>

<script>

    export default {

        data() {

            return {

                imageValue: []

            }

        },

        onLoad() {

        },

        methods:{

            upload() {

                this.$refs.files.upload()

            }

        }

    }

</script>
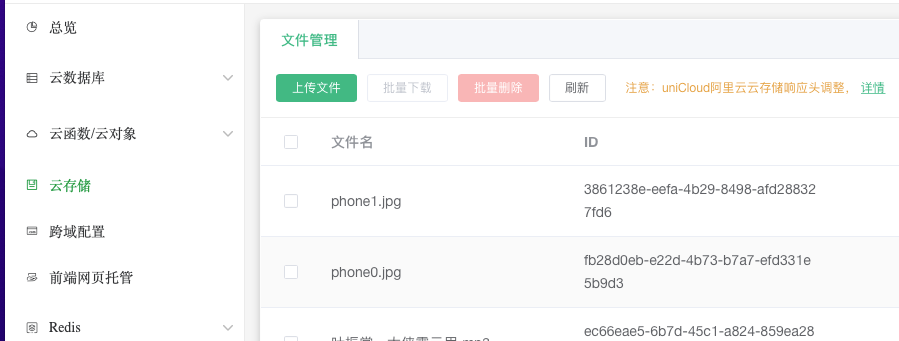
云存储上传成功后,将返回的URL地址保存到云数据库
<template>

    <view class="content">

        <input type="text" v-model="title"/>

        <uni-file-picker

            v-model="imageValue"

            fileMediatype="image"

            mode="grid"

            :auto-upload="false"

            @select="select"

            @progress="progress"

            @success="success"

            @fail="fail"

            ref="files"

        />

        <button @click="upload">开始上传</button>

    </view>

</template>

<script>

    export default {

        data() {

            return {

                imageValue: [],

                imageUrls: [],

                title: ''

            }

        },

        onLoad() {

        },

        methods:{

            // 上传成功

            success(e){

                console.log('上传成功',e)

                this.imageUrls = e.tempFilePaths

                uniCloud.callFunction({

                    name:'add_pic_data_one',

                    data:{

                        title: this.title,

                        imageUrls: this.imageUrls

                    }

                }).then(res => {

                    console.log(res)

                })

            },

            upload() {

                this.$refs.files.upload()

            }

        }

    }

</script>
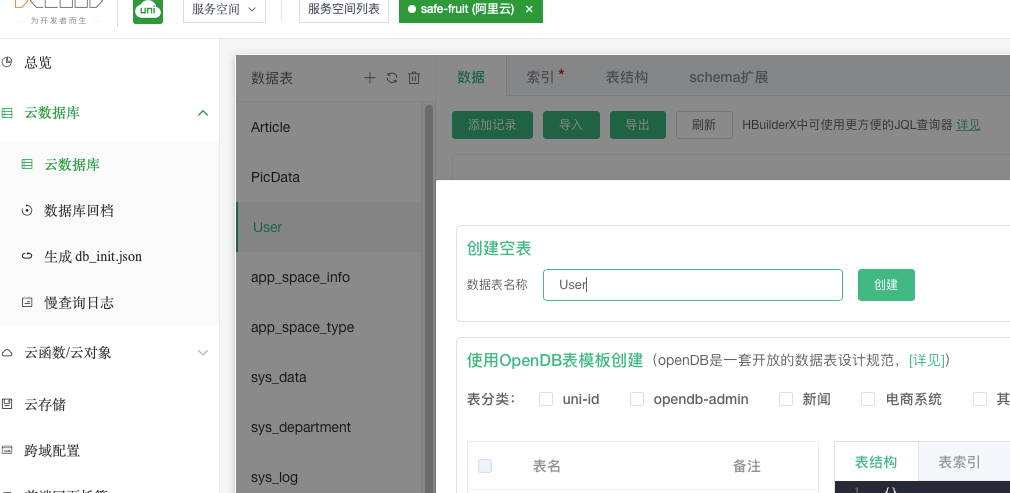
云数据库

'use strict';

const db = uniCloud.database()

exports.main = async (event, context) => {

    //event为客户端上传的参数

    console.log('event : ', event)

    let {title, imageUrls} = event

    const res = await db.collection('PicData').add({

        title,

        imageUrls

    })

    //返回数据给客户端

    return res

};
uni-app云开发入门的更多相关文章
- [安卓开发]App Widget开发入门指导
本节所要讲的主要内容包括Android桌面小部件.App Widget的开发入门指导,并通过一个简单实例的形式来直观的讲解App Widget. 一.Widget .App Widget .Web A ...
- uniCloud云开发入门以及对传统开发方式的思考
事情缘由 作为选修了移动互联网应用的一员,老师讲的什么JS基础,还有ES6和uniapp,当然是没怎么听,因为是之前大二的时候都大概看过. 但是快到期末,老师讲了云开发,并且布置了与此相关的大作业,自 ...
- 【小程序云开发入门】quickStart
开发者可以使用云开发开发微信小程序.小游戏,无需搭建服务器,即可使用云端能力. 云开发为开发者提供完整的云端支持,弱化后端和运维概念,无需搭建服务器,使用平台提供的 API 进行核心业务开发,即可实现 ...
- DCloud-HTML5+:5+ App开发入门指南
ylbtech-DCloud-HTML5+:5+ App开发入门指南 1.返回顶部 1. 5+ App开发入门指南 App App入门 HTML5 Plus应用概述 HTML5 Plus移动App,简 ...
- 一个编程小白,如何入门APP软件开发领域?
近些年,互联网创业火得不得了!一时间,满世界都在招做App软件开发的专业人员.从大众角度来看,学编程,写代码,是一件非常困难的事情.但是,App开发人员的工资那么诱人,让很多小白也跃跃欲试想学一下.那 ...
- HTML5手机APP开发入门(2)
HTML5手机APP开发入门(2) 课程内容 使用IonicFramework v2 + angular 2 完成一个简单的联系人列表的操作,有三个页面: ListPage,DetailPage,Ad ...
- HTML5手机APP开发入门(1)
HTML5手机APP开发入门(1) 开发框架 Ionicframework V2 + Angular 2 具体内容可以参考一下网站 http://ionicframework.net/ http:// ...
- 微信公众平台开发:Web App开发入门
WebApp与Native App有何区别呢?Native App:1.开发成本非常大.一般使用的开发语言为JAVA.C++.Objective-C.2.更新体验较差.同时也比较麻烦.每一次发布新的版 ...
- 一看就懂的Android APP开发入门教程
一看就懂的Android APP开发入门教程 作者: 字体:[增加 减小] 类型:转载 这篇文章主要介绍了Android APP开发入门教程,从SDK下载.开发环境搭建.代码编写.APP打包等步骤 ...
- Cloudera Manager、CDH零基础入门、线路指导 http://www.aboutyun.com/thread-9219-1-1.html (出处: about云开发)
Cloudera Manager.CDH零基础入门.线路指导http://www.aboutyun.com/thread-9219-1-1.html(出处: about云开发) 问题导读:1.什么是c ...
随机推荐
- OPENGL入门的小知识点
记录一下看到的知识点. 大部分知识点来自于https://learnopengl-cn.github.io/ 1.什么是OpenGL 一般它被认为是一个API,包含了一系列可以操作图形.图像的函数.然 ...
- 5 hashlib模块
import hashlib def gen_md5(origin): """md5加密""" ha = hashlib.md5(b'lkp ...
- python + appium 常用公共方法封装
appium 程序下载安装见之前的帖子:https://www.cnblogs.com/gancuimian/p/16536322.html appium 环境搭建见之前的帖子:https://www ...
- Win10解决无法访问其他机器共享的问题【转】
你不能访问此共享文件夹,因为你组织的安全策略阻止未经身份验证的来宾访问.这些策略可帮助保护你的电脑免受网络上不安全设备或恶意设备的威胁.管理员身份执行sc.exe config lanmanworks ...
- git合并指定分支的commit到主干上
1.先切换分支到master git checkout master 2.目前正处于主干上,执行命令,将分支从最后一个commit合并到主干上 git rebase --onto cb4023015f ...
- sourceTree工具使用方法
https://www.cnblogs.com/tian-xie/p/6264104.html
- ESXI不重启增加硬盘空间更新
ESXI虚拟机Linux添加新磁盘后,可以通过重新扫描SCSI总线,在不重启虚拟机的情况下添加SCSI设备在线扩容磁盘(不停机)后,添加磁盘无法识别的问题,尝试了多种办法,最终通过重新扫描SCSI设备 ...
- 在mysql中正常查询的句子,在C#中出错,原因是定义了变量。
在C#中 查询一样. 运行报错 Fatal error encountered during command execution." 命令执行过程中碰到的致命错误." MySqlE ...
- 数组(Java)
数组的定义 数组是相同类型数据的有序集合 数组描述的是相同类型的若干数据,按照一定的先后次序排列组合而成 其中,每个数据称作一个数组元素,每个数组元素可以通过一个下标来访问它们 数组的声明和创建 基本 ...
- mybatis插入批量数据
1 for循环重复调用dao,消耗大 2 sql语句编写插入多条,只用于少数 3 mybatis的batch插入 @Test public void testInsertBatch2() ...