
ASP.NET + MVC5 入门完整教程三 (上) ---第一个MVC项目
https://blog.csdn.net/qq_21419015/article/details/80420815
第一个MVC应用程序
1创建MVC项目
打开VS ,File--新建--项目,选择ASP Web项目,命名后确认。选择(Empty)空模板,
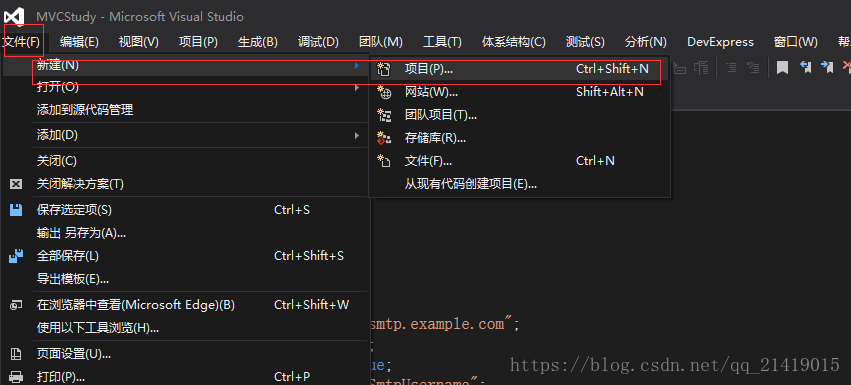
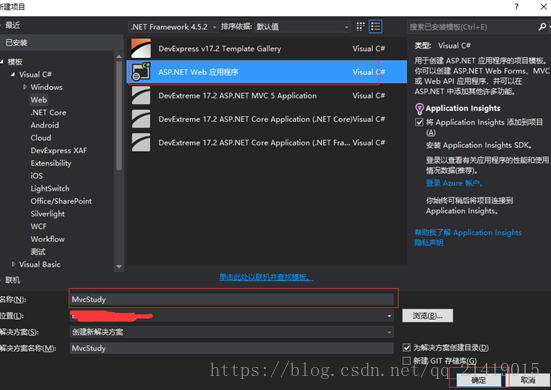
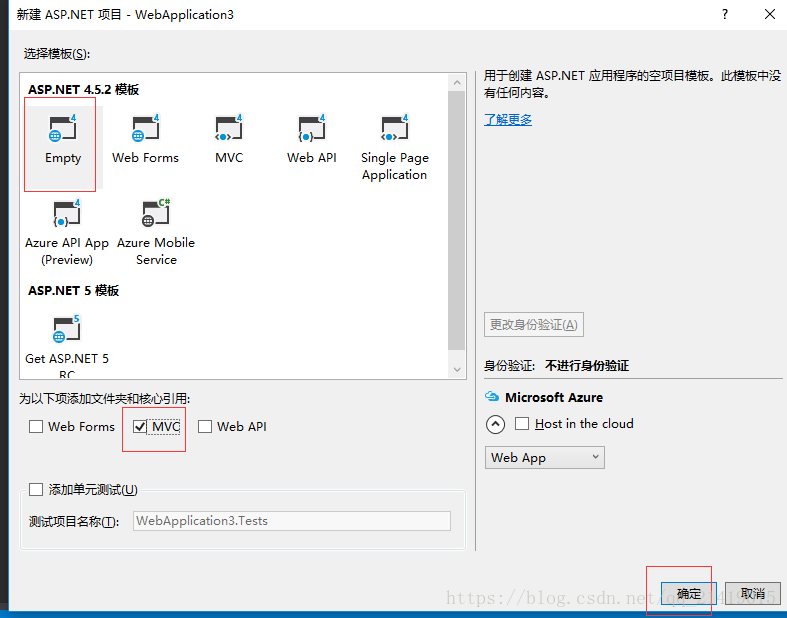
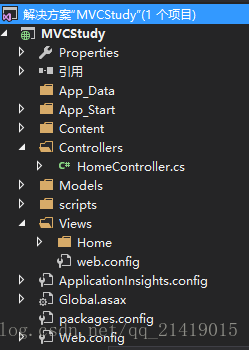
项目创建完成,会看到 解决方案管理器 窗口显示一些文件夹,如图,这是一个MVC的默认结构
2 添加第一个控制器
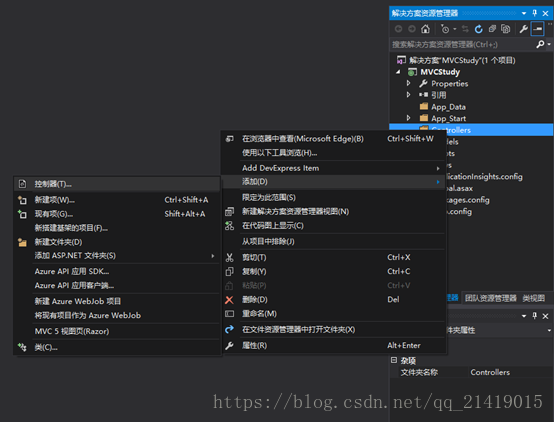
右键 解决方案中的“Controllers”文件夹,从弹出菜单选择 “添加”->“控制器”如上图所示;
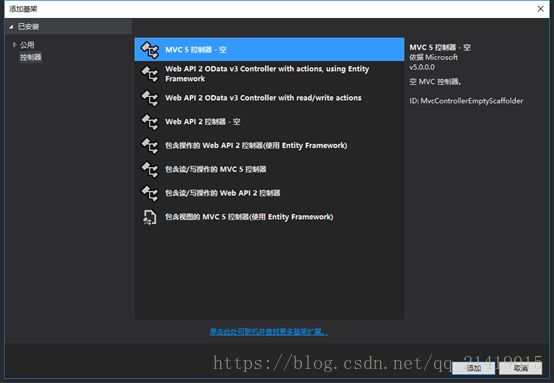
添加后出现下图,单击“Add(添加)”按钮
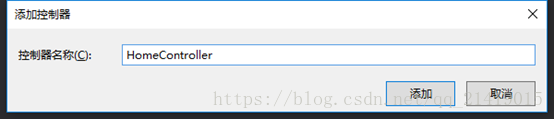
这是打开 控制器对话框,命名为“Home Controller”,点击添加。
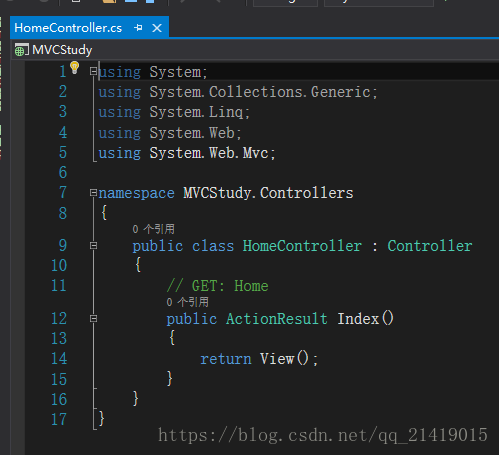
VS会在Controllers文件夹下创建一个新的C#文件,名称为"Home Controller.cs",这个类如下图所示;
3 创建Web界面
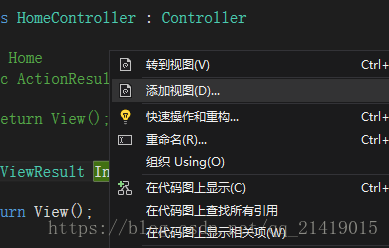
创建web界面,在Index界面任意地方右键,从弹出菜单选择“Add View(添加视图)”,如下图:
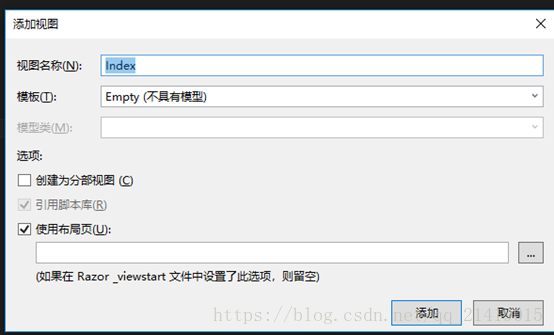
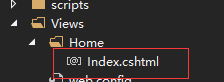
Index.cshtml 基本内容如下所示:
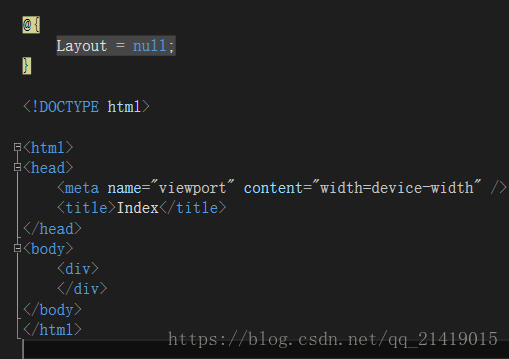
其中:
@{
Layout = null;
}
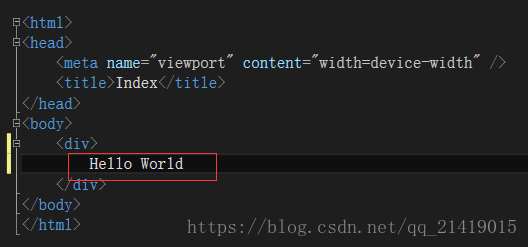
这是一个将由Razor视图引擎进行解释的表达式,Razor引擎处理视图内容并生成发送给浏览器的HTML。这是一个简单的Razor表达式,他告诉Razor未选用布局,以后在详细介绍。对该页面添加内容。
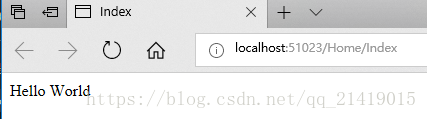
调试后出现界面如下
4 添加显示内容
渲染:视图引擎解释视图文件,转化为html文件;
传递:将渲染后的html标记传给客户端;
呈现:浏览器将html标识显示为web页面。
将数据从控制器传递给视图的一种方法是使用 ViewBag (视图包)对象,ViewBag 是Controller基类的一个成员。
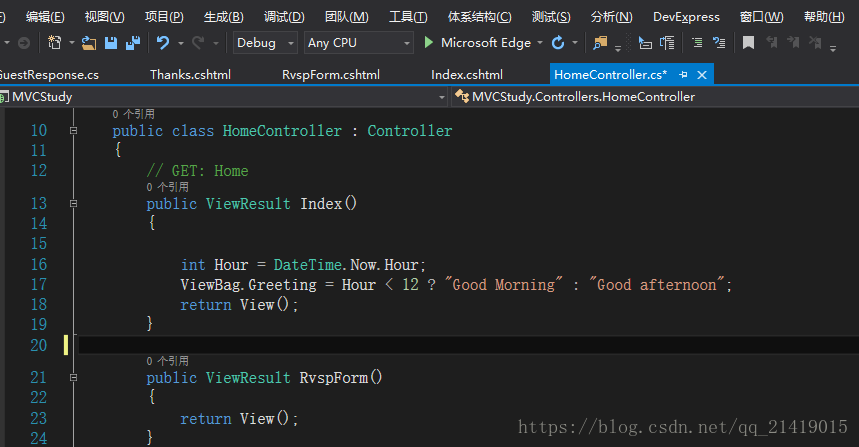
public ViewResult Index()
{
int Hour = DateTime.Now.Hour;
ViewBag.Greeting = Hour < 12 ? "Good Morning" : "Good afternoon";
return View();
}
Greeting属性直到对其赋值的那一刻才会形成。
@{

Layout = null;

}

<!DOCTYPE html>

<html>

<head>

<meta name="viewport" content="width=device-width" />

<title>Index</title>

</head>

<body>

<div>

@ViewBag.Greeting World(From the view)

</div>

</body>

</html>
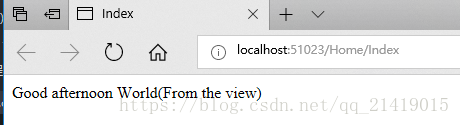
注意:Greeting 可以是任意名称,你也可以写成 @ViewBag.name 只要和Index界面对应就可以实现值传递。
效果如下:
5 创建一个简单的数据录入程序
场景设置:假设朋友准备举办一场聚会,设计一个Web应用程序,对受邀人进行电子回复(RSVP);
一个显示晚会信息首页
一个用来回复(PVSP)的表单
对RVSP表单验证,显示一个感谢画面
界面 Views/Home/Index.cshtml 文件添加内容:
@{

Layout = null;

}

<!DOCTYPE html>

<html>

<head>

<meta name="viewport" content="width=device-width" />

<title>Index</title>

<link href="~/Content/Style.css" rel="stylesheet" />

<link href="~/Content/bootstrap.css" rel="stylesheet" />

<link href="~/Content/bootstrap.min.css" rel="stylesheet" />

</head>

<body>

<div class="text-center">

@ViewBag.Greeting World(From the view)

<h2>

我们将会有一个愉悦的party

</h2>

<h3>您是否参加?</h3>

<div class="btn btn-success">

@Html.ActionLink("PVSP Now", "RvspForm")

</div>

</div>

</body>

</html>
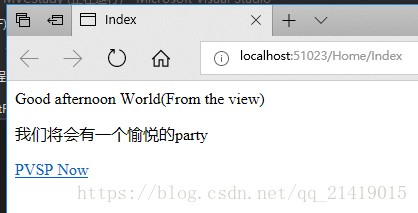
设计一个数据模型:
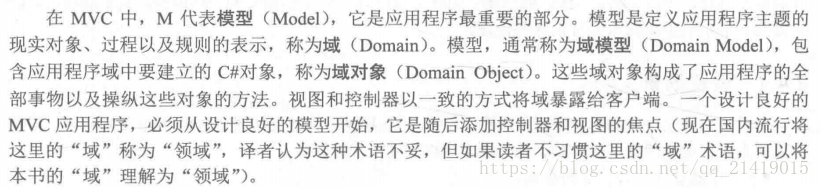
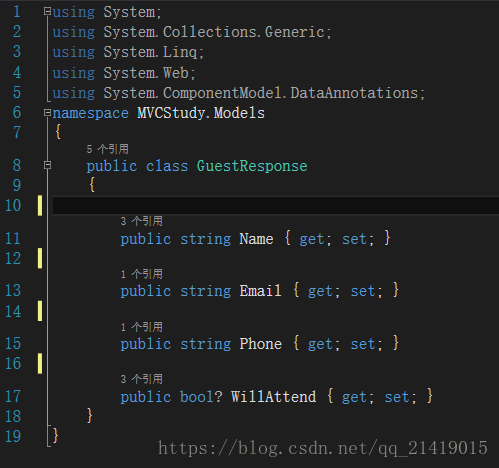
添加模型类:
链接动作方法
在Index.cshtml 添加一个指向RSVP表单的链接;
@{

Layout = null;

}

<!DOCTYPE html>

<html>

<head>

<meta name="viewport" content="width=device-width" />

<title>Index</title>

<link href="~/Content/Style.css" rel="stylesheet" />

<link href="~/Content/bootstrap.css" rel="stylesheet" />

<link href="~/Content/bootstrap.min.css" rel="stylesheet" />

</head>

<body>

<div class="text-center">

@ViewBag.Greeting World(From the view)

<h2>

我们将会有一个愉悦的party

</h2>

<h3>您是否参加?</h3>

<div class="btn btn-success">

@Html.ActionLink("PVSP Now", "RvspForm")

</div>

</div>

</body>

</html>
Html.ActionLink 是HTML辅助器方法 。MVC框架附带一组内置的辅助器方法。可以方便地用来渲染HTML的链接,文本输入,复选框以及其他内容。
ActionLink一共两个参数:显示文本、动作。此时单击该链接会报404错误,因为还没有 /Home/RsvpForm 该界面。
在HomeController类中添加一个“RsvpForm”的方法完成。
添加强类型视图






建立表单
编辑这个RvspForm.cshtml 。
@model MVCStudy.Models.GuestResponse

@

{

	Layout = null;

}

<!DOCTYPE html>

<html>

<head>

<meta name="viewport" content="width=device-width" />

                              <title>RvspForm</title>

                              <link href="~/Content/bootstrap.css" rel="stylesheet" />

                                      <link href="~/Content/bootstrap.css" rel="stylesheet" />

                                              <link href="~/Content/bootstrap-reboot.css" rel="stylesheet" />

                                                      <link href="~/Content/bootstrap-reboot.min.css" rel="stylesheet" />

                                                              <style>

                                                              .btn a {color:white; text-decoration:none}

                                                              body {background-color:#F1F1F1;}

                                                              </style>

                                                              </head>

                                                              <body>

                                                              <div class="p">

	                                                                      </div>

	                                                                      @using (Html.BeginForm())

{

	@Html.ValidationSummary()

	<div class="form-group">

		           <label>Your Name :</label>

		           @Html.TextBoxFor(x => x.Name, new

	{

		@class = "formcontrol"

	})

	</div>

	<div class="form-group">

		           <label>Your Email :</label>

		           @Html.TextBoxFor(x => x.Email, new

	{

		@class = "formcontrol"

	})

	</div>

	<div class="form-group">

		           <label>Your phone : </label>

		           @Html.TextBoxFor(x => x.Phone, new

	{

		@class = "formcontrol"

	})

	</div>

	<div class="form-group">

		           <label>是否接受邀请?</label>

		           @Html.DropDownListFor(x => x.WillAttend, new[] { new SelectListItem()

		{

			Text="是,接受邀请",Value=bool.FalseString

		},new SelectListItem()

		{

			Text = "否,不接受邀请", Value = bool.FalseString

		}

	},"请选择",new {@class="formcontrol"})

	</div>

	<div class="text-center"><input class="btn btn-success" type="submit" value="提交"></div>

	}

</body>

</html>

设置启动URL
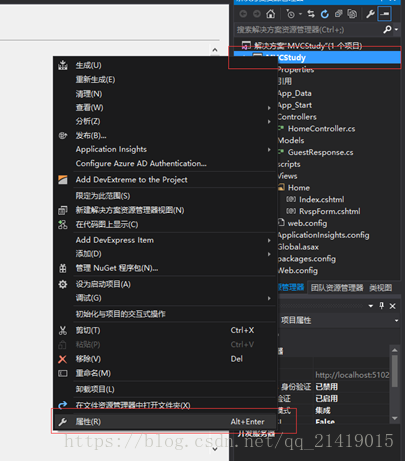
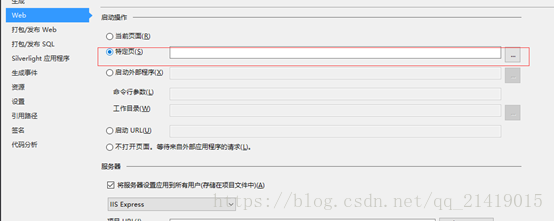
注意:保持特定页空白
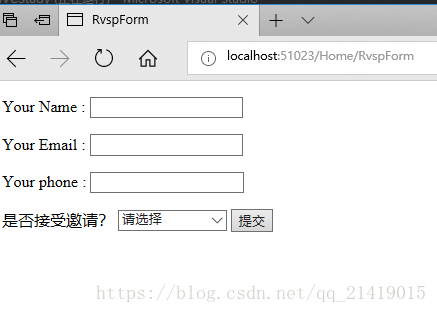
处理表单
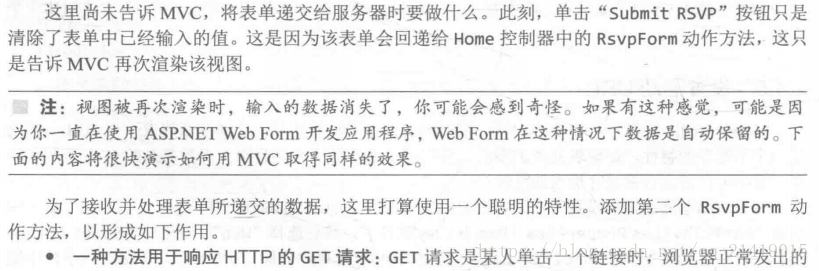

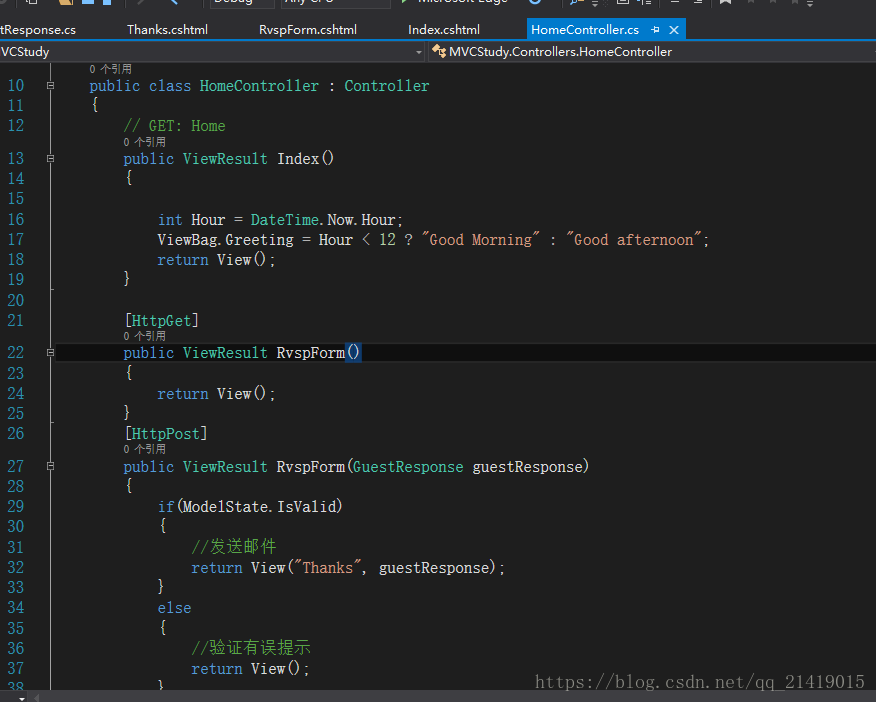
请求,来调用合适的方法。对HomeController类做修改。
using System;

using System.Collections.Generic;

using System.Linq;

using System.Web;

using System.Web.Mvc;

using MVCStudy.Models;

namespace MVCStudy.Controllers

{

public class HomeController : Controller

{

// GET: Home

	public ViewResult Index()

	{

		int Hour = DateTime.Now.Hour;

		ViewBag.Greeting = Hour < 12 ? "Good Morning" : "Good afternoon";

		return View();

	}

	[HttpGet]

	public ViewResult RvspForm()

	{

		return View();

	}

	[HttpPost]

	public ViewResult RvspForm(GuestResponse guestResponse)

	{

		return View("Thanks",guestResponse);

	}

}

}

using MVCStudy.Models 命名空间,这样可以直接使用GuestResponse模型类型,而不需要使用这个类的限定名。
使用模型绑定

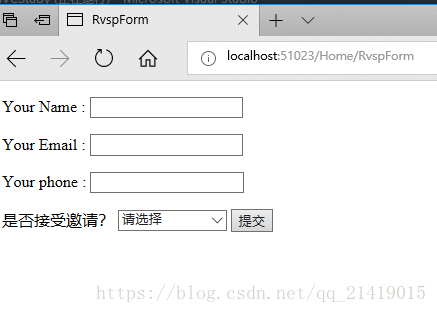

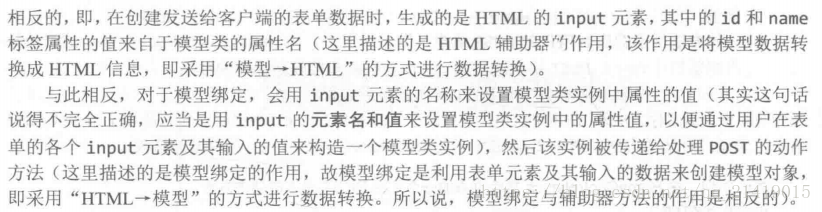
渲染其他视图
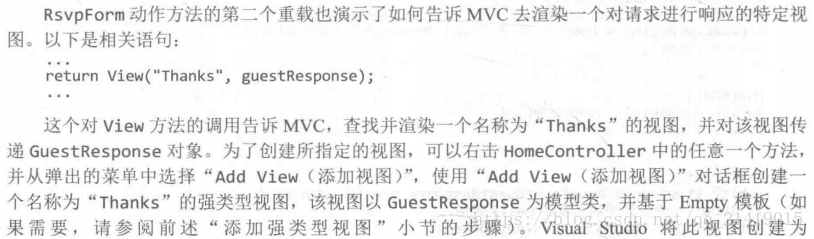
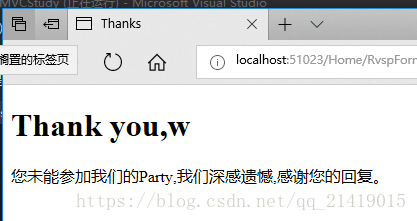
View\Home\Thanks.cshtml。编辑此视图。
@model MVCStudy.Models.GuestResponse

@

{

	Layout = null;

}

<!DOCTYPE html>

<html>

<head>

<meta name="viewport" content="width=device-width" />

                              <link href="~/Content/bootstrap.css" rel="stylesheet" />

                                      <title>Thanks</title>

                                      <style>

                                      body

{

	background-color: #F1F1F1;

}

</style>

</head>

<body>

@try

{

	WebMail.SmtpServer = "smtp.example.com";

	WebMail.SmtpPort = 587;

	WebMail.EnableSsl = true;

	WebMail.UserName = "mySmtpUsername";

	WebMail.Password = "mySmtpPassword";

	WebMail.From = "rsvps@example.com";

	WebMail.Send("party-host@example.com", "RSVP Notifiaction", Model.Name + "is" + ((Model.WillAttend ?? false) ? "" : "not") + "attending");

}

catch(Exception)

{

	@:<b>对不起,未能给您发送回复邮件</b>

}

<div class="text-center">

	           <h1>

	           Thank you,@Model.Name

	           </h1>

	           <div class="lead">

	                      @if (Model.WillAttend == true)

{

	@:感谢您的到来

}

else

{

	@:您未能参加我们的Party,我们深感遗憾,感谢您的回复。

}

</div>

</div>

</body>

</html>
添加验证

注释属性进行定义。
using System;
using System.Collections.Generic;
using System.Linq;
using System.Web;
using System.ComponentModel.DataAnnotations;
namespace MVCStudy.Models
{
public class GuestResponse
{
[Required(ErrorMessage ="请确认您的姓名")]
public string Name { get; set; }
[Required(ErrorMessage = "请确认您的邮箱")]
[RegularExpression(".+\\@.+\\..+",ErrorMessage ="请输入有效邮箱")]
public string Email { get; set; }
[Required(ErrorMessage = "请确认您的电话")]
public string Phone { get; set; }
[Required(ErrorMessage = "请确认您是否接受邀请")]
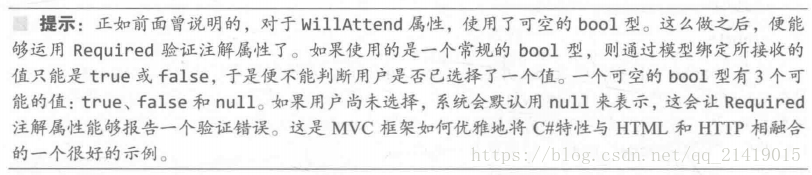
public bool? WillAttend { get; set; }
}
}



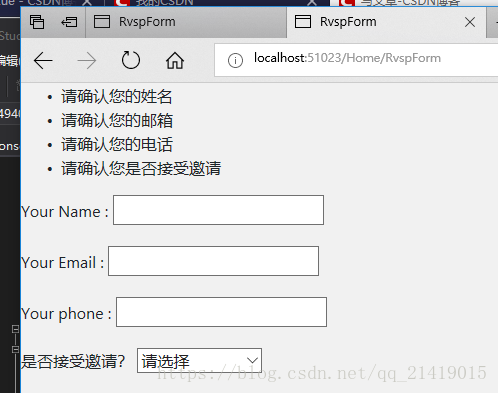
ValidationSummary()(验证摘要)辅助器方法。
@model MVCStudy.Models.GuestResponse
@{
Layout = null;
}
<!DOCTYPE html>
<html>
<head>
<meta name="viewport" content="width=device-width" />
<title>RvspForm</title>
<link href="~/Content/bootstrap.css" rel="stylesheet" />
<link href="~/Content/bootstrap.css" rel="stylesheet" />
<link href="~/Content/bootstrap-reboot.css" rel="stylesheet" />
<link href="~/Content/bootstrap-reboot.min.css" rel="stylesheet" />
<style>
.btn a {color:white;text-decoration:none}
body{background-color:#F1F1F1;}
</style>
</head>
<body>
<div class="p">
</div>
@using (Html.BeginForm())
{
@Html.ValidationSummary()
<div class="form-group">
<label>Your Name :</label>
@Html.TextBoxFor(x => x.Name, new { @class = "formcontrol" })
</div>
<div class="form-group">
<label>Your Email :</label>
@Html.TextBoxFor(x => x.Email, new { @class = "formcontrol" })
</div>
<div class="form-group">
<label>Your phone : </label>
@Html.TextBoxFor(x => x.Phone, new { @class = "formcontrol" })
</div>
<div class="form-group">
<label>是否接受邀请?</label>
@Html.DropDownListFor(x => x.WillAttend, new[]{ new SelectListItem(){ Text="是,接受邀请",Value=bool.FalseString},new SelectListItem(){ Text = "否,不接受邀请", Value = bool.FalseString } },"请选择",new {@class="formcontrol"})
</div>
<div class="text-center"><input class="btn btn-success" type="submit" value="提交"></div>
}
</body>
</html>
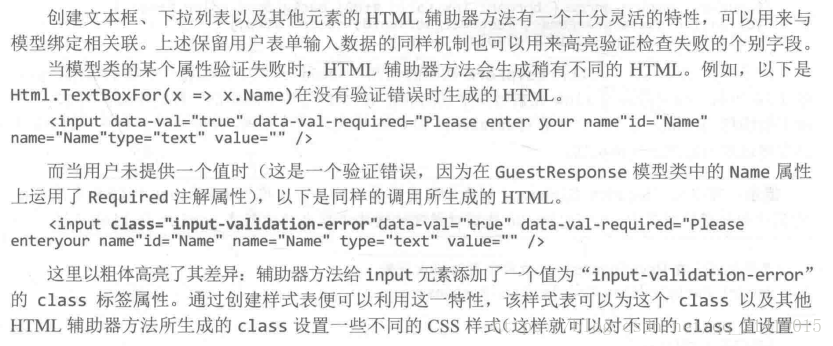
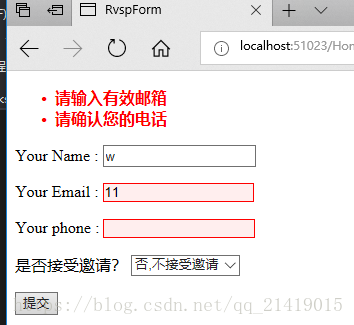
高亮显示无效字段

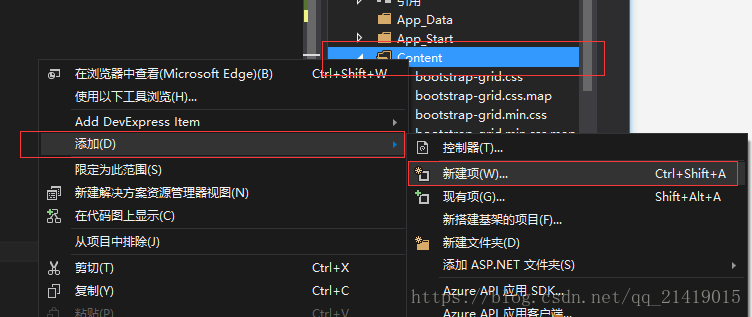

内容:
.field-validation-error {

	color: #f00;

}

.field-validation-valid {display:none;}

.input-validation-error {border:1px solid #f00; background-color:#fee;}

.validation-summary-errors {font-weight:bold; color:#f00}

.validation-summary-valid {display:none}

在 RvsvpForm.cshtml中添加Link元素。
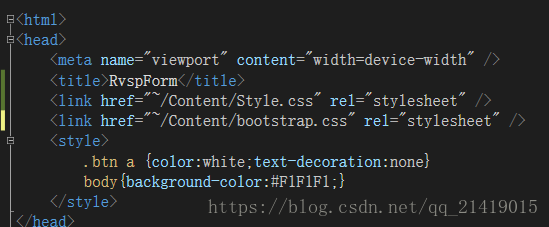
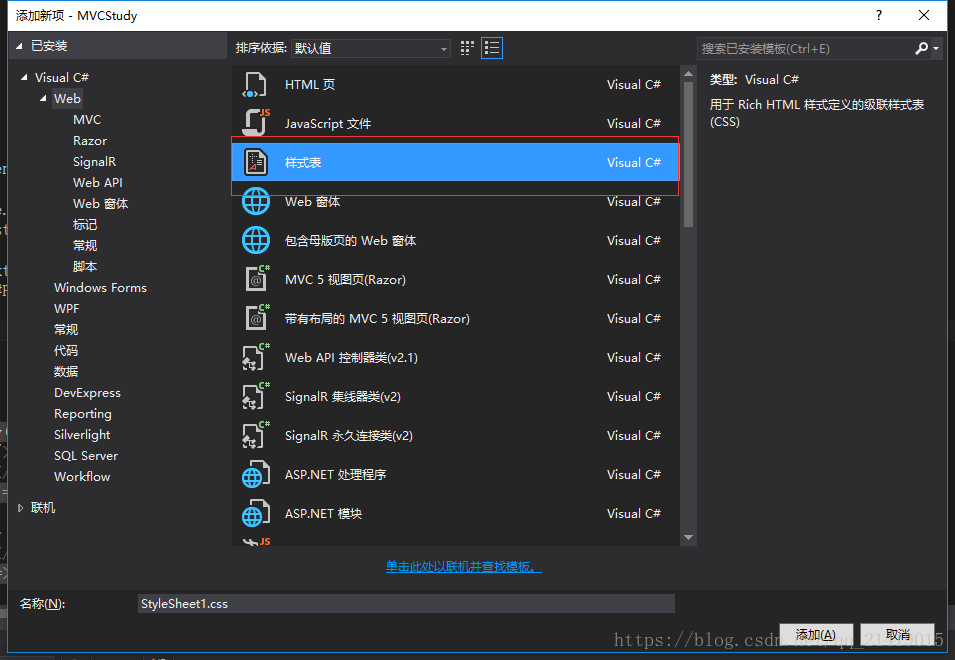
直接从解决方案中用鼠标拖拽文件到相应位置就能自动写Link.
设置内容样式
使用NuGet安装Bootstrap;
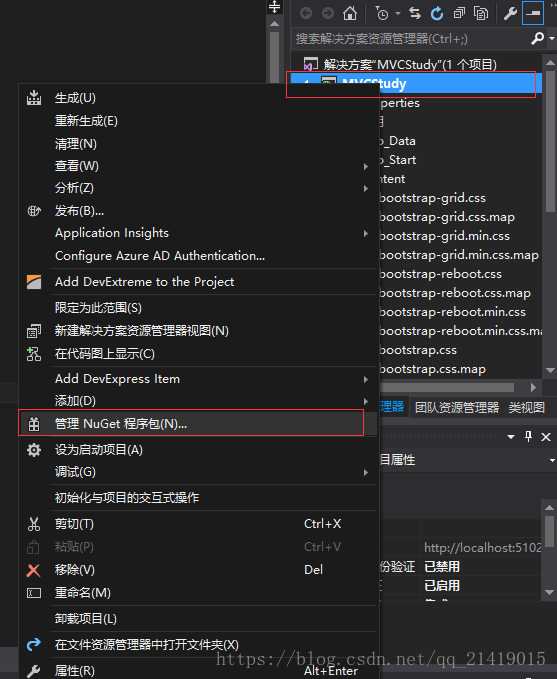
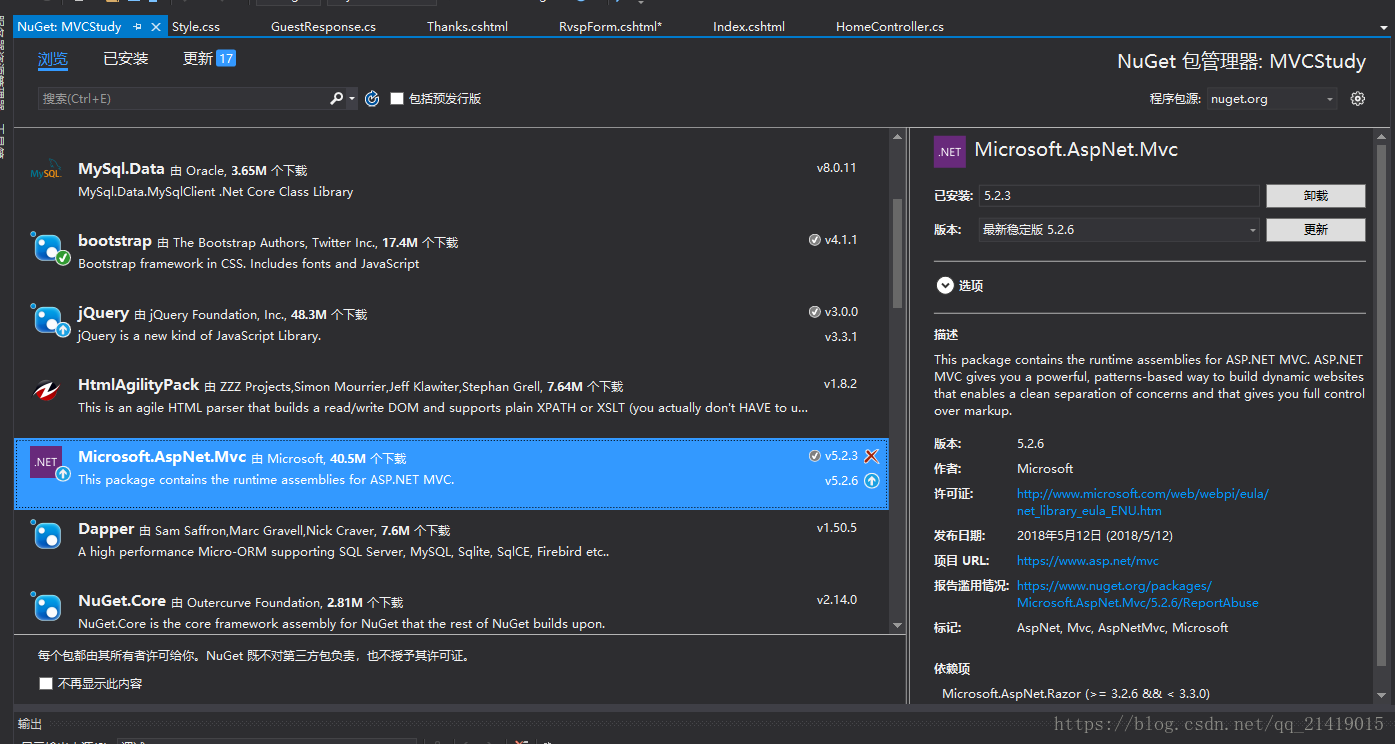
找到Bootstrap安装即可。
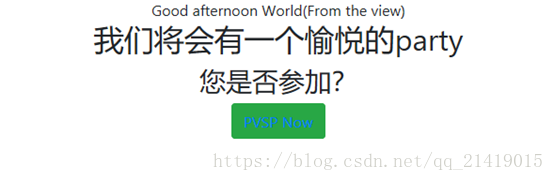
设置Index视图
<html>

 <head></head>

 <body>

  @{ Layout = null; }

  <meta name="viewport" content="width=device-width" />

  <title>Index</title>

  <link href="~/Content/Style.css" rel="stylesheet" />

  <link href="~/Content/bootstrap.css" rel="stylesheet" />

  <link href="~/Content/bootstrap.min.css" rel="stylesheet" />

  <div class="text-center">

    @ViewBag.Greeting World(From the view)

   <h2> 我们将会有一个愉悦的party </h2>

   <h3>您是否参加?</h3>

   <div class="btn btn-success">

     @Html.ActionLink("PVSP Now", "RvspForm")

   </div>

  </div>

 </body>

</html>
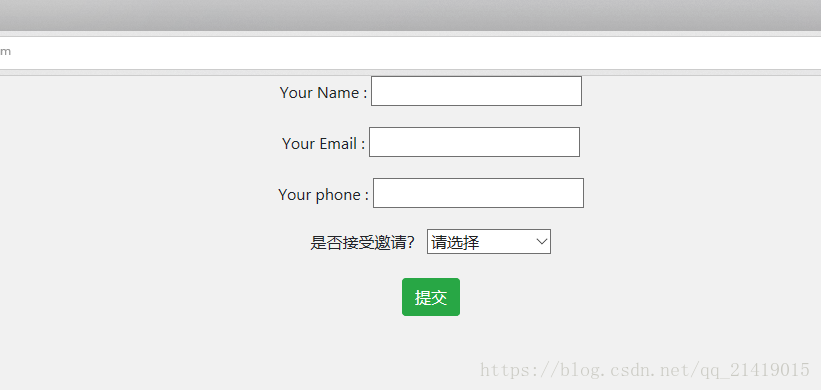
设置RsvpForm视图
<html>

 <head></head>

 <body>

  @model MVCStudy.Models.GuestResponse @{ Layout = null; }

  <meta name="viewport" content="width=device-width" />

  <title>RvspForm</title>

  <link href="~/Content/Style.css" rel="stylesheet" />

  <link href="~/Content/bootstrap.css" rel="stylesheet" />

  <style>

.btn a {color:white;text-decoration:none}

body{background-color:#F1F1F1;}

</style>

  <div class="text-center">

    @using (Html.BeginForm()) { @Html.ValidationSummary()

   <div class="form-group">

    <label>Your Name :</label> @Html.TextBoxFor(x => x.Name, new { @class = "formcontrol" })

   </div>

   <div class="form-group">

    <label>Your Email :</label> @Html.TextBoxFor(x => x.Email, new { @class = "formcontrol" })

   </div>

   <div class="form-group">

    <label>Your phone : </label> @Html.TextBoxFor(x => x.Phone, new { @class = "formcontrol" })

   </div>

   <div class="form-group">

    <label>是否接受邀请?</label> @Html.DropDownListFor(x => x.WillAttend, new[] { new SelectListItem() { Text = "是,接受邀请", Value = bool.FalseString }, new SelectListItem() { Text = "否,不接受邀请", Value = bool.FalseString } }, "请选择", new { @class = "formcontrol" })

   </div>

   <div class="text-center">

    <input class="btn btn-success" type="submit" value="提交" />

   </div> }

  </div>

 </body>

</html>
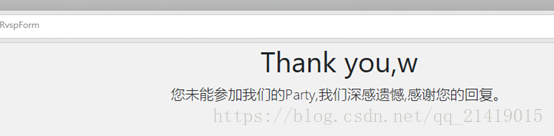
设置Thanks视图样式
<html>

 <head></head>

 <body>

  @model MVCStudy.Models.GuestResponse @{ Layout = null; }

  <meta name="viewport" content="width=device-width" />

  <link href="~/Content/bootstrap.css" rel="stylesheet" />

  <title>Thanks</title>

  <style>

body {

background-color: #F1F1F1;

}

</style>   @try { WebMail.SmtpServer = "smtp.example.com"; WebMail.SmtpPort = 587; WebMail.EnableSsl = true; WebMail.UserName = "mySmtpUsername"; WebMail.Password = "mySmtpPassword"; WebMail.From = "rsvps@example.com"; WebMail.Send("party-host@example.com", "RSVP Notifiaction", Model.Name + "is" + ((Model.WillAttend ?? false) ? "" : "not") + "attending"); } catch(Exception) { @:

  <b>对不起,未能给您发送回复邮件</b> }

  <div class="text-center">

   <h1> Thank you,@Model.Name </h1>

   <div class="lead">

     @if (Model.WillAttend == true) { @:感谢您的到来 } else { @:您未能参加我们的Party,我们深感遗憾,感谢您的回复。 }

   </div>

  </div>

 </body>

</html>
源码下载:https://download.csdn.net/download/qq_21419015/10433092
ASP.NET + MVC5 入门完整教程三 (上) ---第一个MVC项目的更多相关文章
- ASP.NET + MVC5 入门完整教程三 (下) ---MVC 松耦合
建立松耦合组件 MVC 模式最重要的特性之一视他支持关注分离,希望应用程序中的组件尽可能独立,只有很少的几个可控依赖项.在理想的情况下,每个组件都不了解其他组件,而只是通过抽象接口来处理应用程序的其他 ...
- ASP.NET + MVC5 入门完整教程七 -—-- MVC基本工具(上)
https://blog.csdn.net/qq_21419015/article/details/80474956 这里主要介绍三类工具之一的 依赖项注入(DI)容器,其他两类 单元测试框架和模仿工 ...
- ASP.NET + MVC5 入门完整教程八 -—-- 一个完整的应用程序(上)
https://blog.csdn.net/qq_21419015/article/details/80509513 SportsStore 1.开始创建Visual Studio 解决方案和项目这里 ...
- ASP.NET + MVC5 入门完整教程四---MVC 中使用扩展方法
https://blog.csdn.net/qq_21419015/article/details/80433640 1.示例项目准备1)项目创建新建一个项目,命名为LanguageFeatures ...
- ASP.NET + MVC5 入门完整教程二
原文链接:https://blog.csdn.net/qq_21419015/article/details/80318046 从前端UI开始 MVC分离的比较好,开发顺序没有特别要求,先开发哪一部分 ...
- ASP.NET + MVC5 入门完整教程八 -—-- 一个完整的应用程序(下)
https://blog.csdn.net/qq_21419015/article/details/80802931 SportsStore 1.导航 添加导航控件 如果客户能够通过产品列表进行分类导 ...
- ASP.NET + MVC5 入门完整教程五 --- Razor (模型与布局)
https://blog.csdn.net/qq_21419015/article/details/80451895 1.准备示例项目 为了演示Razor,使用VS创建一个名称为“Razor”的新项目 ...
- ASP.NET + MVC5 入门完整教程七 -—-- MVC基本工具(下)
https://blog.csdn.net/qq_21419015/article/details/80493633 Visual Stdio 的单元测试
- asp.net + MVC5 入门完整教程一
原文链接:https://blog.csdn.net/qq_21419015/article/details/80311918原创凌霜残雪 最后发布于2018-05-14 17:26:30 阅读数 3 ...
随机推荐
- Ansible Tower 3.5.1 平台部署和破解
原创 Ansible Tower 3.5.1 平台部署和破解 Ansible Tower (以前叫’AWX’)是能够帮助任何IT团队更容易使用Ansible的解决方案.该方案基于web. Tower允 ...
- UVA10791-Minimum Sum LCM(唯一分解定理基本应用)
原题:https://vjudge.net/problem/UVA-10791 基本思路:1.借助唯一分解定理分解数据.2.求和输出 知识点:1.筛法得素数 2.唯一分解定理模板代码 3.数论分析-唯 ...
- Winpcap学习笔记
————————————————版权声明:本文为CSDN博主「Ezioooooo」的原创文章,遵循 CC 4.0 BY-SA 版权协议,转载请附上原文出处链接及本声明.原文链接:https://blo ...
- 中间件c10k问题
中间件c10k问题 没有使用iocp/epoll/kqueue通讯的中间件,中间件就算部署在拥有多核CPU的强大服务器上,最头痛的问题是C10K问题. 中间件没有办法通过优化程序,提升CPU利用率来处 ...
- Socket之UDP
相对于TCP/IP来说,UDP更像是发快递和写信,不需要判断和对方是否连通就可以发送,而TCP/IP必须确认连通之后才可以发送,这样UDP通讯其实不能严格按照TCP/IP的说法区分服务器和客户端,对于 ...
- Python 3.9.0 首个迭代版本发布了
Python 3.9.0 alpha 1 发布了,这是 3.8 之后的首个 3.9 系列版本. ! 官方没有介绍新特性,也没有添加新模块,但是以下模块有所改进: ast asyncio curses ...
- C# LINQ学习笔记一:走进LINQ的世界
本笔记摘抄自:https://www.cnblogs.com/liqingwen/p/5832322.html,记录一下学习过程以备后续查用. LINQ 简介: 语言集成查询(LINQ)是Vi ...
- python qrcode二维码生成与识别
二维码 二维码生成 1.用法 https://github.com/lincolnloop/python-qrcode 2.使用 简单实用 import qrcode # 二维码内容 data = & ...
- 0002 Django工程创建
1 创建一个目录,用于专门存放Django工程的虚拟环境 PyCharm默认虚拟环境在工程内,从而导致打包的时候,会把虚拟环境一起打包. 同时,虚拟环境中的插件较多,一个工程创建了一个虚拟环境,以后, ...
- @RendSection{"scripts",require:false}的作用
MVC视图中,Javascripts代码被放于下面的Razor代码中(@section Scripts{}). 好处:在视图进行JavaScript编程时,是一个很好的实践,在共享视图(_Layout ...