【论文项目复现1】漏洞检测项目复现_VulDeeLocator
复现环境
Ubuntu 20.04
CPU: 32G
GPU: 11G 2080ti
Source2slice: clang-6.0 + llvm + dg (dg: https://github.com/mchalupa/dg)、gcc-9.5,g++-9.5
Data preprocess and Model training: python3.6 + tensorflow1.6 + keras2.1.2 + gensim3.4
建议用conda配置环境,包括cuda9.0,cudnn7.3,tensorflow-gpu-base-1.6(安装pytorch1.1.0会一起安装),nvidia driver-535
1. llvm,clang-6.0安装
参考:https://askubuntu.com/questions/1058534/installing-clang-6-0-on-ubuntu-18-04-lts-bionic
wget -O - https://apt.llvm.org/llvm-snapshot.gpg.key | sudo apt-key add -

sudo apt-add-repository "deb http://apt.llvm.org/bionic/ llvm-toolchain-bionic-6.0 main"

sudo apt update && sudo apt install clang-6.0
安装失败无果再考虑源码编译安装(并不容易),安装成功直接跳过下一节
ubuntu clang6.0源代码编译安装
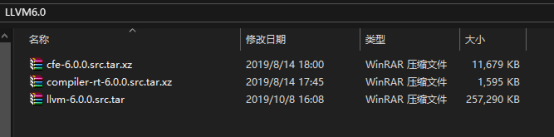
文件资源下载
安装总共需要三个tar包,将其全部拖入到Linux环境下。其中cfe-6.0.0.src.tar.xz是clang的源码,compiler-rt-6.0.0.src.tar.xz是动态测试工具,llvm-6.0.0.src.tar是llvm的源码
curl -L -C - "https://d.pcs.baidu.com/file/ca2f32029rb0f579d86a18435f3b612a?fid=3580935171-250528-214634233489673&dstime=1710208818&rt=sh&sign=FDtAERVJouK-DCb740ccc5511e5e8fedcff06b081203-0EsKsUXkXhEWjG9fPhnStkiYz%2Bw%3D&expires=8h&chkv=1&chkbd=0&chkpc=&dp-logid=503437474518640837&dp-callid=0&shareid=3950100901&r=731328302&resvsflag=1-12-0-1-1-1&vuk=3360598225&file_type=0" -o "cfe-6.0.0.src.tar.xz" -A "pan.baidu.com" -b "BDUSS=FZXR2xPaWdwVlRKZXktbUlTVThWVFRHZGRFdjRaUXFVYUFKby1DSVpzTFM3N1ZsRVFBQUFBJCQAAAAAAAAAAAEAAADmyA5KUWlxaV9DbGlmZgAAAAAAAAAAAAAAAAAAAAAAAAAAAAAAAAAAAAAAAAAAAAAAAAAAAAAAAAAAAAAAAAAAAAAAANJijmXSYo5lN"

curl -L -C - "https://d.pcs.baidu.com/file/959617e93jc8a5079ca676a1dbd64b49?fid=3580935171-250528-711933849979721&dstime=1710208818&rt=sh&sign=FDtAERVJouK-DCb740ccc5511e5e8fedcff06b081203-zYRnYqUenQ4cpO%2B%2BMLMzIZOBxao%3D&expires=8h&chkv=1&chkbd=0&chkpc=&dp-logid=503437474518640837&dp-callid=0&shareid=3950100901&r=502521574&resvsflag=1-12-0-1-1-1&vuk=3360598225&file_type=0" -o "compiler-rt-6.0.0.src.tar.xz" -A "pan.baidu.com" -b "BDUSS=FZXR2xPaWdwVlRKZXktbUlTVThWVFRHZGRFdjRaUXFVYUFKby1DSVpzTFM3N1ZsRVFBQUFBJCQAAAAAAAAAAAEAAADmyA5KUWlxaV9DbGlmZgAAAAAAAAAAAAAAAAAAAAAAAAAAAAAAAAAAAAAAAAAAAAAAAAAAAAAAAAAAAAAAAAAAAAAAANJijmXSYo5lN"

curl -L -C - "https://d.pcs.baidu.com/file/6532a5a6en72a72e58bae082b68ccca4?fid=3580935171-250528-783078331849335&dstime=1710208818&rt=sh&sign=FDtAERVJouK-DCb740ccc5511e5e8fedcff06b081203-%2BpKHwQMhRNXZhmFxLpGalRO0gw4%3D&expires=8h&chkv=1&chkbd=0&chkpc=&dp-logid=503437474518640837&dp-callid=0&shareid=3950100901&r=109145561&resvsflag=1-12-0-1-1-1&vuk=3360598225&file_type=0" -o "llvm-6.0.0.src.tar" -A "pan.baidu.com" -b "BDUSS=FZXR2xPaWdwVlRKZXktbUlTVThWVFRHZGRFdjRaUXFVYUFKby1DSVpzTFM3N1ZsRVFBQUFBJCQAAAAAAAAAAAEAAADmyA5KUWlxaV9DbGlmZgAAAAAAAAAAAAAAAAAAAAAAAAAAAAAAAAAAAAAAAAAAAAAAAAAAAAAAAAAAAAAAAAAAAAAAANJijmXSYo5lN"

# 下载链接:https://pan.baidu.com/s/1pGTDJd7rGxD5vIxChNPP3Q

# 提取码:cbm1
安装clang-6.0
参考:https://blog.csdn.net/qq_42570601/article/details/107146407
1解压llvm-6.0.0.src.tar
在root权限的根目录下,创建一个名为llvmtest目录:
将llvm-6.0.0.src.tar移到llvmtest目录下,使用tar -xvf llvm-6.0.0.src.tar命令解压文件到当前目录,并将解压好的文件重命名为llvm
2解压cfe-6.0.0.src.tar.xz
步骤1.1中被解压出来命名为llvm的文件下有一个tools目录,将cfe-6.0.0.src.tar.xz移到其中,使用tar -xvf cfe-6.0.0.src.tar.xz解压,并将解压后的文件重命名为clang
3解压compiler-rt-6.0.0.src.tar.xz
步骤1.1中被解压出来命名为llvm的文件下有一个projects目录,将compiler-rt-6.0.0.src.tar.xz移动到其中,使用tar -xvf compiler-rt-6.0.0.src.tar.xz命令解压,并重命名为compiler-rt
编译安装
确保你的Linux中有安装cmake。输入cmake -version指令,查看你本机cmake的版本号
没有的话就安装,3.15验证可行
wget https://cmake.org/files/v3.15/cmake-3.15.1.tar.gz
然后参考下面链接完成安装即可:
https://www.cnblogs.com/cxscode/p/10980101.html
确保已经安装gcc和g++
tar -xvzf cmake-3.6.1.tar.gz
cd cmake-3.6.1/
然后执行安装过程
./bootstrap
执行完之后,一般就是执行make编译,但是根据命令行的提示是接下来请运行gmake,所以应该执行下面命令编译并安装:
gmake
gmake install
正式编译安装llvm
在步骤1.1中被解压出来命名为llvm的文件下新建一个名为llvm-build的目录,然后cd到该目录下,输入下面指令对llvm源码进行编译:
cmake -G "Unix Makefiles" -DLLVM_ENABLE_ASSERTIONS=On -DCMAKE_BUILD_TYPE=Release ../

编译完成后输入make install指令进行安装,这个过程比较久,可能要两三个小时;
2. SARD files
(1). getVulLineForCounting.py
python getVulLineForCounting.py ../../000 ../../xxx.xml
This file is used to get the line numbers of vulnerable lines in the source code file. The input is the source code file and xxx.xml file. The output is xxx.txt file, which is renamed as SARD-hole_line.txt.

就是从xml文件中定位到漏洞的具体行数。
(2). multiFileCompile.py
python multiFileCompile.py ../../000/ ../../xxx.xml
跑之前需要注意,multiFileCompile.py中构造编译命令的代码如下:
            if noFlawFile.endswith('.c'):

                cmd1 = 'clang -emit-llvm -w -g -c ' + os.path.join(rawPathHead,noFlawFile) + ' -o ' + os.path.join(rawPathHead,noFlawFile)[:-2] + '.bc'

                cmd1 += ' -I /home/king/aproSARD/testcaseLib/'

            elif noFlawFile.endswith('.cpp'):

                cmd1 = 'clang++ -emit-llvm -w -g -c ' + os.path.join(rawPathHead,noFlawFile) + ' -o ' + os.path.join(rawPathHead,noFlawFile)[:-4] + '.bc'

                cmd1 += ' -I /home/king/aproSARD/testcaseLib/'
- 1.上面的clang和clang++我安装的时候是clang-6.0和clang++-6.0,所以要和源码统一。
- 2.还有头文件std_testcase.h,代码中是作者的绝对路径,需要改成自己的。
- 3.作者构造cmd的时候字符串用的单引号,注意将synthetic and academic programs改为synthetic_and_academic_programs
This file is used to compile the source code file to .bc file.

使用clang6.0和clang++-6.0将000/下的c文件都编译成.bc文件,.bc 文件是 LLVM 项目中使用的中间表示文件,它们包含了从源代码生成的低级、平台无关的代码。
这个过程我在虚拟机上跑了17分钟。
(3). get-llvmwithline.cpp
./get-llvmwithline SARD-hole_line.txt
This file is used to extract four kinds of focuses. The output file is in the directory of "000".

可能会遇到ubuntu 缺少 libtinfo.so.5 问题
sudo apt-get install libncurses5
然后就等待他跑完,放一段单个文件的中间输出:
/home/key/Work/2024/VulDeeLocator/data_pre/data_pre_proces/synthetic_and_academic_programs/000/080/513/CWE134_Uncontrolled_Format_String__char_listen_socket_w32_vsnprintf_34.c//输出文件名称是我修改了get-llvmwithline.cpp文件.

./llvm-slicer -c 71:data,124:data,129:data,152:data,154:data,154:data -entry CWE134_Uncontrolled_Format_String__char_listen_socket_w32_vsnprintf_34_bad -annotate slicer /home/key/Work/2024/VulDeeLocator/data_pre/data_pre_proces/synthetic_and_academic_programs/000/080/513/CWE134_Uncontrolled_Format_String__char_listen_socket_w32_vsnprintf_34.bc

Matched line 71 with variable data to:

  store i8* %12, i8** %1, align 8, !dbg !81

Matched line 124 with variable data to:

  %68 = load i8*, i8** %1, align 8, !dbg !187

Matched line 129 with variable data to:

  %75 = load i8*, i8** %1, align 8, !dbg !197

Matched line 152 with variable data to:

  %95 = load i8*, i8** %1, align 8, !dbg !227

Matched line 154 with variable data to:

  %97 = load i8*, i8** %10, align 8, !dbg !231

Matched line 154 with variable data to:

  %98 = load i8*, i8** %10, align 8, !dbg !232

[llvm-slicer] CPU time of pointer analysis: 3.329000e-03 s

[llvm-slicer] CPU time of reaching definitions analysis: 4.249000e-03 s

[llvm-slicer] CPU time of control dependence analysis: 2.780000e-04 s

[llvm-slicer] Finding dependent nodes took 0 sec 0 ms

[llvm-slicer] Saving IR with annotations to /home/key/Work/2024/VulDeeLocator/data_pre/data_pre_proces/synthetic_and_academic_programs/000/080/513/CWE134_Uncontrolled_Format_String__char_listen_socket_w32_vsnprintf_34-debug.ll

[llvm-slicer] Slicing dependence graph took 0 sec 0 ms

[llvm-slicer] Sliced away 57 from 151 nodes in DG

[llvm-slicer] saving sliced module to: /home/key/Work/2024/VulDeeLocator/data_pre/data_pre_proces/synthetic_and_academic_programs/000/080/513/CWE134_Uncontrolled_Format_String__char_listen_socket_w32_vsnprintf_34.sliced

holefuncname: CWE134_Uncontrolled_Format_String__char_listen_socket_w32_vsnprintf_34_bad

funcname:badVaSink

·································

./llvm-slicer -c 237:service,237:service,241:service,241:service -entry goodB2G -annotate slicer /home/key/Work/2024/VulDeeLocator/data_pre/data_pre_proces/synthetic_and_academic_programs/000/080/513/CWE134_Uncontrolled_Format_String__char_listen_socket_w32_vsnprintf_34.bc

Did not find slicing criteria: '237:service,237:service,241:service,241:service'

[llvm-slicer] CPU time of pointer analysis: 4.581000e-03 s

[llvm-slicer] CPU time of reaching definitions analysis: 4.114000e-03 s

[llvm-slicer] CPU time of control dependence analysis: 2.430000e-04 s

[llvm-slicer] Saving IR with annotations to /home/key/Work/2024/VulDeeLocator/data_pre/data_pre_proces/synthetic_and_academic_programs/000/080/513/CWE134_Uncontrolled_Format_String__char_listen_socket_w32_vsnprintf_34-debug.ll

[llvm-slicer] saving sliced module to: /home/key/Work/2024/VulDeeLocator/data_pre/data_pre_proces/synthetic_and_academic_programs/000/080/513/CWE134_Uncontrolled_Format_String__char_listen_socket_w32_vsnprintf_34.sliced

holefuncname: goodB2G

funcname:badVaSink

api over
执行完毕
让GPT为我们解答一下:
; 定义一个名为 CWE121_Stack_Based_Buffer_Overflow__CWE805_char_alloca_memcpy_32_bad 的函数,

; 该函数模拟了一个栈基础的缓冲区溢出漏洞。

define void @CWE121_Stack_Based_Buffer_Overflow__CWE805_char_alloca_memcpy_32_bad() #0 !dbg !11 {

  ; 在栈上分配一个指针的空间(8字节对齐)

  %1 = alloca i8*, align 8

  ; 在栈上分配另一个指针的空间(8字节对齐)

  %2 = alloca i8**, align 8

  ; 在栈上分配另一个指针的空间(8字节对齐)

  %3 = alloca i8**, align 8

  ; 在栈上分配一个指针的空间(8字节对齐)

  %4 = alloca i8*, align 8

  ; 在栈上分配一个大小为100字节的数组的空间(16字节对齐)

  %8 = alloca [100 x i8], align 16

  ; 将数组的地址存储到为其分配的指针中(%9)

  %9 = alloca i8, i64 50, align 16, !dbg !23

  store i8* %9, i8** %4, align 8, !dbg !22

  ; 加载 %4 指针指向的地址到新指针中(%13),准备进行 memcpy 操作

  %13 = load i8*, i8** %4, align 8, !dbg !32

  ; 将加载的地址存储到用于 memcpy 操作的指针中(%6)

  store i8* %13, i8** %6, align 8, !dbg !33

  ; 加载 %2 指针指向的地址到 %17,并将未初始化的指针存储到 %7 中

  %17 = load i8**, i8*** %2, align 8, !dbg !37

  store i8* %16, i8** %17, align 8, !dbg !38

  ; 加载 %7 指针的值

  %24 = load i8*, i8** %7, align 8, !dbg !53

  ; 准备 memcpy 操作的目标指针

  %23 = getelementptr inbounds [100 x i8], [100 x i8]* %8, i32 0, i32 0, !dbg !54

  ; 执行 memcpy 操作,从源数组复制100字节到目标缓冲区

  ; 这将导致栈溢出,因为目标缓冲区只有99字节

  call void @llvm.memcpy.p0i8.p0i8.i64(i8* %22, i8* %23, i64 100, i32 1, i1 false), !dbg !54

  ; 加载目标指针

  %26 = load i8*, i8** %7, align 8, !dbg !57

  ; 获取目标缓冲区最后一字节的地址

  %25 = getelementptr inbounds i8, i8* %24, i64 99, !dbg !55

  ; 在最后一个地址存储一个空字符以结束复制的数据

  store i8 0, i8* %25, align 1, !dbg !56

  ; 调用一个打印缓冲区内容的函数(这个函数调用可能是一个漏洞)

  call void @printLine(i8* %26), !dbg !58

  ; 函数返回,无返回值

  ret void, !dbg !59

}

(4). autoReorder.py
python2 autoRecorder.py ../../000/
此文件用于对从源代码文件中提取的语句进行重新排序。输出是 newslice 目录下的 .final.ll 文件,这是一个 llvm 切片。
修改源代码中autoReorder.py 为autoRecorder.py

(5). getFlawLoc.py
python2 getFlawLoc.py ../../000/
此文件用于获取 slice2flawline.pkl,其中包含易受攻击的行号。
(6). addFlawtag.py
python addFlawtag.py SARD-hole_line.txt
此文件用于获取 newslice 目录下 llvm 切片对应的源代码切片 (.slicer.c)
(7). getSourceLine.py
python getSourceLine.py ../../000/
此文件用于 slice2flawline.pkl,其中包含对应于 .slicer.c 文件的易受攻击行的行号
Step 2: Data preprocess
- process_dataflow.py: Get the corpus of slices generated from the systhetic and academic dataset.
process_dataflow_NVD.py: Get the corpus of slices generated from the real-world dataset.
The input is slices generated from the systhetic and academic dataset and the real-world dataset and the output is corpus files.
获取从系统和学术数据集生成的切片语料库。 process_dataflow_NVD.py:获取从真实数据集生成的切片语料库。 输入是从系统和学术数据集以及真实世界数据集生成的切片,输出是语料库文件。
这里需要修改很多地方
将000文件夹移动到\src\data_preprocess\data\SARD\data_source\xxx下,这里的xxx自己取。
将getllvm..目录下的slice2flawline_NO.pkl移动到src\data_preprocess\data\SARD\label_source目录下,并修改文件名为xxx_Flawline.pkl,主要原因如下:

然后corpus目录下就出现了
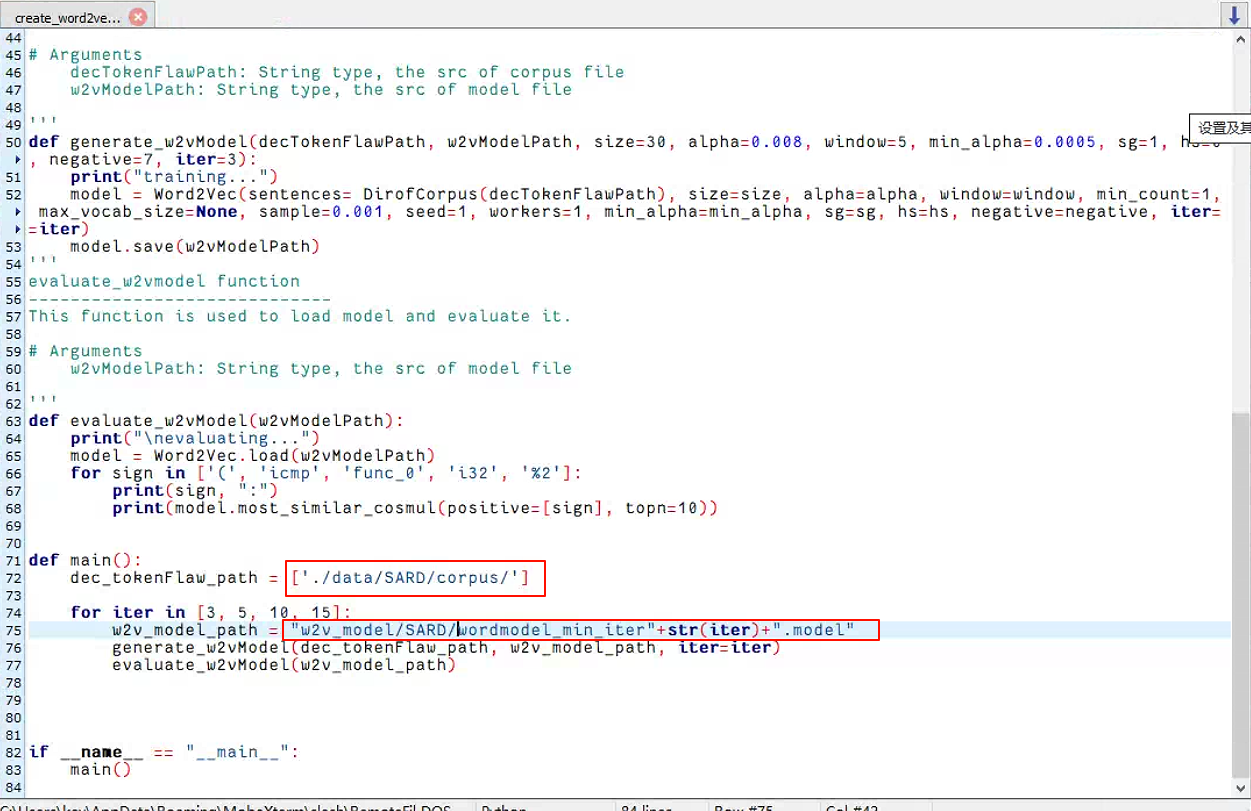
- create_word2vecmodel.py: Train the word2vec model. The input is the corpus files and the output is the trained model.
训练 word2vec 模型。输入是语料库文件,输出是经过训练的模型。

- get_dl_input.py. Get the vectors of tokens in the corpus files. The input is the corpus file and the trained word2vec model and the output is the vector file.
获取语料库文件中标记的向量。输入是语料库文件和经过训练的 word2vec 模型,输出是向量文件。
要注意修改py文件缩进要用空格,因为源代码用的就是空格spqce

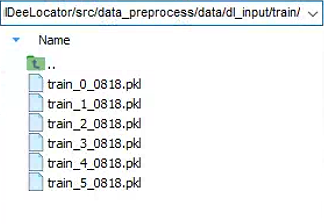
train
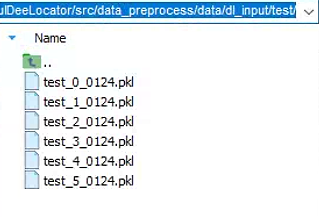
test
Step 3: Model training
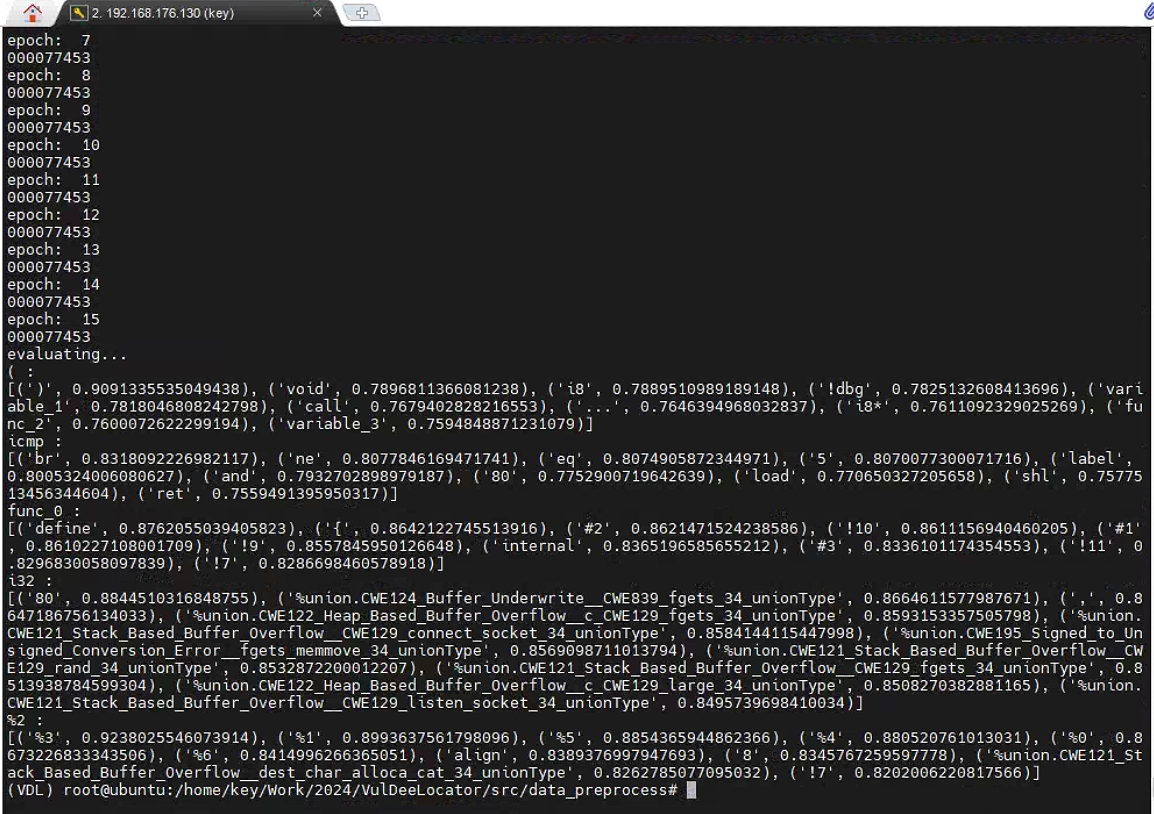
- bgru_threshold.py: Train the BGRU model which can locate the vulnerabilities and evaluate it. The input is the training dataset and the test dataset, and the output is the trained BGRU model.

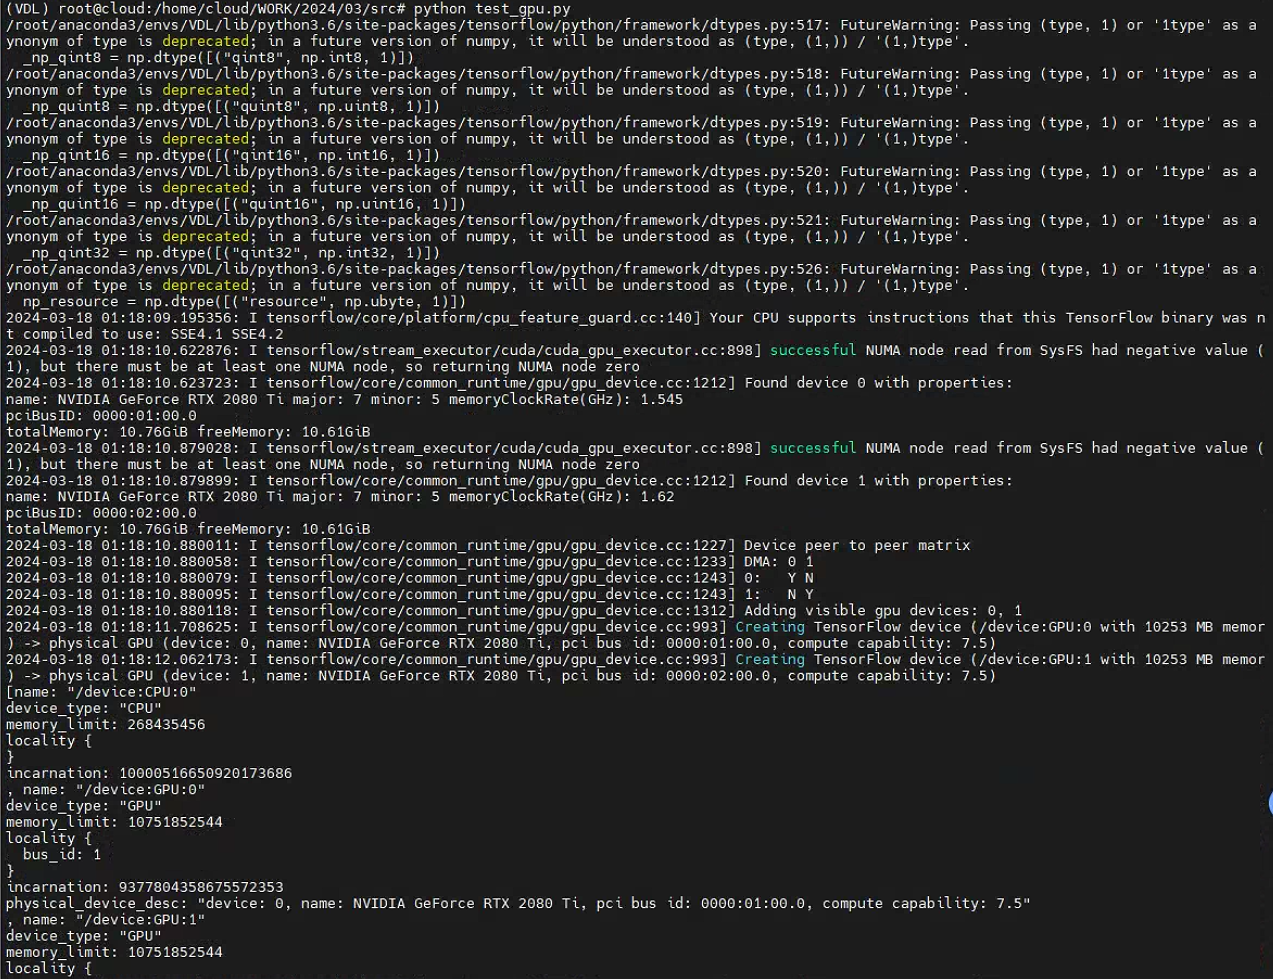
conda安装cuda-cudnn-pytorch参考:
gpu调用成功
- bgru_raw.py: Train the original BGRU model.
process_dataflow.py:获取从系统和学术数据集生成的切片语料库。
注意程序中

这里是有s的

但是github的源码文件夹没有s,需要在synthetic and academic dataset后面加个s。
结果
第一次
(VDL) root@cloud:/home/cloud/WORK/2024/03/src# python bgru_threshold.py
Using TensorFlow backend.
/root/anaconda3/envs/VDL/lib/python3.6/site-packages/tensorflow/python/framework/dtypes.py:517: FutureWarning: Passing (type, 1) or '1type' as a synonym of type is deprecated; in a future version of numpy, it will be understood as (type, (1,)) / '(1,)type'.
_np_qint8 = np.dtype([("qint8", np.int8, 1)])
/root/anaconda3/envs/VDL/lib/python3.6/site-packages/tensorflow/python/framework/dtypes.py:518: FutureWarning: Passing (type, 1) or '1type' as a synonym of type is deprecated; in a future version of numpy, it will be understood as (type, (1,)) / '(1,)type'.
_np_quint8 = np.dtype([("quint8", np.uint8, 1)])
/root/anaconda3/envs/VDL/lib/python3.6/site-packages/tensorflow/python/framework/dtypes.py:519: FutureWarning: Passing (type, 1) or '1type' as a synonym of type is deprecated; in a future version of numpy, it will be understood as (type, (1,)) / '(1,)type'.
_np_qint16 = np.dtype([("qint16", np.int16, 1)])
/root/anaconda3/envs/VDL/lib/python3.6/site-packages/tensorflow/python/framework/dtypes.py:520: FutureWarning: Passing (type, 1) or '1type' as a synonym of type is deprecated; in a future version of numpy, it will be understood as (type, (1,)) / '(1,)type'.
_np_quint16 = np.dtype([("quint16", np.uint16, 1)])
/root/anaconda3/envs/VDL/lib/python3.6/site-packages/tensorflow/python/framework/dtypes.py:521: FutureWarning: Passing (type, 1) or '1type' as a synonym of type is deprecated; in a future version of numpy, it will be understood as (type, (1,)) / '(1,)type'.
_np_qint32 = np.dtype([("qint32", np.int32, 1)])
/root/anaconda3/envs/VDL/lib/python3.6/site-packages/tensorflow/python/framework/dtypes.py:526: FutureWarning: Passing (type, 1) or '1type' as a synonym of type is deprecated; in a future version of numpy, it will be understood as (type, (1,)) / '(1,)type'.
np_resource = np.dtype([("resource", np.ubyte, 1)])
Build model...
WARNING:tensorflow:From /home/cloud/WORK/2024/03/src/keras/backend/tensorflow_backend.py:1364: calling reduce_any (from tensorflow.python.ops.math_ops) with keep_dims is deprecated and will be removed in a future version.
Instructions for updating:
keep_dims is deprecated, use keepdims instead
WARNING:tensorflow:From /home/cloud/WORK/2024/03/src/keras/backend/tensorflow_backend.py:1247: calling reduce_sum (from tensorflow.python.ops.math_ops) with keep_dims is deprecated and will be removed in a future version.
Instructions for updating:
keep_dims is deprecated, use keepdims instead
WARNING:tensorflow:From /home/cloud/WORK/2024/03/src/keras/backend/tensorflow_backend.py:1349: calling reduce_mean (from tensorflow.python.ops.math_ops) with keep_dims is deprecated and will be removed in a future version.
Instructions for updating:
keep_dims is deprecated, use keepdims instead
begin compile
__________________________________________________________________________________________________
Layer (type) Output Shape Param # Connected to
==================================================================================================
input_1 (InputLayer) (None, 900, 30) 0
__________________________________________________________________________________________________
mask_1 (Masking) (None, 900, 30) 0 input_1[0][0]
__________________________________________________________________________________________________
bgru_1 (Bidirectional) (None, 900, 1024) 1668096 mask_1[0][0]
__________________________________________________________________________________________________
dropout_1 (Dropout) (None, 900, 1024) 0 bgru_1[0][0]
__________________________________________________________________________________________________
bgru_2 (Bidirectional) (None, 900, 1024) 4721664 dropout_1[0][0]
__________________________________________________________________________________________________
dropout_2 (Dropout) (None, 900, 1024) 0 bgru_2[0][0]
__________________________________________________________________________________________________
dense1 (TimeDistributed) (None, 900, 1) 1025 dropout_2[0][0]
__________________________________________________________________________________________________
activation_1 (Activation) (None, 900, 1) 0 dense1[0][0]
__________________________________________________________________________________________________
vulner_mask_input (InputLayer) (None, 900, 900) 0
__________________________________________________________________________________________________
non_masking_1 (NonMasking) (None, 900, 1) 0 activation_1[0][0]
__________________________________________________________________________________________________
multiply_1 (Multiply) (None, 900, 900) 0 vulner_mask_input[0][0]
non_masking_1[0][0]
__________________________________________________________________________________________________
reshape_1 (Reshape) (None, 1, 810000) 0 multiply_1[0][0]
__________________________________________________________________________________________________
k_max_1 (KMaxPooling) (None, 1, 1) 0 reshape_1[0][0]
__________________________________________________________________________________________________
average_1 (GlobalAveragePooling (None, 1) 0 k_max_1[0][0]
==================================================================================================
Total params: 6,390,785
Trainable params: 6,390,785
Non-trainable params: 0
__________________________________________________________________________________________________
Loading data...
train_1_0818.pkl
train_3_0818.pkl
train_2_0818.pkl
train_0_0818.pkl
train_4_0818.pkl
train_5_0818.pkl
60859
Train...
Epoch 1/4
2024-03-18 01:20:28.271197: I tensorflow/core/platform/cpu_feature_guard.cc:140] Your CPU supports instructions that this TensorFlow binary was not compiled to use: SSE4.1 SSE4.2
2024-03-18 01:20:29.555945: I tensorflow/stream_executor/cuda/cuda_gpu_executor.cc:898] successful NUMA node read from SysFS had negative value (-1), but there must be at least one NUMA node, so returning NUMA node zero
2024-03-18 01:20:29.556830: I tensorflow/core/common_runtime/gpu/gpu_device.cc:1212] Found device 0 with properties:
name: NVIDIA GeForce RTX 2080 Ti major: 7 minor: 5 memoryClockRate(GHz): 1.545
pciBusID: 0000:01:00.0
totalMemory: 10.76GiB freeMemory: 10.61GiB
2024-03-18 01:20:29.556877: I tensorflow/core/common_runtime/gpu/gpu_device.cc:1312] Adding visible gpu devices: 0
2024-03-18 01:20:29.862770: I tensorflow/core/common_runtime/gpu/gpu_device.cc:993] Creating TensorFlow device (/job:localhost/replica:0/task:0/device:GPU:0 with 10253 MB memory) -> physical GPU (device: 0, name: NVIDIA GeForce RTX 2080 Ti, pci bus id: 0000:01:00.0, compute capability: 7.5
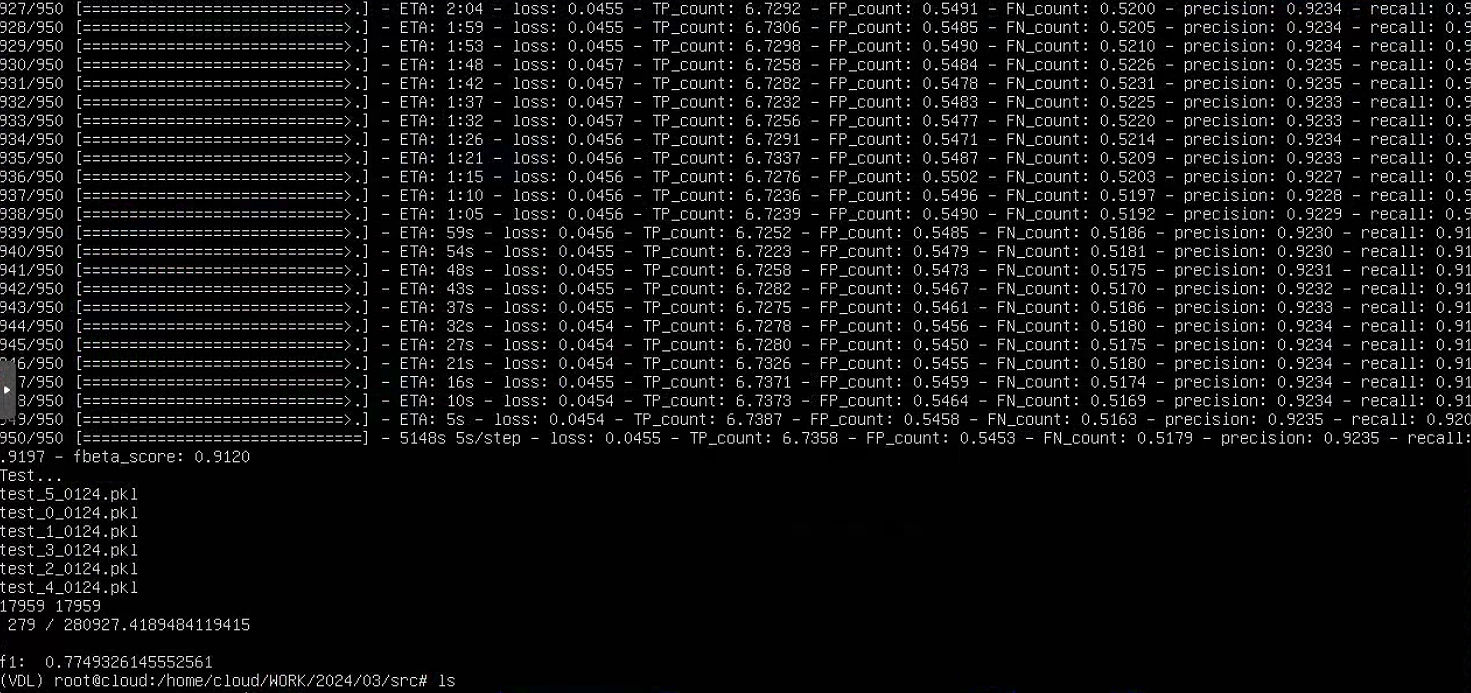
950/950 [==============================] - 5091s 5s/step - loss: 0.2346 - TP_count: 1.9284 - FP_count: 0.8095 - FN_count: 5.3253 - precision: 0.3146 - recall: 0.2630 - fbeta_score: 0.2694 ETA: 14:17 - loss: 0.2581 - TP_count: 1.2494 - FP_count: 0.7025 - FN_count: 6.0241 - precision: 0.2162Epoch 2/41675 - fbeta_score: 0.17431499
950/950 [==============================] - 5087s 5s/step - loss: 0.0941 - TP_count: 5.8947 - FP_count: 1.1053 - FN_count: 1.3589 - precision: 0.8- recall: 0.8083 - fbeta_score: 0.8045657
950/950 [==============================] - 5089s 5s/step - loss: 0.0652 - TP_count: 6.3674 - FP_count: 0.8021 - FN_count: 0.8863 - precision: 0.8- recall: 0.8735 - fbeta_score: 0.86686 - ETA: 1:06:26 - loss: 0.0760 - TP_count: 6.4433 - FP_count: 0.9212 - FN_count: 1.0837 - precision: 0.88
950/950 [==============================] - 5087s 5s/step - loss: 0.0445 - TP_count: 6.7379 - FP_count: 0.5611 - FN_count: 0.5158 - precision: 0.9209 - recall: 0.9220 - fbeta_score: 0.9116 ETA: 9:37 - loss: 0.0453 - TP_count: 6.7530 - FP_count: 0.5831 - FN_count: 0.5238 - precision: 0.9180 Test....9202 - fbeta_score: 0.9091
test_5_0124.pkl
test_0_0124.pkl
test_1_0124.pkl
test_3_0124.pkl
test_2_0124.pkl
test_4_0124.pkl
17959 17959
0 / 280Traceback (most recent call last):
File "bgru_threshold.py", line 437, in <module>
main(traindataSetPath, testdataSetPath, weightPath, resultPath, batchSize, maxLen, vectorDim, dropout=dropout)
File "bgru_threshold.py", line 288, in main
with open("result_analyze/TP/"+str(index)+".pkl","wb") as f:
FileNotFoundError: [Errno 2] No such file or directory: 'result_analyze/TP/0.pkl'
这里的报错是因为没有TP目录,创建目录后重新训练和测试。
最终结果
- END -
::: block-2
一个只记录最真实学习网络安全历程的小木屋,最新文章会在公众号更新,欢迎各位师傅关注!
公众号名称:奇怪小木屋

博客园主页:
博客园-我记得https://www.cnblogs.com/Zyecho/
:::
【论文项目复现1】漏洞检测项目复现_VulDeeLocator的更多相关文章
- Nexus Repository Manager 3(CVE-2019-7238) 远程代码执行漏洞分析和复现
0x00 漏洞背景 Nexus Repository Manager 3是一款软件仓库,可以用来存储和分发Maven,NuGET等软件源仓库.其3.14.0及之前版本中,存在一处基于OrientDB自 ...
- 每天复现一个漏洞--vulhub
phpmyadmin scripts/setup.php 反序列化漏洞(WooYun-2016-199433) 漏洞原理:http://www.polaris-lab.com/index.php/ar ...
- 使用MLeaksFinder检测项目内存泄露总结
前几天看到开源工具MLeaksFinder,决定用在公司的项目中试一下,效果很不错,用法也很简单,直接把项目文件夹拖到项目中就可以了,依靠这个项目,我发现公司项目中有不少内存泄露的地方,在此总结一下: ...
- kvm qemu ,ubuntu debian rootfs 通过qemu复现路由器漏洞
KVM https://www.toutiao.com/i6264303973256135170/?tt_from=weixin&utm_campaign=client_share&t ...
- 通过qemu复现路由器漏洞
目录 简介 环境搭建 固件解包 复现漏洞,IDA调试 参考资料 简介 qemu和vmware一样,一种虚拟机软件,只不过qemu能够虚拟的平台更加丰富一些.能够虚拟很多嵌入式平台的设备. 工作上需要向 ...
- [CVE-2014-3704]Drupal 7.31 SQL注入漏洞分析与复现
记录下自己的复现思路 漏洞影响: Drupal 7.31 Drupal是一个开源内容管理平台,为数百万个网站和应用程序提供支持. 0x01漏洞复现 复现环境: 1) Apache2.4 2) Php ...
- [CVE-2017-5487] WordPress <=4.7.1 REST API 内容注入漏洞分析与复现
记录下自己的复现思路 漏洞影响: 未授权获取发布过文章的其他用户的用户名.id 触发前提:wordpress配置REST API 影响版本:<= 4.7 0x01漏洞复现 复现环境: 1) Ap ...
- thinkphp远程执行漏洞的本地复现
thinkphp远程执行漏洞的本地复现 0X00漏洞简介 由于ThinkPHP5 框架控制器名 没有进行足够的安全监测,导致在没有开启强制路由的情况下,可以伪装特定的请求可以直接Getshell(可以 ...
- 明火烟雾目标检测项目部署(YoloV5+Flask)
明火烟雾目标检测项目部署 目录 明火烟雾目标检测项目部署 1. 拉取Docker PyToch镜像 2. 配置项目环境 2.1 更换软件源 2.2 下载vim 2.3 解决vim中文乱码问题 3. 运 ...
- DLink 815路由器栈溢出漏洞分析与复现
DLink 815路由器栈溢出漏洞分析与复现 qemu模拟环境搭建 固件下载地址 File DIR-815_FIRMWARE_1.01.ZIP - Firmware for D-link DIR-81 ...
随机推荐
- Working with Dates in PL/SQL(PL/SQL中使用日期)
Working with Dates in PL/SQL By Steven Feuerstein 史蒂芬.佛伊尔斯坦 The previous articles in this introduct ...
- FileBeat简单使用
简介 首先要了解ELK架构 这种结构因为需要在各个服务器上部署 Logstash,而它比较消耗 CPU 和内存资源,所以比较适合计算资源丰富的服务器,否则容易造成服务器性能下降,甚至可能导致无法正常工 ...
- 【webserver 前置知识 02】Linux网络编程入门其一
网络结构模式 C/S结构 服务器 - 客户机,即 Client - Server(C/S)结构.C/S 结构通常采取两层结构.服务器负责数据的管理,客户机负责完成与用户的交互任务.客户机是因特网上访问 ...
- 【Azure 服务总线】如何批量删除Azure Service Bus中的Topics(数量较多,需要过滤后批量删除)
问题描述 Azure Service Bus 的门户操作页面上,是否可以批量删除其中的Topics呢? 问题解答 Azure Service Bus门户或Service Bus Explorer工具没 ...
- 【Azure 应用服务】如何来检查App Service上证书的完整性以及在实例中如何查找证书是否存在呢?
问题描述 1:如何来检查App Service上证书的完整性呢? 2:如何来检查App Service的实例上是否包含这个证书呢? Windows 环境 or Linux 环境? 问题解答 问题一: ...
- 【Azure 应用服务】Python Function App重新部署后,出现 Azure Functions runtime is unreachable 错误
问题描述 Python Function App重新部署后,出现 Azure Functions runtime is unreachable 错误 问题解答 在Function App的门户页面中, ...
- STL-unordered_map,unordered_set模拟实现
unordered_set #pragma once #include"28hashtable_container.h" namespace test { //template & ...
- 在winform中如何嵌入第三方软件窗体✨
相关win32api的学习 SetParent [DllImport("user32.dll ", EntryPoint = "SetParent")] pri ...
- 记录: OpenAI中转代理API接口服务的使用
由于OpenAI提供服务的地区列表里没有 China,因此想要方便使用OpenAI API的话就需要用到中转服务. 本文介绍的iDataRiver平台便提供这样的API,且比官方OpenAI还要便宜, ...
- 建立两台linux主机的ssh信任,实现ssh免密登录远程服务器
1.介绍 假设我们现在有AB两个服务器,要求A能够远程登录到B服务. CentOS版本:CentOS Linux release 7.6.1810 (Core) 2.实操 1.先在A服务上输入以下命令 ...